


This survey will take about 1 minute.
Your answers will help us to improve our website.
Throne and Liberty (TL)
Best Berserker Dagger / Sword and Shield (SnS) Build (PvE)
As of March 2025, Game8 has ended coverage of Throne and Liberty.
Thank you very much for your understanding and we hope you continue to enjoy Game8's guides!
This is a guide on the Berserker Dagger and Sword (SnS) build for PvE in Throne and Liberty (TL). This guide shows how to effectively use the Berserker Dagger / Sword and Shield to clear hordes of enemies and bosses, including the best gears to equip, skill rotations, runes, traits, and more.
 Attention! Attention! |
This build was last updated on December 2024; changes to the game since then have not been reflected in this build. |
|---|
| All Berserker Sword and Shield / Dagger Builds | |
|---|---|
| Best Sword and Shield / Dagger Build (PvP) | Best Dagger / Sword and Shield Build (PvE) |
List of Contents
Berserker Dagger / Sword Build Overview
Build Summary
| Jump to a Section | |||
|---|---|---|---|
Rare Equipment
w/o Worldboss
w/ Worldboss
| Build Summary | |
|---|---|
  | Focus: DPS, Damage Mitigation, Pull Aggro, PvE Stat Priority: Strength, Dexterity, Perception |
| Skill Setup | |
Shield Strike Deals 360% of Base Damage + 16. Weakens the target with a 70% chance to decrease Magic, Melee, and Ranged Hit by 250 for 6s. Shield Strike’s Melee Heavy Attack Chance increases by 20 per 1% of Shield Block Chance. On Counterattacking with Counter Barrier, Shield Strike cooldown decreases by 1.3s. The target’s aggression greatly increases. Counter Barrier Shield Block Chance increases by 13% for 6s. On evading an attack, using Shield Block, or blocking with a Defense skill within 1.35 times the Attack Range (4.5 times for Magic and Ranged), performs a counterattack that deals damage equal to 250% of Damage Reduction to the attacker. The counterattack damage is not affected by Critical Hit and Heavy Attack Chance. Strategic Rush Fury Attack: Charges 4.5 times the distance of Attack Range in the selected direction and deal 200% of Base Damage + 19 damage up to 5 targets with a 70% chance to apply Collision: Push. The target is Stunned for 2s if colliding into a wall. Targets immune to Collision increase Base Damage by 40 for 6s. Chain Hook Fury Attack: Has an 80% chance to apply Collision: Pull to the target and bind them for 3s. When used on boss monsters, pulls you to them. Increases the target monster’s Hostility to max on hit. Provoking Roar Has a 70% chance to apply Weaken: Provoke on 6 enemies within 3m for 2s (3s against Monsters, always hits) Provoked targets direct their attacks and skills towards you. Shield Throw Hurls a shield 4.5 times the Attack Range in the selected direction. The shield deals damage equal to 260% of Base Damage to all targets in its path before returning to you. Magic, Melee, and Ranged Heavy Attack Chance increase by 30 for 2s. The targets’ aggression greatly increases. Annihilating Slash Deals damage equal to 240% of Base Damage + 14 to enemies within Attack Range. If used on a target you have Weakened, deals damage to 360% of Base Damage + 21. Annihilating Slash’s remaining cooldown decreases by 8% per damaged target. A Shot at Victory A special growth skill that can only be grown with Precious Skill Growth Book: Omnipotence. Deals 730% of Base Damage + 51 to the target. Damage of Sword skills increases by 20% for 6s. Shadow Strike Moves behind a target and deals damage equal to 200% of Base Damage. Has a 52% chance to Bind the target for 2s and apply Silence: Poison for 4s. Inject Venom Adds Weaken: Poison effect to all attacks for 9s. Poison lasts for 6s and deals 2.3% of Base Damage + 1 damage per stack every second, while decreasing Health Regen by 4% per stack. Stacks up to 20 times. Reusing the skill within 9s will trigger a stabbing attack with the both hands, where stab inflicts 90% + 3 damage, and then turn to inflict additional 135% + 5 damage. The turning attack is increased by 2% per each Poison stack. Umbral Spirit Deals additional 25% of Base Damage + 3 upon a Melee Critical Hit for 6s. Delivers 2 additional attacks against targets you have Poisoned, each attack dealing 5% of Base Damage + 1. Activates once per attack. Camouflage Cloak Becomes Stealthed for 3.5s, unable to be targeted. Removes all Bind and Move Speed Reduction effects. Your first attack while Stealthed is a guaranteed Critical Hit. IF you are hit, or Morph, or becomes a target of Collision, Stun, or Sleep, you will no longer be Stealthed. | |
| Equipment Setup | |
Daggers of Slaughtering Strength 7 Bonus Damage 6 Resonance Blade Dexterity 3 Critical Hit Chance 100 Seething Black Fog: Hitting with a Sword has a 15% chance to apply Weaken: Curse, decreasing Magic, Melee, and Ranged Hit Chance by 30 for 3s. Resolute Crusader Helmet Cooldown Speed +1.5% Weaken Resistance 62 Indomitable Knight Set Effects: (3) Damage Reduction 15 - Berserker's Shroud Weaken Chance 62 Mana Regen 30 Decorated Champion Armor Strength 2 Max Mana 300 Resolute Crusader Gauntlets Added Attack Speed +2.3% Max Health 335 Indomitable Knight Set Effects: (3) Damage Reduction 15 - Resolute Crusader Greaves Melee Evasion 80 Ranged Evasion 80 Indomitable Knight Set Effects: (3) Damage Reduction 15 - Gloom Guard Sabatons Strength 2 Melee Endurance 80 Spider Silk Collar Max Health 150 Stun Resistance 25 Bind Resistance 25 Ruby Bangle Health Regen 26.25 Melee Endurance 110 Imperial Ring Strength 1 Stun Chance 25 Collision Resistance 25 Violent Signet Added Attack Speed +2% Dexterity 3 Gladiator's Girdle Max Health 150 Silence Resistance 25 Bind Resistance 25 | |
| Pros | Cons |
| | |
| Build Summary | |
|---|---|
| | Focus: DPS, Damage Mitigation, Pull Aggro, PvE Stat Priority: Strength, Dexterity, Perception |
| Skill Setup | |
Shield Strike Deals 360% of Base Damage + 16. Weakens the target with a 70% chance to decrease Magic, Melee, and Ranged Hit by 250 for 6s. Shield Strike’s Melee Heavy Attack Chance increases by 20 per 1% of Shield Block Chance. On Counterattacking with Counter Barrier, Shield Strike cooldown decreases by 1.3s. The target’s aggression greatly increases. Counter Barrier Shield Block Chance increases by 13% for 6s. On evading an attack, using Shield Block, or blocking with a Defense skill within 1.35 times the Attack Range (4.5 times for Magic and Ranged), performs a counterattack that deals damage equal to 250% of Damage Reduction to the attacker. The counterattack damage is not affected by Critical Hit and Heavy Attack Chance. Strategic Rush Fury Attack: Charges 4.5 times the distance of Attack Range in the selected direction and deal 200% of Base Damage + 19 damage up to 5 targets with a 70% chance to apply Collision: Push. The target is Stunned for 2s if colliding into a wall. Targets immune to Collision increase Base Damage by 40 for 6s. Chain Hook Fury Attack: Has an 80% chance to apply Collision: Pull to the target and bind them for 3s. When used on boss monsters, pulls you to them. Increases the target monster’s Hostility to max on hit. Provoking Roar Has a 70% chance to apply Weaken: Provoke on 6 enemies within 3m for 2s (3s against Monsters, always hits) Provoked targets direct their attacks and skills towards you. Shield Throw Hurls a shield 4.5 times the Attack Range in the selected direction. The shield deals damage equal to 260% of Base Damage to all targets in its path before returning to you. Magic, Melee, and Ranged Heavy Attack Chance increase by 30 for 2s. The targets’ aggression greatly increases. Annihilating Slash Deals damage equal to 240% of Base Damage + 14 to enemies within Attack Range. If used on a target you have Weakened, deals damage to 360% of Base Damage + 21. Annihilating Slash’s remaining cooldown decreases by 8% per damaged target. A Shot at Victory A special growth skill that can only be grown with Precious Skill Growth Book: Omnipotence. Deals 730% of Base Damage + 51 to the target. Damage of Sword skills increases by 20% for 6s. Shadow Strike Moves behind a target and deals damage equal to 200% of Base Damage. Has a 52% chance to Bind the target for 2s and apply Silence: Poison for 4s. Inject Venom Adds Weaken: Poison effect to all attacks for 9s. Poison lasts for 6s and deals 2.3% of Base Damage + 1 damage per stack every second, while decreasing Health Regen by 4% per stack. Stacks up to 20 times. Reusing the skill within 9s will trigger a stabbing attack with the both hands, where stab inflicts 90% + 3 damage, and then turn to inflict additional 135% + 5 damage. The turning attack is increased by 2% per each Poison stack. Umbral Spirit Deals additional 25% of Base Damage + 3 upon a Melee Critical Hit for 6s. Delivers 2 additional attacks against targets you have Poisoned, each attack dealing 5% of Base Damage + 1. Activates once per attack. Camouflage Cloak Becomes Stealthed for 3.5s, unable to be targeted. Removes all Bind and Move Speed Reduction effects. Your first attack while Stealthed is a guaranteed Critical Hit. IF you are hit, or Morph, or becomes a target of Collision, Stun, or Sleep, you will no longer be Stealthed. | |
| Equipment Setup | |
Darkslayer Daggers Strength 7 Max Health 855 Karnix's Netherblade Strength 6 Humanoid Bonus Damage 8 Max Health 1,005 Shock Commander Visor Strength 3 Cooldown Speed +2.5% Chief Commander Set Effects: (2) Damage Reduction 22 (4) Shield Block Chance 10% ▲ Bile Drenched Veil Weaken Chance 125 Cooldown Speed +1.3% Shock Commander Plate Armor Strength 4 Damage Reduction 4 Chief Commander Set Effects: (2) Damage Reduction 22 (4) Shield Block Chance 10% Shock Commander Gauntlets Range ▲ 3% Dexterity 1 Critical Hit 31 Chief Commander Set Effects: (2) Damage Reduction 22 (4) Shield Block Chance 10% Shock Commander Greaves Strength 2 Damage Reduction 3 Chief Commander Set Effects: (2) Damage Reduction 22 (4) Shield Block Chance 10% Shock Commander Sabatons Movement Speed +1.4% Strength 2 Collision Chance 25 Chief Commander Set Effects: (2) Damage Reduction 22 (4) Shield Block Chance 10% Clasp of the Conqueror Strength 1 Perception 2 Mana Regen 27.75 Bracers of Unrelenting Strength 2 Bind Resistance 43 Collision Resistance 27 Eldritch Ice Band Dexterity 4 Weaken Chance 58 Amber Dimensional Band Movement Speed +2.4% Strength 1 Dexterity 2 Butcher's Belt Max Health 225 Damage Reduction 6 Weaken Resistance 33 | |
| Pros | Cons |
| | |
| Build Summary | |
|---|---|
| | Focus: DPS, Damage Mitigation, Pull Aggro, PvE Stat Priority: Strength, Dexterity, Perception |
| Skill Setup | |
Shield Strike Deals 360% of Base Damage + 16. Weakens the target with a 70% chance to decrease Magic, Melee, and Ranged Hit by 250 for 6s. Shield Strike’s Melee Heavy Attack Chance increases by 20 per 1% of Shield Block Chance. On Counterattacking with Counter Barrier, Shield Strike cooldown decreases by 1.3s. The target’s aggression greatly increases. Counter Barrier Shield Block Chance increases by 13% for 6s. On evading an attack, using Shield Block, or blocking with a Defense skill within 1.35 times the Attack Range (4.5 times for Magic and Ranged), performs a counterattack that deals damage equal to 250% of Damage Reduction to the attacker. The counterattack damage is not affected by Critical Hit and Heavy Attack Chance. Strategic Rush Fury Attack: Charges 4.5 times the distance of Attack Range in the selected direction and deal 200% of Base Damage + 19 damage up to 5 targets with a 70% chance to apply Collision: Push. The target is Stunned for 2s if colliding into a wall. Targets immune to Collision increase Base Damage by 40 for 6s. Chain Hook Fury Attack: Has an 80% chance to apply Collision: Pull to the target and bind them for 3s. When used on boss monsters, pulls you to them. Increases the target monster’s Hostility to max on hit. Provoking Roar Has a 70% chance to apply Weaken: Provoke on 6 enemies within 3m for 2s (3s against Monsters, always hits) Provoked targets direct their attacks and skills towards you. Shield Throw Hurls a shield 4.5 times the Attack Range in the selected direction. The shield deals damage equal to 260% of Base Damage to all targets in its path before returning to you. Magic, Melee, and Ranged Heavy Attack Chance increase by 30 for 2s. The targets’ aggression greatly increases. Annihilating Slash Deals damage equal to 240% of Base Damage + 14 to enemies within Attack Range. If used on a target you have Weakened, deals damage to 360% of Base Damage + 21. Annihilating Slash’s remaining cooldown decreases by 8% per damaged target. A Shot at Victory A special growth skill that can only be grown with Precious Skill Growth Book: Omnipotence. Deals 730% of Base Damage + 51 to the target. Damage of Sword skills increases by 20% for 6s. Shadow Strike Moves behind a target and deals damage equal to 200% of Base Damage. Has a 52% chance to Bind the target for 2s and apply Silence: Poison for 4s. Inject Venom Adds Weaken: Poison effect to all attacks for 9s. Poison lasts for 6s and deals 2.3% of Base Damage + 1 damage per stack every second, while decreasing Health Regen by 4% per stack. Stacks up to 20 times. Reusing the skill within 9s will trigger a stabbing attack with the both hands, where stab inflicts 90% + 3 damage, and then turn to inflict additional 135% + 5 damage. The turning attack is increased by 2% per each Poison stack. Umbral Spirit Deals additional 25% of Base Damage + 3 upon a Melee Critical Hit for 6s. Delivers 2 additional attacks against targets you have Poisoned, each attack dealing 5% of Base Damage + 1. Activates once per attack. Camouflage Cloak Becomes Stealthed for 3.5s, unable to be targeted. Removes all Bind and Move Speed Reduction effects. Your first attack while Stealthed is a guaranteed Critical Hit. IF you are hit, or Morph, or becomes a target of Collision, Stun, or Sleep, you will no longer be Stealthed. | |
| Equipment Setup | |
Tevent's Fangs of Fury Dexterity 6 Bonus Damage 4 Critical Hit Chance 32 Tevent's Furious Rage: Resets Camouflage Cloak cooldown on enemy kills within 5s of its expiration. Camouflage Cloak deals 205% of Base Damage to all enemies in a 3m radius, with a 70% chance to apply Collision: Push. Queen Bellandir's Languishing Blade Strength 4 Collision Chance 48 Queen Bellandir's Quicksand: Creates 5m radius of Quicksand on the spot where Annihilating Slash was used. Quicksand decreases enemy Movement Speed by 60% and has a 70% chance to apply Collision: Pull to enemies within the radius when it disappears after 2s. Cooldown 34s. Shock Commander Visor Strength 3 Cooldown Speed +2.5% Chief Commander Set Effects: (2) Damage Reduction 22 (4) Shield Block Chance 10% ▲ Bile Drenched Veil Weaken Chance 125 Cooldown Speed +1.3% Shock Commander Plate Armor Strength 4 Damage Reduction 4 Chief Commander Set Effects: (2) Damage Reduction 22 (4) Shield Block Chance 10% Shock Commander Gauntlets Range ▲ 3% Dexterity 1 Critical Hit 31 Chief Commander Set Effects: (2) Damage Reduction 22 (4) Shield Block Chance 10% Shock Commander Greaves Strength 2 Damage Reduction 3 Chief Commander Set Effects: (2) Damage Reduction 22 (4) Shield Block Chance 10% Shock Commander Sabatons Movement Speed +1.4% Strength 2 Collision Chance 25 Chief Commander Set Effects: (2) Damage Reduction 22 (4) Shield Block Chance 10% Clasp of the Conqueror Strength 1 Perception 2 Mana Regen 27.75 Forged Golden Bangle Health Regen 67.5 Weaken Resistance 46 Embossed Granite Band Collision Chance 50 Health Regen 65.25 Eldritch Ice Band Dexterity 4 Weaken Chance 58 Belt of Bloodlust Move Speed +2% Strength 2 Max Health 200 | |
| Pros | Cons |
| | |
The Dagger and Sword functions as a pseudo-tank, pulling aggression from enemies and buffing itself with skills to give itself a defense boost. This build is excellent for mobbing and clearing dungeons as it provides plenty of mobility with its skills, and inflicts debuffs with the Thunderclouds debuff from the Dagger skill path.
Stat Allocation
Rare Equipment
w/o Worldboss
w/ Worldboss
| Stat | Total | Points From Lvl. | Points From Gear |
|---|---|---|---|
| Strength | 50 | 18 | 22 |
| Dexterity | 38 | 16 | 12 |
| Wisdom | 10 | 0 | 0 |
| Perception | 10 | 0 | 0 |
| Fortitude | 30 | 20 | 0 |
| Stat | Total | Points From Lvl. | Points From Gear |
|---|---|---|---|
| Strength | 60 | 0 | 50 |
| Dexterity | 40 | 17 | 13 |
| Wisdom | 10 | 0 | 0 |
| Perception | 26 | 12 | 4 |
| Fortitude | 30 | 20 | 0 |
| Stat | Total | Points From Lvl. | Points From Gear |
|---|---|---|---|
| Strength | 50 | 4 | 36 |
| Dexterity | 50 | 19 | 21 |
| Wisdom | 20 | 10 | 0 |
| Perception | 15 | 1 | 4 |
| Fortitude | 30 | 20 | 0 |
Note: Base stats are always 10!
For this build, allocate most of your skill points to Strength to reach 60, while keeping Dexterity at 40, and Fortitude at 30. The remaining stat points can be allocated into Perception to increase consistency with hitting abilities that apply Weaken or Collision.
Skills and Specialization
| Jump to a Section | |||
|---|---|---|---|
| Active Skills | |||||||
|---|---|---|---|---|---|---|---|
 Shadow Strike Shadow Strike Shadow Strike Moves behind a target and deals damage equal to 200% of Base Damage. Has a 52% chance to Bind the target for 2s and apply Silence: Poison for 4s.
|
- | ||||||
 Inject Venom Inject Venom Inject Venom Adds Weaken: Poison effect to all attacks for 9s. Poison lasts for 6s and deals 2.3% of Base Damage + 1 damage per stack every second, while decreasing Health Regen by 4% per stack. Stacks up to 20 times. Reusing the skill within 9s will trigger a stabbing attack with the both hands, where stab inflicts 90% + 3 damage, and then turn to inflict additional 135% + 5 damage. The turning attack is increased by 2% per each Poison stack.
▼  Lightning Infusion Lightning Infusion Lightning Infusion Adds Weaken: Thunderclouds effect to all attacks for 9s. Thunderclouds lasts for 6s, and decreases Melee, Ranged, Magic Endurance by 6 per stack. Stacks up to 20 times. Reusing the skill within 9s will trigger a stabbing attack with the both hands, where stab inflicts 110% + 4 damage, and then turn to inflict additional 240% + 9 damage. Applies Weaken: Thunderclouds to every target within a 3m radius of the target.
|
Effect Duration ▲ Increases the Duration of Poison or Thunderclouds by 2s. Lightning Infusion Adds Weaken: Thunderclouds effect to all attacks for 9s. Thunderclouds last for 6s, and decreases Melee, Ranged, Magic Endurance by 17 per stack. Stacks up to 20 times. Reusing the skill within 9s will trigger a stabbing attack with the both hands, where each stab inflicts 120% +25 damage, then dealing an additional 180% +38 damage. Applies Weaken: Thunderclouds to every target within a 3m radius of the target. |
||||||
 Umbral Spirit Umbral Spirit Umbral Spirit Deals additional 25% of Base Damage + 3 upon a Melee Critical Hit for 6s. Delivers 2 additional attacks against targets you have Poisoned, each attack dealing 5% of Base Damage + 1. Activates once per attack.
▼  Thunder Spirit Thunder Spirit Thunder Spirit Deals 35% of Base Damage + 4 Bonus Damage to the target if your attack was a Melee Critical Hit for 6s. If the target is affected by Wet or Thunderclouds, inflict 28% of Base Damage + 3 to 2 random enemies within a 5m radius of the target.
|
Thunder Spirit Deals 52% of Base Damage + 21 Bonus Damage to the target if your attack was a Melee Critical Hit for 6s. If the target is affected by Wet or Thunderclouds, inflict 41.6% of Base Damage + 17 to 2 random enemies within a 5m radius of the target. |
||||||
 Brutal Incision Brutal Incision Brutal Incision Deals 450% of Base Damage + 92 damage, and removes the target’s Thunderclouds effect. The damage is amplified by 15% against bosses. When the target’s remaining Health is 50% or less, Critical Hit 600% ▲. Critical Damage 20% ▲.
▼  Thunderclouds Bombing Thunderclouds Bombing Thunderclouds Bombing Deal 180% of Base Damage + 37 damage, and removes the target's Thunderclouds effect. The damage is amplified by 15% against monsters. When the target's remaining Health is 50% or less, Critical Hit Chance increases by 600. If the target is affected by Weaken: Thunderclouds, they take 36% + 7 Bonus Damage and the damage is boosted by 100% per stack. Critical Damage increases by 20%.
|
Thunderclouds Bombing Deals 240% of Base Damage +74 damage, and removes the target’s Thunderclouds effect. The damage is amplified by 15% against bosses. When the target’s remaining Health is 50% or less, Critical Hit increases by 600. If the target is affected by Weaken: Thunderclouds, they receive 48% +15 additional damage and the damage is boosted by 100% per stack. Critical Damage increases by 20%. Cannot be stacked with Damage ▲ Specialization. |
||||||
 Shield Strike Shield Strike Shield Strike Deals 360% of Base Damage + 16. Weakens the target with a 70% chance to decrease Magic, Melee, and Ranged Hit by 250 for 6s. Shield Strike’s Melee Heavy Attack Chance increases by 20 per 1% of Shield Block Chance. On Counterattacking with Counter Barrier, Shield Strike cooldown decreases by 1.3s. The target’s aggression greatly increases.
|
Critical Hit ▼ When weaken is applied to a target, has a 70% chance to apply Critical Hit 250 ▼ for 6sec./c Aggression ▲ The damaged target’s aggression greatly increases. Piercing Attack Deals 360% of Base Damage + 16 to the target and other enemies within a 60-degrees cone. Weakens the target with a 70% chance to decrease Magic, Melee, and Ranged Hit by 250 for 6s. Shield Strike’s Melee Heavy Attack Chance increases by 20 per 1% of Shield Block Chance. On counterattacking with Counter Barrier, Shield Strike cooldown decrease by 1.3s. The target’s Aggression greatly increases. |
||||||
 Counter Barrier Counter Barrier Counter Barrier Shield Block Chance increases by 13% for 6s. On evading an attack, using Shield Block, or blocking with a Defense skill within 1.35 times the Attack Range (4.5 times for Magic and Ranged), performs a counterattack that deals damage equal to 250% of Damage Reduction to the attacker. The counterattack damage is not affected by Critical Hit and Heavy Attack Chance.
|
Additional Damage Boost While Counter Barrier lasts, the Base Damage increases by 5%. |
||||||
 Strategic Rush Strategic Rush Strategic Rush Fury Attack: Charges 4.5 times the distance of Attack Range in the selected direction and deal 200% of Base Damage + 19 damage up to 5 targets with a 70% chance to apply Collision: Push. The target is Stunned for 2s if colliding into a wall. Targets immune to Collision increase Base Damage by 40 for 6s.
|
- | ||||||
 Chain Hook Chain Hook Chain Hook Fury Attack: Has an 80% chance to apply Collision: Pull to the target and bind them for 3s. When used on boss monsters, pulls you to them. Increases the target monster’s Hostility to max on hit.
|
Range ▲ The attack range increases by 3.75m. |
||||||
 Provoking Roar Provoking Roar Provoking Roar Has a 70% chance to apply Weaken: Provoke on 6 enemies within 3m for 2s (3s against Monsters, always hits) Provoked targets direct their attacks and skills towards you.
|
Bonus Damage Deals additional damage equal to 220% of Base Damage. |
||||||
 Shield Throw Shield Throw Shield Throw Hurls a shield 4.5 times the Attack Range in the selected direction. The shield deals damage equal to 260% of Base Damage to all targets in its path before returning to you. Magic, Melee, and Ranged Heavy Attack Chance increase by 30 for 2s. The targets’ aggression greatly increases.
|
Consecutive Use Can be used twice with a chance of 35%. Whirling Shield Hurls a shield at the target, dealing 270% of Base Damage. The shield ricochets up to 4 times to other enemies within a 5m radius of the target, dealing the same damage. Magic, Melee, and Ranged Heavy Attack Chance increase by 30 for 2s. The targets’ aggression greatly increases. |
||||||
 Annihilating Slash Annihilating Slash Annihilating Slash Deals damage equal to 240% of Base Damage + 14 to enemies within Attack Range. If used on a target you have Weakened, deals damage to 360% of Base Damage + 21. Annihilating Slash’s remaining cooldown decreases by 8% per damaged target.
|
Consecutive Use You can use Annihilating Slash 2 times. |
||||||
 A Shot at Victory A Shot at Victory A Shot at Victory A special growth skill that can only be grown with Precious Skill Growth Book: Omnipotence. Deals 730% of Base Damage + 51 to the target. Damage of Sword skills increases by 20% for 6s.
▼  Annihilation Blade Annihilation Blade Annihilation Blade A special growth skill that can only be grown with Precious Skill Growth Book: Omnipotence. Uses Annihilation Blade in the designated direction, dealing 730% + 51 of Base Damage to all targets within 6 times the Attack Range, and increases Sword skill damage by 20% for 6s.
|
Effect Duration ▲ The Sword skill Bonus Damage duration increases to 2s. Annihilation Blade Uses Annihilation Blade in the designated direction, dealing 730% of Base Damage to all enemies within 6 times the attack range, and increases Sword skill damage by 20% for 6s. |
||||||
| Passive Skills | |||||||
 Impenetrable Impenetrable Impenetrable Increases Magic, Melee, and Ranged Defense proportional to the number of targets within a 2m radius. Magic, Melee, and Ranged Defense 179 ▲ if there are 2 or fewer targets within range, 280 ▲ if there are 3 to 6 targets, and 700 ▲ if there are 7 or more targets.
|
 Morale Boost Morale Boost Morale Boost Colliding the target with another applies cooldown 14% ▼ to all skills. Each subsequent Collision applies cooldown 1.4% ▼ to all skills per Collided target, up to 3 times.
|
 Spectrum of Agony Spectrum of Agony Spectrum of Agony On hitting a target you have Provoked and applied Cleaving Roar to, the remaining time for Provoke and Cleaving Roar increase by 0.4s. Deals damage equal to 30% of Base Damage + 9 to all targets Provoked and affected by Cleaving Roar within a 3m radius.
|
 Aegis Shield Aegis Shield Aegis Shield Magic, Melee, and Ranged Defense 4 ▲ per 1% of Shield Block Chance. Reduce Damage: Shield always gains 2.5% ▲.
|
||||
 Destructive Fang Destructive Fang Destructive Fang Ranged, Melee, and Magical Critical Hit increase by 78 against targets you have applied Poison or Thunderclouds to.
|
 Assassination Stance Assassination Stance Assassination Stance On evading, has a 10% chance to apply Camouflage Cloak cooldown 7% ▼.
|
 Assassin's Instincts Assassin's Instincts Assassin's Instincts Magic, Melee, and Ranged Critical hit 66 ▲.
|
 Shadow Walker Shadow Walker Shadow Walker After using a Mobility or Movement skill, Damage Reduction increases by 14 and Magic and Ranged Evasion increase by 270 for 6s.
|
||||
| Defensive Skill | |||||||
 Block Blade Block Blade Block Blade Defends against attacks. On defending against a Fury Attack while stationary, 180 Mana regenerates. On Defending against a Fury Attack within 0.5s, Block Blade changes to Poison Dagger for 3s. Wrath Attacks can’t be defended. Use with the directional buttons to defend against attacks while moving 4m to the designated direction for 0.5s. Becomes Stealthed for 3s to make yourself unable to be targeted and increase Mana Regen by 450 after defending against Fury or Wrath Attack. Block Blade changes to Poison Dagger. The first attack while Stealthed is a Critical Hit. Stealth ends when you attack or morph. Poison Dagger: Throws up to 5 daggers at enemies within a 5m radius, dealing 100% damage and applying Weaken: Poison. Distributes the attack if there are multiple enemies within range.
|
|||||||
Active Skills
Shadow Strike and Chain Hook function as engage tools, both applying the Bind debuff on enemies. Cycle between these when mobbing or clearing dungeons. For bosses, these skills can be used inbetween skill rotations.
Inject Venom and Umbral Spirit function as damage boosts, allowing you to apply Thunderclouds with their respective skill specializations. For this build, Lightning Infusion and Thunder Spirit must be taken.Taking Thunderclouds Bombing under Brutal Incision will give you access to an execute that does more damage the more stacks of Thunderclouds you have applied.
Shield Strike, Annihilating Slash, Shield Throw, and A Shot at Victory are offensive tools, and have different properties that proc when certain conditions are met. For example, Annihilating Slash does more damage to enemies who are weakened. Also, taking Whirling Shield under Shield Throw will help with mobbing, and increase the amount of targets provoked.
Provoking Roar and Strategic Rush are tools used for Crowd Control, and can be used to draw aggression and momentarily displace enemies.
When levelling skills, prioritize Shield Strike, Annihilating Slash, and Provoking Roar to maximize damage.
Passive Skills
Impenetrable, Aegis Shield, and Assassination Stance are defensive passives that should be upgraded when mobbing becomes too difficult. To maximize these passives, invest in stats that give Shield Block Chance.
Destructive Fang, Morale boost, Spectrum of Agony, and Assassin's Instincts are offensive passives that boost stats and add properties to attacks. Prioritize Destructive Fang to improve defense shredding from Thunderclouds, and Spectrum of Agony to deal more damage to taunted enemies.
Shadow Walker and Morale Boost are utility passives that help with the cooldowns of this build. Upgrade these skills if growthstones are available.
Best Weapons
| Jump to a Section | |||
|---|---|---|---|
| Primary Weapon | |
|---|---|
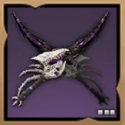
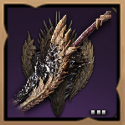 Queen Bellandir's Languishing Blade Queen Bellandir's Languishing Blade Queen Bellandir's Languishing Blade Strength 4
Collision Chance 48 |
・Hit +80 ・Critical Hit +80 ・Heavy Attack Chance +80 |
Creates 5m radius of Quicksand on the spot where Annihilating Slash was used. Quicksand decreases enemy Movement Speed by 60% and has a 70% chance to apply Collision: Pull to enemies within the radius when it disappears after 2s. Cooldown 34s. |
Note: All of the traits shown here are of max value!
Queen Bellandir's Languishing Blade is most ideal for the Dagger and Sword build. It's passive provides another source of Collision which procs Morale Boost, lowering cooldowns. For this build, run Hit, Critical Hit, and Weaken Chance to consistently land debuffs, as well as Collision Chance. This weapon also provides Strength, helping reach breakpoints.
| Secondary Weapon | |
|---|---|
 Tevent's Fangs of Fury Tevent's Fangs of Fury Tevent's Fangs of Fury Dexterity 6
Bonus Damage 4 Critical Hit Chance 32 |
・Heavy Attack Chance +80 ・Critical Hit +80 ・Hit +80 |
Resets Camouflage Cloak cooldown on enemy kills within 5s of its expiration. Camouflage Cloak deals 205% of Base Damage to all enemies in a 3m radius, with a 70% chance to apply Collision: Push. |
Note: All of the traits shown here are of max value!
Tevent's Fangs of Fury are best in slot here as it's Dexterity bonus and boosts to Bonus Damage and Critical Hit Chance significantly improve the offensive capabilities of this build. The only drawback of this weapon is that it's skill won't be as utilized as much as Camouflage Cloak is not a necessity in surviving the endgame.
Best Armors and Accessories
| Jump to a Section | |||
|---|---|---|---|
| Armors | |
|---|---|
 Shock Commander Visor Shock Commander Visor Shock Commander Visor Strength 3
Cooldown Speed +2.5% |
・Melee Endurance +160 ・Ranged Endurance +160 ・Melee Evasion +160 |
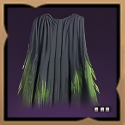 Bile Drenched Veil Bile Drenched Veil Bile Drenched Veil Weaken Chance 125
Cooldown Speed +1.3% |
・Weaken Resistance +100 ・Bind Resistance +100 ・Debuff Duration -6% |
 Shock Commander Plate Armor Shock Commander Plate Armor Shock Commander Plate Armor Strength 4
Damage Reduction 4 |
・Melee Endurance +160 ・Ranged Endurance +160 ・Melee Evasion +160 |
 Shock Commander Gauntlets Shock Commander Gauntlets Shock Commander Gauntlets Range ▲ 3%
Dexterity 1 Critical Hit 31 |
・Melee Endurance +160 ・Ranged Endurance +160 ・Melee Evasion +160 |
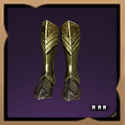
 Shock Commander Greaves Shock Commander Greaves Shock Commander Greaves Strength 2
Damage Reduction 3 |
・Melee Endurance +160 ・Ranged Endurance +160 ・Melee Evasion +160 |
 Shock Commander Sabatons Shock Commander Sabatons Shock Commander Sabatons Movement Speed +1.4%
Strength 2 Collision Chance 25 |
・Melee Endurance +160 ・Ranged Endurance +160 ・Melee Evasion +160 |
| Accessories | |
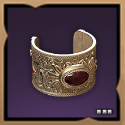
 Clasp of the Conqueror Clasp of the Conqueror Clasp of the Conqueror Strength 1
Perception 2 Mana Regen 27.75 |
・Skill Damage Boost +80 ・Max Health +600 ・Buff Duration +6% |
 Forged Golden Bangle Forged Golden Bangle Forged Golden Bangle Health Regen 67.5
Weaken Resistance 46 |
・Weaken Resistance +100 ・Max Health +600 ・Debuff Duration -6% |
 Embossed Granite Band Embossed Granite Band Embossed Granite Band Collision Chance 50
Health Regen 65.25 |
・Skill Damage Boost +80 ・Max Health +600 ・Buff Duration +6% |
 Eldritch Ice Band Eldritch Ice Band Eldritch Ice Band Dexterity 4
Weaken Chance 58 |
・Skill Damage Boost +80 ・Weaken Chance +100 ・Buff Duration +6% |
 Belt of Bloodlust Belt of Bloodlust Belt of Bloodlust Move Speed +2%
Strength 2 Max Health 200 |
・Collision Resistance +100 ・Max Health +600 ・Debuff Duration -6% |
Note: All of the traits shown here are of max value!
For this build, the Chief Commander's set bonus provides Shield Block Chance and Damage Reduction, making this extremely viable for the any Sword build. Here, take traits and resonances that improve Endurance and Evasion for Melee and Ranged Attacks. This will synergize with Assassination Stance, further lowering the cooldown of Camouflage Cloak with each evaded attack.
As for accessories, Clasp of the Conqueror and Belt of Bloodlust are taken to provide Strength bonuses, while Lethal Frost Ring is taken for its Dexterity and Weaken Chance bonus. Forged Golden Bangle and Embossed Granite Band are taken as they provide Health Regen. Adding to this, take Max Health for Traits and Resonance in order to maximize your character's overall uptime in battle.
| List of References | |
|---|---|
| List of All Armor | List of All Accessories |
Best Runes
| Jump to a Section | |||
|---|---|---|---|
| Weapon Runes | |
|---|---|
|
Queen Bellandir's Languishing Blade Queen Bellandir's Languishing Blade Strength 4
Collision Chance 48 |
・Heavy Attack Chance ・Max Health ・Collision Chance Rune Synergy: ・Dexterity ・Attack Speed |
|
Tevent's Fangs of Fury Tevent's Fangs of Fury Dexterity 6
Bonus Damage 4 Critical Hit Chance 32 |
・Critical Hit Chance ・Health Regen ・Weaken Chance Rune Synergy: ・Dexterity ・Attack Speed |
| Necklace Runes | |
|
Clasp of the Conqueror Clasp of the Conqueror Strength 1
Perception 2 Mana Regen 27.75 |
・Hit Chance ・Max Health ・Healing Received Rune Synergy: ・Max Health ・Dexterity |
| Bracelet Runes | |
|
Forged Golden Bangle Forged Golden Bangle Health Regen 67.5
Weaken Resistance 46 |
・Heavy Attack Chance ・Max Health ・Mana Cost Efficiency Rune Synergy: ・Attack Speed ・Max Health |
| Ring Runes | |
|
Embossed Granite Band Embossed Granite Band Collision Chance 50
Health Regen 65.25 |
・Crtitical Hit Chance ・Max Health ・Weaken Chance Rune Synergy: ・Cooldown Speed ・Strength |
|
Eldritch Ice Band Eldritch Ice Band Dexterity 4
Weaken Chance 58 |
・Crtitical Hit Chance ・Max Health ・Weaken Chance Rune Synergy: ・Cooldown Speed ・Strength |
| Belt Runes | |
|
Belt of Bloodlust Belt of Bloodlust Move Speed +2%
Strength 2 Max Health 200 |
・Hit Chance ・Max Health ・Mana Cost Efficiency Rune Synergy: ・Movement Speed ・Max Health |
Best Weapon Mastery
| Jump to a Section | |||
|---|---|---|---|
| Dagger | ・Disguise (9 Pts) ・Poison (1 Pt) ・Assassination (9 Pts) |
|---|---|
| Sword | ・Provoke and Counter (9 Pts) ・Boss (9 Pts) ・Collision (1 Pt) |
This Mastery loadout is geared around sustain and cooldown mitigation, taking the defensive Disguise path from the Dagger skillset that allows for more sustain, as well as the Provoke and Counter path from the Sword skillset. This also uses the Boss mastery path from the Sword and Shield in order to deal more damage in PvE scenarios.
How to Get Weapon Mastery Points
Best Guardian
| Jump to a Section | |||
|---|---|---|---|
| Best Guardian | |
|---|---|
 Vampire Slayer Ezekiel Vampire Slayer Ezekiel |
All defense +400. Deals damage over time equal to 0.6% of your Max Health every sec to hostile targets within a 2.5m radius. Restores Health by 20% of damage dealt to the targets. |
This Guardian boosts the sustain of this build, acting as a lifeline when healing is scarce. Vampire Slayer Ezekiel should be used in emergency situations, before a skill rotation.
Skill Rotations and Playstyle
| Jump to a Section | |||
|---|---|---|---|
| How to Play Dagger / Sword and Shield Build |
|---|
|
|
Note: If the skills icons are confusing, some of the skill icons indicated here are using their specialized variants.
Engage Options
Shadow Strike Moves behind a target and deals damage equal to 200% of Base Damage. Has a 52% chance to Bind the target for 2s and apply Silence: Poison for 4s.
▶
Chain Hook Fury Attack: Has an 80% chance to apply Collision: Pull to the target and bind them for 3s. When used on boss monsters, pulls you to them. Increases the target monster’s Hostility to max on hit.
|
Shadow Strike and Chain Hook will be your main form of engaging with an enemy. These skills can be cycled through one another to alleviate the high cooldowns.
For Skill Specializations, Effect Accumulation on Shadow Strike is a must, while Range ▲ on Chain Hook can be beneficial provided the player has extra points.
Mobbing Skill Rotation
Lightning Infusion Adds Weaken: Thunderclouds effect to all attacks for 9s. Thunderclouds lasts for 6s, and decreases Melee, Ranged, Magic Endurance by 6 per stack. Stacks up to 20 times. Reusing the skill within 9s will trigger a stabbing attack with the both hands, where stab inflicts 110% + 4 damage, and then turn to inflict additional 240% + 9 damage. Applies Weaken: Thunderclouds to every target within a 3m radius of the target.
▶
Thunder Spirit Deals 35% of Base Damage + 4 Bonus Damage to the target if your attack was a Melee Critical Hit for 6s. If the target is affected by Wet or Thunderclouds, inflict 28% of Base Damage + 3 to 2 random enemies within a 5m radius of the target.
▶
Shield Throw Hurls a shield 4.5 times the Attack Range in the selected direction. The shield deals damage equal to 260% of Base Damage to all targets in its path before returning to you. Magic, Melee, and Ranged Heavy Attack Chance increase by 30 for 2s. The targets’ aggression greatly increases.
▶
Counter Barrier Shield Block Chance increases by 13% for 6s. On evading an attack, using Shield Block, or blocking with a Defense skill within 1.35 times the Attack Range (4.5 times for Magic and Ranged), performs a counterattack that deals damage equal to 250% of Damage Reduction to the attacker. The counterattack damage is not affected by Critical Hit and Heavy Attack Chance.
▶
Provoking Roar Has a 70% chance to apply Weaken: Provoke on 6 enemies within 3m for 2s (3s against Monsters, always hits) Provoked targets direct their attacks and skills towards you.
▶
Annihilating Slash Deals damage equal to 240% of Base Damage + 14 to enemies within Attack Range. If used on a target you have Weakened, deals damage to 360% of Base Damage + 21. Annihilating Slash’s remaining cooldown decreases by 8% per damaged target.
▶
Thunderclouds Bombing Deal 180% of Base Damage + 37 damage, and removes the target's Thunderclouds effect. The damage is amplified by 15% against monsters. When the target's remaining Health is 50% or less, Critical Hit Chance increases by 600. If the target is affected by Weaken: Thunderclouds, they take 36% + 7 Bonus Damage and the damage is boosted by 100% per stack. Critical Damage increases by 20%.
|
For general Mobbing, always be sure to activate Inject Venom and Umbral Spirit before engaging the enemy. Then, cast Shield Throw to immediately take aggro from mobs. Cast Counter Barrier to boost your defenses, before casting Provoking Roar to reapply the taunt, and inflict Weakness: Provoke. After that, cast Annihilating Slash and Thunderclouds Bombing to finish up the rotation. Keep in mind that Provoking Roar must always be cast before Annihilating Slash to gain bonus damage from attacking weakened enemies.
Take Lightning Infusion under Inject Venom, and Lightning Spirit under Umbral Spirit to inflict Thunderclouds on the opponent, lowering their defenses. Whirling Shield under Shield Throw allows the attack to reach more enemies, while Concentrated Barrier under Counter Barrier provides another instance of damage. Consecutive Use can be taken under Annihilating Slash to double the damage output from this attack.
Bossing Skill Rotation
Lightning Infusion Adds Weaken: Thunderclouds effect to all attacks for 9s. Thunderclouds lasts for 6s, and decreases Melee, Ranged, Magic Endurance by 6 per stack. Stacks up to 20 times. Reusing the skill within 9s will trigger a stabbing attack with the both hands, where stab inflicts 110% + 4 damage, and then turn to inflict additional 240% + 9 damage. Applies Weaken: Thunderclouds to every target within a 3m radius of the target.
▶
Thunder Spirit Deals 35% of Base Damage + 4 Bonus Damage to the target if your attack was a Melee Critical Hit for 6s. If the target is affected by Wet or Thunderclouds, inflict 28% of Base Damage + 3 to 2 random enemies within a 5m radius of the target.
▶
Annihilation Blade A special growth skill that can only be grown with Precious Skill Growth Book: Omnipotence. Uses Annihilation Blade in the designated direction, dealing 730% + 51 of Base Damage to all targets within 6 times the Attack Range, and increases Sword skill damage by 20% for 6s.
▶
Shield Strike Deals 360% of Base Damage + 16. Weakens the target with a 70% chance to decrease Magic, Melee, and Ranged Hit by 250 for 6s. Shield Strike’s Melee Heavy Attack Chance increases by 20 per 1% of Shield Block Chance. On Counterattacking with Counter Barrier, Shield Strike cooldown decreases by 1.3s. The target’s aggression greatly increases.
▶
Strategic Rush Fury Attack: Charges 4.5 times the distance of Attack Range in the selected direction and deal 200% of Base Damage + 19 damage up to 5 targets with a 70% chance to apply Collision: Push. The target is Stunned for 2s if colliding into a wall. Targets immune to Collision increase Base Damage by 40 for 6s.
▶
Provoking Roar Has a 70% chance to apply Weaken: Provoke on 6 enemies within 3m for 2s (3s against Monsters, always hits) Provoked targets direct their attacks and skills towards you.
▶
Annihilating Slash Deals damage equal to 240% of Base Damage + 14 to enemies within Attack Range. If used on a target you have Weakened, deals damage to 360% of Base Damage + 21. Annihilating Slash’s remaining cooldown decreases by 8% per damaged target.
▶
Thunderclouds Bombing Deal 180% of Base Damage + 37 damage, and removes the target's Thunderclouds effect. The damage is amplified by 15% against monsters. When the target's remaining Health is 50% or less, Critical Hit Chance increases by 600. If the target is affected by Weaken: Thunderclouds, they take 36% + 7 Bonus Damage and the damage is boosted by 100% per stack. Critical Damage increases by 20%.
|
Like the previous rotation, open with Inject Venom and Umbral Spirit before casting A Shot at Victory. Then, cast Shield Strike with Strategic Rush to instantly deal two instances of damage. Then, proceed with casting Provoking Roar before Annihilation Blade and Thunderclouds Bombing to finish the rotation. After that, the mobbing rotation can be repeated to make full use of the nine second sword skill buff that A Shot at Victory applies.
Take Aggression and Critical Hit under Shield Strike, to boost its damage and effectivity. Also be sure to take Annihilation Blade and Effect Duration ▲ to prolong its buff and extend its range.
Stats
| Jump to a Section | |||
|---|---|---|---|
| Jump to a Stat |
|
|---|
Offensive Stats
| Stat | Value |
|---|---|
| Melee Hit | 270 |
| Ranged Hit | 250 |
| Magic Hit | 250 |
| Melee Crit. Hit | 310 |
| Ranged Crit. Hit | 250 |
| Magic Crit. Hit | 250 |
Defensive Stats
| Stat | Value |
|---|---|
| Melee Defense | 2,065 |
| Ranged Defense | 2,520 |
| Magic Defense | 1,350 |
| Melee Evasion | 860 |
| Ranged Evasion | 60 |
| Magic Evasion | 60 |
| Melee Endurance | 800 |
| Ranged Endurance | 800 |
| Damage Reduction | 82 |
| Debuff Duration | -12% |
Body Stats
| Stat | Value |
|---|---|
| Max Health | 16,805 |
| Max Mana | 5,640 |
| Mana Cost Efficiency | 4% |
| Max Stamina | 100 |
| Move Speed | 600 | 14.2% |
| Health Regen | 494.15 |
| Mana Regen | 358.45 |
| Cooldown Speed | 13.2% |
Crowd Control Stats
| Stat | Value |
|---|---|
| Weaken Chance | 620 |
| Stun Chance | 150 |
| Petrification Chance | 150 |
| Sleep Chance | 150 |
| Silence Chance | 150 |
| Terror Chance | 150 |
| Bind Chance | 150 |
| Collision Chance | 499 |
| Weaken Resistance | 407 |
| Stun Resistance | 173 |
| Bind Resistance | 100 |
| Collision Resistance | 100 |
Miscellaneous Stats
| Stat | Value |
|---|---|
| Boss Damage Reduction | 24 |
| Shield Block Chance | 44% |
| Reduce Damage: Shield | 40% |
| All Evasion | 145 |
| Range ▲ | 7.5% |
| Off-Hand Weapon Attack Chance | 6% |
| Hit | 160 |
| Critical Hit | 236 |
| Heavy Attack Chance | 160 |
| Boss Endurance | 120 |
Item Set Stats
| Stat | Value |
|---|---|
| Chief Commander Set | Damage Reduction 18 Shield Block Chance 10% ▲ |
Throne and Liberty Related Guides

Weapon Builds
 Spear Spear |
 Crossbows Crossbows |
 Daggers Daggers |
 Greatsword Greatsword |
 Longbow Longbow |
 Staff Staff |
 Sword and Shield Sword and Shield |
 Wand Wand |
All Build Guides
All Role Guides
 Best Healer Build Best Healer Build |
 Best Tank Build Best Tank Build |
 Best DPS Build Best DPS Build |
 Best Mage Build Best Mage Build |
Comment
Author

Throne and Liberty: Wilds of Talandre Walkthrough & Guides Wiki
Best Berserker Dagger / Sword and Shield (SnS) Build (PvE)
Please participate in our site
improvement survey
03/2026
improvement survey
03/2026
Would you assist in
improving Game8's site?
improving Game8's site?

×
We are listening to our users' valuable opinions and discussing how to act on them.
The information collected through this survey will be used for the purpose of improving our services. In addition, the information will only be disclosed a part of a statistic in a format that will not allow identification of personal information.
Begin Survey
Not Now
×
Please rate each item regarding Game8.co's Advertisements.
Amount of Ads
Very Dissatisfied
Somewhat Dissatisfied
Fine
Somewhat Satisfied
Highly Satisfied
Placement of Ads
Timing of Ad Display
Ad Loading Speed
Safeness of Ads
Content of Ads
×
Please rate each item regarding Game8.co's Quality of Articles.
Amount of information
Very Dissatisfied
Somewhat Dissatisfied
Fine
Somewhat Satisfied
Highly Satisfied
Frequency of updates
Speed of new information
Accuracy of articles
Understandibility of articles
Readability of sentences
×
Please rate each item regarding Game8.co's Usability of the Site.
Ease of finding information
Very Dissatisfied
Somewhat Dissatisfied
Fine
Somewhat Satisfied
Highly Satisfied
Loading Speed
Use of Color
Font Size
Visibility of Images
Easy to Understand Layout
×
Please rate each item regarding Game8.co's Message Boards, Comments.
Ease of Writing
Very Dissatisfied
Somewhat Dissatisfied
Fine
Somewhat Satisfied
Highly Satisfied
Readability
Ease in Finding Information
Comment Quality
Comment Quantity
Admin Response
×
Please rate each item regarding Game8.co's Site's new design.
Please rate our site's new design
Very Dissatisfied
Somewhat Dissatisfied
Fine
Somewhat Satisfied
Highly Satisfied
Do you think that the website's design change makes the site easier to use?
Has the new design made it easier for you to find information on the site?
Has the new design improved the overall visual appeal of the site?
How would you rate your overall satisfaction with the new design of the site?
×
How likely are you to recommend Game8 to someone you know?
Very Unlikely
0
1
2
3
4
5
6
7
8
9
10
Very Likely
If you have other opinions regarding potential improvement to the website, please share them with us. We would appreciate your honest opinion.
Note: This is a free response section, so you can proceed without entering anything.
Note: Please be sure not to enter any kind of personal information into your response.
Note: Please be sure not to enter any kind of personal information into your response.
×
Thank You
×
Thank you for participating in our survey! Your answers will help us to improve the quality of our website and services.
We hope you continue to make use of Game8.
We hope you continue to make use of Game8.
Close
Rankings
- We could not find the message board you were looking for.
Gaming News


![Everwind Review [Early Access] | The Shaky First Step to A Very Long Journey](https://img.game8.co/4440226/ab079b1153298a042633dd1ef51e878e.png/thumb)

![Monster Hunter Stories 3 Review [First Impressions] | Simply Rejuvenating](https://img.game8.co/4438641/2a31b7702bd70e78ec8efd24661dacda.jpeg/thumb)
Popular Games

Genshin Impact Walkthrough & Guides Wiki
Honkai: Star Rail Walkthrough & Guides Wiki
Umamusume: Pretty Derby Walkthrough & Guides Wiki
Pokemon Pokopia Walkthrough & Guides Wiki
Resident Evil Requiem (RE9) Walkthrough & Guides Wiki
Monster Hunter Wilds Walkthrough & Guides Wiki
Wuthering Waves Walkthrough & Guides Wiki
Arknights: Endfield Walkthrough & Guides Wiki
Pokemon FireRed and LeafGreen (FRLG) Walkthrough & Guides Wiki
Pokemon TCG Pocket (PTCGP) Strategies & Guides Wiki


Recommended Games
Diablo 4: Vessel of Hatred Walkthrough & Guides Wiki
Fire Emblem Heroes (FEH) Walkthrough & Guides Wiki
Yu-Gi-Oh! Master Duel Walkthrough & Guides Wiki
Super Smash Bros. Ultimate Walkthrough & Guides Wiki
Pokemon Brilliant Diamond and Shining Pearl (BDSP) Walkthrough & Guides Wiki
Elden Ring Shadow of the Erdtree Walkthrough & Guides Wiki
Monster Hunter World Walkthrough & Guides Wiki
The Legend of Zelda: Tears of the Kingdom Walkthrough & Guides Wiki
Persona 3 Reload Walkthrough & Guides Wiki
Cyberpunk 2077: Ultimate Edition Walkthrough & Guides Wiki


All rights reserved
Published by Amazon Games under license. ©2023-2024 NCSOFT Corporation. All rights reserved. THRONE AND LIBERTY and the THRONE AND LIBERTY logo are trademarks of NCSOFT Corporation. Used by Amazon Games under license. Amazon Games, Amazon, and all related logos are trademarks of Amazon.com, Inc. or its affiliates. The “PS” Family logo and “PS5” are registered trademarks of Sony Interactive Entertainment Inc. Steam and the Steam logo are trademarks and/or registered trademarks of Valve Corporation in the U.S. and/or other countries.
The copyrights of videos of games used in our content and other intellectual property rights belong to the provider of the game.
The contents we provide on this site were created personally by members of the Game8 editorial department.
We refuse the right to reuse or repost content taken without our permission such as data or images to other sites.