Cursed Wasteland Dungeon: How to Beat Shaikal
As of March 2025, Game8 has ended coverage of Throne and Liberty.
Thank you very much for your understanding and we hope you continue to enjoy Game8's guides!

Cursed Wasteland is a 1-Star Dimensional Circle dungeon where you must fight Shaikal in Throne and Liberty (TL). Read on to see an overview of Cursed Wasteland, a complete walkthrough of Cursed Wasteland, how to beat Shaikal, as well as the possible rewards and drops upon completion!
List of Contents
How to Beat Shaikal
Shaikal Boss Showcase
Check out our 3-minute clear of Shaikal with only 5 party members!
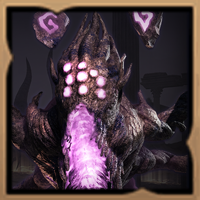
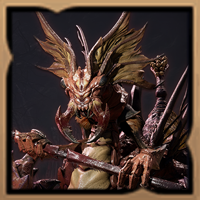
Shaikal Overview
| Shaikal | |
|---|---|
 |
|
| Type | Undead |
| Passive | Freedom Stance: Bind Resistance ▲ |
How to Remove Glowing Floors
| Shaikal Mechanics |
|---|
Interact With the Devices
During the fight with Shaikal, the arena has glowing floors that divides it into three (3) sections. These glowing floors are also the same ones found scattered across the dungeon, wherein they deal damage and stun players who step on them.
The only way to remove the glowing floors is by interacting with the devices located at the end of each barrier. Interacting with these objects will remove the corresponding barrier for several seconds, allowing players to rotate.
Shaikal Attack Patterns
Dark Nova
This attack has Shaikal raise its arms, charge up, then unleash a ring of dark energy. This attack is blockable and is always the first attack.
Astral Zones
This attack has Shaikal create purple zones beneath two targets. The only way to avoid this attack is to simply move away.
Red Sinkhole
Shaikal will target a party member with a red orb. The red orb creates a red sinkhole that impairs the movement speed of targets around it, with the effect intensifying toward the center.
To deal with this mechanic, the marked player must get as far away from party members as possible.
Once the mark disappears, the marked player will be able to return to their previous location, as the red sinkhole location will be at the point where the tag disappears from the affected target.
Void Breath
This attack has Shaikal mark a target with a purple orb. The purple orb will disappear after a short duration and Shaikal will face the marked target and unleash a wave of purple matter that follows the target.
The only way to avoid this attack is to remove the barriers that divides the arena by interacting with the devices at the end of each barrier and relocating to a safer spot.
Cursed Wasteland Best Team and Roles
| Weapon Combo Recommendation |
Role Explanation |
|---|---|
  Tank |
Weapon Combination: The best tank combination, adept at surviving and absorbing massive amounts of damage. Dungeon Role: Starts battles by being the first point of contact. Responsible for clumping mobs so allies can take them down with AoE damage. Shaikal Role: Maintains Shaikal's aggro in check by engaging it in melee range, to prevent it from spamming an AoE attack. Will be the team's primary runner for the void breath phase. |
  DPS |
Weapon Combination: Capable of outputting it's entire skillset at a safe distance, which is ideal for the encounters in this dungeon. Dungeon Role: Able to deal incredible AoE damage, allowing the party to finish mobbing sections much faster. Shaikal Role: Can stay within pillar activation range while providing consistent ranged DPS. |
  DPS |
Weapon Combination: This weapon combo also makes a great DPS build that's effective against fighting the Elites and Shaikal. Dungeon Role: Delivers high single-target DPS and is adept at focusing damage on specific key targets. Shaikal Role: Focuses solely on dealing damage, but is able to activate Pillars in a timely manner when needed, thanks to the high mobility of the class. |
 Healer |
Weapon Combination: Provides the highest amount of healing in the game, both for AoE and for single targets. Dungeon Role: Supports the tank with healing and damage mitigation. Can sleep targets to split mobs so the party can focus on fewer targets at once. Shaikal Role: Provides healing and mitigation when needed. Can provide allies with enough healing and mitigation if they are unable to deal with any of the mechanics. |
Cursed Wasteland Walkthrough
| Cursed Wasteland Sequences | |
|---|---|
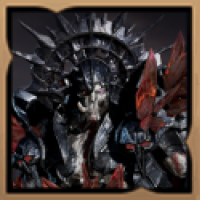
| 1 |  Uphill Climb The first section of the dungeon is an uphill climb with many enemy encounters. Just follow the path uphill and defeat all enemies along the way while avoiding the glowing floors scattered along the path. Stepping on these floors will damage and stun the player's character. |
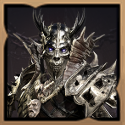
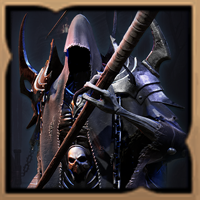
| 2 |  Blath Arena At the end of the uphill climb, players will encouter Blath, the dungeon's first mini boss. Blath needs to be defeated to proceed further. ┗ How to Beat Blath |
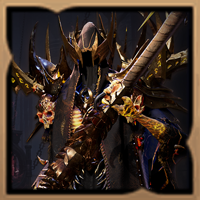
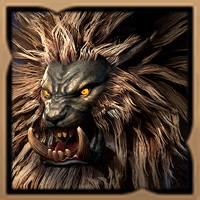
| 3 |  Belrog Arena Just a few meters from Blath, players will now encounter Belrog, the dungeon's second mini boss. Belrog needs to be defeated to proceed further. After Belrog, the path ahead now leads to the final boss. ┗ How to Beat Belrog |
How to Beat Blath
Blath doesn't have any special mechanics to take into account in order to beat it. However, it does have a special attack that can be devastating.
This attack has Blath pull in all targets towards the center, then summon multiple glowing floors, which are the same as those scattered along the path earlier, and multiple AOE explosions, creating a maze.
When this happens, players need to get out of the maze and as far away from Blath as possible all while avoiding the glowing floors. Getting stunned by a glowing floor will almost always lead to a death.
How to Beat Belrog
There's only one (1) special mechanic to note when fighting Belrog. The mini boss has a special attack very similar to Blath where it pulls targets towards the center, then creates glowing floors. However, in Belrog's case, players will be trapped inside the glowing floors.
In order to get out of the enclosure, players have to interact with the floating dark orbs on the edges of the enclosure to remove the glowing floors. Once the glowing floors blocking the path outside dissapears, players can safely move out of the AoE attack.
Moreover, after removing the glowing floors, players must get far away from Belrog as possible to avoid the AOE explosions.
Cursed Wasteland Overview
| Required Level | Lv. 50 |
|---|---|
| Type | 1-Star Dimensional Circle |
| Contract Token |
|
| Min. Combat Power | |
| Description | |
| Ahzriel and his followers kidnapped a Light Elemental Spirit and carried out a cruel ritual, corrupting and transforming it into a Dark Elemental. The Elemental was bound by the ritual, but destroyed any who dared approach it. People eventually began calling it Shaikal, after the legendary Dark Elemental. | |
Cursed Wasteland Rewards and Drops
All Drops
Weapons
| All Weapon Drops |
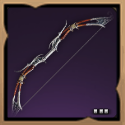 Shaikal's Deepmind Longbow Shaikal's Deepmind Longbow Shaikal's Deepmind Longbow Perception 5
Bind Chance 192 |
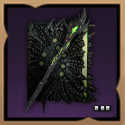 Shaikal's Mindfire Scepter Shaikal's Mindfire Scepter Shaikal's Mindfire Scepter Perception 6
Weaken Chance 148 |
 Shaikal's Mindveil Harpoon Shaikal's Mindveil Harpoon Shaikal's Mindveil Harpoon Strength 5
Hit Chance 104 |
 Daggers of Slaughtering Daggers of Slaughtering Daggers of Slaughtering Strength 7
Bonus Damage 6 |
|---|---|---|---|
Armor
| All Armor Drops |
 Swirling Essence Shoes Swirling Essence Shoes Swirling Essence Shoes Perception 2
Critical Hit Chance 40 Stamina Regen 1.65 |
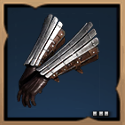
 Visage of the Executioner Visage of the Executioner Visage of the Executioner Perception 2
Critical Hit Chance 22 Weaken Chance 43 |
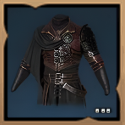 Duskblood Garb Duskblood Garb Duskblood Garb Dexterity 2
Weaken Chance 62 |
 Feathered Drakeskin Boots Feathered Drakeskin Boots Feathered Drakeskin Boots Movement Speed +3%
Ranged Endurance 90 |
|---|---|---|---|
 Feathered Drakeskin Breeches Feathered Drakeskin Breeches Feathered Drakeskin Breeches Hit 45
Bind Chance 56 |
 Feathered Drakeskin Gloves Feathered Drakeskin Gloves Feathered Drakeskin Gloves Range ▲ 5%
Perception 2 |
 Feathered Drakeskin Mask Feathered Drakeskin Mask Feathered Drakeskin Mask Dexterity 2
Critical Hit Chance 50 |
 Feathered Drakeskin Tunic Feathered Drakeskin Tunic Feathered Drakeskin Tunic Wisdom 2
Stamina Regen 2.5 |
 Soul Mirror Boots Soul Mirror Boots Soul Mirror Boots Perception 2
Melee Evasion 100 |
|||
Accessories
| All Accessory Drops |
 Eldritch Ice Band Eldritch Ice Band Eldritch Ice Band Dexterity 4
Weaken Chance 58 |
 Violent Signet Violent Signet Violent Signet Added Attack Speed +2%
Dexterity 3 |
|---|
Items
 Precious Polished Crystal
 Precious Stalon Ore
 Precious Emeret Ore
 Precious Rubrix Ore
 Precious Marind Ore
 Precious Parchment
 Precious Omnipotence Parchment
 Dimensional Soul Shard: Shaikal
 Rare Polished Crystal
 Reaper's Soul
 Mana Blood
Other
| All Other Rewards | ||
|---|---|---|
 Light Shaiki Light Shaiki
|
Abyssal Contract Token Points (x500) | Training Dew: 10,000 Points |
Throne and Liberty (TL) Related Guides
All Co-op Dungeons: Dimensional Circles
Dungeon Guides
| 3-Star Co-op Dungeons | 2-Star Co-op Dungeons |
3-Star Dimensional Circle Coop Dungeons
 Rancorwood Rancorwood |
 Halls of Tragedy Halls of Tragedy |
 Chapel of Madness Chapel of Madness |
 Doomrot Grove Doomrot Grove |
 Twisted Laboratory Twisted Laboratory |
- |
2-Star Dimensional Circle Coop Dungeons
 Island of Terror Island of Terror |
 Voidwastes Voidwastes |
 Valley of Slaughter Valley of Slaughter |
 Carmine Rage Island Carmine Rage Island |
 Torture Chamber of Screams Torture Chamber of Screams |
- |
1-Star Dimensional Circle Coop Dungeons
 Death's Abyss Death's Abyss |
 Cursed Wasteland Cursed Wasteland |
 Temple of Slaughter Temple of Slaughter |
 Butcher's Canyon Butcher's Canyon |
 Tyrant's Isle Tyrant's Isle |
 Cave of Destruction Cave of Destruction |
Dimensional Circle Coop Dungeons
 Specter's Abyss Specter's Abyss |
 Roaring Temple Roaring Temple |
 Cave of Desperation Cave of Desperation |
Event Coop Dungeons
 Haunted Labyrinth Haunted Labyrinth |
Comment
Author

Throne and Liberty: Wilds of Talandre Walkthrough & Guides Wiki
Cursed Wasteland Dungeon: How to Beat Shaikal
Rankings
- We could not find the message board you were looking for.


Popular Games

Genshin Impact Walkthrough & Guides Wiki
Umamusume: Pretty Derby Walkthrough & Guides Wiki
Crimson Desert Walkthrough & Guides Wiki
Monster Hunter Stories 3: Twisted Reflection Walkthrough & Guides Wiki
Honkai: Star Rail Walkthrough & Guides Wiki
Pokemon Pokopia Walkthrough & Guides Wiki
The Seven Deadly Sins: Origin Walkthrough & Guides Wiki
Wuthering Waves Walkthrough & Guides Wiki
Zenless Zone Zero Walkthrough & Guides Wiki
Arknights: Endfield Walkthrough & Guides Wiki


Recommended Games
Fire Emblem Heroes (FEH) Walkthrough & Guides Wiki
Diablo 4: Vessel of Hatred Walkthrough & Guides Wiki
Cyberpunk 2077: Ultimate Edition Walkthrough & Guides Wiki
Yu-Gi-Oh! Master Duel Walkthrough & Guides Wiki
Super Smash Bros. Ultimate Walkthrough & Guides Wiki
Pokemon Brilliant Diamond and Shining Pearl (BDSP) Walkthrough & Guides Wiki
Elden Ring Shadow of the Erdtree Walkthrough & Guides Wiki
Monster Hunter World Walkthrough & Guides Wiki
The Legend of Zelda: Tears of the Kingdom Walkthrough & Guides Wiki
Persona 3 Reload Walkthrough & Guides Wiki


All rights reserved
Published by Amazon Games under license. ©2023-2024 NCSOFT Corporation. All rights reserved. THRONE AND LIBERTY and the THRONE AND LIBERTY logo are trademarks of NCSOFT Corporation. Used by Amazon Games under license. Amazon Games, Amazon, and all related logos are trademarks of Amazon.com, Inc. or its affiliates. The “PS” Family logo and “PS5” are registered trademarks of Sony Interactive Entertainment Inc. Steam and the Steam logo are trademarks and/or registered trademarks of Valve Corporation in the U.S. and/or other countries.
The copyrights of videos of games used in our content and other intellectual property rights belong to the provider of the game.
The contents we provide on this site were created personally by members of the Game8 editorial department.
We refuse the right to reuse or repost content taken without our permission such as data or images to other sites.