Carmine Rage Island Dungeon: How to Beat Gaitan
As of March 2025, Game8 has ended coverage of Throne and Liberty.
Thank you very much for your understanding and we hope you continue to enjoy Game8's guides!
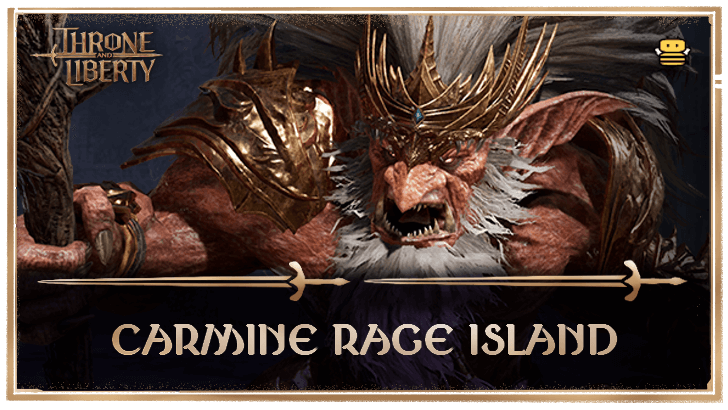
To finish Carmine Rage Island and beat Gaitan in Throne and Liberty (TL), rotate counter-clock wise during his shock waves and stay close during his Axe Whirlwind.See an overview of Carmine Rage Island, a complete walkthrough of Carmine Rage Island, how to beat Gaitan, as well as the best rewards and drops upon completion!
List of Contents
How to Beat Gaitan
Gaitan Boss Showcase
Note: This clear was done in the KR server.
Check out our 2-minute clear of Gaitan focused around properly manuevering their mechanics!
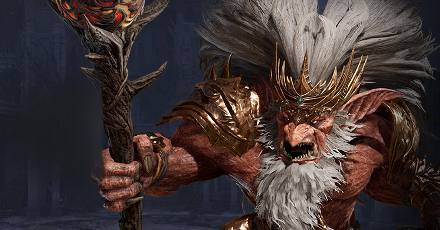
Gaitan Overview
| Gaitan | |
|---|---|
 |
|
| Type | Humanoid |
| Passive | Dawn's Dash: Day: When hit, Movement Speed increases for 3s |
Gaitan Mechanics
| Gaitan Mechanics |
|---|
|
|
Chain Pillars
After reaching 80% HP, Gaitan will spawn four stone pillars and chain up to 4 players to each of them. Each player will continue to be pulled and have hindered speed when moving away from their chained pillar.
When the chain is broken after Gaitan breaks the pillar holding it, the player will be stunned for a time. In terms of chain assignments, Gaitan will only avoid chaining the one player closest to him, optimally being the Healer. The furthest targets will be chained first, dictating the Shock Wave priority.
Homing Axe
Gaitan will channel his staff and throw out his axe which homes in on the designated player with the axe icon, dealing damage over time until either the player dies or its duration ends. When its duration ends or the player being followed by the Homing Axe dies while still active, a pool of fire will be left on the ground.
The player being followed by the axe is tasked to bring the axe as far away from the party as possible to avoid spreading its damage and to keep the pool of fire at a safe distance.
Shock Waves
As soon as all the players are chained up to the four pillars, Gaitan will begin breaking the pillars by slamming down his axe, causing a shock wave guaranteed to kill players upon hit for each quarter. Gaitan's first pillar will always be towards the player pulled last, so act accordingly.
To properly avoid this, always keep at the top of your head that Gaitan will rotate his shockwaves in a clockwise pattern. This means it would always be best to move relatively close to Gaitan in a counter-clockwise motion, avoiding the guaranteed stun after your assigned pillar breaks.
Gaitan Attack Patterns
Gaitan follows and repeats this pattern the whole fight alongside performing his mechanics:
| Axe Swings ▶ Axe Spin ▶ Axe Slam ▶ Fireballs Sling ▶ Charge Attacks x3 ▶ Axe Whirlwind ▶ Magma Sling |
Axe Swings
Gaitan swings his axe two times, attempting to bludgeon those who dare close the distance. The axe swing is considered as Gaitan's basic attack. While insignificant at most times, it will quickly mount up when targeted at DPS members.
Axe Spin
Gaitan will rally his axe in the air and then perform a quick spin to push away any of those near him. He will use this attack to end his usual axe swings, so space yourself accordingly!
Axe Slam
Gaitan raises his axe, glowing red in the process, and slams it down the ground. The force of the axe will send three tremors out in a cone shape, damaging players caught in its wake.
To avoid taking maximum damage, have the DPS members stay away from each other so he only hits one of them at best!
Fireball Sling
Gaitan charges up his staff and slings out fireballs to each of your party members arena-wide. This will be Gaitan's signature Fury Attack, meaning it is very telegraphed if you pay attention. Failing to parry this will leave you low on health and burned.
Charge Attack
Gaitan begins quickly revving up, running towards and ramming the furthest enemy from his position. Upon being hit, the player will be left below half-health and stunned during the process.
Gaitan will repeat this move three times before transitioning to his next move. To avoid this, simply dodge by inputting any movement alongside your defense skill.
Axe Whirlwind
Gaitan will emit red smoke and wildly spins around with his axe afterwards which has an arena-wide reach. While intimidating, the key to avoiding this move is to stick close to him to lessen the damage taken. The farther away you are from Gaiten, the more damage he deals.
Carmine Rage Island Best Team and Roles
| Role | Explanation |
|---|---|
  Tank |
Weapon Combination: This weapon combo makes a great tank build to help the party take on the mobs of enemies encountered in the dungeon. Dungeon Role: Responsible for taking all of the goblin's aggro at all times, especially during the tricky parts of the dungeon. Gaitan Role: Responsible for sticking close to Gaitan alongside the Healer to take aggro. It is also the tank's responsibility to know when the chain pillar mechanic begins to position themselves in between the healer and DPS to receive the Homing Axe aggro. |
  DPS |
Weapon Combination: This weapon combo makes for the best single target and AoE damage for PVE. Dungeon Role: Responsible for clearing the mobs the tank has grouped up as well as being mindful of the mechanics of the dungeon to avoid party wipes. Gaitan Role: Responsible for dealing as much damage to Gaitan positioning themselves far away from Gaitan to get chained during his pillar mechanic. |
  Healer |
Weapon Combination: This weapon combo makes a great support build to provide consistent healing to the party. It also has strong DoT potential with Curses and Burning. Dungeon Role: Responsible for keeping the whole party healthy while dealing with their DPS along with pushing the bombs the Red Goblin Bomber throws out. Gaitan Role: Responsible for keeping the whole party healthy during the fight whilst getting close to Gaitan to avoid getting chained during his pillar mechanic. |
Carmine Rage Island Walkthrough
| Carmine Rage Island Sequences | |
|---|---|
| 1 | Enter the Island Starting, you will find yourself situated on the coast of the island. You will see raving red goblins that have barricaded the entrance of the forest which you will need to simply break with your skills. Breaking the barricade will cause the goblins to abandon their post and run back into the forest, inciting you to follow them. Shortly after entering the forest, you will enter multiple clearings that house these red goblins. Upon reaching the second clearing, there will be differently named goblins, that while easy to clear, require you to be more observant as they explode and deal significant AoE damage when not dealt with adequately. ┗ Exploding Goblins |
| 2 | Dredge Through the Forest After clearing the Exploding Goblins, the next section will reveal itself. You will come upon an area surrounded by runic stone formations with a single flame in the middle. Make sure to be prepared before interacting with the flame as doing so starts the dungeon's first mini-boss, the Red Goblin Shaman ┗ Red Goblin Shaman |
| 3 | Chase the Red Goblin Bomber Dealing with the Red Goblin Shaman will allow you to exit the forest and proceed further into the island's center. Upon exit, you will again encounter a barricade, but this time it is laced with bombs accredited to the Bomber hidden in the next section to hinder your party's progress. Breaking through the barricade will cause the Bomber to flee towards the bridge. As the Bomber flees, it will leave behind timed bombs to deter the party from giving chase. Use these to your advantage by pushing them towards the Goblin Stone Throwers stationed far back from a safe distance with your weapon attacks. Progressing further will bring you to a tower that you need to fly off from to reach the platform that starts the fight with the elusive Bomber. ┗ Red Goblin Bomber |
Exploding Goblins
Upon entering the clearing, you will notice that either you or a party member will have a red eye looming over their character. The player with this eye will notice that one of the goblins will be glowing red, which is an indicator that killing said goblin will not trigger the arena-wide explosion.
It is recommended to whittle down the health of all the goblins to a comfortable threshold to avoid scrambling over a single goblin. After doing so, have the player with the eye call out or chat the name of the Goblin that is glowing red to allow the party to coordinate and focus on said goblin.
Red Goblin Shaman
Upon interacting with the sole flame, the six stone pillars will show one of six runes with varying shapes and colors for a brief moment. Each party member will then have a rune assigned to them, looming over their character, which assigns them to interact with the corresponding pillar to obtain a shield.
Failure to obtain a shield will allow the Shaman to curse you, leaving you with only 50% of your max health for 30 seconds, often resulting in death.
To consistently have all of your party members get a shield and avoid receiving this crippling debuff, assign two party members to position themselves on opposite sides then call out the colors from left to right. The first player will call out the first three colors, and then the second player follow with the last three.
Upon reaching critical health, the Shaman will repeat this mechanic for its final throes. As an additional note, the Red Goblin Shaman will heal itself by a substantial amount, so it can be helpful to put the Heal ▼ specialization on fernal Meteor
Red Goblin Bomber
After reaching the platform, the Red Goblin Bomber only has three moves you will need to look out for to beat: its (1) Stacking Explosives, (2) Moveable Bombs, and lastly (3) its Platform Breaker.
| Attack | Description |
|---|---|
| Stacking Explosives | The first mechanic to keep in mind is its stacking explosives, which will deal an absurd amount of damage to players that group up together. Simply space yourself away from your teammates whenever you notice a red radius follows each player. This is the Bomber's most used move, so always be vigilant about your spacing! |
| Moveable Bombs | The Bomber will shout "Now, enjoy the kaboom!" and throw around bombs reminiscent of those it dropped during the bridge sequence. The trick here is to push the bombs outside the platform to avoid its high AoE damage. |
| Platform Breaker | After the Bomber exclaims "There's a real art to explosives, isn't there?", it will plant an immovable bomb that continues to fill the platform's radius. Stop whatever you were doing and quickly grapple over the piton to the next platform to avoid falling to your death. The Bomber will repeat this one more time, up until it reaches the last platform. |
Carmine Rage Island Overview
| Required Level | Lv. 50 |
|---|---|
| Type | 2-Star Dimensional Circle |
| Contract Token |
|
| Min. Combat Power | |
| Description | |
| Gaitan sought revenge against humans for mistreating goblins. With the help of the dark elf Soleil, Gaitan gained strength beyond any ordinary goblin. With this new power, he waged a bloody war against humans. They say the blood shed during the battle turned the sea around the island red. Gaitan named his new clan Bloodwave and continues to gain power. slaughtering every human he can. Now, the ambitious Red Goblin King aims to unite all goblin clans and take over the world. | |
Carmine Rage Island New Equipment
Armor
| Armor | Stats |
|---|---|
 Gilded Raven Tunic Gilded Raven Tunic
|
Type: Chest Armor Set: Gilded Raven Set Melee Def: 178 Ranged Def: 162 ・Fortitude 3 ・Max Health 150 ・Ranged Evasion 34 |
Accessories
| Accessory | Stats |
|---|---|
 Eternal Champion Bindings Eternal Champion Bindings
|
Type: Bracelet Magic Def.: 180 Modifiers: ・Hit Chance 22 ・Max Health 375 ・Magic Endurance 50 |
 Forbidden Sacred Chain Forbidden Sacred Chain
|
Type: Belt Magic Def.: 180 Modifiers: ・Melee Evasion 100 ・Petrification Resistance 21 ・Ranged Endurance 60 |
Carmine Rage Island Best Rewards and All Drops
Sabatons of the Field General
| Armor | Stats |
|---|---|
 Sabatons of the Field General Sabatons of the Field General
|
Type: Feet Armor Set: Imperator Set Melee Def: 165 Ranged Def: 165 ・Movement Speed +2% ・Strength 4 |
Currently standing as one of the best feet armors, the Sabatons of the Field General provide high defenses and a ton of Strength allotment.
As with the current build system, Strength is one of the most important stats to invest in due to the innate durability and Heavy Attack Chance. The Sabatons of the Field General not only supply it but give up to a total of 6 Strength!
Furthermore, if you are using a melee-oriented build, the Field General set bonus provides you with a whopping 150 to your Melee Heavy Attack Chance!
Swirling Essence Shoes
| Armor | Stats |
|---|---|
 Swirling Essence Shoes Swirling Essence Shoes
|
Type: Feet Armor Set: Mother Nature Set Melee Def: 135 Ranged Def: 135 ・Perception 2 ・Critical Hit Chance 40 ・Stamina Regen 1.65 |
For those that are interested in investing on the PvP side of Throne and Liberty, the Swirling Essence Shoes can be a go-to pick for your feet armor for its additional Perception and Critical Hit Chance.
Perception, being that it gives additional Hit and Range, is a premier stat for all PvP builds present. Remember that all missed hits are a huge detriment to your ability to dole out DPS!
As a bonus, the Swirling Essence Shoes has all of the sought-after traits for both PvE and PvP content, meaning it is always a good investment.
All Drops
Weapons
| Weapon Drops |
|---|
 First Blood Longbow First Blood Longbow First Blood Longbow Dexterity 6
Critical Hit 40 |
Armor
| All Armor Drops | ||
|---|---|---|
 Gilded Raven Tunic Gilded Raven Tunic Gilded Raven Tunic Fortitude 3
Max Health 150 Ranged Evasion 34 |
 Shock Commander Sabatons Shock Commander Sabatons Shock Commander Sabatons Movement Speed +1.4%
Strength 2 Collision Chance 25 |
 Sabatons of the Field General Sabatons of the Field General Sabatons of the Field General Movement Speed +2%
Strength 4 |
 Shadow Harvester Boots Shadow Harvester Boots Shadow Harvester Boots Strength 1
Perception 3 Bind Chance 21 |
 Phantom Wolf Boots Phantom Wolf Boots Phantom Wolf Boots Movement Speed +2%
Melee Evasion 80 Stamina Regen 1.35 |
 Swirling Essence Shoes Swirling Essence Shoes Swirling Essence Shoes Perception 2
Critical Hit Chance 40 Stamina Regen 1.65 |
 Ascended Guardian Shoes Ascended Guardian Shoes Ascended Guardian Shoes Movement Speed +6.6%
Melee Evasion 86 |
 Annihilator's Wings Annihilator's Wings |
 Decorated Champion Greaves Decorated Champion Greaves Decorated Champion Greaves Max Health 300
|
 Duskblood Boots Duskblood Boots Duskblood Boots Movement Speed +2%
Dexterity 3 |
- | - |
Accessories
| Accessory Drops | |
|---|---|
 Eternal Champion Bindings Eternal Champion Bindings |
 Forbidden Sacred Chain Forbidden Sacred Chain |
Item Drops
| Item Drops | ||
|---|---|---|
 Precious Omnipotence Parchment Precious Omnipotence Parchment |
 Precious Parchment Precious Parchment |
 Precious Polished Crystal Precious Polished Crystal |
 Precious Stalon Ore Precious Stalon Ore |
 Precious Emeret Ore Precious Emeret Ore |
 Precious Rubrix Ore Precious Rubrix Ore |
 Precious Marind Ore Precious Marind Ore |
 Beast Fang Beast Fang |
 Mana Blood Mana Blood |
Other
| All Other Rewards | ||
|---|---|---|
| Dimensional Soul Shard: Gaitan | Abyssal Contract Token Points (x750) | Training Dew: 10,000 Points |
Throne and Liberty (TL) Related Guides

All Co-op Dungeons: Dimensional Circles
Dungeon Guides
| 3-Star Co-op Dungeons | 2-Star Co-op Dungeons |
3-Star Dimensional Circle Coop Dungeons
 Rancorwood Rancorwood |
 Halls of Tragedy Halls of Tragedy |
 Chapel of Madness Chapel of Madness |
 Doomrot Grove Doomrot Grove |
 Twisted Laboratory Twisted Laboratory |
- |
2-Star Dimensional Circle Coop Dungeons
 Island of Terror Island of Terror |
 Voidwastes Voidwastes |
 Valley of Slaughter Valley of Slaughter |
 Carmine Rage Island Carmine Rage Island |
 Torture Chamber of Screams Torture Chamber of Screams |
- |
1-Star Dimensional Circle Coop Dungeons
 Death's Abyss Death's Abyss |
 Cursed Wasteland Cursed Wasteland |
 Temple of Slaughter Temple of Slaughter |
 Butcher's Canyon Butcher's Canyon |
 Tyrant's Isle Tyrant's Isle |
 Cave of Destruction Cave of Destruction |
Dimensional Circle Coop Dungeons
 Specter's Abyss Specter's Abyss |
 Roaring Temple Roaring Temple |
 Cave of Desperation Cave of Desperation |
Event Coop Dungeons
 Haunted Labyrinth Haunted Labyrinth |
Comment
Author
Throne and Liberty: Wilds of Talandre Walkthrough & Guides Wiki
Carmine Rage Island Dungeon: How to Beat Gaitan
improvement survey
03/2026
improving Game8's site?

Your answers will help us to improve our website.
Note: Please be sure not to enter any kind of personal information into your response.

We hope you continue to make use of Game8.
Rankings
- We could not find the message board you were looking for.
Gaming News
Popular Games

Genshin Impact Walkthrough & Guides Wiki

Honkai: Star Rail Walkthrough & Guides Wiki

Umamusume: Pretty Derby Walkthrough & Guides Wiki

Pokemon Pokopia Walkthrough & Guides Wiki

Resident Evil Requiem (RE9) Walkthrough & Guides Wiki

Monster Hunter Wilds Walkthrough & Guides Wiki

Wuthering Waves Walkthrough & Guides Wiki

Arknights: Endfield Walkthrough & Guides Wiki

Pokemon FireRed and LeafGreen (FRLG) Walkthrough & Guides Wiki

Pokemon TCG Pocket (PTCGP) Strategies & Guides Wiki
Recommended Games

Fire Emblem Heroes (FEH) Walkthrough & Guides Wiki

Diablo 4: Vessel of Hatred Walkthrough & Guides Wiki

Yu-Gi-Oh! Master Duel Walkthrough & Guides Wiki

Super Smash Bros. Ultimate Walkthrough & Guides Wiki

Pokemon Brilliant Diamond and Shining Pearl (BDSP) Walkthrough & Guides Wiki

Elden Ring Shadow of the Erdtree Walkthrough & Guides Wiki

Monster Hunter World Walkthrough & Guides Wiki

The Legend of Zelda: Tears of the Kingdom Walkthrough & Guides Wiki

Persona 3 Reload Walkthrough & Guides Wiki

Cyberpunk 2077: Ultimate Edition Walkthrough & Guides Wiki
All rights reserved
Published by Amazon Games under license. ©2023-2024 NCSOFT Corporation. All rights reserved. THRONE AND LIBERTY and the THRONE AND LIBERTY logo are trademarks of NCSOFT Corporation. Used by Amazon Games under license. Amazon Games, Amazon, and all related logos are trademarks of Amazon.com, Inc. or its affiliates. The “PS” Family logo and “PS5” are registered trademarks of Sony Interactive Entertainment Inc. Steam and the Steam logo are trademarks and/or registered trademarks of Valve Corporation in the U.S. and/or other countries.
The copyrights of videos of games used in our content and other intellectual property rights belong to the provider of the game.
The contents we provide on this site were created personally by members of the Game8 editorial department.
We refuse the right to reuse or repost content taken without our permission such as data or images to other sites.


![Slay the Spire 2 Review [Early Access] | Still the Deckbuilder to Beat](https://img.game8.co/4433115/44e19e1fb0b4755466b9e516ec7ffb1e.png/thumb)

![Resident Evil Village Review [Switch 2] | Almost Flawless Port](https://img.game8.co/4432790/e1859f64830960ce4248d898f8cd38d9.jpeg/thumb)


