Torture Chamber of Screams Dungeon Guide: How to Beat Kaligras
As of March 2025, Game8 has ended coverage of Throne and Liberty.
Thank you very much for your understanding and we hope you continue to enjoy Game8's guides!
Torture Chamber of Screams is a 2-Star Dimensional Circle dungeon where you must fight Kaligras in Throne and Liberty (TL). See an overview of Torture Chamber of Screams, a complete walkthrough of Torture Chamber of Screams, how to beat Kaligras, as well as the best rewards and drops upon completion!
List of Contents
How to Beat Kaligras
Kaligras Overview
| Kaligras | |
|---|---|
 |
|
| Type | Humanoid |
| Passive | Flash Fury: Day: Attack Speed ▲ |
Kaligras Mechanics
| Kaligras Mechanics |
|---|
|
|
Blood Reservoir Mechanic
The stage has five Blood Reservoirs that fill up when the boss performs certain mechanics or if a party member fails to block its attacks.
If all the reservoirs are completely full or if all of them are empty, the entire party will be wiped out.
Players can interact with these reservoirs to empty them when they contain blood. It is crucial to monitor the state of the reservoirs throughout the fight and manage them accordingly while killing the boss.
Zombies and Blood Reservoir Phase
At around 90% HP, Kaligras will summon three Zombies that will follow party members. These three players would have numbers assigned to them, and they would have to position themselves correctly properly to avoid death.
At the start of the mechanic, a closed eye icon will appear on top of the player. In order to open the eye and see the correct numbers on top of the player, players would have to interact with the blood reservoirs.
The marked players would have to position themselves in ascending order, with 1 being the closest to the boss, followed by the 2nd player, and the 3rd player being the furthest.
Players who have zombies chasing them should avoid being hit by their respective zombies to avoid difficulty repositioning once their numbers are revealed.
Once the numbers are revealed, players can now safely position themselves for their respective zombies to attach to them. Players who are correctly positioned will be outlined in blue when the zombie attaches to them.
The marked players do not need to stand in a straight line. They can position themselves anywhere on the map, as long as the order and distance are correct. Any marked player out of sequence will be instantly killed.
Once the numbers are revealed, players can safely position themselves and allow their respective Zombies to attach to them. Players who are correctly positioned will be outlined in blue when the zombie attaches to them.
At the end of this mechanic, one player will be marked. The marked player will be the only party member responsible for maintaining the correct number of active blood reservoirs, as they are the only one capable of doing so.
Note that this mechanic will repeat when the boss's HP drops to 50% or less, but with increased difficulty. Five zombies will spawn instead of three. Follow the same procedure to survive this phase.
Charge Attack Phase
During this phase, the boss will select a party member and bind them while the boss teleports to the other side.
The boss will then charge directly at the bound player and perform an execution move, dealing heavy damage and often killing the bound target if not handled properly.
In order for the bound player to survive, other party members must intercept this attack by stepping between the boss and the bound target and blocking the boss's attack.
At least two party members should block the oncoming boss attack, in order to free the bound target safely.
The boss will execute the attack regardless of whether or not the bound character has been freed, so players should still move out of the way to safely complete this mechanic.
Kaligras Attack Patterns
Heavy AoE Slash
The boss will always start the fight with this attack. The player can dodge this attack by using the block skill + any directional input to avoid taking damage.
Getting hit by this attack will cause a debuff that will limit the player's vision and partially fill one of the surrounding blood reservoirs, so be sure to dodge!
Cone Shockwave Attack
The boss will mark three players and prepare a cone shaped shockwave attack. This attack deals massive damage, so it is important to avoid overlapping with other members of the party.
While players can survive being hit by one cone, taking damage from multiple cones can be fatal. Spread out to minimize the risk and avoid stacking the damage with other players.
Arrow Shower
Arrows will rain down from the sky, damaging players caught in the area of effect. This move will follow the player to some extent, so continue to move out of the attack's AoE as needed.
Fury Attack
This is a basic melee attack that deals moderate damage if it lands. Ideally, your tank should take the aggro and absorb most of the damage from this attack.
Ranged Salvo
Kaligras fires multiple ranged attacks in rapid succession at a single target.
The Ranged attacks can be intercepted by anyone, so tanks and other party members can mitigate some of the incoming damage to the targeted player by tanking for them if necessary.
Swirling Blood
During this phase, each player will be marked with a red circle, forcing everyone to spread out. If party members remain close to one another, the overlapping circles will deal damage to nearby players.
To avoid unnecessary damage, party members should reposition themselves away from one another.
Alternatively, if the party has enough Skill Damage Resistance, players can group up near the tank and healer, and tank all of the incoming damage.
The tank can use defensive buffs, while the healer provides additional damage mitigation when needed, as well as the necessary AoE heals.
This mechanic will cause some of the Blood Reservoirs to fill, requiring a party member to interact with them after the attack ends.
Torture Chamber of Screams Best Team and Roles
| Role | Explanation |
|---|---|
  Tank |
Weapon Combination: This weapon combo provides an excellent tank build with sufficient damage and excellent crowd control to take the aggro from Kaligras and the enemies that players will encounter along the way. Dungeon Role: The tank's primary responsibility is to draw enemy aggro and group them together, allowing the DPS to focus on eliminating the Brainwashed Guards for a more efficient run. Kaligras Role: During the fight with Kaligras, the tank must stay close to the boss, absorbing and mitigating all of its attacks. Additionally, it is important for the tank to consistently use defensive buffs to help the entire team survive Kaligras' more punishing mechanics. |
  DPS |
Weapon Combination: This weapon combination offers the highest single target DPS class, excelling in close range burst damage and providing exceptional mobility. Dungeon Role: As a DPS, the primary responsibility is to efficiently eliminate the Brainwashed Guards and deliver high single target damage against both the Torture Chamber Warden and the Master Torture Technician. Kaligras Role: The focus should be on dealing damage as quickly as possible to shorten the fight. Additionally, the high mobility makes this class best suited to interact with the Blood Reservoirs to empty them when necessary, ensuring that the party avoids a team wipe. |
  Healer |
Weapon Combination: This weapon combination is currently the top healer build, providing consistent AoE healing, powerful burst healing, and the ability to cleanse enemy crowd control effects, greatly boosting the party's survivability. Dungeon Role: The healer is responsible for maintaining the party's health at all times, with a particular focus on keeping the tank alive, as they will absorb the majority of the damage from the zombies early on. This ensures sustained survivability throughout the dungeon. Kaligras Role: Throughout the fight against Kaligras, the healer's primary role is to help the DPS survive all AoE attacks, allowing them to focus on the mechanics, while also keeping the tank healthy as they maintain aggro. |
Torture Chamber of Screams Walkthrough
| Torture Chamber of Screams Sequences | |
|---|---|
| 1 |
 Defeat the Brainwashed Guards At the start of the dungeon, you will face three Brainwashed Guards accompanied by several zombie ads. To progress, players must defeat all three Guards to open the door to the next area. Be cautious as these Guards can charge at a player and slam them into the wall, causing instant death. Ensure the Tank draws the aggro from the zombie ads, allowing the DPS to focus on taking down the Brainwashed Guards as quickly as possible. |
| 2 |
 Retrieve the Axe from the Torture Chamber Warden Once the Brainwashed Guards are defeated, proceed to the next room. The Tank should enter last to ensure the zombie ads remain outside. Once all party members are inside, the gate will shut, leaving the zombies behind. Here, you will face the dungeon's first miniboss, the Torture Chamber Warden. After defeating the Warden, an Axe will drop. One party member must pick up this Axe, which will transform them into the Warden. As the Warden, their skill bar will change, granting unique abilities. |
| 3 |
 Activate the Symbols Inside the Cell Before moving forward, observe the four glowing red symbols on the wall near the stairs. Memorize their sequence, as it will be crucial for solving a puzzle in the next area. In the following room, you will find four cells that only the Warden can open. Unlock all the cells, then use the Warden's third ability to reveal the hidden symbols inside. Match and press these symbols in the same sequence displayed on the wall to unlock the door to the next area. |
| 4 |
 Defend the Scream Collection Devices The next room contains three Scream Collection Devices that must be defended. Waves of enemies will spawn and attempt to destroy these devices. To charge the devices, defeat enemies close to them. Once all devices are fully charged, interact with the symbol at the center of the room to teleport to the next area, where you will face the Master Torture Technician. ┗ Master Torture Technician |
Master Torture Technician
This miniboss encounter is relatively straightforward. Focus on damaging the boss while avoiding the red tiles, as they will spawn spikes that deal massive damage.
When the boss health drops to around 20%, prepare to move to one of the corners of the stage.
At this point, the boss will cast a skill that turns all floor tiles red except for one green tile on each corner. Quickly position on a green tile and wait for the spikes to appear.
Afterward, the boss will start a followup attack where the safe zone is at the center of the room, close to the boss. Be prepared to roll toward the boss to reach safety during this phase.
After these mechanics, continue attacking the miniboss to finish the fight and proceed to Kaligras.
Torture Chamber of Screams Overview
| Required Level | Lv. 50 |
|---|---|
| Type | 2-Star Dimensional Circle |
| Contract Token |
|
| Min. Combat Power | |
| Description | |
| The Arkeum Legion has teamed up with the Sylavean Order to create a torture chamber within the Shadow Crypt in order to extract vital information to crush the Resistance. Kaligras, the Arkeum Legion's chief torture technician assigned to the facility, always hides his face behind a dark mask. Behind this hideous mask lies a twisted desire that revels in gruesome murders and horrific screams. | |
Torture Chamber of Screams Best Rewards and All Drops
Shock Commander Greaves
| Armor | Stats |
|---|---|
 Shock Commander Greaves Shock Commander Greaves
|
Type: Legs Armor Set: Chief Commander Set Melee Def: 160 Ranged Def: 234 ・Strength 2 ・Damage Reduction 3 |
The Shock Commander Greaves is an excellent leg armor, primarily used by tanks due to the significant damage reduction it provides. Additionally, they are part of the Chief Commander Set, which grants incredible durability, making them extremely tanky even against bosses.
Phantom Wolf Breeches
| Armor | Stats |
|---|---|
 Phantom Wolf Breeches Phantom Wolf Breeches
|
Type: Legs Armor Set: Ghost Wolf Set Melee Def: 152 Ranged Def: 168 ・Perception 2 ・Damage Reduction 4 ・Magic Evasion 60 |
The Phantom Wolf Breeches is a popular choice for DPS players, as they offer a balance of survivability through damage reduction and a substantial boost to your damage output. The Ghost Wolf Set bonuses increase Off-Hand Weapon Attack Chance by 30%, providing a massive DPS increase.
All Drops
| Torture Chamber of Screams Drops | ||
|---|---|---|
 Gilded Raven Trousers Gilded Raven Trousers Gilded Raven Trousers Fortitude 2
Max Health 225 Magic Evasion 54 |
 Precious Omnipotence Parchment Precious Omnipotence Parchment |
 Precious Parchment Precious Parchment |
 Greaves of the Field General Greaves of the Field General Greaves of the Field General Strength 2
Dexterity 1 |
 Shock Commander Greaves Shock Commander Greaves Shock Commander Greaves Strength 2
Damage Reduction 3 |
 Shadow Harvester Trousers Shadow Harvester Trousers Shadow Harvester Trousers Perception 3
Hit 22 Mana Regen 11.25 |
 Phantom Wolf Breeches Phantom Wolf Breeches Phantom Wolf Breeches Perception 2
Damage Reduction 4 Magic Evasion 60 |
 Ascended Guardian Pants Ascended Guardian Pants Ascended Guardian Pants Wisdom 3
Damage Reduction 3 Collision Resistance 41 |
 Swirling Essence Pants Swirling Essence Pants Swirling Essence Pants Wisdom 2
Weaken Chance 41 Mana Cost Efficiency +4% |
 Band of the Silent One Band of the Silent One |
 Thunderstorm Necklace Thunderstorm Necklace Thunderstorm Necklace Perception 2
Cooldown Speed +1.3% Ranged Endurance 60 |
 Immortal Reckoning Immortal Reckoning Immortal Reckoning Melee Evasion 60
Stun resistance 28 Bind Resistance 55 |
 Precious Polished Crystal Precious Polished Crystal |
 Precious Stalon Ore Precious Stalon Ore |
 Precious Emeret Ore Precious Emeret Ore |
 Precious Rubrix Ore Precious Rubrix Ore |
 Precious Marind Ore Precious Marind Ore |
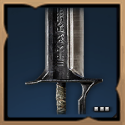 Dead Reckoning Greatsword Dead Reckoning Greatsword Dead Reckoning Greatsword Dexterity 4
Stun Chance 100 |
 Decorated Champion Crown Decorated Champion Crown Decorated Champion Crown Wisdom 2
Mana Regen 30 |
 Decorated Champion Boots Decorated Champion Boots Decorated Champion Boots Collision Chance 50
Health Regen 30 |
 Ant Wings Ant Wings
|
 Fermented Rotein Fermented Rotein
|
 Steel Fist Dentwerp Steel Fist Dentwerp
|
Abyssal Contract Token Points (x500) |
| Dimensional Soul Shard: Kaligras | Training Dew: 10,000 Points | - |
Throne and Liberty (TL) Related Guides

All Co-op Dungeons: Dimensional Circles
Dungeon Guides
| 3-Star Co-op Dungeons | 2-Star Co-op Dungeons |
3-Star Dimensional Circle Coop Dungeons
 Rancorwood Rancorwood |
 Halls of Tragedy Halls of Tragedy |
 Chapel of Madness Chapel of Madness |
 Doomrot Grove Doomrot Grove |
 Twisted Laboratory Twisted Laboratory |
- |
2-Star Dimensional Circle Coop Dungeons
 Island of Terror Island of Terror |
 Voidwastes Voidwastes |
 Valley of Slaughter Valley of Slaughter |
 Carmine Rage Island Carmine Rage Island |
 Torture Chamber of Screams Torture Chamber of Screams |
- |
1-Star Dimensional Circle Coop Dungeons
 Death's Abyss Death's Abyss |
 Cursed Wasteland Cursed Wasteland |
 Temple of Slaughter Temple of Slaughter |
 Butcher's Canyon Butcher's Canyon |
 Tyrant's Isle Tyrant's Isle |
 Cave of Destruction Cave of Destruction |
Dimensional Circle Coop Dungeons
 Specter's Abyss Specter's Abyss |
 Roaring Temple Roaring Temple |
 Cave of Desperation Cave of Desperation |
Event Coop Dungeons
 Haunted Labyrinth Haunted Labyrinth |
Comment
Author
Throne and Liberty: Wilds of Talandre Walkthrough & Guides Wiki
Torture Chamber of Screams Dungeon Guide: How to Beat Kaligras
improvement survey
03/2026
improving Game8's site?

Your answers will help us to improve our website.
Note: Please be sure not to enter any kind of personal information into your response.

We hope you continue to make use of Game8.
Rankings
- We could not find the message board you were looking for.
Gaming News
Popular Games

Genshin Impact Walkthrough & Guides Wiki

Honkai: Star Rail Walkthrough & Guides Wiki

Umamusume: Pretty Derby Walkthrough & Guides Wiki

Pokemon Pokopia Walkthrough & Guides Wiki

Resident Evil Requiem (RE9) Walkthrough & Guides Wiki

Monster Hunter Wilds Walkthrough & Guides Wiki

Wuthering Waves Walkthrough & Guides Wiki

Arknights: Endfield Walkthrough & Guides Wiki

Pokemon FireRed and LeafGreen (FRLG) Walkthrough & Guides Wiki

Pokemon TCG Pocket (PTCGP) Strategies & Guides Wiki
Recommended Games

Fire Emblem Heroes (FEH) Walkthrough & Guides Wiki

Diablo 4: Vessel of Hatred Walkthrough & Guides Wiki

Yu-Gi-Oh! Master Duel Walkthrough & Guides Wiki

Super Smash Bros. Ultimate Walkthrough & Guides Wiki

Pokemon Brilliant Diamond and Shining Pearl (BDSP) Walkthrough & Guides Wiki

Elden Ring Shadow of the Erdtree Walkthrough & Guides Wiki

Monster Hunter World Walkthrough & Guides Wiki

The Legend of Zelda: Tears of the Kingdom Walkthrough & Guides Wiki

Persona 3 Reload Walkthrough & Guides Wiki

Cyberpunk 2077: Ultimate Edition Walkthrough & Guides Wiki
All rights reserved
Published by Amazon Games under license. ©2023-2024 NCSOFT Corporation. All rights reserved. THRONE AND LIBERTY and the THRONE AND LIBERTY logo are trademarks of NCSOFT Corporation. Used by Amazon Games under license. Amazon Games, Amazon, and all related logos are trademarks of Amazon.com, Inc. or its affiliates. The “PS” Family logo and “PS5” are registered trademarks of Sony Interactive Entertainment Inc. Steam and the Steam logo are trademarks and/or registered trademarks of Valve Corporation in the U.S. and/or other countries.
The copyrights of videos of games used in our content and other intellectual property rights belong to the provider of the game.
The contents we provide on this site were created personally by members of the Game8 editorial department.
We refuse the right to reuse or repost content taken without our permission such as data or images to other sites.


![Slay the Spire 2 Review [Early Access] | Still the Deckbuilder to Beat](https://img.game8.co/4433115/44e19e1fb0b4755466b9e516ec7ffb1e.png/thumb)

![Resident Evil Village Review [Switch 2] | Almost Flawless Port](https://img.game8.co/4432790/e1859f64830960ce4248d898f8cd38d9.jpeg/thumb)


