 Precious Polished Crystal
 Precious Stalon Ore
 Precious Emeret Ore
 Precious Rubrix Ore
 Precious Marind Ore
 Precious Parchment
 Precious Omnipotence Parchment
 Dimensional Soul Shard: Toublek
 Rare Polished Crystal
 Lizard Scale
 Fermented Rotein
This survey will take about 1 minute.
Your answers will help us to improve our website.
Throne and Liberty (TL)
Tyrant's Isle Dungeon: How to Beat Toublek
As of March 2025, Game8 has ended coverage of Throne and Liberty.
Thank you very much for your understanding and we hope you continue to enjoy Game8's guides!
To finish Tyrant's Isle and beat Toublek in Throne and Liberty (TL), dig down and rush to the blue flower as a rat, then stand on the active geysers to be safe before dealing damage. Read on to see an overview of Tyrant's Isle, a complete walkthrough of Tyrant's Isle, how to beat Toublek, and the best rewards and drops upon completion!
List of Contents
How to Beat Toublek
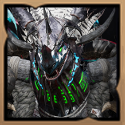
Toublek Boss Showcase
Note: This clear was done in the KR server!
Check out our 6-minute clear of Duke Magna with minimal gear investments and only 5 party members!
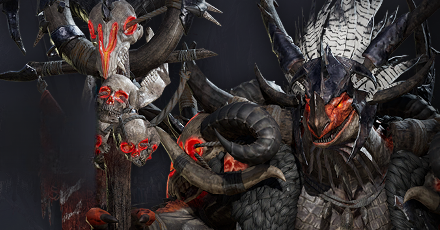
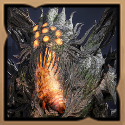
Toublek Overview
| Toublek | |
|---|---|
 |
|
| Type | Wildkin |
| Passive | Skillful Defense: All Endurance ▲ |
Toublek Mechanics
To beat Toublek even without end-game gear, follow and abide by the fight's mechanics to keep yourself safe and able to deal with as much DPS as possible.
| Toublek Mechanics |
|---|
|
|
Dig Then Get the Blue Flower
Toublek will lift you in the air and place you near him, after which he will turn you into a tiny rat that only has one action, the ability to dig. After turning into a rat, he will do a ground pound that will stun any of those that did not tunnel down. Getting stunned will result in Toublek eating the player, which is an instakill move.
To survive this mechanic, you must dig into the ground while you are a rat as soon as his animation shows him lowering his staff. After that, resurface by pressing the skill again and scamper quickly to the blue glowing flower nearest to your location to turn yourself back into a human.
As the blue flowers are a one-time use per player, assign flowers to each of your party members or simply scatter in the opposite direction. Do not get the flower before digging down as you will die to the first ground pound.
Get Launched by the Geyser
Toublek, after exclaiming "See if you can dodge this" raises his staff. This causes the ground to rumble and select geysers will begin to turn active and start bubbling rapidly.
The geysers will then erupt, followed by an AoE attack that one-shots any player inside its radius. Toublek will do this once more before proceeding to another move. To survive this mechanic, stand inside the geyser to allow yourself to get launched in the air, avoiding the AoE in the process.
However, always remember to morph and glide or risk fall damage. As an additional tip, using the Staff's Salvation Chain on allies far from an active geyser's range will save most runs, so keep that tool ready just in case!
Toublek Attack Patterns
Toublek follows and repeats this pattern the whole fight:
| Force Balls ▶ Tail Spin ▶ Rat Morph ▶ Fireballs ▶ Tail Spin ▶ Cross Meteors ▶ Geyser Boost ▶ Rat Morph |
Force Balls
Toublek's basic attack is where he will fling a targeted ball of energy to a party member, dealing 800-1000 damage per hit. While insignificant at most times, it will quickly mount up when targeted at DPS members.
Tail Spin
For the majority of the battle, Toublek will always begin his rotation with a Fury Attack that has him do a Tail Spin. While not much of a threat, it is recommended to position close to him and parry the attack as the timing is fairly simple. This allows you to get your Defense Skill's bonuses to consistently activate!
However, as soon as Toublek is done performing the attack, he will quickly transition into other of his mechanics after a few basic attacks.
Cross Meteors
Toublek will use his staff to charge up a blue infernal ball with his staff and fire it into the air, crashing down meteors that expand into a cross-shape after its initial explosion. While the first impact deals minimal damage, the proceeding aftershocks will likely kill a DPS quickly.
As a tip, he only proceeds to do this attack after exclaiming "I'll fry you", which gives you ample time to react. The most reliable way to dodge this would be to morph and reposition yourself safely. However, the most optimal way to dodge this would be to only walk/run diagonally to avoid the cross explosions, allowing you to deal damage very early on.
Tyrant's Isle Best Team and Roles
| Role | Explanation |
|---|---|
  Tank |
Weapon Combination: This weapon combo makes a great tank build to help the party take on the mobs of enemies encountered in the dungeon. Dungeon Role: Responsible for taking all of the mob's aggro and grouping them up near the Oil Jars for the DPS to clean up. Toublek Role: Responsible for sticking close to Toublek to take aggro while parrying its tail swipe Fury Attacks. |
  DPS |
Weapon Combination: This weapon combo makes a great ranged DPS build for solo targets while adding in some utility during the fight. Dungeon Role: Responsible for clearing the mobs the tank has grouped up near the Oil Jars alongside the other DPS. Toublek Role: Responsible for dealing as much damage to Toublek while keeping themselves prepared for the mechanics by staying near the possible geysers. |
  DPS |
Weapon Combination: This weapon combo makes for the best single target and AoE damage for PVE. Dungeon Role: Responsible for clearing the mobs the tank has grouped up near the Oil Jars alongside the other DPS. Toublek Role: Responsible for dealing as much damage to Toublek while keeping themselves prepared for the mechanics by staying near the possible geysers. |
  DPS |
Weapon Combination: This weapon combo provides ranged DPS through consistent AoE DoTs and burst damage with their magical spells. Dungeon Role: Responsible for igniting the spilt Oil Jar to easily clear the mobs the tank has grouped up alongside the other DPS. Toublek Role: Responsible for dealing as much damage to Toublek while keeping themselves prepared for the mechanics by staying near the possible geysers. |
  Healer |
Weapon Combination: This weapon combo makes a great support build to provide consistent healing to the party. It also has strong DoT potential with Curses and Burning. Dungeon Role: Responsible for inflicting the Sleep Status on grouped up enemies while healing low-health party members. Toublek Role: Responsible for keeping the whole party healthy during the fight whilst dealing as much damage as possible. Also responsible for helping other members with the geyser mechanic using Salvation Chain |
Tyrant's Isle Walkthrough
| Tyrant's Isle Sequences | |
|---|---|
| 1 | Marsh Section Starting Tyrant's Isle, you will enter a marsh filled with Reptilians with a single Reptilian Butcher in the middle clearing. Before proceeding with the mini-boss, make sure to clear most of the mobs since the mini-boss will periodically use a move and call on nearby mobs for assistance. ┗ Reptilian Butcher |
| 2 | Cavernous Section After defeating the Reptilian Butcher, you enter the cave under the waterfall to proceed. You will often come through Oil Jars with health bars as you progress through this area. Use these jars by grabbing the attention of multiple mobs, grouping them up near the oil jar, and then destroying it. Doing so spreads oil, which can then be ignited by using any Fire skill to quickly kill the mobs. As you progress further into the area and closer to the second mini-boss, coming into contact with Reptilian eggs becomes more frequent. These eggs spawn ravenous hatchlings when you come near them, so have your ranged members remove them before engaging the second mini-boss. ┗ Bloodthirsty Reptilian Executioner |
| 3 | Rescuing the Kidnapped Sailors As soon as you beat the Executioner, the gate will open but will glow a red hue. If a teammate is lagging behind, they run the risk of getting stuck in the previous area. Open the gate by activating the lever that is found on a platform you can grapple to on the left side of the gate. Progress while using the Oil Jars to quickly clear mobs. However, you were tasked earlier to rescue the kidnapped sailors. The first sailor is found inside a cage near the Reptilian housings at the right side as you enter the gate. The next sailor is found atop the area near the Reptilian Gladiator but can only be rescued after defeating said mini-boss. ┗ Bloodthirsty Reptilian Gladiator |
| 4 | Geyser Gliding You will receive a cutscene and prompt from a sailor after rescuing them, which shows that a geyser nearby is now active. You and the party must get on the geyser, preferably at the front-most edge facing the wooden barricade. As soon as you are launched, do not hold forward as you will not maintain enough momentum to reach the platform. Instead, glide while pressing the jump button to gain more height, which allows you to barely reach. Soon after, glide down the platform to get to the second Geyser, which will launch you to the area of the final boss of the dungeon, Toublek. ┗ Toublek |
Reptilian Butcher
Fighting Reptilian Butcher is simple as it will only repeat a few moves. Have your tank face them head-on to parry the Fury Attacks while the others provide DPS.
The Butcher will sometimes teleport to the farthest player and chase them down with leaps if they attempt to kite. Have them hold their ground so the Butcher will only use Fury Attacks.
As for its main mechanic, the Reptilian Butcher will periodically turn invisible and invulnerable to damage. Interact with the Luminescent Coral scattered near the area to reveal and stun him.
During this sequence, it is recommended to do this with your team to make the process quicker and ensure the Butcher is near. Additionally, have the healer set up the Wand's Fountain of Life before doing so for additional safety.
Bloodthirsty Reptilian Executioner
Starting the fight, it is best to first focus on the Reptilian Fighter that is stationed beside the Reptilian Executioner as it can be annoying with its Stun-inflicting fury attacks. After defeating the mob, focus your resources on the Executioner.
There will be three attacks that you will have to watch out for in this fight: (1) Plunge, (2) Halberd Tremor, and lastly (3) the Crashing Wave.
| Attack | Description |
|---|---|
| Plunge Attack | Quickly leaps to a random member of the team, stunning them upon hit while having a tracking property. This is the Executioner's most used move, so always be vigilant about parrying it! |
| Halberd Tremor | When you see the Executioner dancing and hopping around, it will swing its halberd down and cause tremors that shoot straight. Avoid this by simply going to the side as it deals significant damage. |
| Crashing Wave | The Executioner will leap near the gate and slam the ground to produce a damaging wave. Dodge this by jumping when the wave comes near you. The jump itself does not have to be perfect to avoid the damage. |
As an additional note, you will be fighting in a pool of stagnant water, meaning that you and the Executioner will have the Wet status the whole time. Capitalize on this by using skills that get beneficial effects while being wet such as Chain Lightning!
Bloodthirsty Reptilian Gladiator
Like the Reptilian Butcher, the fight with the Gladiator is fairly simple. Again, have your tank face them head-on to parry the Fury Attacks while the others position near the pillars for its mechanic later. It is also important to keep note that you should not attempt to kite the Gladiator as it does a rotation of leaping and range attacks if you run from them!
There will be only one mechanic that you should be worried about. As you fight, one of your party members will begin to have a red glowing aura around them. That is the indicator that the Gladiator will charge at the party member.
As this dash is unblockable, the only means to stop it would be to position a pillar between you and the Gladiator. Successfully doing so will stun it for a brief moment, but it will prepare to dash to a different target after it recovers.
If you and your party are not able to destroy all of the pillars during this phase, he will break all the pillars and deal massive AoE damage that can down most players. The key to consistently avoiding this is by having each member assigned to each pillar.
Tyrant's Isle Overview
| Required Level | Lv. 50 |
|---|---|
| Type | 1-Star Dimensional Circle |
| Contract Token |
|
| Min. Combat Power | |
| Description | |
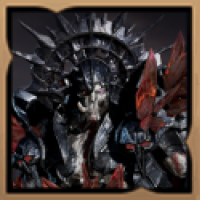
| A violent tyrant named Toublek of Saurodoma Island possesses the reptilian gift of infinite regeneration as well as the power to use sorcery, making him impervious to even the most devastating attacks. Once an elf wizard, Toublek's reptilianism is the result of a magical experiment gone awry. Now, he's become the terror of Saurodoma Island, kidnapping innocent victims to perform experiments on in hopes of finding a way to reverse his transformation. | |
Tyrant's Isle Best Rewards and All Drops
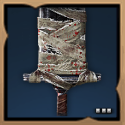
Toublek's Shattering Quarterstaff
| Weapon | Stats |
|---|---|
 Toublek's Shattering Quarterstaff Toublek's Shattering Quarterstaff Toublek's Shattering Quarterstaff Cooldown Speed +5.7%
Dexterity 6 |
Type:
Damage: 84~106Atk Spd: 0.709s Range: 17.6m Modifiers: ・Cooldown Speed +5.7% ・Dexterity 6 |
The best weapon drop you can get from Tyrant's Isle would be Toublek's Shattering Quarterstaff due to the additional stats you gain for Dexterity and Cooldown Speed. Most of the available builds that use a Staff utilize this weapon.
Furthermore, Toublek's Boost's is a naturally positive weapon effect since it is active at all times when you optimally fight from long range, increasing your Critical consistency.
Ancient Saurodoma Bracers
| Accessory | Stats |
|---|---|
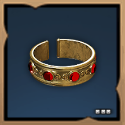
 Ancient Saurodoma Bracers Ancient Saurodoma Bracers
|
Type: Bracelet Magic Def.: 180 Modifiers: ・Dexterity 2 ・Mana Regen 20.25 ・Ranged Evasion 60 |
When your build is handicapped by mana issues and is reliant on criticals, Ancient Saurodoma Bracers are a good inclusion. Mage builds often use this accessory since it helps them reach their Dexterity caps and provide an additional means of safety with Ranged Evasion.
All Drops
Weapons
| All Weapon Drops |
 Toublek's Deathmark Longbow Toublek's Deathmark Longbow Toublek's Deathmark Longbow Dexterity 5
Wildkin Bonus Damage 8 Cooldown Speed +6.7% |
Toublek's Shattering Quarterstaff Toublek's Shattering Quarterstaff Cooldown Speed +5.7%
Dexterity 6 |
 Relentless Cleaver Relentless Cleaver Relentless Cleaver Strength 2
Critical Hit Chance 50 Stamina Regen 1.5 |
|---|
Armor
| All Armor Drops |
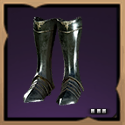 Ebon Roar Sabatons Ebon Roar Sabatons Ebon Roar Sabatons Perception 1
Melee Evasion 82 Stamina Regen 1 |
 Phantom Wolf Tunic Phantom Wolf Tunic Phantom Wolf Tunic Strength 2
Weaken Chance 21 Magic Evasion 80 |
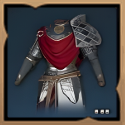 Resolute Crusader Armor Resolute Crusader Armor Resolute Crusader Armor Health Regen 41.25
Bind Resistance 31 |
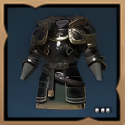 Ruthless Enforcer Chest Plate Ruthless Enforcer Chest Plate Ruthless Enforcer Chest Plate Dexterity 1
Critical Hit 60 |
|---|---|---|---|
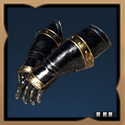 Ruthless Enforcer Gauntlets Ruthless Enforcer Gauntlets Ruthless Enforcer Gauntlets Stun Chance 75
Max Health 150 |
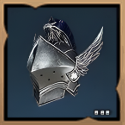 Ruthless Enforcer Helmet Ruthless Enforcer Helmet Ruthless Enforcer Helmet Strength 2
Stun Chance 50 |
 Ruthless Enforcer Leggings Ruthless Enforcer Leggings Ruthless Enforcer Leggings Strength 1
Ranged Evasion 120 |
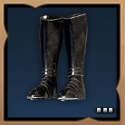 Ruthless Enforcer Sabatons Ruthless Enforcer Sabatons Ruthless Enforcer Sabatons Critical Hit Chance 55
Stun Chance 31 |
Accessories
| All Accessory Drops |
Ancient Saurodoma Bracers Ancient Saurodoma Bracers Dexterity 2
Mana Regen 20.25 Ranged Evasion 60 |
 Imperial Bracelet Imperial Bracelet Imperial Bracelet Melee Defense 210
|
 Regeneration Loop Regeneration Loop Regeneration Loop Health Regen 33.75
Mana Regen 33.75 |
|---|
Items
Other
| All Other Rewards | ||
|---|---|---|
| Beak Diatrima | Abyssal Contract Token Points (x500) | Training Dew: 10,000 Points |
Throne and Liberty (TL) Related Guides
All Co-op Dungeons: Dimensional Circles
Dungeon Guides
| 3-Star Co-op Dungeons | 2-Star Co-op Dungeons |
3-Star Dimensional Circle Coop Dungeons
 Rancorwood Rancorwood |
 Halls of Tragedy Halls of Tragedy |
 Chapel of Madness Chapel of Madness |
 Doomrot Grove Doomrot Grove |
 Twisted Laboratory Twisted Laboratory |
- |
2-Star Dimensional Circle Coop Dungeons
 Island of Terror Island of Terror |
 Voidwastes Voidwastes |
 Valley of Slaughter Valley of Slaughter |
 Carmine Rage Island Carmine Rage Island |
 Torture Chamber of Screams Torture Chamber of Screams |
- |
1-Star Dimensional Circle Coop Dungeons
 Death's Abyss Death's Abyss |
 Cursed Wasteland Cursed Wasteland |
 Temple of Slaughter Temple of Slaughter |
 Butcher's Canyon Butcher's Canyon |
 Tyrant's Isle Tyrant's Isle |
 Cave of Destruction Cave of Destruction |
Dimensional Circle Coop Dungeons
 Specter's Abyss Specter's Abyss |
 Roaring Temple Roaring Temple |
 Cave of Desperation Cave of Desperation |
Event Coop Dungeons
 Haunted Labyrinth Haunted Labyrinth |
Comment
Author

Throne and Liberty: Wilds of Talandre Walkthrough & Guides Wiki
Tyrant's Isle Dungeon: How to Beat Toublek
Please participate in our site
improvement survey
03/2026
improvement survey
03/2026
Would you assist in
improving Game8's site?
improving Game8's site?

×
We are listening to our users' valuable opinions and discussing how to act on them.
The information collected through this survey will be used for the purpose of improving our services. In addition, the information will only be disclosed a part of a statistic in a format that will not allow identification of personal information.
Begin Survey
Not Now
×
Please rate each item regarding Game8.co's Advertisements.
Amount of Ads
Very Dissatisfied
Somewhat Dissatisfied
Fine
Somewhat Satisfied
Highly Satisfied
Placement of Ads
Timing of Ad Display
Ad Loading Speed
Safeness of Ads
Content of Ads
×
Please rate each item regarding Game8.co's Quality of Articles.
Amount of information
Very Dissatisfied
Somewhat Dissatisfied
Fine
Somewhat Satisfied
Highly Satisfied
Frequency of updates
Speed of new information
Accuracy of articles
Understandibility of articles
Readability of sentences
×
Please rate each item regarding Game8.co's Usability of the Site.
Ease of finding information
Very Dissatisfied
Somewhat Dissatisfied
Fine
Somewhat Satisfied
Highly Satisfied
Loading Speed
Use of Color
Font Size
Visibility of Images
Easy to Understand Layout
×
Please rate each item regarding Game8.co's Message Boards, Comments.
Ease of Writing
Very Dissatisfied
Somewhat Dissatisfied
Fine
Somewhat Satisfied
Highly Satisfied
Readability
Ease in Finding Information
Comment Quality
Comment Quantity
Admin Response
×
Please rate each item regarding Game8.co's Site's new design.
Please rate our site's new design
Very Dissatisfied
Somewhat Dissatisfied
Fine
Somewhat Satisfied
Highly Satisfied
Do you think that the website's design change makes the site easier to use?
Has the new design made it easier for you to find information on the site?
Has the new design improved the overall visual appeal of the site?
How would you rate your overall satisfaction with the new design of the site?
×
How likely are you to recommend Game8 to someone you know?
Very Unlikely
0
1
2
3
4
5
6
7
8
9
10
Very Likely
If you have other opinions regarding potential improvement to the website, please share them with us. We would appreciate your honest opinion.
Note: This is a free response section, so you can proceed without entering anything.
Note: Please be sure not to enter any kind of personal information into your response.
Note: Please be sure not to enter any kind of personal information into your response.
×
Thank You
×
Thank you for participating in our survey! Your answers will help us to improve the quality of our website and services.
We hope you continue to make use of Game8.
We hope you continue to make use of Game8.
Close
Rankings
- We could not find the message board you were looking for.
Gaming News


![Slay the Spire 2 Review [Early Access] | Still the Deckbuilder to Beat](https://img.game8.co/4433115/44e19e1fb0b4755466b9e516ec7ffb1e.png/thumb)

![Resident Evil Village Review [Switch 2] | Almost Flawless Port](https://img.game8.co/4432790/e1859f64830960ce4248d898f8cd38d9.jpeg/thumb)
Popular Games

Genshin Impact Walkthrough & Guides Wiki
Honkai: Star Rail Walkthrough & Guides Wiki
Umamusume: Pretty Derby Walkthrough & Guides Wiki
Pokemon Pokopia Walkthrough & Guides Wiki
Resident Evil Requiem (RE9) Walkthrough & Guides Wiki
Monster Hunter Wilds Walkthrough & Guides Wiki
Wuthering Waves Walkthrough & Guides Wiki
Arknights: Endfield Walkthrough & Guides Wiki
Pokemon FireRed and LeafGreen (FRLG) Walkthrough & Guides Wiki
Pokemon TCG Pocket (PTCGP) Strategies & Guides Wiki


Recommended Games
Fire Emblem Heroes (FEH) Walkthrough & Guides Wiki
Diablo 4: Vessel of Hatred Walkthrough & Guides Wiki
Yu-Gi-Oh! Master Duel Walkthrough & Guides Wiki
Super Smash Bros. Ultimate Walkthrough & Guides Wiki
Pokemon Brilliant Diamond and Shining Pearl (BDSP) Walkthrough & Guides Wiki
Elden Ring Shadow of the Erdtree Walkthrough & Guides Wiki
Monster Hunter World Walkthrough & Guides Wiki
The Legend of Zelda: Tears of the Kingdom Walkthrough & Guides Wiki
Persona 3 Reload Walkthrough & Guides Wiki
Cyberpunk 2077: Ultimate Edition Walkthrough & Guides Wiki


All rights reserved
Published by Amazon Games under license. ©2023-2024 NCSOFT Corporation. All rights reserved. THRONE AND LIBERTY and the THRONE AND LIBERTY logo are trademarks of NCSOFT Corporation. Used by Amazon Games under license. Amazon Games, Amazon, and all related logos are trademarks of Amazon.com, Inc. or its affiliates. The “PS” Family logo and “PS5” are registered trademarks of Sony Interactive Entertainment Inc. Steam and the Steam logo are trademarks and/or registered trademarks of Valve Corporation in the U.S. and/or other countries.
The copyrights of videos of games used in our content and other intellectual property rights belong to the provider of the game.
The contents we provide on this site were created personally by members of the Game8 editorial department.
We refuse the right to reuse or repost content taken without our permission such as data or images to other sites.