Cave of Destruction Dungeon: How to Beat Lequirus
As of March 2025, Game8 has ended coverage of Throne and Liberty.
Thank you very much for your understanding and we hope you continue to enjoy Game8's guides!
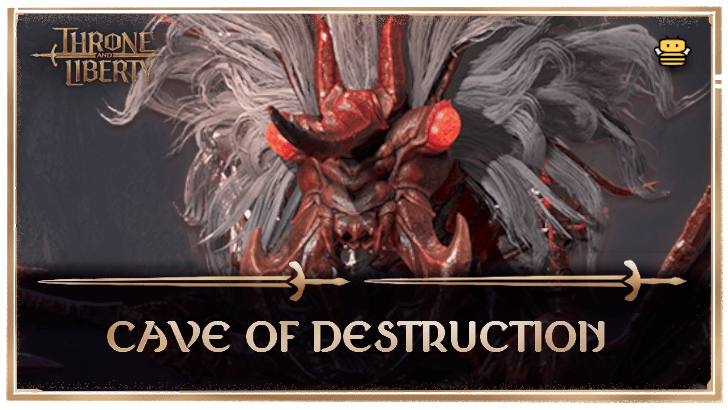
To finish Cave of Destruction and beat fight Lequirus in Throne and Liberty (TL), clear the paralyzing ants and designate larva collection to minimize damage taken. Read on to see an overview of Cave of Destruction, a complete walkthrough of Cave of Destruction, how to beat Lequirus, and the best rewards and drops upon completion!
List of Contents
How to Beat Lequirus
Lequirus Boss Showcase
Note: This clear was done in the KR server!
Check out our 5-minute clear of Lequirus with minimal gear investments and only 5 party members!
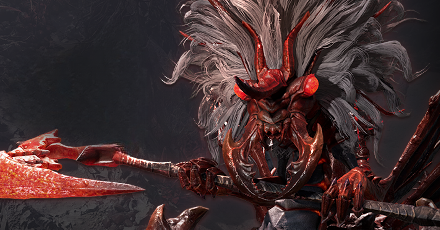
Lequirus Overview
| Lequirus | |
|---|---|
 |
|
| Type | Wildkin |
| Passive | Innate Defense: All Defense ▲ |
Lequirus Mechanics
| How to Avoid AoE Attack |
|---|
|
|
Clear the Colored Paralyzing Ant
Lequirus will spawn two ants, red and blue. At the same time, a colored marked area will also spawn. Killing the ant of the same color as the marked area will grant an attack buff and allow the player to enter the marked area.
Remember that the buff has a duration, meaning that if you lose the buff while inside the area, you will be repeatedly stunned and pushed out!
Head to the Marked Area
Lequirus will telegraph this attack and text will appear above his head. Walk to the marked area and a pillar will spawn. If the player stands on the pillar, they will be launched upwards when Lequirus unleashes his AoE attack, but avoid taking any damage.
As an alternative for when you did not get the buff from the Paralyzing Ants, you can climb the three natural pillars. The only two downsides of opting for this alternative are you must be quick to react to the text and that Lequirus will have more air time.
Defeat the Gem Ant
After unleashing its AoE attack, Lequrius will begin flying while a Gem Ant spawns. If players are launched into the air during the attack, they can glide to one of the platforms where the Gem Ant spawned.
Lequirus will continuously bombard players with ranged poison spits that stack, only stopping when the Gem Ant is defeated.
Designate Larva Collection
When Lequirus' HP drops below 50%, they can spit volatile larva on the entire party, which clings for a set amount of time. To deal with this mechanic, two players with larvae should stand next to each other to merge the larvae, then go to other players to get their larvae.
Doing the mechanic successfully results in only two players getting knocked up while minimizing damage. Failure to deal with the larva would cause it to explode, knocking the affected player upwards and dealing damage.
Lequirus Attack Patterns
Fury Attack
After a short wind-up, Lequirus will unleash a Fury Attack, dealing significant damage. Tanks should be able to block this accordingly.
Red AoE Slam
Lequirus will use an AoE attack when the aggro is on a player out of their melee range. Make sure the tank is close to Lequirus and allow them to draw Lequirus' attention first to reduce the occurrence of this attack as it can quickly wipe out the party.
Cave of Destruction Best Team and Roles
| Weapon Combo Recommendation |
Role Explanation |
|---|---|
  Tank |
Weapon Combination: This weapon combo makes a great tank build to clear out the mobs and soak damage for the team before reaching Lequirus. Dungeon Role: Responsible for taking the aggro of the ants, especially the explosive ones, you encounter throughout the dungeon. Lequirus Role: Responsible for sticking close to Lequirus to prevent him from using its Red AoE Slam AoE attack. |
  DPS |
Weapon Combination: This weapon combo makes use of long-range attacks to take out key targets. Dungeon Role: Responsible for focusing on bursting down the numerous amounts of Explosive Ants to prevent downed teammates. Lequirus Role: Responsible for dealing massive single-target damage both to the Colored Paralyzing Ants and Lequirus. Furthermore, this class should stick close to the Healer for when Lequirus does its larva attack. |
  DPS |
Weapon Combination This weapon combo is built around massive AoE clears and stealth utility. Dungeon Role: Responsible for dealing with the clumped-together ants the tank has gathered. Lequirus Role: Responsible for dealing massive single-target damage both to the Colored Paralyzing Ants and Lequirus. Furthermore, this class should stick close to the tank to deal as much damage as possible. |
  Healer |
Weapon Combination This weapon combo makes a great healer build to provide consistent healing to the party, especially to the tank. It also has some offensive options for additional damage. Dungeon Role: Responsible for keeping the party healthy at all times, especially towards poisoned allies and victims of explosive ants. Lequirus Role: Focus on healing the tank as they will take the brunt of the damage. Apart from that, the healers are responsible for retrieving the larvae from the Tank and DPS in conjunction with another DPS when Lequirus performs that attack. |
Cave of Destruction Walkthrough
| Cave of Destruction Sequences | |
|---|---|
| 1 |
Watch Out for the Explosive Ants The overall dungeon will be filled to the brim with ants. While most are not a threat, keep it a general rule to watch out for the exploding ants, as they deal AoE damage on death. Try to avoid killing the ants next to any teammates. Even if they do not have a fury attack indicator, you can still parry the attack to mitigate the explosion's poison damage by waiting until its belly turns bright green! |
| 2 |
Quickly Dispatch the Larvae After you clear the first room, you will enter a chamber filled with larvae. These larvae, while numerous, are squishy since you deal increased damage to them during this state. The goal here is to quickly deal with the larvae before they have the chance to grow into ants. It is recommended to clear out the Charging and Worker larvae as they are the most problematic when they mature! |
| 3 |
Deal with the Worker Ants In the third room, you will enter a section that houses a lone Empty Poison Sac. Simply attack it to progress then clear out the ants that spawn afterwards. As soon as the initial wave is cleared out, a Giant Acid Ant Egg will appear along with four tethered Worker Ants that run in the opposite direction. Have each party member split up and dispose of them to make the egg vulnerable to damage, which will spawn a miniboss upon death. Note that you cannot deal DoT damage such as Burns and Curses to the Giant Egg! |
| 4 |
Defeat the Giant Mutant Acid Ant After destroying the Giant Acid Ant egg, the Giant Mutant Acid Ant will spawn. The ant's deadliest move will have it release green acid on the ground, which can be avoided by stepping out of the way. Its Fury attack will pull the player towards it, so make sure to block to avoid being pulled. Upon completion, you will now reach Lequirus' lair, the arena where you will fight the queen of the ants! |
Note: The clips used for the walkthrough were filmed in the Cave of Desperation as the only difference was the stats of the mobs!
Cave of Destruction Overview
| Required Level | Lv. 50 |
|---|---|
| Type | 1-Star Dimensional Circle |
| Contract Token |
|
| Min. Combat Power | |
| Description | |
| A creature of dark magic empowered by a Star Fragment, the Queen Ant instinctually defends her kingdom with ruthless ferocity. With each of the countless invaders she consumed, her magic grew, until at last she took on a newer, deadlier form with a new name - Lequirus. | |
Cave of Destruction Best Rewards and All Drops
Lequirus's Wicked Thorns
| Weapon | Stats |
|---|---|
 Lequirus's Wicked Thorns Lequirus's Wicked Thorns Lequirus's Wicked Thorns Wisdom 4
Perception 3 Critical Hit Chance 39 |
Type:
Damage: 17~66Atk Spd: 0.405s Range: 2.5m Off-Hand Stats: DMG: 17~66 Atk Chance: 26% Modifiers: ・Wisdom 4 ・Perception 3 ・Critical Hit Chance 39 |
One of Cave of Destruction's better drops would be Lequirus's Wicked Thorns, which is the most popular daggers to use and is used by almost all builds with daggers. This popularity is due to the additional stats you gain for Perception and Critical Hit Chance.
Given that the weapon itself is mobile, the Lequirus's Gale Blade weapon effect is simply an easy means of increasing your overall damage as it is applied to your base stats.
Lequirus's Coveted Tome
| Weapon | Stats |
|---|---|
 Lequirus's Coveted Tome Lequirus's Coveted Tome Lequirus's Coveted Tome Wisdom 3
Perception 2 Critical Hit 74 |
Type:
Damage: 45~82Atk Spd: 0.475s Range: 14m Modifiers: ・Wisdom 3 ・Perception 2 ・Critical Hit 74 |
Along with its dagger counterpart, Lequirus's Coveted Tome is also currently the most popular wand to use for Healers due to the utility it provides along with the increase of Wisdom, Perception, and Critical Hit.
As healers are often frail and globally targetted by any competent player when it comes to PVP, the weapon effect Lequirus's Ambush attempts to answer that by giving the player stealth for a significant amount of time to reposition and recuperate.
Supreme Devotion
| Armor | Stats |
|---|---|
 Supreme Devotion Supreme Devotion
|
Type: Cloak Melee Def: 135 Ranged Def: 135 ・Critical Hit Chance 50 ・Mana Regen 22.5 ・Cooldown Speed +0.8% |
Supreme Devotion is one of the best cloaks for DPS in PVE content as it provides the necessary offensive stats such as Critical Hit Chance and Cooldown Speed. It also provides extra Mana Regen for utility!
Bracers of the Primal King
| Accessory | Stats |
|---|---|
 Bracers of the Primal King Bracers of the Primal King
|
Type: Bracelet Magic Def.: 180 Modifiers: ・Perception 4 ・Bonus Damage 7 |
Simplified, Bracers of the Primal King is one of the better bracers due to the raw Perception stat it provides. If you are missing a few points of Perception to reach a crucial break point on a build that relies on consistent accuracy, you can easily slot this in!
All Drops
Weapons
| All Weapon Drops |
 Lequirus's Coveted Tome Lequirus's Coveted Tome Lequirus's Coveted Tome Wisdom 3
Perception 2 Critical Hit 74 |
 Lequirus's Wicked Thorns Lequirus's Wicked Thorns Lequirus's Wicked Thorns Wisdom 4
Perception 3 Critical Hit Chance 39 |
 Farshot Longbow Farshot Longbow Farshot Longbow Perception 4
Critical Hit 100 |
 Steel Flurry Crossbows Steel Flurry Crossbows Steel Flurry Crossbows Dexterity 2
Critical Hit Chance 40 Max Mana 300 |
|---|---|---|---|
Armor
| All Armor Drops |
 Shock Commander Gauntlets Shock Commander Gauntlets Shock Commander Gauntlets Range ▲ 3%
Dexterity 1 Critical Hit 31 |
 Supreme Devotion Supreme Devotion Supreme Devotion Critical Hit Chance 50
Mana Regen 22.5 Cooldown Speed +0.8% |
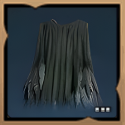 Berserker's Shroud Berserker's Shroud Berserker's Shroud Weaken Chance 62
Mana Regen 30 |
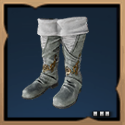 Glade Stalker Boots Glade Stalker Boots Glade Stalker Boots Hit Chance 50
Max Health 300 |
|---|---|---|---|
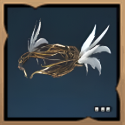 Glade Stalker Circlet Glade Stalker Circlet Glade Stalker Circlet Hit Chance 85
|
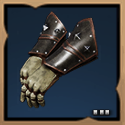 Glade Stalker Gloves Glade Stalker Gloves Glade Stalker Gloves Critical Hit 105
|
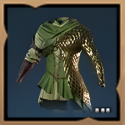 Glade Stalker Scales Glade Stalker Scales Glade Stalker Scales Critical Hit 60
Mana Regen 22.5 |
 Glade Stalker Trousers Glade Stalker Trousers Glade Stalker Trousers Mana Regen 30
Weaken Resistance 62 |
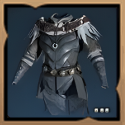 Soul Mirror Carapace Soul Mirror Carapace Soul Mirror Carapace Perception 2
Ranged Evasion 100 |
|||
Accessories
| All Accessory Drops |
 Bracers of the Primal King Bracers of the Primal King Bracers of the Primal King Perception 4
Bonus Damage 7 |
|---|
Items
Other
| All Other Rewards | ||
|---|---|---|
 Fighter Dentwerp Fighter Dentwerp
|
Abyssal Contract Token Points (x500) | Training Dew: 10,000 Points |
Throne and Liberty (TL) Related Guides

All Co-op Dungeons: Dimensional Circles
Dungeon Guides
| 3-Star Co-op Dungeons | 2-Star Co-op Dungeons |
3-Star Dimensional Circle Coop Dungeons
 Rancorwood Rancorwood |
 Halls of Tragedy Halls of Tragedy |
 Chapel of Madness Chapel of Madness |
 Doomrot Grove Doomrot Grove |
 Twisted Laboratory Twisted Laboratory |
- |
2-Star Dimensional Circle Coop Dungeons
 Island of Terror Island of Terror |
 Voidwastes Voidwastes |
 Valley of Slaughter Valley of Slaughter |
 Carmine Rage Island Carmine Rage Island |
 Torture Chamber of Screams Torture Chamber of Screams |
- |
1-Star Dimensional Circle Coop Dungeons
 Death's Abyss Death's Abyss |
 Cursed Wasteland Cursed Wasteland |
 Temple of Slaughter Temple of Slaughter |
 Butcher's Canyon Butcher's Canyon |
 Tyrant's Isle Tyrant's Isle |
 Cave of Destruction Cave of Destruction |
Dimensional Circle Coop Dungeons
 Specter's Abyss Specter's Abyss |
 Roaring Temple Roaring Temple |
 Cave of Desperation Cave of Desperation |
Event Coop Dungeons
 Haunted Labyrinth Haunted Labyrinth |
Comment
Author
Throne and Liberty: Wilds of Talandre Walkthrough & Guides Wiki
Cave of Destruction Dungeon: How to Beat Lequirus
Rankings
- We could not find the message board you were looking for.
Gaming News
Popular Games

Genshin Impact Walkthrough & Guides Wiki

Umamusume: Pretty Derby Walkthrough & Guides Wiki

Crimson Desert Walkthrough & Guides Wiki

Monster Hunter Stories 3: Twisted Reflection Walkthrough & Guides Wiki

Honkai: Star Rail Walkthrough & Guides Wiki

Pokemon Pokopia Walkthrough & Guides Wiki

The Seven Deadly Sins: Origin Walkthrough & Guides Wiki

Wuthering Waves Walkthrough & Guides Wiki

Zenless Zone Zero Walkthrough & Guides Wiki

Arknights: Endfield Walkthrough & Guides Wiki
Recommended Games

Fire Emblem Heroes (FEH) Walkthrough & Guides Wiki

Diablo 4: Vessel of Hatred Walkthrough & Guides Wiki

Cyberpunk 2077: Ultimate Edition Walkthrough & Guides Wiki

Yu-Gi-Oh! Master Duel Walkthrough & Guides Wiki

Super Smash Bros. Ultimate Walkthrough & Guides Wiki

Pokemon Brilliant Diamond and Shining Pearl (BDSP) Walkthrough & Guides Wiki

Elden Ring Shadow of the Erdtree Walkthrough & Guides Wiki

Monster Hunter World Walkthrough & Guides Wiki

The Legend of Zelda: Tears of the Kingdom Walkthrough & Guides Wiki

Persona 3 Reload Walkthrough & Guides Wiki
All rights reserved
Published by Amazon Games under license. ©2023-2024 NCSOFT Corporation. All rights reserved. THRONE AND LIBERTY and the THRONE AND LIBERTY logo are trademarks of NCSOFT Corporation. Used by Amazon Games under license. Amazon Games, Amazon, and all related logos are trademarks of Amazon.com, Inc. or its affiliates. The “PS” Family logo and “PS5” are registered trademarks of Sony Interactive Entertainment Inc. Steam and the Steam logo are trademarks and/or registered trademarks of Valve Corporation in the U.S. and/or other countries.
The copyrights of videos of games used in our content and other intellectual property rights belong to the provider of the game.
The contents we provide on this site were created personally by members of the Game8 editorial department.
We refuse the right to reuse or repost content taken without our permission such as data or images to other sites.
 Precious Polished Crystal
 Precious Stalon Ore
 Precious Emeret Ore
 Precious Rubrix Ore
 Precious Marind Ore
 Precious Parchment
 Precious Omnipotence Parchment
 Dimensional Soul Shard: Lequirus
 Rare Polished Crystal
 Ant Wings
 Fermented Rotein


