Best Ranger Longbow / Greatsword (GS) Build PvP
As of March 2025, Game8 has ended coverage of Throne and Liberty.
Thank you very much for your understanding and we hope you continue to enjoy Game8's guides!
Be on the front lines and take down key targets with the Ranger Longbow/Greatsword build in Throne and Liberty (TL) PvP. Read on to learn how to use the Ranger Longbow / Greatsword Build effectively to burst down other players, including the best gears to equip, skill rotations, traits, and more.
 Attention! Attention! |
This build was last updated on December 2024; changes to the game since then have not been reflected in this build. |
|---|
| All Ranger Longbow / Greatsword Builds | |
|---|---|
| Best Ranger Longbow / Greatsword PvP Build | Best Ranger Longbow / Greatsword PvE Build |
List of Contents
Scout Longbow / Greatsword Build Overview
Build Summary
| Jump to a Section | |||||||||||
|---|---|---|---|---|---|---|---|---|---|---|---|
| Build Summary | |
|---|---|
  |
Focus: CC, AoE, Lockdown, Small/Large Scale PvP Stat Priority: Strength, Perception |
| Skill Setup | |
Precision Dash Rushes to the designated direction, dealing damage equal to 110% of Base Damage to the maximum of 6 enemies on the path, and increases Magic, Melee, and Ranged Heavy Attack chance by 90 for 3s on hit. Damage increases by 16% per 1m of distance from the target at the starting point. If used again within 3s, will rush to the designated target and apply the same effect again.
Stunning Blow Deals 150% of Base Damage, with an 80% chance to Stun the target for 1.8s. Targets immune to Stun are Shocked for 4.2s. Every successful heavy attack sets Stun duration to 2.3s, and Shock duration to 5.2s
Death Blow Deals damage equal to 390% of Base Damage + 89. Against Bound, Sleeping, Shocked, or Stunned targets, damage increases by 30%. The damage is amplified by 80% against bosses.
DaVinci's Courage For party members within a 15m range, Max Health 480 ▲, Health Regen 120 ▲, and Attack Speed 15% ▲ for 12s.
Guillotine Blade A special growth skill that can only be grown with Precious Training Books: Omnipotence. Deals 630% of Base Damage + 80 damage. Deals 819% of Base Damage +104 damage to Collision: Prone or Shocked Targets. The damage is amplified by 100% against bosses. On hit, Weakens the target, decreasing Incoming Heal by 60% for s.
Ascending Slash Deals damage equal to 265% of Base Damage + 54. Applies Collision: Prone with a 80% chance against Bound, Sleeping, or Stunned targets, or those using Static Defense, for 2.5. For each Heavy Attack, Collision: Prone duration increases by 1s.
Devastating Smash Jump at a target and slash down with a Greatsword, dealing damage equal to 230% +49 to all targets within a 3m radius. Has a 42% chance to Stun the target for 2s.
Ensnaring Arrow Deals 130% of Base Damage. With an 80% chance to Bind a boss for 3s. A Boss immune to Bind is instead Oppressed for the same duration.
Blitz A special growth skill that can only be grown with Precious Skill Growth Book: Omnipotence. Resets the cooldown of the recently used skill. This is only available when a resettable skill exists, and it is not affected by Skill cooldown speed and skill cooldown reduction.
Arrow Vortex Fury Attack: Fires an arrow at the target location, dealing 100% of Base Damage to the first enemy hit and applying Move Speed 37.5% ▼ within a 3m radius around the target. After 2s, applies Collision: Pull with a 1--% chance to pull all enemies within range to the center while inflicting an additional damage that is equal to 70% of the Base Damage. The pulled enemies have their Move Speed decreased by 37.5% for 2s.
Deadly Marker Has a 90% chance to Mark a target for 9s. When attacking the Marked target, Magic, Melee, and Ranged Critical Hit increases by 100 for you, and 100 for your party members. On every Critical Hit, you and your party members’ skill cooldowns 1% ▼. On Marking a monster, only 50% of the cooldown decreases is applied (up to 100 times).
Flash Arrow A special skill that can only be grown with Precious Skill Growth Book: Omnipotence. Deals 150% of Base Damage to enemies within 4m around the designated location. Has a 80% chance to Stun Stealth enemies for 2, which will end their Stealth. Ending Stealth increases Critical Damage by 20% for 6s. Not applicable to Stealth by Transcending Power: Eclipse.
|
|
| Pros | Cons |
|
|
|
A unique melee weapon combination, this deadly class can take down single targets with ease, leaving no room for retaliation. The Greatsword dismantles the enemy with a series of CC skills, leaving them unable to fight back.
This has a number of drawbacks. Because this build uses the longbow instead of a sword and shield, it leaves the class with only one damage mitigation skill, which must be used as sparingly as possible because it is also a source of damage.
It also relies on the stuns landing properly to complete the full combo. If the opponent's melee evasion stat is too high, it can cause stun skills to fail to land and mess up the rotation. This gets better as the hit stat increases.
Perception is extremely important in this build, as it would be the difference between skills hitting targets or not. To that end, the goal would be to hit the stat targets of 60 Perception and 60 Strength for Damage, Health, and increased chance of Heavy Attack.
Skills and Specialization
| Jump to a Section | |||||||||||
|---|---|---|---|---|---|---|---|---|---|---|---|
| Active Skills | |||
|---|---|---|---|
 Stunning Blow Stunning Blow Stunning Blow Deals 150% of Base Damage, with an 80% chance to Stun the target for 1.8s. Targets immune to Stun are Shocked for 4.2s. Every successful heavy attack sets Stun duration to 2.3s, and Shock duration to 5.2s
|
Hit Rate ▲ Skill hit increases by 30%. Effects Duration ▲ Stun Duration increases by 0.5s. Cooldown ▼ Skill Cooldown decreases by 15%. Additional Damage Boost When used, Skill Damage Boost 150% ▲ for the next skill that is used within 5s. |
||
|
Cooldown ▼ Skill Cooldown decreases by 15%. Area Damage Inflicts 630% of Base Damage + 80 damage to a 3m radius area around the target if the attack is Critical or Heavy Attack hit. Damage Collection Deals 630% of Base Damage + 80 damage. Deals 819% of Base Damage + 104 damage to Collision: Prone or Shocked targets. The damage is amplified by 100% against bosses. On Hit, Weakens the target, decreasing Incoming Heal by 60% for 6s. The damage increases up to 100% in proportional to the collection time. |
|||
 Ascending Slash Ascending Slash Ascending Slash Deals damage equal to 265% of Base Damage + 54. Applies Collision: Prone with a 80% chance against Bound, Sleeping, or Stunned targets, or those using Static Defense, for 2.5. For each Heavy Attack, Collision: Prone duration increases by 1s.
|
Additional Damage Boost Skill Damage Boost of the skill used next within 5s increases by 250. Cooldown ▼ Skill Cooldown decreases by 15%. |
||
 Devastating Smash Devastating Smash Devastating Smash Jump at a target and slash down with a Greatsword, dealing damage equal to 230% +49 to all targets within a 3m radius. Has a 42% chance to Stun the target for 2s.
|
Effect Duration ▲ Stun Duration ▲ by 1s. Effects Chance ▲ The Stun chance increases by 15%. |
||
 Precision Dash Precision Dash Precision Dash Rushes to the designated direction, dealing damage equal to 110% of Base Damage to the maximum of 6 enemies on the path, and increases Magic, Melee, and Ranged Heavy Attack chance by 90 for 3s on hit. Damage increases by 16% per 1m of distance from the target at the starting point. If used again within 3s, will rush to the designated target and apply the same effect again.
|
Range ▲ Range +20%. |
||
 Death Blow Death Blow Death Blow Deals damage equal to 390% of Base Damage + 89. Against Bound, Sleeping, Shocked, or Stunned targets, damage increases by 30%. The damage is amplified by 80% against bosses.
|
Damage ▲ Damage dealt to a Prone target increases by 30%. |
||
 Flash Arrow Flash Arrow Flash Arrow A special skill that can only be grown with Precious Skill Growth Book: Omnipotence. Deals 150% of Base Damage to enemies within 4m around the designated location. Has a 80% chance to Stun Stealth enemies for 2, which will end their Stealth. Ending Stealth increases Critical Damage by 20% for 6s. Not applicable to Stealth by Transcending Power: Eclipse.
▼  Flash Wave Flash Wave Flash Wave The skill effect is enhanced based on collection time. Send a large arrow in a designated direction to deal 360% of Base Damage 310 to 720% + 620 to every enemy within the range. Allies within the area receive healing over time that is equal to 48% of Base Damage + 42 to 96% +84 for 6s.
|
Flash Wave The skill effect is enhanced based on the collection time. Throw a large arrow to the designated direction to deal 360% of Base Damage 310 to 720% + 620 to every enemy within the range. Allies within the are receives a healing over time that is equal to 48% of Base Damage + 42 to 96% + 84 for 6s. |
||
 Ensnaring Arrow Ensnaring Arrow Ensnaring Arrow Deals 130% of Base Damage. With an 80% chance to Bind a boss for 3s. A Boss immune to Bind is instead Oppressed for the same duration.
|
Hit Rate ▲ Skill Hit Rate increases by 20% |
||
 DaVinci's Courage DaVinci's Courage DaVinci's Courage For party members within a 15m range, Max Health 480 ▲, Health Regen 120 ▲, and Attack Speed 15% ▲ for 12s.
|
Damage Reduction Damage Reduction increases by an additional 25. Cannot be stacked with DaVinci’s Chill Specialization. |
||
 Arrow Vortex Arrow Vortex Arrow Vortex Fury Attack: Fires an arrow at the target location, dealing 100% of Base Damage to the first enemy hit and applying Move Speed 37.5% ▼ within a 3m radius around the target. After 2s, applies Collision: Pull with a 1--% chance to pull all enemies within range to the center while inflicting an additional damage that is equal to 70% of the Base Damage. The pulled enemies have their Move Speed decreased by 37.5% for 2s.
▼  Tornado Tornado Tornado Creates a 4m radius Tornado that moves to the designated direction. The Gale deals 100% of Base Damage + 15 to enemies in range, and applies Gale for 6s, which causes Collision: Push with a 70% chance to float targets in the air for 2s. You can attack the enemy multiple times while in the area, but the Collision Effect does not stack. The Gale cannot climb steep hills.
|
Tornado Creates a 4m radius Tornado that moves to the designated direction. The Gale deals 100% of Base Damage + 15 to enemies in range, and applies Gale for 6s, which causes Collision: Push with a 70% chance to float targets in the air for 2s. You can attack the enemy multiple times while in the area, but the Collision Effect does not stack. The Gale cannot climb steep hills. |
||
 Deadly Marker Deadly Marker Deadly Marker Has a 90% chance to Mark a target for 9s. When attacking the Marked target, Magic, Melee, and Ranged Critical Hit increases by 100 for you, and 100 for your party members. On every Critical Hit, you and your party members’ skill cooldowns 1% ▼. On Marking a monster, only 50% of the cooldown decreases is applied (up to 100 times).
|
Hit ▲ Party members who attack enemies with Deadly Marker gain additional accuracy by 150. |
||
 Blitz Blitz Blitz A special growth skill that can only be grown with Precious Skill Growth Book: Omnipotence. Resets the cooldown of the recently used skill. This is only available when a resettable skill exists, and it is not affected by Skill cooldown speed and skill cooldown reduction.
|
- | ||
| Passive Skills | |||
 Robust Constitution Robust Constitution Robust Constitution Health Regen 10 ▲ and Max Health 470 ▲.
|
 Vital Force Vital Force Vital Force Magic, Melee, and Ranged Hit 0.62 ▲, Skill Damage Boost 0.07 ▲, and Stun Chance 0.425 ▲ pero 100 of Max Health.
|
 Cold Warrior Cold Warrior Cold Warrior Against Shocked or Stunned targets, Magic, Melee, and Ranged Heavy Attack chances increase by 120 and Magic, Melee, and Ranged Critical Hit increase by 105.
|
 Indomitable Armor Indomitable Armor Indomitable Armor Has a 25% chance to increase Magic, Melee, and Ranged Defense by 140 for 2s on being hit. Stacks up to 3 times.
|
 Distorted Sanctuary Distorted Sanctuary Distorted Sanctuary Melee, Ranged, and Magic Endurance increases by 18, and Continuous Health Recovery from skills increase by 1.8% per party member (including yourself) within a 16m radius.
|
 Devoted Shield Devoted Shield Devoted Shield When Weakened, has a 4.5% chance to create a Shield of 3,000 Health that lasts for 3s.
|
 Steady Aim Steady Aim Steady Aim Against Bound and Oppressed targets, Magic, Melee, and Ranged Critical Hit 155 ▲.
|
 Earth's Blessing Earth's Blessing Earth's Blessing Health Regen increases by 12 and Continuous Health Recovery from skills increases by15%.
|
| Defensive Skill | |||
 Iron Point Parry Iron Point Parry Iron Point Parry Defends against attacks. Increases Skill Damage Boost by 11% for skills used within 5s after defeating against a Fury Attack while stationary. Deals damage equal to 230% of Base Damage + 27 to targets within Attack Range, and Iron Point Parry changes to Murderous Draw on Defending against a Fury Attack within 0.5s, deals damage with a 80% chance to Stun the target for 3. Targets immune to Stun are Shocked for 6s. Wrath Attacks can’t be defended. Use with the directional buttons to defend against attacks while moving 4m in the designated direction for 0.5s. Upon defending against a Fury or Wrath Attack, Charging Draw is activated for 3s.
|
|||
Active Skills
This build emphasizes melee combat, using Greatsword skills to specialize in damage. Stunning Blow and Devastating Smash are used to set up Death Blow and Guillotine Blade, the most powerful Greatsword skill.
Since the build relies on stuns, the Longbow skills are used to help the Greatsword close the gap and increase hit rate. To that end, Deadly Marker and Ensnare Arrow are used, with Blitz being a flexible skill to refresh the cooldown of a chosen skill.
Prioritize leveling Precision Dash, Stunning Blow, and Death Blow, as they make up the bulk of the damage early on, to be followed by Guillotine Blade.
Passive Skills
With most encounters being fought in melee range, Only three offensive passives are taken, in order to increase survivability. Since this build has plenty of the Strength stat, the rest of the passives can be focused on survivability and sustain.
Prioritize leveling Robust Consitution and Cold Warrior for leveling, as it will increase overall damage dealt.
Best Weapons
| Jump to a Section | |||||||||||
|---|---|---|---|---|---|---|---|---|---|---|---|
| Primary Weapon | |
|---|---|
 Adentus's Gargantuan Greatsword Adentus's Gargantuan Greatsword Adentus's Gargantuan Greatsword Strength 4
Critical Hit Chance 159 Construct Bonus Damage 8 |
・Attack Speed ・Critical Hit ・Heavy Attack Chance |
| Weapon Effect | Base Damage 3 ▲ per 1,000 of current Health when attacking with Greatswords. Base Damage Min 15 ▲, Max 60 ▲. |
Since this build has a very high Strength stat, Adentus's Gargantuan Greatsword is the best option, as it increases damage consistently. Duke Magna's Fury Warblade is a great alternative with its excellent passive, but the lack of Strength means the build wouldn't have as much Health.
| Secondary Weapon | |
|---|---|
 Tevent's Arc of Wailing Death Tevent's Arc of Wailing Death Tevent's Arc of Wailing Death Attack Range Increase 4%
Dexterity 3 Perception 4 |
・Hit ・Critical Hit ・Heavy Attack Chance |
| Weapon Effect | Shoots a bonus projectile whenever using Strafing, dealing 54% of Base Damage |
Despite this build not using Strafing, Tevent's Arc of Wailing Death will be used in order to reach the important stat breakpoints.
Best Armors and Accessories
| Jump to a Section | |||||||||||
|---|---|---|---|---|---|---|---|---|---|---|---|
| Armors | |
|---|---|
 Helm of the Field General Helm of the Field General Helm of the Field General Perception 1
Stun Chance 37 Max Health 230 |
・Magic Evasion ・Ranged Evasion ・Max Health |
 Supreme Devotion Supreme Devotion Supreme Devotion Critical Hit Chance 50
Mana Regen 22.5 Cooldown Speed +0.8% |
・Stun Resistance ・Debuff Duration ・Skill Damage Resistance |
 Shock Commander Plate Armor Shock Commander Plate Armor Shock Commander Plate Armor Strength 4
Damage Reduction 4 |
・Max Health ・Melee Evasion ・Ranged Evasion |
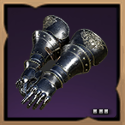 Gauntlets of the Field General Gauntlets of the Field General Gauntlets of the Field General Added Attack Speed +2%
Perception 4 |
・Max Health ・Melee Evasion ・Ranged Evasion |
 Shadow Harvester Trousers Shadow Harvester Trousers Shadow Harvester Trousers Perception 3
Hit 22 Mana Regen 11.25 |
・Magic Evasion ・Ranged Evasion ・Magic Endurance |
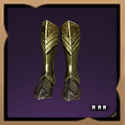 Shock Commander Sabatons Shock Commander Sabatons Shock Commander Sabatons Movement Speed +1.4%
Strength 2 Collision Chance 25 |
・Max Health ・Ranged Evasion ・Melee Evasion |
| Accessories | |
 Clasp of the Conqueror Clasp of the Conqueror Clasp of the Conqueror Strength 1
Perception 2 Mana Regen 27.75 |
・Max Health ・Skill Damage Boost ・Buff Duration |
 Bracers of the Primal King Bracers of the Primal King Bracers of the Primal King Perception 4
Bonus Damage 7 |
・Max Health ・Skill Damage Resistance ・Debuff Duration |
 Etched Alabaster Band Etched Alabaster Band Etched Alabaster Band Added Attack Speed +1.8%
Strength 2 Stun Chance 37 |
・Max Health ・Skill Damage Boost ・Buff duration |
 Band of Universal Power Band of Universal Power Band of Universal Power Strength 1
Dexterity 1 Wisdom 1 Perception 1 |
・Bind Chance ・Skill Damage Boost ・Stun Chance |
 Belt of Bloodlust Belt of Bloodlust Belt of Bloodlust Move Speed +2%
Strength 2 Max Health 200 |
・Max Health ・Skill Damage Resistance ・Debuff Duration |
Two pieces of the Shock Commander Set are used to increase Damage Reduction. Stacking defensive traits is critical to increasing survivability, and this build does just that.
Getting to 60 Perception is crucial because it determines how much the skills will hit. Since the build would be doing a lot of melee combat, this build also aims for 60 Strength. The rest of the remaining points would go to Dexterity, which would reach 30 points.
| List of References | |
|---|---|
| List of All Armor | List of All Accessories |
Best Weapon Mastery
| Jump to a Section | |||||||||||
|---|---|---|---|---|---|---|---|---|---|---|---|
| Longbow | ・Check (6 Pts) ・Support (9 Pts) |
|---|---|
| Greatsword | ・Face Off (9 Pts) ・Incapacitate (6 Pts) |
The check tree provides Gale Arrowhead, which is critical for reducing all skill cooldowns except Blitz. The rest of the points go into the support tree, as Anti-Magic Arts and Song of Grace are essential passives for survivability.
Since this build relies on Heavy Attacks, 9 points are spent in the Face Off tree to improve that aspect. The rest of the avaialble points goes to Incapacitate for more stun chance.
How to Get Weapon Mastery Points
Best Guardian
| Jump to a Section | |||||||||||
|---|---|---|---|---|---|---|---|---|---|---|---|
| Best Guardian | |
|---|---|
 Shade Revenant Stheno Shade Revenant Stheno |
Launches 5 projectiles at random enemies within a 10m range every second. A single enemy may be hit with multiple projectiles at the same time. Each projectile deals 52% of Base Damage. |
Shade Revenant Stheno is the best option, as the build would keep the player in melee all the time, allowing Shade Revenant Stheno's Guardian effect to shine. Note, however, that the projectiles it launches will be distributed among multiple targets, so it is best used on targets that are alone.
Should the player find themselves engaging multiple targets in close vicinity quite often, Green Ranger Elowen is a great alternative, as it can bind all targets within a 4m radius if it hits.
Skill Rotations and Playstyle
| Jump to a Section | |||||||||||
|---|---|---|---|---|---|---|---|---|---|---|---|
| How to Play Longbow / Greatsword Build |
|---|
|
|
Note: If the skills icons are confusing, some of the skill icons indicated here are using their specialized variants.
Single Target Burst Rotation
DaVinci's Courage For party members within a 15m range, Max Health 480 ▲, Health Regen 120 ▲, and Attack Speed 15% ▲ for 12s.
▶
Deadly Marker Has a 90% chance to Mark a target for 9s. When attacking the Marked target, Magic, Melee, and Ranged Critical Hit increases by 100 for you, and 100 for your party members. On every Critical Hit, you and your party members’ skill cooldowns 1% ▼. On Marking a monster, only 50% of the cooldown decreases is applied (up to 100 times).
▶
Ensnaring Arrow Deals 130% of Base Damage. With an 80% chance to Bind a boss for 3s. A Boss immune to Bind is instead Oppressed for the same duration.
▶
Precision Dash Rushes to the designated direction, dealing damage equal to 110% of Base Damage to the maximum of 6 enemies on the path, and increases Magic, Melee, and Ranged Heavy Attack chance by 90 for 3s on hit. Damage increases by 16% per 1m of distance from the target at the starting point. If used again within 3s, will rush to the designated target and apply the same effect again.
▶
Stunning Blow Deals 150% of Base Damage, with an 80% chance to Stun the target for 1.8s. Targets immune to Stun are Shocked for 4.2s. Every successful heavy attack sets Stun duration to 2.3s, and Shock duration to 5.2s
▶
Death Blow Deals damage equal to 390% of Base Damage + 89. Against Bound, Sleeping, Shocked, or Stunned targets, damage increases by 30%. The damage is amplified by 80% against bosses.
▶
Ascending Slash Deals damage equal to 265% of Base Damage + 54. Applies Collision: Prone with a 80% chance against Bound, Sleeping, or Stunned targets, or those using Static Defense, for 2.5. For each Heavy Attack, Collision: Prone duration increases by 1s.
▶
Guillotine Blade A special skill that can only be grown with Precious Training Books: Omnipotence. Deals 630% of Base Damage + 80 damage. Deals 819% of Base Damage + 104 damage to Collision: Prone or Shocked targets. The damage is amplified by 120% against monsters. On hit, Weakens the target, decreasing Incoming Heal by 60% for 6s. The damage increases up to 100% in proportional to the charging time.
▶
Blitz A special growth skill that can only be grown with Precious Skill Growth Book: Omnipotence. Resets the cooldown of the recently used skill. This is only available when a resettable skill exists, and it is not affected by Skill cooldown speed and skill cooldown reduction.
▶
Devastating Smash Jump at a target and slash down with a Greatsword, dealing damage equal to 230% +49 to all targets within a 3m radius. Has a 42% chance to Stun the target for 2s.
▶
Guillotine Blade A special skill that can only be grown with Precious Training Books: Omnipotence. Deals 630% of Base Damage + 80 damage. Deals 819% of Base Damage + 104 damage to Collision: Prone or Shocked targets. The damage is amplified by 120% against monsters. On hit, Weakens the target, decreasing Incoming Heal by 60% for 6s. The damage increases up to 100% in proportional to the charging time.
(Half Charge)
|
As one of the team's frontline bruisers, look for high-value targets such as Healers or backline support classes. Use DaVinci's Courage for a Health buff, followed by Deadly Marker and Ensnaring Arrow on the chosen target.
Since Ensnaring Arrow would bind the target, there will be plenty of time to close the gap with Precision Dash. Once the target is in melee range, use Stunning Blow immediately, followed by Death Blow.
Before the target recovers, use Ascending Slash to knock them down and finish the rotation with Guillotine Blade. If the target is still alive, use Blitz to refresh the cooldown, then use Devastating Smash to stun the target.
Unfortunately, Devastating Smash's stun doesn't last long enough for a fully charged Guillotine Blade. It's best to only charge it halfway before unleashing it.
AoE Rotation
Tornado Creates a 4m radius Tornado that moves to the designated direction. The Gale deals 100% of Base Damage + 15 to enemies in range, and applies Gale for 6s, which causes Collision: Push with a 70% chance to float targets in the air for 2s. You can attack the enemy multiple times while in the area, but the Collision Effect does not stack. The Gale cannot climb steep hills.
▶
Flash Wave The skill effect is enhanced based on collection time. Send a large arrow in a designated direction to deal 360% of Base Damage 310 to 720% + 620 to every enemy within the range. Allies within the area receive healing over time that is equal to 48% of Base Damage + 42 to 96% +84 for 6s.
▶
Blitz A special growth skill that can only be grown with Precious Skill Growth Book: Omnipotence. Resets the cooldown of the recently used skill. This is only available when a resettable skill exists, and it is not affected by Skill cooldown speed and skill cooldown reduction.
▶
Flash Wave The skill effect is enhanced based on collection time. Send a large arrow in a designated direction to deal 360% of Base Damage 310 to 720% + 620 to every enemy within the range. Allies within the area receive healing over time that is equal to 48% of Base Damage + 42 to 96% +84 for 6s.
▶
Precision Dash Rushes to the designated direction, dealing damage equal to 110% of Base Damage to the maximum of 6 enemies on the path, and increases Magic, Melee, and Ranged Heavy Attack chance by 90 for 3s on hit. Damage increases by 16% per 1m of distance from the target at the starting point. If used again within 3s, will rush to the designated target and apply the same effect again.
▶
Guillotine Blade A special skill that can only be grown with Precious Training Books: Omnipotence. Deals 630% of Base Damage + 80 damage. Deals 819% of Base Damage + 104 damage to Collision: Prone or Shocked targets. The damage is amplified by 120% against monsters. On hit, Weakens the target, decreasing Incoming Heal by 60% for 6s. The damage increases up to 100% in proportional to the charging time.
|
Being on the front lines would mean actively looking for combat, not necessarily looking up to set up an AoE rotation. However, this class deals more damage to disabled targets and can capitalize on AoE setups executed alongside teammates.
Throne and Liberty Related Guides

Weapon Builds
 Spear Spear |
 Crossbows Crossbows |
 Daggers Daggers |
 Greatsword Greatsword |
 Longbow Longbow |
 Staff Staff |
 Sword and Shield Sword and Shield |
 Wand Wand |
All Build Guides
All Role Guides
 Best Healer Build Best Healer Build |
 Best Tank Build Best Tank Build |
 Best DPS Build Best DPS Build |
 Best Mage Build Best Mage Build |
Comment
Author
Throne and Liberty: Wilds of Talandre Walkthrough & Guides Wiki
Best Ranger Longbow / Greatsword (GS) Build PvP
improvement survey
03/2026
improving Game8's site?

Your answers will help us to improve our website.
Note: Please be sure not to enter any kind of personal information into your response.

We hope you continue to make use of Game8.
Rankings
- We could not find the message board you were looking for.
Gaming News
Popular Games

Genshin Impact Walkthrough & Guides Wiki

Honkai: Star Rail Walkthrough & Guides Wiki

Umamusume: Pretty Derby Walkthrough & Guides Wiki

Pokemon Pokopia Walkthrough & Guides Wiki

Resident Evil Requiem (RE9) Walkthrough & Guides Wiki

Monster Hunter Wilds Walkthrough & Guides Wiki

Wuthering Waves Walkthrough & Guides Wiki

Arknights: Endfield Walkthrough & Guides Wiki

Pokemon FireRed and LeafGreen (FRLG) Walkthrough & Guides Wiki

Pokemon TCG Pocket (PTCGP) Strategies & Guides Wiki
Recommended Games

Diablo 4: Vessel of Hatred Walkthrough & Guides Wiki

Fire Emblem Heroes (FEH) Walkthrough & Guides Wiki

Yu-Gi-Oh! Master Duel Walkthrough & Guides Wiki

Super Smash Bros. Ultimate Walkthrough & Guides Wiki

Pokemon Brilliant Diamond and Shining Pearl (BDSP) Walkthrough & Guides Wiki

Elden Ring Shadow of the Erdtree Walkthrough & Guides Wiki

Monster Hunter World Walkthrough & Guides Wiki

The Legend of Zelda: Tears of the Kingdom Walkthrough & Guides Wiki

Persona 3 Reload Walkthrough & Guides Wiki

Cyberpunk 2077: Ultimate Edition Walkthrough & Guides Wiki
All rights reserved
Published by Amazon Games under license. ©2023-2024 NCSOFT Corporation. All rights reserved. THRONE AND LIBERTY and the THRONE AND LIBERTY logo are trademarks of NCSOFT Corporation. Used by Amazon Games under license. Amazon Games, Amazon, and all related logos are trademarks of Amazon.com, Inc. or its affiliates. The “PS” Family logo and “PS5” are registered trademarks of Sony Interactive Entertainment Inc. Steam and the Steam logo are trademarks and/or registered trademarks of Valve Corporation in the U.S. and/or other countries.
The copyrights of videos of games used in our content and other intellectual property rights belong to the provider of the game.
The contents we provide on this site were created personally by members of the Game8 editorial department.
We refuse the right to reuse or repost content taken without our permission such as data or images to other sites.


