 Precious Polished Crystal
 Precious Stalon Ore
 Precious Emeret Ore
 Precious Rubrix Ore
 Precious Marind Ore
 Precious Parchment
 Precious Omnipotence Parchment
 Dimensional Soul Shard: Rex Chimaerus
 Rare Polished Crystal
 Beast Fang
 Mana Blood
This survey will take about 1 minute.
Your answers will help us to improve our website.
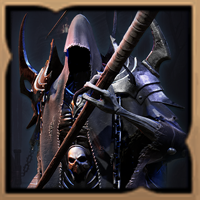
Throne and Liberty (TL)
Temple of Slaughter Dungeon: How to Beat Rex Chimaerus
As of March 2025, Game8 has ended coverage of Throne and Liberty.
Thank you very much for your understanding and we hope you continue to enjoy Game8's guides!
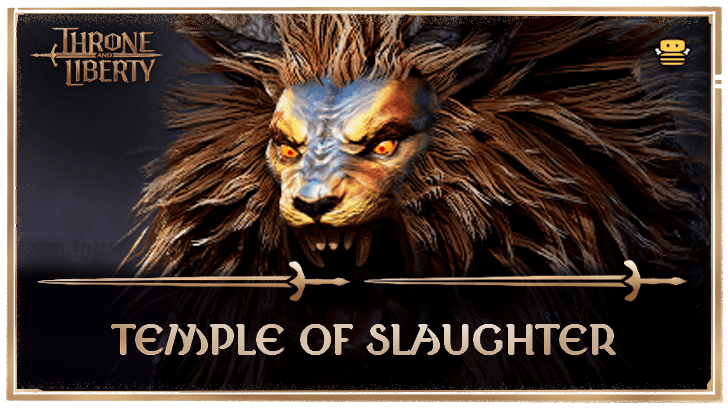
Temple of Slaughter is a 1-Star Dimensional Circle dungeon where you must fight Rex Chimaerus in Throne and Liberty (TL). Read on to see an overview of Temple of Slaughter, a complete walkthrough of Temple of Slaughter, how to beat Rex Chimaerus, as well as the possible rewards and drops upon completion!
List of Contents
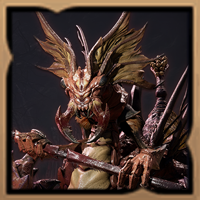
How to Beat Rex Chimaerus
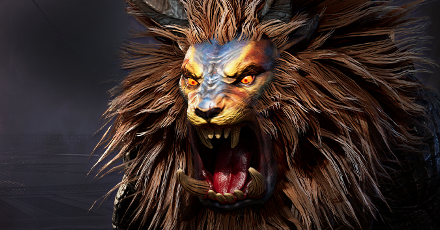
Rex Chimaerus Boss Showcase
Disclaimer: This clear was done in the KR server.
Check out our 3-minute clear of Rex Chimaerus with minimal gear optimization and only five party members!
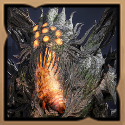
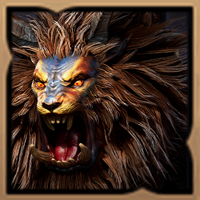
Rex Chimaerus Overview
| Rex Chimaerus | |
|---|---|
 |
|
| Type | Demon |
| Passive | Dusk Madness: Night: Damage Dealt ▲, Damage Taken ▲ |
Rex Chimaerus Mechanics
| Rex Chimaerus Mechanics |
|---|
The Four (4) Pillars
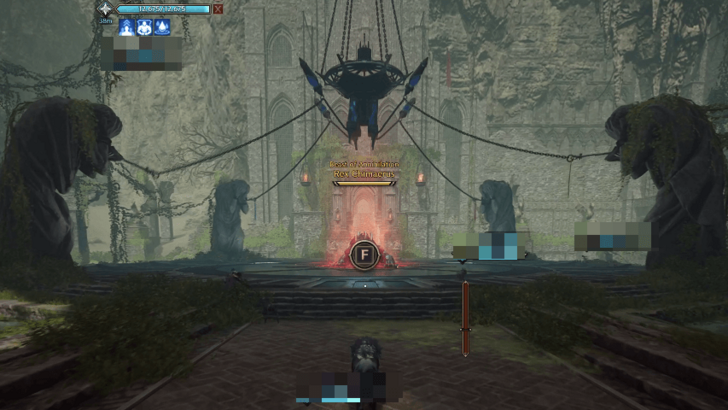
There are four (4) pillars surrounding the arena that are chained to a platform in the middle of the arena. At a certain point during the fight, the boss will charge up a fire attack and Air Pitons appear around the arena. Players must use the Air Pitons to grapple up and reach the platform in the middle of the arena and interact with the lever.
Once the lever is activated, the chains from the four (4) pillars surrounding the arena become interactable. Players must now interact with all four chains to prevent Rex Chimaerus' powerful AoE attack.
Assign Each Party Member to a Pillar
Before beginning the encounter, it's best to have a member of the party with an assigned column of their own. This will ensure that the mechanic can finish quickly, and party members will activate their assigned column as soon as the lever is activated.
Reach the Platform and Pull the Lever
Once the special mechanic starts,the first step is to have one (1) party member use the Air Pitons to grapple up and reach the platform in the middle of the arena and interact with the lever.
Two (2) party members can also do this task in case one fails to reach the platform.
Interact With The Chains
Once all four chains from the pillars become interactable, the party members stationed near the pillars should interact with one of the four chains. Doing so in a timely manner prevents Rex Chimaerus from performing a devastating AoE attack.
If Rex Chimaerus is already performing its AoE attack, pulling the levers will end this phase and it will resume its normal attack pattern.
Rex Chimaerus Attack Patterns
Rex Chimaerus follows and repeats this pattern the whole fight:
| Normal Attacks ▶ Acid Puddles ▶ Normal Attacks ▶ Paralyzing Venom ▶ Acid Puddles ▶ Fireballs ▶ AoE Attack (Special Mechanic) |
Normal Attacks
This attack has Rex Chimaerus perform swiping attacks with its claws. This doesn't do much damage and any tank could easily soak the damage.
Leaping Attack
Rex Chimaerus will perform a jump attack on distant party members with the highest aggro value. To prevent this, the tank should keep the boss aggro with skills that generate a lot of threat.
If the tank is having trouble maintaining aggro, consider using Shield Strike with the Aggro Increased specialization in addition to Chain Hook and Provoking Roar.
Acid Puddles
This attack has Rex Chimaerus shoot acid projectiles from its tail at three of the farthest targets, creating a puddle of acid on their position. Players only need to relocate and avoid staying on the acid puddle to avoid the attack.
Paralyzing Venom
Rex Chimaerus will tag a party member, and the tagged target will glow green. After a few seconds, Rex Chimaerus will stun the tagged target in preparation for its next attack.
Fireballs
This attack causes Rex Chimaerus to fire three (3) fireballs at the target affected by the Paralyzing Venom attack, dealing bonus damage to the stunned target while inflicting a DoT stacking debuff. This attack always comes after the Paralyzing Venom. In addition, while shooting fireballs Rex Chaimaerus also sprays poison using its tail on its right side.
There are multiple ways to deal with this mechanic. The easiest way is to remove Paralyzing Venom's Stun with the Longbow's Purifying Touch weapon skill. Other weapon skills that make players immune to or recover from CC, as well as the Precious Purification Stone, can also be used.
The other option is to let the other party members tank the fireballs. Ideally, this should be left to the tank, and well-equipped tanks can take all 3 fireballs, followed by support from the healer.
Lesser tanks may have trouble surviving the damage from stacking DoT if they take all three Fireballs. In this case, the tank can take at least two fireballs, with another party member taking the last fireball hit.
AoE Attack (Special Mechanic)
If the party does not activate the pillars in time, Rex Chimaerus will continuously perform a devastating AoE attack. It will continue to use this AoE attack until the party activates the levers.
Cave of Destruction Best Team and Roles
| Role | Explanation |
|---|---|
  Tank |
Weapon Combination: With Rex Chimera's frequent AoE attacks, it is imperative to keep aggro on the tank at all times. This is the best class suited for this task. Dungeon Role: Initiate fights while trying to generate aggro and defend the backline from teleporting mobs. Rex Chimaerus Role: Facetank Rex Chimaerus fireballs as needed and maintain aggro. |
  DPS |
Weapon Combination: Class that can output all of its DPS from medium to long range. Dungeon Role: Can specialize in AoE for faster mob clearing. Rex Chimaerus Role: Can stay near the Pillars and the Pitons, as the class is ranged. Can cast Purifying Cleanse on allies as needed. |
  DPS |
Weapon Combination: Consistently deals the highest damage of the entire team, while increasing the DPS of the entire party with Mortal Mark and Weak Point Shot. Dungeon Role: Bursts down key targets and attack the mobs that have ignored the tank and are attacking the backline. Rex Chimaerus Role: Arguably the class with the highest single-target DPS, all focus should be on DPS and maintaining a pristine rotation. |
  DPS |
Weapon Combination A safe, ranged option for dealing DPS, with the ability to save allies via the Salvation Chain. Can be swapped for another Crossbow / Dagger player. Dungeon Role: Can specialize in AoE for mobbing, or for bursting down single targets. Rex Chimaerus Role: Primary role is DPS, but can also save allies via Salvation Chain and Purifying Touch. |
 Healer |
Weapon Combination: Provides a wide range of healing options, both party-wide and single-target Dungeon Role: Focuses on survivability and the survival of party members. Rex Chimaerus Role: Keeps track of party members' health and provides healing and mitigation. Can remove the Paralyzing Venom debuff, making the Fireball phase easier. |
Temple of Slaughter Walkthrough
| Temple of Slaughter Sequences | |
|---|---|
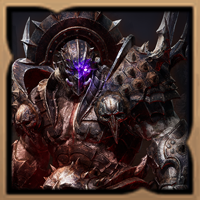
| 1 |  Activate First Valve At the start, just travel through the dungeon to reach and defeat the Ancient Shade Wizard, then open the valve to fill the area with water and reach the other side, defeating all enemies in the path. |
| 2 |  Activate Second Valve Upon reaching the next other side, simply do the same thing as the first sequence and open the second valve to reach the next destination. |
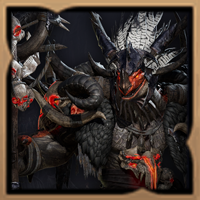
| 3 |  Middle Path After opening both valves, go to the middle and defeat the Ancient Berserk Dark Enforcer. The mini-boss doesn't have any notable mechanics, and it only takes damage to defeat it. |
| 4 | 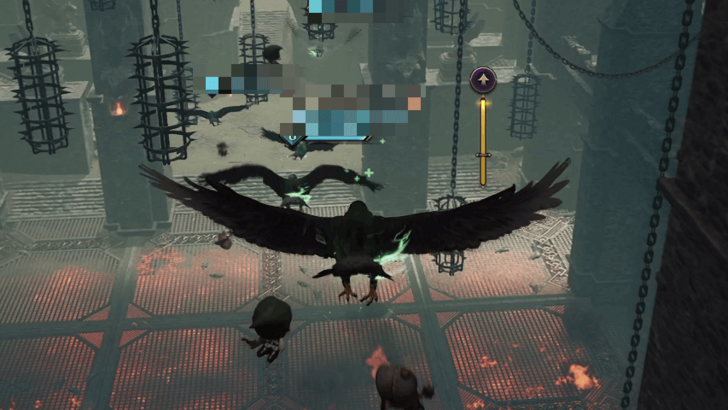 Flaming Room After defeating the mini-boss, glide through the room with flames to get to the next destination. Be careful not to hit any of the hanging cages, as they can impede movement. |
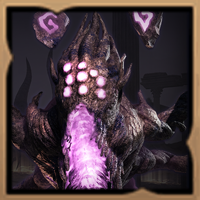
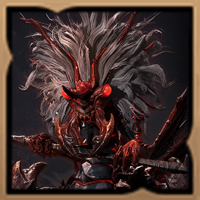
| 5 |  Last Barrier Upon landing, just go further into the dungeon until the last barrier. Defeat the Ancient Berserk Shade Wizard to remove the last barrier and proceed to the final boss' arena. ┗ How to Beat Ancient Berserk Shade Wizard |
How to Beat Ancient Berserk Shade Wizard
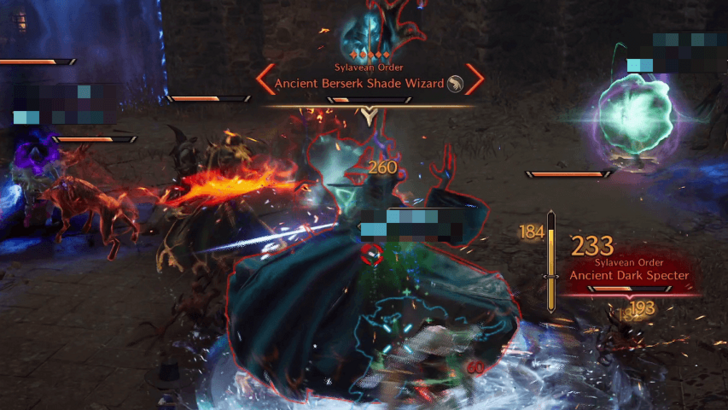
Although the Ancient Berserk Shade Wizard doesn't have any special mechanics, it does summon a pack of hounds that makes the fight a lot more difficult.
The best strategy to defeat the mini-boss is to have the tank get all the aggro from both the mini-boss and the hounds while the rest of the party focuses all their damage on the mini-boss. Moreover, healers should make sure that the tank get consistent healing as it soaks all the damage.
Temple of Slaughter Overview
| Required Level | Lv. 50 |
|---|---|
| Type | 1-Star Dimensional Circle |
| Contract Token |
|
| Min. Combat Power | |
| Description | |
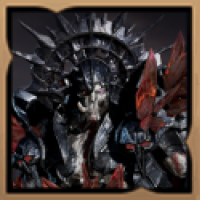
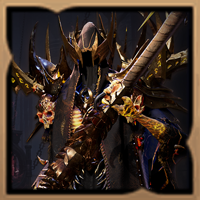
| Ahzriel, and Elder of the Sylavean Order, put a stop to the experiments and abandoned the monsters under the temple, sealing them away for good. Trapped with no others to prey upon, the monsters turned on each other, but King Chimaerus made short work of them all. According to one Shadowmancer's records, if King Chimaerus absorbs greater mana, it could transform into an even deadlier beast called Rex Chimaerus. | |
Temple of Slaughter Best Rewards and All Drops
Best Weapon
| Weapon | Stats |
|---|---|
 Rex Chimaerus's Crossbows Rex Chimaerus's Crossbows Rex Chimaerus's Crossbows Dexterity 7
Bonus Damage 14 |
Type:
Damage: 22~90Atk Spd: 0.55s Range: 12m Modifiers: ・Dexterity 7 ・Bonus Damage 14 |
Providing a good amount of Dexterity, Bonus Damage, and a high Off-hand attack chance, the Rex Chimaerus's Crossbows is highly sought after by Crossbow builds, and mandatory for Crossbow / Dagger builds.
Throne and Liberty Crossbow Builds
All Drops
Weapons
| All Weapon Drops |
Rex Chimaerus's Crossbows Rex Chimaerus's Crossbows Dexterity 7
Bonus Damage 14 |
 Rex Chimaerus's Fangs Rex Chimaerus's Fangs Rex Chimaerus's Fangs Dexterity 8
Weaken Chance 117 Wildling Bonus Damage 8 |
 Wand of Skyward Blessing Wand of Skyward Blessing Wand of Skyward Blessing Perception 4
Mana Cost Efficiency +8% |
|---|
Armor
| All Armor Drops |
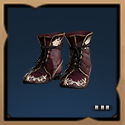
 Ebon Roar Greaves Ebon Roar Greaves Ebon Roar Greaves Dexterity 1
Damage Reduction 4 Melee Evasion 62 |
 Shadow Harvester Grips Shadow Harvester Grips Shadow Harvester Grips Range ▲ 1.7%
Dexterity 3 Critical Hit 20 |
 Elusive Hexweaver Shoes Elusive Hexweaver Shoes Elusive Hexweaver Shoes Sleep Chance 50
Health Regen 45 |
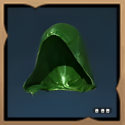 Nature's End Cowl Nature's End Cowl Nature's End Cowl Critical Hit Chance 40
Max Mana 450 |
|---|---|---|---|
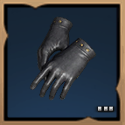 Nature's End Gloves Nature's End Gloves Nature's End Gloves Range ▲ 3%
Max Health 110 Ranged Evasion 50 |
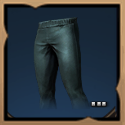 Nature's End Pants Nature's End Pants Nature's End Pants Wisdom 1
Mana Regen 60 |
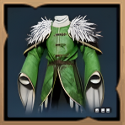 Nature's End Raiment Nature's End Raiment Nature's End Raiment Weaken Chance 62
Max Health 375 |
 Nature's End Shoes Nature's End Shoes Nature's End Shoes Movement Speed +2.6%
Perception 3 |
Accessories
| All Accessory Drops |
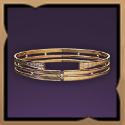 Demonic Beast King's Belt Demonic Beast King's Belt Demonic Beast King's Belt Move Speed +4%
Melee Defense 134 |
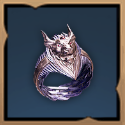 Regal Jade Band Regal Jade Band Regal Jade Band Critical Hit Chance 55
Mana Regen 26.25 |
 Serpentine Wristlet Serpentine Wristlet Serpentine Wristlet Bonus Damage 6
Mana Regen 37.5 |
|---|
Items
Other
| All Other Rewards | ||
|---|---|---|
| Ancient Taion | Abyssal Contract Token Points (x500) | Training Dew: 10,000 Points |
Throne and Liberty (TL) Related Guides
All Co-op Dungeons: Dimensional Circles
Dungeon Guides
| 3-Star Co-op Dungeons | 2-Star Co-op Dungeons |
3-Star Dimensional Circle Coop Dungeons
 Rancorwood Rancorwood |
 Halls of Tragedy Halls of Tragedy |
 Chapel of Madness Chapel of Madness |
 Doomrot Grove Doomrot Grove |
 Twisted Laboratory Twisted Laboratory |
- |
2-Star Dimensional Circle Coop Dungeons
 Island of Terror Island of Terror |
 Voidwastes Voidwastes |
 Valley of Slaughter Valley of Slaughter |
 Carmine Rage Island Carmine Rage Island |
 Torture Chamber of Screams Torture Chamber of Screams |
- |
1-Star Dimensional Circle Coop Dungeons
 Death's Abyss Death's Abyss |
 Cursed Wasteland Cursed Wasteland |
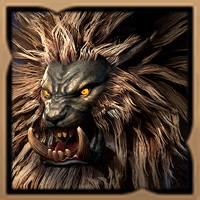
 Temple of Slaughter Temple of Slaughter |
 Butcher's Canyon Butcher's Canyon |
 Tyrant's Isle Tyrant's Isle |
 Cave of Destruction Cave of Destruction |
Dimensional Circle Coop Dungeons
 Specter's Abyss Specter's Abyss |
 Roaring Temple Roaring Temple |
 Cave of Desperation Cave of Desperation |
Event Coop Dungeons
 Haunted Labyrinth Haunted Labyrinth |
Comment
Author

Throne and Liberty: Wilds of Talandre Walkthrough & Guides Wiki
Temple of Slaughter Dungeon: How to Beat Rex Chimaerus
Please participate in our site
improvement survey
03/2026
improvement survey
03/2026
Would you assist in
improving Game8's site?
improving Game8's site?

×
We are listening to our users' valuable opinions and discussing how to act on them.
The information collected through this survey will be used for the purpose of improving our services. In addition, the information will only be disclosed a part of a statistic in a format that will not allow identification of personal information.
Begin Survey
Not Now
×
Please rate each item regarding Game8.co's Advertisements.
Amount of Ads
Very Dissatisfied
Somewhat Dissatisfied
Fine
Somewhat Satisfied
Highly Satisfied
Placement of Ads
Timing of Ad Display
Ad Loading Speed
Safeness of Ads
Content of Ads
×
Please rate each item regarding Game8.co's Quality of Articles.
Amount of information
Very Dissatisfied
Somewhat Dissatisfied
Fine
Somewhat Satisfied
Highly Satisfied
Frequency of updates
Speed of new information
Accuracy of articles
Understandibility of articles
Readability of sentences
×
Please rate each item regarding Game8.co's Usability of the Site.
Ease of finding information
Very Dissatisfied
Somewhat Dissatisfied
Fine
Somewhat Satisfied
Highly Satisfied
Loading Speed
Use of Color
Font Size
Visibility of Images
Easy to Understand Layout
×
Please rate each item regarding Game8.co's Message Boards, Comments.
Ease of Writing
Very Dissatisfied
Somewhat Dissatisfied
Fine
Somewhat Satisfied
Highly Satisfied
Readability
Ease in Finding Information
Comment Quality
Comment Quantity
Admin Response
×
Please rate each item regarding Game8.co's Site's new design.
Please rate our site's new design
Very Dissatisfied
Somewhat Dissatisfied
Fine
Somewhat Satisfied
Highly Satisfied
Do you think that the website's design change makes the site easier to use?
Has the new design made it easier for you to find information on the site?
Has the new design improved the overall visual appeal of the site?
How would you rate your overall satisfaction with the new design of the site?
×
How likely are you to recommend Game8 to someone you know?
Very Unlikely
0
1
2
3
4
5
6
7
8
9
10
Very Likely
If you have other opinions regarding potential improvement to the website, please share them with us. We would appreciate your honest opinion.
Note: This is a free response section, so you can proceed without entering anything.
Note: Please be sure not to enter any kind of personal information into your response.
Note: Please be sure not to enter any kind of personal information into your response.
×
Thank You
×
Thank you for participating in our survey! Your answers will help us to improve the quality of our website and services.
We hope you continue to make use of Game8.
We hope you continue to make use of Game8.
Close
Rankings
- We could not find the message board you were looking for.
Gaming News


![Slay the Spire 2 Review [Early Access] | Still the Deckbuilder to Beat](https://img.game8.co/4433115/44e19e1fb0b4755466b9e516ec7ffb1e.png/thumb)

![Resident Evil Village Review [Switch 2] | Almost Flawless Port](https://img.game8.co/4432790/e1859f64830960ce4248d898f8cd38d9.jpeg/thumb)
Popular Games

Genshin Impact Walkthrough & Guides Wiki
Honkai: Star Rail Walkthrough & Guides Wiki
Umamusume: Pretty Derby Walkthrough & Guides Wiki
Pokemon Pokopia Walkthrough & Guides Wiki
Resident Evil Requiem (RE9) Walkthrough & Guides Wiki
Monster Hunter Wilds Walkthrough & Guides Wiki
Wuthering Waves Walkthrough & Guides Wiki
Arknights: Endfield Walkthrough & Guides Wiki
Pokemon FireRed and LeafGreen (FRLG) Walkthrough & Guides Wiki
Pokemon TCG Pocket (PTCGP) Strategies & Guides Wiki


Recommended Games
Fire Emblem Heroes (FEH) Walkthrough & Guides Wiki
Diablo 4: Vessel of Hatred Walkthrough & Guides Wiki
Yu-Gi-Oh! Master Duel Walkthrough & Guides Wiki
Super Smash Bros. Ultimate Walkthrough & Guides Wiki
Pokemon Brilliant Diamond and Shining Pearl (BDSP) Walkthrough & Guides Wiki
Elden Ring Shadow of the Erdtree Walkthrough & Guides Wiki
Monster Hunter World Walkthrough & Guides Wiki
The Legend of Zelda: Tears of the Kingdom Walkthrough & Guides Wiki
Persona 3 Reload Walkthrough & Guides Wiki
Cyberpunk 2077: Ultimate Edition Walkthrough & Guides Wiki


All rights reserved
Published by Amazon Games under license. ©2023-2024 NCSOFT Corporation. All rights reserved. THRONE AND LIBERTY and the THRONE AND LIBERTY logo are trademarks of NCSOFT Corporation. Used by Amazon Games under license. Amazon Games, Amazon, and all related logos are trademarks of Amazon.com, Inc. or its affiliates. The “PS” Family logo and “PS5” are registered trademarks of Sony Interactive Entertainment Inc. Steam and the Steam logo are trademarks and/or registered trademarks of Valve Corporation in the U.S. and/or other countries.
The copyrights of videos of games used in our content and other intellectual property rights belong to the provider of the game.
The contents we provide on this site were created personally by members of the Game8 editorial department.
We refuse the right to reuse or repost content taken without our permission such as data or images to other sites.