Dimensional Trials: Valley of Slaughter
As of March 2025, Game8 has ended coverage of Throne and Liberty.
Thank you very much for your understanding and we hope you continue to enjoy Game8's guides!
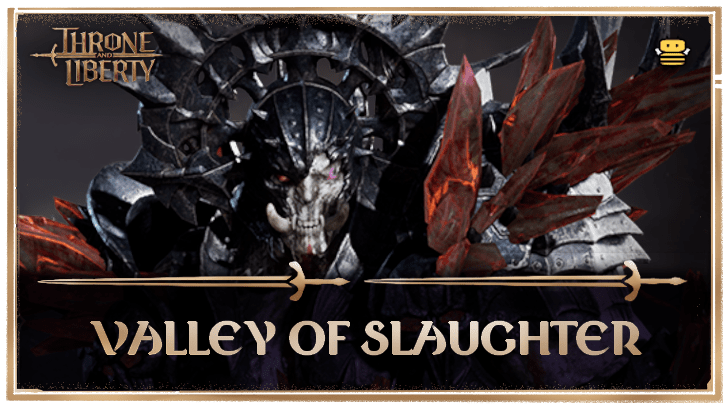
Revisit the Valley of Slaughter best Turka once more in this Dimensional Trial in Throne and Liberty (TL). Find out how to beat this Dimensional Trial in this guide.
List of Contents
How to Beat Turka
Additional Mechanics
| Dimensional Trial Mechanics |
|---|
|
|
The Valley of Slaughter: Dimensional Trial is pretty much identical to its normal dungeon version.
While most of the dungeon remains the same, the difficulty is increased by enemies with stronger attacks, additional mob placement, and the Dimensional Trial modifier for that week.
To top it off, starting in higher tiers, the final boss has some new deadly moves that can result in a wipe if not handled correctly.
It is recommended that players thoroughly familiarize themselves with the normal version before attempting to complete the Dimensional Trial dungeon.
Valley of Slaughter Dungeon: How to Beat Turka
Enhanced Attacks
Just like the normal version, Turka would channel energy into him and slam his weapon into the ground, dealing heavy damage to the entire party.
Party members can use Ice Attacks to mitigate the damage of this attack, in combination with other defensive skills such as Da Vinci's Courage and Invincible Wall as needed.
Fury and Wrath Attacks
At tier 5 and above, the timing indicator will be removed for both Fury and Wrath attacks, so players will have to time their dodges and blocks to match the animation of the attack in order to successfully defend against it.
Purple Tether Phase
In Tier 3 and above, Turka will mark the player furthest away from him with a red marker. After a few seconds, Turka will send a projectile to the marked player, killing them instantly.
In order for the marked player to survive, a person must move close to the marked player. The tagged player will have a tether to the nearby player, and the tether will have a Purple color.
If the tethered players move too far away from each other, the tether will break and both players will be stunned. It is imperative that the tether not break, as it will be needed for the next phase.
Explosive Bighorn Sheep
After the Purple Tether phase, Explosive Bighorn Sheep can spawn in the arena. This needs to be dealt with quickly.
To inflict significant damage, the party must place the sheep between the Purple Tethers in order to do significant damage to it.
Available party members should also attack the sheep to take it down faster.
Enhanced Sheep Phase
| Turka’s Rotation During Sheep Phase |
|---|
| Meteor ▶ Wrath Attack ▶ Frontal Fire Cleave ▶ Wrath Attack ▶ Meteor ▶ AoE Slam (Wipe Mechanic) |
At the start of this phase, several sheep will spawn in the arena. Like the normal version, the sheep must be killed for the orb to spawn, preventing Turka from using his mechanic to wipe out the party.
However, there are a few differences that makes the trial version significantly harder.
In order for the orb to spawn, all of the sheep in the arena must be killed. The orb will spawn on the spot where the last sheep died, so leaving any sheep alive is definitely not an option.
The Sheep has an incredibly high amount of Health. To deal with the sheep in time, there are two main ways the party can deal with it.
Method 1: Wrath Attack
Once the Sheep Phase begins, the party will herd all the sheep in the arena into a single spot.
The tank will attract Turka's attention and direct Turka's Wrath Attack to the area where all the sheep were gathered.
Each Wrath attack deals about 55% damage to the sheep's health bar, so two of Turka's Wrath attacks should be enough to take care of them.
Method 2: Purple Tether
The party will still need to gather all the sheep in one place, similar to the first method.
The pair with the Purple tether will stand in two separate areas, and the gathered sheep must be positioned between them, allowing them to be hit by the purple Tether.
The Purple Tether will be the main source of damage, constantly chipping away at the sheep's health. The rest of the party will continue to deal damage to the sheep while allowing them to be hit by the Purple Tether.
Orb Phase
Once all the sheep have been dealt with, regardless of the method used, the party must interact with the orb in order for the shield to appear, saving the party from the Turka's wipe mechanic.
However, the big difference between this mechanic and its normal counterpart is that the orb will be destroyed if it's hit by Turka's meteor attack.
This should be avoided at all costs, as it will result in an immediate wipe, as the shield that protects the party from Turka's attack can no longer be obtained.
Because the meteor spawns relative to the player's position, party members must move away from the orb's location when Turka casts the meteor.
Players should interact with the orb after Turka casts his second meteor. The only exception to this rule is the tank, as Turka will not target the tank with the meteor if Turka previously targeted the tank with the Wrath attack.
Players can familiarize themselves with Turka's attack rotation during the Sheep Phase in order to anticipate upcoming attacks.
Dimensional Trial Modifier
| Effect | Description |
|---|---|
 Damage Reflection
 |
Reflects all physical damage within range. |
 Enhance Pattern
 |
Has an enhanced attack pattern. |
 Frenzy
 |
Increases surrounding monsters' damage dealt and damage taken after a certain period of time. |
 Increase Attack Power
 |
Increases Attack Power in stages. |
 Increase Health
 |
Increases Health in stages. |
 Time Bomb
 |
Summons a ticking time bomb upon death. |
 Totem of Retribution
 |
Summons a totoem that delivers a Stun attack to an area after a set duration. |
Each week, Dimensional Trials would have a modifier that would rotate with the dungeon available for that week. Players should be aware of the modifiers and make the necessary preparations in advance.
Dimensional Trial Rewards
Rune Chance Chests
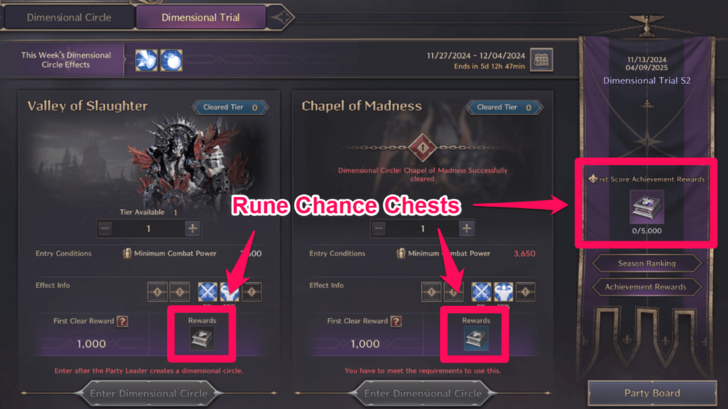
Upon successful completion of the Dimensional Trial, players would be rewarded with Rune chests. The rewards vary by tier, with higher tiers offering better rewards.
Throne and Liberty Related Guides

Dimensional Trials Guide and Schedule
Current Trials
 Carmine Rage Island Carmine Rage Island |
 Valley of Slaughter Valley of Slaughter |
Previous Trials
 Voidwastes Voidwastes |
 Island of Terror Island of Terror |
Comment
Author
Throne and Liberty: Wilds of Talandre Walkthrough & Guides Wiki
Dimensional Trials: Valley of Slaughter
improvement survey
03/2026
improving Game8's site?

Your answers will help us to improve our website.
Note: Please be sure not to enter any kind of personal information into your response.

We hope you continue to make use of Game8.
Rankings
- We could not find the message board you were looking for.
Gaming News
Popular Games

Genshin Impact Walkthrough & Guides Wiki

Honkai: Star Rail Walkthrough & Guides Wiki

Umamusume: Pretty Derby Walkthrough & Guides Wiki

Pokemon Pokopia Walkthrough & Guides Wiki

Resident Evil Requiem (RE9) Walkthrough & Guides Wiki

Monster Hunter Wilds Walkthrough & Guides Wiki

Wuthering Waves Walkthrough & Guides Wiki

Arknights: Endfield Walkthrough & Guides Wiki

Pokemon FireRed and LeafGreen (FRLG) Walkthrough & Guides Wiki

Pokemon TCG Pocket (PTCGP) Strategies & Guides Wiki
Recommended Games

Fire Emblem Heroes (FEH) Walkthrough & Guides Wiki

Diablo 4: Vessel of Hatred Walkthrough & Guides Wiki

Yu-Gi-Oh! Master Duel Walkthrough & Guides Wiki

Super Smash Bros. Ultimate Walkthrough & Guides Wiki

Pokemon Brilliant Diamond and Shining Pearl (BDSP) Walkthrough & Guides Wiki

Elden Ring Shadow of the Erdtree Walkthrough & Guides Wiki

Monster Hunter World Walkthrough & Guides Wiki

The Legend of Zelda: Tears of the Kingdom Walkthrough & Guides Wiki

Persona 3 Reload Walkthrough & Guides Wiki

Cyberpunk 2077: Ultimate Edition Walkthrough & Guides Wiki
All rights reserved
Published by Amazon Games under license. ©2023-2024 NCSOFT Corporation. All rights reserved. THRONE AND LIBERTY and the THRONE AND LIBERTY logo are trademarks of NCSOFT Corporation. Used by Amazon Games under license. Amazon Games, Amazon, and all related logos are trademarks of Amazon.com, Inc. or its affiliates. The “PS” Family logo and “PS5” are registered trademarks of Sony Interactive Entertainment Inc. Steam and the Steam logo are trademarks and/or registered trademarks of Valve Corporation in the U.S. and/or other countries.
The copyrights of videos of games used in our content and other intellectual property rights belong to the provider of the game.
The contents we provide on this site were created personally by members of the Game8 editorial department.
We refuse the right to reuse or repost content taken without our permission such as data or images to other sites.


![Slay the Spire 2 Review [Early Access] | Still the Deckbuilder to Beat](https://img.game8.co/4433115/44e19e1fb0b4755466b9e516ec7ffb1e.png/thumb)

![Resident Evil Village Review [Switch 2] | Almost Flawless Port](https://img.game8.co/4432790/e1859f64830960ce4248d898f8cd38d9.jpeg/thumb)


