Best Templar Sword and Shield (SnS) / Wand PvE Build
As of March 2025, Game8 has ended coverage of Throne and Liberty.
Thank you very much for your understanding and we hope you continue to enjoy Game8's guides!
This is a guide on the Templar Sword and Shield (SnS) and Wand build for PvE in Throne and Liberty (TL). Read on to learn how to use the Templar Sword and Shield / Wand build, including the best gears to equip, skill rotations, runes, traits, and more.
 Attention! Attention! |
This build was last updated on December 2024; changes to the game since then have not been reflected in this build. |
|---|
| All Templar Sword and Shield / Wand Builds | |
|---|---|
| Best Wand / Sword and Shield Build (PvP) | Best Sword and Shield / Wand (PvE) |
List of Contents
Templar Sword / Wand Build Overview
Build Summary
| Jump to a Section | |||
|---|---|---|---|
This build makes use of Sword and Wand weapons to create a well-balanced Melee and Magic build. It's effective against groups of enemies, allowing for faster farming and leveling.
Stat Allocation
| Stat | Total | Points From Lvl. | Points From Gear |
|---|---|---|---|
| Strength | 64 | 22 | 32 |
| Dexterity | 10 | 0 | 0 |
| Wisdom | 51 | 22 | 19 |
| Perception | 10 | 0 | 0 |
| Fortitude | 11 | 1 | 0 |
| Stat | Total | Points From Lvl. | Points From Gear |
|---|---|---|---|
| Strength | 70 | 19 | 41 |
| Dexterity | 14 | 0 | 4 |
| Wisdom | 60 | 25 | 25 |
| Perception | 20 | 0 | 0 |
| Fortitude | 11 | 1 | 0 |
| Stat | Total | Points From Lvl. | Points From Gear |
|---|---|---|---|
| Strength | 73 | 19 | 44 |
| Dexterity | 17 | 0 | 7 |
| Wisdom | 60 | 25 | 25 |
| Perception | 13 | 0 | 0 |
| Fortitude | 11 | 1 | 0 |
Note: Base stats are always 10!
Most of the build's Strength will come from items, so putting just enough points to Strength to reach the 70 breakpoint would be the ideal choice. Majority of the points should instead go to Wisdom for mana, cooldown speed, and debuff duration.
Skills and Specialization
| Jump to a Section | |||
|---|---|---|---|
| Active Skills | |||||||
|---|---|---|---|---|---|---|---|
 Shield Strike Shield Strike Shield Strike Deals 360% of Base Damage + 16. Weakens the target with a 70% chance to decrease Magic, Melee, and Ranged Hit by 250 for 6s. Shield Strike’s Melee Heavy Attack Chance increases by 20 per 1% of Shield Block Chance. On Counterattacking with Counter Barrier, Shield Strike cooldown decreases by 1.3s. The target’s aggression greatly increases.
▼  Piercing Attack Piercing Attack Piercing Attack Deals 360% of Base Damage + 16. to the target and other enemies within a 60-degrees cone. Weakens the target with a 70% chance to decrease Magic, Melee, and Ranged Hit by 250 for 6s. Shield Strike's Melee Heavy Attack Chance increases by 20 per 1% of Shield Block Chance. On counterattacking with Counter Barrier, Shield Strike cooldown decrease by 1.3s. The target's Aggression greatly increases.
|
Piercing Attack Deals 360% of Base Damage + 16 to the target and other enemies within a 60-degrees cone. Weakens the target with a 70% chance to decrease Magic, Melee, and Ranged Hit by 250 for 6s. Shield Strike’s Melee Heavy Attack Chance increases by 20 per 1% of Shield Block Chance. On counterattacking with Counter Barrier, Shield Strike cooldown decrease by 1.3s. The target’s Aggression greatly increases. |
||||||
 Counter Barrier Counter Barrier Counter Barrier Shield Block Chance increases by 13% for 6s. On evading an attack, using Shield Block, or blocking with a Defense skill within 1.35 times the Attack Range (4.5 times for Magic and Ranged), performs a counterattack that deals damage equal to 250% of Damage Reduction to the attacker. The counterattack damage is not affected by Critical Hit and Heavy Attack Chance.
|
Cooldown ▼ Upon a successful counterattack, Shield Strike cooldown decreases by 0.5 sec. |
||||||
 Provoking Roar Provoking Roar Provoking Roar Has a 70% chance to apply Weaken: Provoke on 6 enemies within 3m for 2s (3s against Monsters, always hits) Provoked targets direct their attacks and skills towards you.
|
Cooldown ▼ Cooldown decreases by 6 sec. Effect Duration ▲ Duration increases by 1.2s (1.8s against monsters). Cannot be stacked with Cleaving Roar Specialization. |
||||||
 Stalwart Bastion Stalwart Bastion Stalwart Bastion Damage Reduction 47 ▲ for 9s for you and party members within a 10m radius. The area lasts for 2s.
|
Move Speed ▲ Move Speed increases by an additional 10%. |
||||||
 Annihilating Slash Annihilating Slash Annihilating Slash Deals damage equal to 240% of Base Damage + 14 to enemies within Attack Range. If used on a target you have Weakened, deals damage to 360% of Base Damage + 21. Annihilating Slash’s remaining cooldown decreases by 8% per damaged target.
|
Range ▲ Range 1.5m ▲. Consecutive Use You can use Annihilating Slash 2 times. |
||||||
 A Shot at Victory A Shot at Victory A Shot at Victory A special growth skill that can only be grown with Precious Skill Growth Book: Omnipotence. Deals 730% of Base Damage + 51 to the target. Damage of Sword skills increases by 20% for 6s.
▼  Annihilation Blade Annihilation Blade Annihilation Blade A special growth skill that can only be grown with Precious Skill Growth Book: Omnipotence. Uses Annihilation Blade in the designated direction, dealing 730% + 51 of Base Damage to all targets within 6 times the Attack Range, and increases Sword skill damage by 20% for 6s.
|
Boost Effects The sword skill Bonus Damage increases to 30%. Annihilation Blade Uses Annihilation Blade in the designated direction, dealing 730% of Base Damage to all enemies within 6 times the attack range, and increases Sword skill damage by 20% for 6s. |
||||||
 Touch of Despair Touch of Despair Touch of Despair Applies Weaken: Curse. Deals damage over time equal to 25% of Base Damage + 9 per stack for 9s, and the base damage to the target increases by 10%. Stacks up to 3 times. Duration increases by 2s if used on a target with 3 stacks. Does not wake Sleeping targets.
▼  Touch of Despair Touch of Despair Touch of Despair Applies Weaken: Curse. Deals damage over time equal to 25% of Base Damage + 9 per stack for 9s, and the base damage to the target increases by 10%. Stacks up to 3 times, Duration increases by 2s if used on a target with 3 stacks. Does not wake Sleeping targets.
|
Curse Gains 2 Touch of Despair with a 50% chance. Effect Duration ▲ Touch of Despair duration increases by 3s. Range ▲ Touch of Despair is applied to 2 more enemies within 3m radius around the target. |
||||||
 Curse Explosion Curse Explosion Curse Explosion Deals 280% of Base Damage + 34 to enemies within a 5m radius area. If there is a target has Curse Damage over time from you, boost the remaining Burning. Curse, and Poison damage over time from you by 5% for every one of your Touch of Despair stacks, deals the damage two times, and removes the effects.
|
Additional Damage Boost Touch of Despair's damage boosts by 10% per stack. |
||||||
 Swift Healing Swift Healing Swift Healing Heals friendly targets’ Health by 310% of Base Damage + 29. Can be used up to 2 times consecutively, and Mana Cost increases upon consecutive uses.
▼  Swift Healing Swift Healing Swift Healing Heals friendly target's Health by 310% of Base Damage + 29. Can be used up to 2 times consecutively, and Mana Cost increases upon consecutive uses.
|
Mana Recovery Target recovers Mana equal to 50% of Base Damage. Consecutive Use Consecutive Use count increases to 3. Healing Transfer Additionally heals self by 50% of the total heal. |
||||||
 Corrupted Magic Circle Corrupted Magic Circle Corrupted Magic Circle Creates a 5m area at the target location and inflicts Weaken: Curse on all enemies within the area to deal 46% of Base Damage + 17 per sec for 9s. Does not wake up Sleeping targets.
▼  Decaying Touch Decaying Touch Decaying Touch Applies Weaken: Curse to target to deal 60% of Base Damage + 22 per sec for 9s. Does not wake up Sleeping targets.
|
Bonus Damage Deals damage equal to 260% of Base Damage to the target. Does not wake Sleeping targets. Decaying Touch Applies Weaken: Curse to target to deal 60% of Base Damage + 22 per sec for 9s. Does not wake up Sleeping targets. |
||||||
 Blessed Barrier Blessed Barrier Blessed Barrier Friendly target’s Magic, Melee, and Ranged Defense increase by 1,120 for 6s. Incoming Heal increases by 27% during the day, and Magic, Melee, and Ranged Endurance increase by 270 at night. The increased amount will be multiplied by 2 for 2s after the effect is activated.
|
- | ||||||
 Invincible Wall Invincible Wall Invincible Wall Grants Protection to an friendly target proportional to 630% of Base Damage + 246 for 6s.
|
- | ||||||
| Passive Skills | |||||||
 Resilient Mind Resilient Mind Resilient Mind Evading an attack restores Mana by 18, and each successful Shield Block or Defense skill block restores Mana by 8% of the damage blocked. Additionally restores Health by 21.
|
 Aegis Shield Aegis Shield Aegis Shield Magic, Melee, and Ranged Defense 4 ▲ per 1% of Shield Block Chance. Reduce Damage: Shield always gains 2.5% ▲.
|
 Spectrum of Agony Spectrum of Agony Spectrum of Agony On hitting a target you have Provoked and applied Cleaving Roar to, the remaining time for Provoke and Cleaving Roar increase by 0.4s. Deals damage equal to 30% of Base Damage + 9 to all targets Provoked and affected by Cleaving Roar within a 3m radius.
|
 Impenetrable Impenetrable Impenetrable Increases Magic, Melee, and Ranged Defense proportional to the number of targets within a 2m radius. Magic, Melee, and Ranged Defense 179 ▲ if there are 2 or fewer targets within range, 280 ▲ if there are 3 to 6 targets, and 700 ▲ if there are 7 or more targets.
|
||||
 Devotion and Emptiness Devotion and Emptiness Devotion and Emptiness Skill heal 8% ▲ and Skill cooldown 10% ▼ during the day. Skill Damage over time 8% ▲ and Curse Skill cooldown 10% ▼ at night.
|
 Wraith's Beckon Wraith's Beckon Wraith's Beckon Increases the duration of your Curses by 1.2, and Curse chance increases by 4%.
|
 Noble Revival Noble Revival Noble Revival Skill Heal 1.76% ▲ per 1,000 Max Mana.
|
 Selfless Soul Selfless Soul Selfless Soul Increases Mana Regen by 21.2 and Skill Heal by 4% per stack for 3s when you apply Heal and Regen with Active Skills to a friendly target. Stacks up to 5 times.
|
||||
| Defensive Skill | |||||||
 Shield Survival Technique Shield Survival Technique Shield Survival Technique Defends against attacks. On defending against a Fury Attack while stationary, 270 Health regenerates, creates a shield equal to 14% of Max Health for 3s, and Shield Survival Technique changes to Retaliatory Strike for1.5s. On defending against a Fury Attack within 0.5s, increases Damage Reduction by 57 for 6s. Wrath Attacks can’t be defended. Use with the directional buttons to defend against attacks while moving 4m in the designated direction for 0.5s. On defending against a Fury or Wrath Attack, creates a shield equal to 14%/c of Max Health for 3s and Shield Survival Technique changes to Retaliatory Strike for 1.5s Retaliatory Strike: Deals 265% of Base Damage + 21 damage to the target. Defending Fury Attack with Shield Survival Technique before using Retaliatory Strike increases Retaliatory Strike damage by 65%, up to 3 times. Retaliatory Strike from the Shield Survival Technique with a directional button deals the maximum damage.
|
|||||||
Active Skills Explantion
Shield Strike (Piercing Attack), Provoking Roar (with the help from Spectrum of Agony), Annihilating Slash, A Shot at Victory (Annihilation Blade), Curse Explosion, and Corrupted Magic Circle (Decaying Touch) all deal area damage that's useful for clearing waves and are the build's primary damage skills.
Touch of Despair's Range ▲ skill specialization allows the skill to affect two (2) more targets around the initial target. It also amplifies Curse Explosion's damage.
Counter Barrier, Stalwart Bastion, Swift Healing, Blessed Barrier, and Invincile Wall all provide durability and survivability while clearing waves or fighting bosses.
Focus on leveling up Shield Strike, Touch of Despair, and Swift Healing first since other skills will revolve around them, then the rest can be prioritized based on preference.
Passive Skills Explanation
Resilient Mind, Aegis Shield, and Impenetrable provide durability and survivability, especially when clearing waves.
Spectrum of Agony indirectly turns Provoking Roar into a damage skill since it deals damage to enemies inflicted with Provoke.
Devotion and Emptiness, Wraith's Beckon, Noble Revival, and Selfless Soul all improve healing, and curse-inflicting skills.
Focus on leveling up Resilient Mind, Spectrum of Agony, Impenetrable, Devotion and Emptiness first since most skills can benefit from them.
Best Weapons
| Jump to a Section | |||
|---|---|---|---|
| Primary Weapon | |
|---|---|
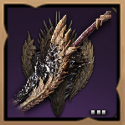 Queen Bellandir's Languishing Blade Queen Bellandir's Languishing Blade Queen Bellandir's Languishing Blade Strength 4
Collision Chance 48 |
・Max Health +600 ・Critical Hit Chance +80 ・Debuff Duration -6% |
Note: All of the traits shown here are of max value!
Queen Bellandir's Languishing Blade provides Strength, and adds another crowd control effect to the build whenever Annihilating Slash is used via its weapon effect, Queen Bellandir's Quicksand.
Traits all focus on improving durability via HP.
| Secondary Weapon | |
|---|---|
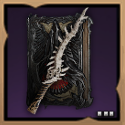 Tevent's Grasp of Withering Tevent's Grasp of Withering Tevent's Grasp of Withering Wisdom 4
Critical Hit 60 Cooldown Speed +19% |
・Hit +80 ・Mana Regen +60 ・Cooldown Speed +6% |
Note: All of the traits shown here are of max value!
Tevent's Grasp of Withering provides Wisdom for more mana, Cooldown Speed for faster cooldowns, and a bit of Critical Hit for damage.
Traits focus mainly on allowing more frequent skill use.
List of All Weapons
Best Armors and Accessories
| Jump to a Section | |||
|---|---|---|---|
| Armors | |
|---|---|
 Swirling Essence Hat Swirling Essence Hat Swirling Essence Hat Wisdom 2
Weaken Chance 50 Cooldown Speed +1.6% |
・Melee Evasion +160 ・Max Health +600 ・Cooldown Speed +6% |
 Shock Commander Plate Armor Shock Commander Plate Armor Shock Commander Plate Armor Strength 4
Damage Reduction 4 |
・Melee Evasion +160 ・Max Health +600 ・Health Regen +60 |
 Supreme Devotion Supreme Devotion Supreme Devotion Critical Hit Chance 50
Mana Regen 22.5 Cooldown Speed +0.8% |
・Max Mana +600 ・Mana Regen +60 ・Debuff Duration -6% |
 Swirling Essence Gloves Swirling Essence Gloves Swirling Essence Gloves Range ▲ 3.3%
Wisdom 2 Critical Hit 40 |
・Magic Evasion +160 ・Melee Evasion +160 ・Max Health +600 |
 Shock Commander Greaves Shock Commander Greaves Shock Commander Greaves Strength 2
Damage Reduction 3 |
・Melee Evasion +160 ・Max Health +600 ・Health Regen +60 |
 Sabatons of the Field General Sabatons of the Field General Sabatons of the Field General Movement Speed +2%
Strength 4 |
・Melee Evasion +160 ・Ranged Evasion +160 ・Max Mana +600 |
| Accessories | |
 Blessed Templar Choker Blessed Templar Choker Blessed Templar Choker Mana Regen 22.5
Mana Cost Efficiency +2.7% Cooldown Speed +2% |
・Max Health +600 ・Health Regen +60 ・Skill Damage Boost +80 |
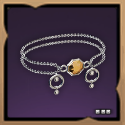 Ascended Guardian Bracelet Ascended Guardian Bracelet Ascended Guardian Bracelet Wisdom 2
Max Mana 300 Stun Resistance 21 |
・Max Mana +600 ・Mana Regen +60 ・Debuff Duration -6% |
 Band of Universal Power Band of Universal Power Band of Universal Power Strength 1
Dexterity 1 Wisdom 1 Perception 1 |
・Max Mana +600 ・Mana Regen +60 ・Skill Damage Boost +80 |
 Amber Dimensional Band Amber Dimensional Band Amber Dimensional Band Movement Speed +2.4%
Strength 1 Dexterity 2 |
・Max Mana +600 ・Mana Regen +60 ・Skill Damage Boost +80 |
 Belt of Bloodlust Belt of Bloodlust Belt of Bloodlust Move Speed +2%
Strength 2 Max Health 200 |
・Max Health +600 ・Health Regen +60 ・Debuff Duration -6% |
Note: All of the traits shown here are of max value!
The armors and accessories selected and their traits provide a good balance of HP and mana for durability and skill usage. In particular, having Shock Commander Plate Armor and Shock Commander Greaves gives extra durability while Swirling Essence Hat and Swirling Essence Gloves increases Weaken duration due to their set effects.
| List of References | |
|---|---|
| List of All Armor | List of All Accessories |
Best Runes
| Jump to a Section | |||
|---|---|---|---|
| Weapon Runes | |
|---|---|
 Queen Bellandir's Languishing Blade Queen Bellandir's Languishing Blade Queen Bellandir's Languishing Blade Strength 4
Collision Chance 48 |
・Skill Damage Boost ・Max Health ・Mana Cost Efficiency Rune Synergy: ・Strength ・Critical Damage Reduction |
 Tevent's Grasp of Withering Tevent's Grasp of Withering Tevent's Grasp of Withering Wisdom 4
Critical Hit 60 Cooldown Speed +19% |
・Mana Regen ・Critical Hit Chance ・Cooldown Speed Rune Synergy: ・Strength ・Critical Damage Reduction |
| Necklace Runes | |
 Blessed Templar Choker Blessed Templar Choker Blessed Templar Choker Mana Regen 22.5
Mana Cost Efficiency +2.7% Cooldown Speed +2% |
・Hit Chance ・Skill Heal ・Max Health Rune Synergy: ・Max Health ・Wisdom |
| Bracelet Runes | |
 Ascended Guardian Bracelet Ascended Guardian Bracelet Ascended Guardian Bracelet Wisdom 2
Max Mana 300 Stun Resistance 21 |
・Heavy Attack Chance ・Mana Cost Efficiency ・Max Health Rune Synergy: ・Bonus Damage ・Max Health |
| Ring Runes | |
 Band of Universal Power Band of Universal Power Band of Universal Power Strength 1
Dexterity 1 Wisdom 1 Perception 1 |
・Melee Critical Hit Chance ・Melee Evasion ・Skill Heal Rune Synergy: ・Max Health ・Strength |
 Amber Dimensional Band Amber Dimensional Band Amber Dimensional Band Movement Speed +2.4%
Strength 1 Dexterity 2 |
・Critical Hit Chance ・Max Health ・Skill Heal Rune Synergy: ・Max Health ・Strength |
| Belt Runes | |
 Belt of Bloodlust Belt of Bloodlust Belt of Bloodlust Move Speed +2%
Strength 2 Max Health 200 |
・Hit Chance ・Mana Cost Efficiency ・Max Health Rune Synergy: ・Damage Reduction ・Max Health |
Equip Attack runes that improve Skill Damage Boost, and Hit Chances for more damage, Defense runes that improve Max Health for more durability, and Support runes that improve Skill Heal for better sustainability and Mana Cost Efficiency to help out in mana management a bit.
For weapon rune synergies, just build the rune combination that gives Strength and Critical Damage Reduction for more durability and damage.
For accessories rune synergies, build rune combinations that improve durability and damage.
Best Weapon Mastery
| Jump to a Section | |||
|---|---|---|---|
| Sword | ・Provoke and Counter (9 Pts) ・Collision (9 Pts) ・Boss (1 Pt) |
|---|---|
| Wand | ・Damage (9 Pts) ・Weaken (9 Pts) ・Recovery (1 Pts) |
For Sword, putting 9 points to Provoke & Counter provides more durability and survivability with a little buff duration. Meanwhile, having 9 points to Collision gives a decent mix of offense and defense. Putting 1 point to Boss gives Melee Hit Chance.
For Wand, putting 9 points to Damage and Weaken improves damage, mana, and skill usage. Putting 1 point to Recovery gives Melee Defense.
How to Get Weapon Mastery Points
Best Guardian
| Jump to a Section | |||
|---|---|---|---|
| Best Guardian | |
|---|---|
 Shade Revenant Stheno Shade Revenant Stheno |
Launches 5 projectiles at random enemies within a 10m range every second. A single enemy may be hit with multiple projectiles at the same time. Each projectile deals 52% of Base Damage. |
Shade Revenant Stheno's ability is great for dealing area and single-target damage, which is enough for the build.
Skill Rotations and Playstyle
| Jump to a Section | |||
|---|---|---|---|
| How to Play Sword and Shield / Wand Build |
|---|
|
|
Note: If the skills icons are confusing, some of the skill icons indicated here are using their specialized variants.
Mob Clearing Skill Rotation
Counter Barrier Shield Block Chance increases by 13% for 6s. On evading an attack, using Shield Block, or blocking with a Defense skill within 1.35 times the Attack Range (4.5 times for Magic and Ranged), performs a counterattack that deals damage equal to 250% of Damage Reduction to the attacker. The counterattack damage is not affected by Critical Hit and Heavy Attack Chance.
▶
Provoking Roar Has a 70% chance to apply Weaken: Provoke on 6 enemies within 3m for 2s (3s against Monsters, always hits) Provoked targets direct their attacks and skills towards you.
▶
Touch of Despair Applies Weaken: Curse. Deals damage over time equal to 25% of Base Damage + 9 per stack for 9s, and the base damage to the target increases by 10%. Stacks up to 3 times, Duration increases by 2s if used on a target with 3 stacks. Does not wake Sleeping targets.
▶
Corrupted Magic Circle Creates a 5m area at the target location and inflicts Weaken: Curse on all enemies within the area to deal 46% of Base Damage + 17 per sec for 9s. Does not wake up Sleeping targets.
▶
Curse Explosion Deals 280% of Base Damage + 34 to enemies within a 5m radius area. If there is a target has Curse Damage over time from you, boost the remaining Burning. Curse, and Poison damage over time from you by 5% for every one of your Touch of Despair stacks, deals the damage two times, and removes the effects.
▶
Annihilation Blade A special growth skill that can only be grown with Precious Skill Growth Book: Omnipotence. Uses Annihilation Blade in the designated direction, dealing 730% + 51 of Base Damage to all targets within 6 times the Attack Range, and increases Sword skill damage by 20% for 6s.
▶
Annihilating Slash Deals damage equal to 240% of Base Damage + 14 to enemies within Attack Range. If used on a target you have Weakened, deals damage to 360% of Base Damage + 21. Annihilating Slash’s remaining cooldown decreases by 8% per damaged target.
x2 |
This acts as the build's main mob clearing or farming combo. Counter Barrier will give a bit of durability via Aegis Shield and perform counterattacks when evading attacks, using Shield Block, or blocking with a Defensive skill against attackers. Provoking Roar will deal the initial burst damage via Spectrum of Agony.
Touch of Despair and Corrupted Magic Circle will inflict enemies with Weaken: Curse. Curse Explosion will deal another burst damage and improve the effects of Touch of Despair and Corrupted Magic Circle.
A Shot at Victory's Annihilation Blade skill specialization will deal one more burst damage and increase the damage of all Sword skills. Annihilating Slash will finish off targets.
Single Target Burst/Boss Fight Skill Rotation
Counter Barrier Shield Block Chance increases by 13% for 6s. On evading an attack, using Shield Block, or blocking with a Defense skill within 1.35 times the Attack Range (4.5 times for Magic and Ranged), performs a counterattack that deals damage equal to 250% of Damage Reduction to the attacker. The counterattack damage is not affected by Critical Hit and Heavy Attack Chance.
▶
Touch of Despair Applies Weaken: Curse. Deals damage over time equal to 25% of Base Damage + 9 per stack for 9s, and the base damage to the target increases by 10%. Stacks up to 3 times, Duration increases by 2s if used on a target with 3 stacks. Does not wake Sleeping targets.
▶
Corrupted Magic Circle Creates a 5m area at the target location and inflicts Weaken: Curse on all enemies within the area to deal 46% of Base Damage + 17 per sec for 9s. Does not wake up Sleeping targets.
▶
Curse Explosion Deals 280% of Base Damage + 34 to enemies within a 5m radius area. If there is a target has Curse Damage over time from you, boost the remaining Burning. Curse, and Poison damage over time from you by 5% for every one of your Touch of Despair stacks, deals the damage two times, and removes the effects.
▶
A Shot at Victory A special growth skill that can only be grown with Precious Skill Growth Book: Omnipotence. Deals 730% of Base Damage + 51 to the target. Damage of Sword skills increases by 20% for 6s.
▶
Piercing Attack Deals 360% of Base Damage + 16. to the target and other enemies within a 60-degrees cone. Weakens the target with a 70% chance to decrease Magic, Melee, and Ranged Hit by 250 for 6s. Shield Strike's Melee Heavy Attack Chance increases by 20 per 1% of Shield Block Chance. On counterattacking with Counter Barrier, Shield Strike cooldown decrease by 1.3s. The target's Aggression greatly increases.
▶
Annihilating Slash Deals damage equal to 240% of Base Damage + 14 to enemies within Attack Range. If used on a target you have Weakened, deals damage to 360% of Base Damage + 21. Annihilating Slash’s remaining cooldown decreases by 8% per damaged target.
x2 |
This is very simillar to the Mob Clearing Skill Rotation but has a few tweaks in skills and skill specialization. Counter Barrier will give a bit of durability via Aegis Shield and perform counterattacks when evading attacks, using Shield Block, or blocking with a Defensive skill against attackers.
Touch of Despair and Corrupted Magic Circle will inflict enemies with Weaken: Curse. Curse Explosion will deal the initial burst damage and improve the effects of Touch of Despair and Corrupted Magic Circle.
A Shot at Victory will deal another burst damage and increase the damage of all Sword skills. Shield Strike (Piercing Attack) and Annihilating Slash will deal the final damage. The specialization points spent on A Shot of Victory's Annihilation Blade can be transferred to other skills instead.
Survivability Skill Rotation
Counter Barrier Shield Block Chance increases by 13% for 6s. On evading an attack, using Shield Block, or blocking with a Defense skill within 1.35 times the Attack Range (4.5 times for Magic and Ranged), performs a counterattack that deals damage equal to 250% of Damage Reduction to the attacker. The counterattack damage is not affected by Critical Hit and Heavy Attack Chance.
▶
Invincible Wall Grants Protection to an friendly target proportional to 630% of Base Damage + 246 for 6s.
▶
Blessed Barrier Friendly target’s Magic, Melee, and Ranged Defense increase by 1,120 for 6s. Incoming Heal increases by 27% during the day, and Magic, Melee, and Ranged Endurance increase by 270 at night. The increased amount will be multiplied by 2 for 2s after the effect is activated.
▶
Swift Healing Heals friendly targets’ Health by 310% of Base Damage + 29. Can be used up to 2 times consecutively, and Mana Cost increases upon consecutive uses.
|
This is the build's skill rotation for surviving battles. Counter Barrier and Blessed Barrier provides durability via increased Defenses while Invincile Wall grants a shield. Spamming Swift Healing after using Blessed Barrier increases the skill's healing.
Stats
| Jump to a Section | |||
|---|---|---|---|
| Jump to a Stat |
|
|---|
Offensive Stats
| Stat | Value |
|---|---|
| Melee Hit Chance | 153 |
| Ranged Hit Chance | 113 |
| Magic Hit Chance | 113 |
| Melee Hit Crit. Chance | 629 |
| Magic Hit Crit. Chance | 599 |
| Ranged Hit Crit. Chance | 599 |
| Melee Heavy Attack Chance | 124 |
| Ranged Heavy Attack Chance | 124 |
| Magic Heavy Attack Chance | 124 |
Defensive Stats
| Stat | Value |
|---|---|
| Melee Defense | 2,515 |
| Ranged Defense | 2,562 |
| Magic Defense | 1,734 |
| Melee Evasion | 922 |
| Ranged Evasion | 234 |
| Magic Evasion | 234 |
Body Stats
| Stat | Value |
|---|---|
| Max Health | 20,620 |
| Max Mana | 12,105 |
| Mana Cost Efficiency | 19.2% |
| Move Speed | 15.1% |
| Health Regen | 565 |
| Mana Regen | 829.4 |
Crowd Control Stats
| Stat | Value |
|---|---|
| Weaken Chance | 294 |
| Stun Chance | 65 |
| Petrification Chance | 65 |
| Sleep Chance | 65 |
| Silence Chance | 65 |
| Fear Chance | 65 |
| Bind Chance | 65 |
| Collision Chance | 300 |
| Stun Resistance | 202 |
| Colllision Resistance | 100 |
Miscellaneous Stats
| Stat | Value |
|---|---|
| Heavy Attack Chance | 124 |
| Critical Hit Chance | 514 |
| Hit Chance | 48 |
| Skill Damage Boost | 300 |
| Cooldown Speed | 50.9% |
| Skill Heal | 42.43% |
| Buff Duration | 7.5% |
| Debuff Duration | -29% |
| Damage Reduction | 118 |
| Critical Damage Reduction | 12% |
| Defense | 384 |
Item Set Stats
| Set | Stat |
|---|---|
| Mother Nature Set | Weaken Duration 7.5s |
| Shock Commander Set | Damage Reduction 18 |
Throne and Liberty Related Guides

Weapon Builds
 Spear Spear |
 Crossbows Crossbows |
 Daggers Daggers |
 Greatsword Greatsword |
 Longbow Longbow |
 Staff Staff |
 Sword and Shield Sword and Shield |
 Wand Wand |
All Build Guides
All Role Guides
 Best Healer Build Best Healer Build |
 Best Tank Build Best Tank Build |
 Best DPS Build Best DPS Build |
 Best Mage Build Best Mage Build |
Author
Throne and Liberty: Wilds of Talandre Walkthrough & Guides Wiki
Best Templar Sword and Shield (SnS) / Wand PvE Build
improvement survey
03/2026
improving Game8's site?

Your answers will help us to improve our website.
Note: Please be sure not to enter any kind of personal information into your response.

We hope you continue to make use of Game8.
Rankings
- We could not find the message board you were looking for.
Gaming News
Popular Games

Genshin Impact Walkthrough & Guides Wiki

Honkai: Star Rail Walkthrough & Guides Wiki

Umamusume: Pretty Derby Walkthrough & Guides Wiki

Pokemon Pokopia Walkthrough & Guides Wiki

Resident Evil Requiem (RE9) Walkthrough & Guides Wiki

Monster Hunter Wilds Walkthrough & Guides Wiki

Wuthering Waves Walkthrough & Guides Wiki

Arknights: Endfield Walkthrough & Guides Wiki

Pokemon FireRed and LeafGreen (FRLG) Walkthrough & Guides Wiki

Pokemon TCG Pocket (PTCGP) Strategies & Guides Wiki
Recommended Games

Diablo 4: Vessel of Hatred Walkthrough & Guides Wiki

Fire Emblem Heroes (FEH) Walkthrough & Guides Wiki

Yu-Gi-Oh! Master Duel Walkthrough & Guides Wiki

Super Smash Bros. Ultimate Walkthrough & Guides Wiki

Pokemon Brilliant Diamond and Shining Pearl (BDSP) Walkthrough & Guides Wiki

Elden Ring Shadow of the Erdtree Walkthrough & Guides Wiki

Monster Hunter World Walkthrough & Guides Wiki

The Legend of Zelda: Tears of the Kingdom Walkthrough & Guides Wiki

Persona 3 Reload Walkthrough & Guides Wiki

Cyberpunk 2077: Ultimate Edition Walkthrough & Guides Wiki
All rights reserved
Published by Amazon Games under license. ©2023-2024 NCSOFT Corporation. All rights reserved. THRONE AND LIBERTY and the THRONE AND LIBERTY logo are trademarks of NCSOFT Corporation. Used by Amazon Games under license. Amazon Games, Amazon, and all related logos are trademarks of Amazon.com, Inc. or its affiliates. The “PS” Family logo and “PS5” are registered trademarks of Sony Interactive Entertainment Inc. Steam and the Steam logo are trademarks and/or registered trademarks of Valve Corporation in the U.S. and/or other countries.
The copyrights of videos of games used in our content and other intellectual property rights belong to the provider of the game.
The contents we provide on this site were created personally by members of the Game8 editorial department.
We refuse the right to reuse or repost content taken without our permission such as data or images to other sites.


ability "Corrupted Magic Circle" after conversion in ability "Decaying Touch" stops being massive and deals damage and debuff to only one target