Voidwastes Dungeon Guide: How to Beat Shakarux
As of March 2025, Game8 has ended coverage of Throne and Liberty.
Thank you very much for your understanding and we hope you continue to enjoy Game8's guides!
Learn to manage the purple beams to defeat Shakarux and clear the Voidwastes in Throne and Liberty (TL). See an overview of Voidwastes, a complete walkthrough of Voidwastes, how to beat Shakarux, as well as the best rewards and drops upon completion!
List of Contents
How to Beat Shakarux
Shakarux Boss Showcase
Note: This clear was done in the KR server.
Check out our 7-minute clear of Shakarux with minimal gear investments to focus on their mechanics and how to properly counter them!
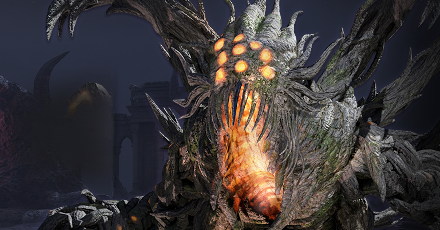
Shakarux Overview
| Shakarux | |
|---|---|
 |
|
| Type | Undead |
| Passive | Freedom Stance: Bind Resistance ▲ |
Shakarux Mechanics
| Shakarux Mechanics |
|---|
Manage the Purple Beam

The boss room contains six columns, three of which are marked with a dark purple color.
These three columns continuously emit a purple beam that provides a stacking status effect that accumulates the longer the target is hit by the beam.
Purple Beam stacks are reduced when the target is no longer being hit by the purple beam.
By default, the three columns are all facing the center of the arena, right at Shakarux. Players can intercept a beam by standing between it and Shakarux.
When Shakarux reaches 30 stacks of this status effect, it effectively results in a party wipe. If a player reaches 30 stacks, that player will die.
To deal with the mechanic, it is recommended that the party divide into teams of three, with two party members on each team. Two players can take turns intercepting one beam for each column.
Shakarux Attack Patterns
Yellow Haze
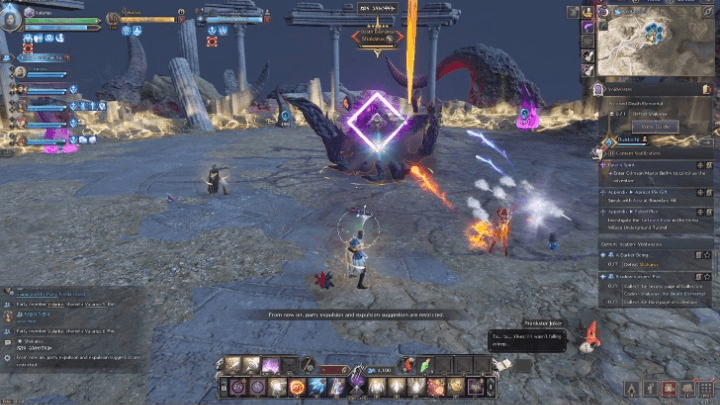
Shakarux telegraphs this Fury attack with a diamond icon, indicating when players should dodge. Shakarux can use this move twice in succession.
To avoid taking damage, players would have to dodge using any block skill + any directional button.
This works similarly to blocking Fury Attacks, but with the addition of a directional input.
Yellow Breath
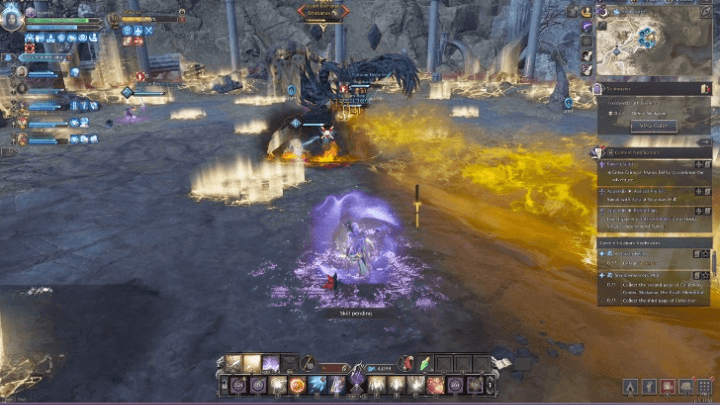
This move begins when the three purple columns stop emitting purple beams. The arena will also change, and will be filled with glowing floor sections that players must avoid.
Shakarux will mark one party member, indicated by the gold marker above them. The marked player will be the target of Shakarux's yellow breath.
At the same time, three of the pillars in the arena will glow yellow. The marked player will need to line up with one of the marked columns, as the breath will need to hit all three columns to trigger the mechanic.
Ideally, the marked player can run clockwise or counterclockwise to hit all three marked columns.
Yellow Zones
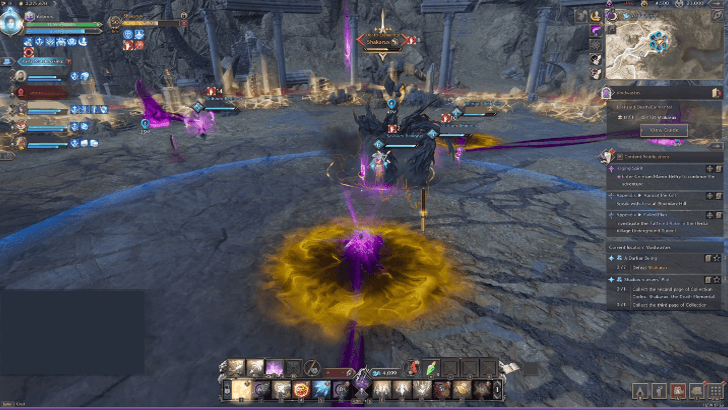
Shakarux creates two Yellow circular pools that continuously deal damage to anyone standing on them. Players need to get out of the area quickly to avoid taking heavy damage.
Red Sinkhole
Shakurax will target two party members and mark them with red orbs. Shakarux will create a red sinkhole on the marked targets, reducing their movement speed and dealing damage, with the effects intensifying towards the center.
Marked party members should run as far away from the rest of the party as possible to avoid being caught by the effect. They must continue to run to a safe distance until the marker disappears.
Once the mark disappears, the marked player will be able to rejoin the party, as the red sinkhole location will be at the point where the mark disappears from the affected target.
Yellow Eyes
At around 50% and 30% HP, Shakarux summons yellow-eye markers above all players that do damage once he slams his tentacles down.
While there is no known way to dodge or parry this attack, it is recommended for your party's healer to cast Blessed Barrier with the Targets Expanded specialization to mitigate the damage. The tank may also use DaVinci's Courage.
Voidwastes Best Team and Roles
| Role | Explanation |
|---|---|
  Tank |
Weapon Combination: The best tank in the game, able to absorb immense amounts of punishment. Dungeon Role: Dives headfirst into fights ahead of the rest of the party to generate aggro and prevent the rest of the party from being targeted. Shakarux Role: Keeps constant aggro to prevent party members from being targeted by Shakarux's attacks. Will usually be the target of the Yellow Breath attack. |
  DPS |
Weapon Combination: Highest single-target DPS class currently available, with high mobility. Dungeon Role: Blow up single targets with Thundercloud bombing, or clear out entire waves of mobs with Annihilation Barrage. Shakarux Role: Focuses on damage dealing to end the encounter as quickly as possible. |
  Healer |
Weapon Combination: The best support in the game bar none, with an abundance of heals and the ability to clear debuffs. Dungeon Role: Keeps the party's health high by healing and buffing the damage dealer when needed. Shakarux Role: Priority is to keep the party alive by providing healing when needed, and act as secondary DPS when the situation allows. |
Voidwastes Walkthrough
| Voidwastes Sequences | |
|---|---|
| 1 | 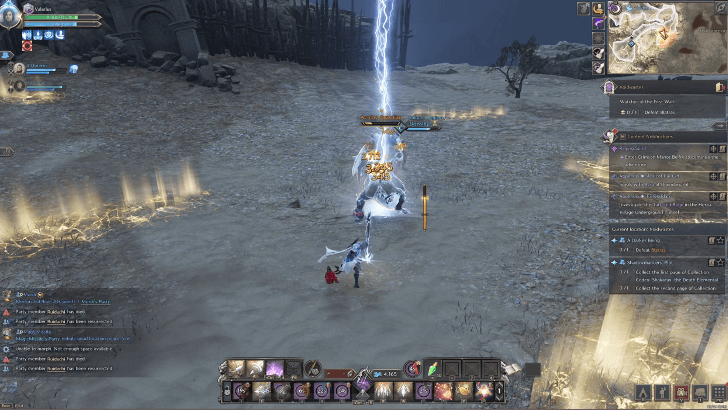 Clear the First Area Players will need to navigate through the dungeon and clear the first area of enemies, avoiding the glowing areas of the floor to avoid taking damage and being stunned for a short period of time. |
| 2 | 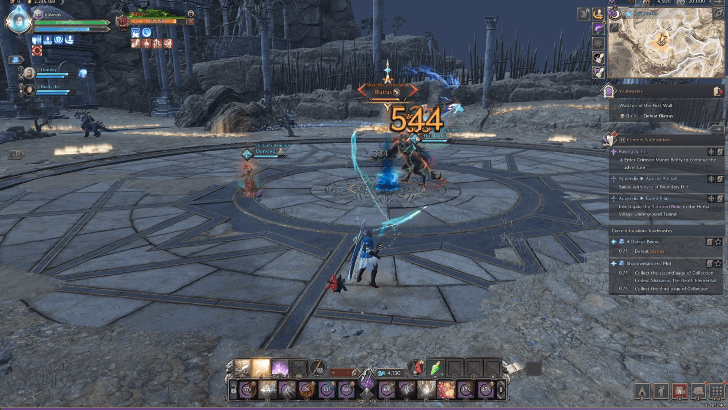 Defeat Blatras Players must face Blatras in order to progress. A relatively easy encounter with very simple mechanics, defeat it to advance to the next area. ┗ How to Beat Blatras |
| 3 | 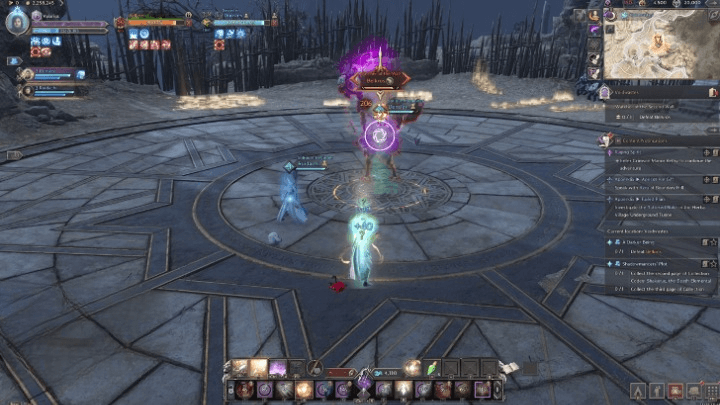 Defeat Belkros Belkros is found just after Blatras, in the next arena. A step up in difficulty from Blatras, but relatively easy to defeat. Defeat Belkros to reach the final area of the dungeon. ┗ How to Beat Belkros |
How to Beat Blatras
Throughout the fight, Blatras will perfom several AoE attacks that can be avoided easily, as players would have more than enough time to move out of harm's way.
However, Blatras has a move that can be quite deadly if not handled properly. At around 50% health, Blatras will pull in all players next to him and disappear. The area will now be covered with glowing floor tiles.
To deal with this mechanic, players would have to navigate outside the circular arena without stepping on the glowing floor tiles, as doing so would stun the player and guarantee a hit on the subsequent attack, resulting in certain death.
After Blatras finishes this attack, he will reappear in the center of the arena and the battle will resume as normal.
How to Beat Belkros
Belkros has a good mix of melee and ranged attacks that most tanks can handle.Belkros also has a few Fury attacks in his arsenal, but the timing is very forgiving and can be easily blocked.
Like Blatras, Belkros only has one mechanic to watch out for. When its health is lowered to around 50%, it will pull all the party members to the center of the arena and dissapear.
Players would be trapped in a square area with glowing floor around the edges. Players would have to leave the arena to avoid Belkros' next attack, as anyone hit by it would be instantly knocked out.
To safely exit the area, players would have to interact with the glowing orbs to remove the glowing floor.
Players would have to interact with the glowing orbs in quick succession to remove the glowing floor. After interacting with the first glowing orb, the second glowing orb outside can now be accessed, allowing players to exit the arena.
Voidwastes New Equipment
Armor
| Armor | Stats |
|---|---|
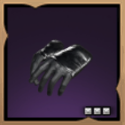 Gilded Raven Grips Gilded Raven Grips
|
Type: Hands Armor Set: Gilded Raven Set Melee Def: 158 Ranged Def: 142 ・Added Attack Speed +1.1% ・Dexterity 1 ・Fortitude 3 |
Accessories
| Accessory | Stats |
|---|---|
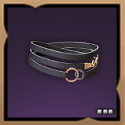 Bindings of the Unstoppable Bindings of the Unstoppable
|
Type: Necklace Magic Def.: 180 Modifiers: ・Stun Resistance 25 ・Sleep Resistance 25 ・Bind Resistance 25 ・Collision Resistance 25 |
 Forbidden Arcane Chain Forbidden Arcane Chain
|
Type: Belt Magic Def.: 180 Modifiers: ・Wisdom 3 ・Mana Regen 12.75 ・Silence Resistance 25 |
Voidwastes Best Rewards and All Drops
Shadow Harvester Grips
| Armor | Stats |
|---|---|
 Shadow Harvester Grips Shadow Harvester Grips
|
Type: Hands Armor Set: Death Set Melee Def: 150 Ranged Def: 150 ・Range ▲ 1.7% ・Dexterity 3 ・Critical Hit 20 |
As one of the best gloves for DPS builds, this glove is often used in many builds due to the offensive stats it provides. As part of the Death Set, it is automatically one of the most sought after pieces for any DPS build.
All Drops
Weapons
| Weapon Drops |
|---|
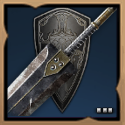 Resonance Blade Resonance Blade Resonance Blade Dexterity 3
Critical Hit Chance 100 |
Armor
| Voidwastes Drops | ||
|---|---|---|
 Gilded Raven Grips Gilded Raven Grips Gilded Raven Grips Added Attack Speed +1.1%
Dexterity 1 Fortitude 3 |
 Eldritch Whispers Eldritch Whispers |
 Precious Parchment Precious Parchment |
 Gauntlets of the Field General Gauntlets of the Field General Gauntlets of the Field General Added Attack Speed +2%
Perception 4 |
 Shock Commander Gauntlets Shock Commander Gauntlets Shock Commander Gauntlets Range ▲ 3%
Dexterity 1 Critical Hit 31 |
 Phantom Wolf Gloves Phantom Wolf Gloves Phantom Wolf Gloves Added Attack Speed +2%
Dexterity 2 Ranged Evasion 54 |
 Shadow Harvester Grips Shadow Harvester Grips Shadow Harvester Grips Range ▲ 1.7%
Dexterity 3 Critical Hit 20 |
 Ascended Guardian Gloves Ascended Guardian Gloves Ascended Guardian Gloves Perception 4
Mana Cost Efficiency +6.3% |
 Swirling Essence Gloves Swirling Essence Gloves Swirling Essence Gloves Range ▲ 3.3%
Wisdom 2 Critical Hit 40 |
 Warlord's Shroud Warlord's Shroud Warlord's Shroud Hit Chance 60
Health Regen 22.5 |
- | - |
Accessories
| Accesory Drops | ||
|---|---|---|
 Forbidden Arcane Chain Forbidden Arcane Chain |
 Bindings of the Unstoppable Bindings of the Unstoppable |
 Spider Silk Collar Spider Silk Collar Spider Silk Collar Max Health 150
Stun Resistance 25 Bind Resistance 25 |
Items
| Item Drops | ||
|---|---|---|
 Precious Stalon Ore Precious Stalon Ore
|
 Precious Emeret Ore Precious Emeret Ore
|
 Precious Rubrix Ore Precious Rubrix Ore
|
 Precious Polished Crystal Precious Polished Crystal
|
 Precious Marind Ore Precious Marind Ore
|
 Precious Omnipotence Parchment Precious Omnipotence Parchment |
 Mana Blood Mana Blood
|
 Reaper's Soul Reaper's Soul
|
- |
Other
| All Other Rewards | ||
|---|---|---|
| Dimensional Soul Shard: Shakarux | Abyssal Contract Token Points (x750) | Training Dew: 10,000 Points |
Voidwastes Overview
| Required Level | Lv. 50 |
|---|---|
| Type | 2-Star Dimensional Circle |
| Contract Token |
|
| Min. Combat Power | |
| Description | |
| The Dark Elemental attracted beings from Diabolica. These monsters mercilessly slaughtered people under Shaikal's will. Ahzreil, wanting to use Shaikal as a weapon of war, cast a powerful dark magic to bring his mind under control. However, Shaikal instead absorbed Ahzreil's power and became a being of even deeper darkness. In the end, Shaikal turned into an incomprehensibly powerful being, Shakarux, forcing Ahzreil to finally give up on him. | |
Throne and Liberty (TL) Related Guides

All Co-op Dungeons: Dimensional Circles
Dungeon Guides
| 3-Star Co-op Dungeons | 2-Star Co-op Dungeons |
3-Star Dimensional Circle Coop Dungeons
 Rancorwood Rancorwood |
 Halls of Tragedy Halls of Tragedy |
 Chapel of Madness Chapel of Madness |
 Doomrot Grove Doomrot Grove |
 Twisted Laboratory Twisted Laboratory |
- |
2-Star Dimensional Circle Coop Dungeons
 Island of Terror Island of Terror |
 Voidwastes Voidwastes |
 Valley of Slaughter Valley of Slaughter |
 Carmine Rage Island Carmine Rage Island |
 Torture Chamber of Screams Torture Chamber of Screams |
- |
1-Star Dimensional Circle Coop Dungeons
 Death's Abyss Death's Abyss |
 Cursed Wasteland Cursed Wasteland |
 Temple of Slaughter Temple of Slaughter |
 Butcher's Canyon Butcher's Canyon |
 Tyrant's Isle Tyrant's Isle |
 Cave of Destruction Cave of Destruction |
Dimensional Circle Coop Dungeons
 Specter's Abyss Specter's Abyss |
 Roaring Temple Roaring Temple |
 Cave of Desperation Cave of Desperation |
Event Coop Dungeons
 Haunted Labyrinth Haunted Labyrinth |
Author
Throne and Liberty: Wilds of Talandre Walkthrough & Guides Wiki
Voidwastes Dungeon Guide: How to Beat Shakarux
improvement survey
03/2026
improving Game8's site?

Your answers will help us to improve our website.
Note: Please be sure not to enter any kind of personal information into your response.

We hope you continue to make use of Game8.
Rankings
- We could not find the message board you were looking for.
Gaming News
Popular Games

Genshin Impact Walkthrough & Guides Wiki

Honkai: Star Rail Walkthrough & Guides Wiki

Umamusume: Pretty Derby Walkthrough & Guides Wiki

Pokemon Pokopia Walkthrough & Guides Wiki

Resident Evil Requiem (RE9) Walkthrough & Guides Wiki

Monster Hunter Wilds Walkthrough & Guides Wiki

Wuthering Waves Walkthrough & Guides Wiki

Arknights: Endfield Walkthrough & Guides Wiki

Pokemon FireRed and LeafGreen (FRLG) Walkthrough & Guides Wiki

Pokemon TCG Pocket (PTCGP) Strategies & Guides Wiki
Recommended Games

Fire Emblem Heroes (FEH) Walkthrough & Guides Wiki

Diablo 4: Vessel of Hatred Walkthrough & Guides Wiki

Yu-Gi-Oh! Master Duel Walkthrough & Guides Wiki

Super Smash Bros. Ultimate Walkthrough & Guides Wiki

Pokemon Brilliant Diamond and Shining Pearl (BDSP) Walkthrough & Guides Wiki

Elden Ring Shadow of the Erdtree Walkthrough & Guides Wiki

Monster Hunter World Walkthrough & Guides Wiki

The Legend of Zelda: Tears of the Kingdom Walkthrough & Guides Wiki

Persona 3 Reload Walkthrough & Guides Wiki

Cyberpunk 2077: Ultimate Edition Walkthrough & Guides Wiki
All rights reserved
Published by Amazon Games under license. ©2023-2024 NCSOFT Corporation. All rights reserved. THRONE AND LIBERTY and the THRONE AND LIBERTY logo are trademarks of NCSOFT Corporation. Used by Amazon Games under license. Amazon Games, Amazon, and all related logos are trademarks of Amazon.com, Inc. or its affiliates. The “PS” Family logo and “PS5” are registered trademarks of Sony Interactive Entertainment Inc. Steam and the Steam logo are trademarks and/or registered trademarks of Valve Corporation in the U.S. and/or other countries.
The copyrights of videos of games used in our content and other intellectual property rights belong to the provider of the game.
The contents we provide on this site were created personally by members of the Game8 editorial department.
We refuse the right to reuse or repost content taken without our permission such as data or images to other sites.


![Slay the Spire 2 Review [Early Access] | Still the Deckbuilder to Beat](https://img.game8.co/4433115/44e19e1fb0b4755466b9e516ec7ffb1e.png/thumb)

![Resident Evil Village Review [Switch 2] | Almost Flawless Port](https://img.game8.co/4432790/e1859f64830960ce4248d898f8cd38d9.jpeg/thumb)


So its all right but the most importent!! The Yellow Eye missed in the Guide