Valley of Slaughter Dungeon: How to Beat Turka
As of March 2025, Game8 has ended coverage of Throne and Liberty.
Thank you very much for your understanding and we hope you continue to enjoy Game8's guides!
Turka is a dungeon boss similar to Duke Magna in Throne and Liberty (TL). Defeat Turka by evading his axe attacks and eliminating his Furry Bighorn Sheep Spawn to survive the Death Slam. See an overview of Valley of Slaughter, a complete walkthrough of Valley of Slaughter, how to beat Turka, as well as the best rewards and drops upon completion!
List of Contents
How to Beat Turka
Turka Boss Showcase
Note: This clear was done in the KR server.
Check out our 2-minute clear of Turka focused around properly manuevering their mechanics!
Turka Overview
| Turka | |
|---|---|
 |
|
| Type | Humanoid |
| Passive | Blood Rush: Max Health ▲ |
Turka and the Valley of Slaughter are both highly similar to Duke Magna and the Butcher's Canyon.
Butcher's Canyon Dungeon: How to Beat Duke Magna
Turka Mechanics
| Turka Mechanics |
|---|
|
|
Spawn Furry Bighorn Sheep
When Turka's HP goes down at 90% and 60%, his head will glow purple and will then pull everyone into the center to then spawn a Furry Bighorn Sheep at the edge of the arena. Take note of an orange line below the ground to know where the Sheep spawns.
At 40% HP Turka will still perform the same move, but spawn 2 Furry Bighorn Sheep instead.
It is recommended that all players rush towards the Sheep and focus on defeating it to collect and gain the Bighorn Sheep Shield Effect. Gaining the effect will give all the players a shield that will protect them from Turka's one-hit Death Slam.
Death Slam
The Death Slam is a one-hit KO move that Turka will do 25-30 seconds after spawning the Furry Bighorn Sheep. Turka will go into a raged state indicated by being covered in magma and releasing red steam from his body.
Turka will jump to the middle of the arena and slam his axe down, releasing a shockwave that covers the whole area. The only way to counter this move is to gain the Bighorn Sheep Shield Effect by defeating the Furry Bighorn Sheep.
Turka Attack Patterns
Turka follows and repeats this pattern the whole fight:
| Axe Swings ▶ Fury Attack ▶ Axe and Tremor Stomp ▶ Axe Swing (1) ▶ Meteor Fall ▶ Axe Swing (2) |
Note: Axe Swing (1) pertains to the first part of his basic attack, while Axe Swing (2) will have Turka slam his axe down.
Eye Beam
If a player is targeted by Turka out of his striking range, he will attack by shooting out an exploding beam that deals massive arena-wide AoE damage.
It is recommended to communicate with your party and let the tank catch Turka's aggro so that he focuses on doing his basic strike attacks.
Axe Charge
Turka performs an Axe Charge attack to players who are far away from his range. This is a Wrath Attack wherein he channels before charging to the target. This can be avoided with a perfectly timed dodge roll.
Turka usually performs this move when he spawns the Furry Bighorn Sheep as all players cluster at the edge of the arena to focus on the Sheep.
Axe Swings
Turka's basic attacks will have him swing his axe two times, ending with him raising his arm and then slamming his axe down on the ground. When he does this attack, it means your party is following the rule that everyone stays within his range.
Note that his axe slam attack will leave a long trail of fire on the ground.
Axe Spin
After Turka finishes his Axe Swings, he will perform an Axe Spin. The Axe Spin is a Fury attack, meaning you can easily parry or dodge this to activate your Defense Skill's passives.
Meteor Fall
Turka will perform a pointing motion and raise his axe into the air, summoning a rain of meteors on to the arena. It is recommended to dodge it by going the opposite way.
Note that if you and your allies are spread apart, the meteors will have more coverage. It is best to coordinate your movement with the party as soon as you see Turka performing the attack!
Axe and Tremor Stomp
Turka will lift and spin his axe before driving it to the ground to cause an arena-wide tremor, knocking any player caught within its radius. Dodge by timing your jump to avoid the incoming shockwave. If you mistime for even a second, you will be prone.
Turka will then perform one of his axe swings and then another move that causes an arena-wide tremor. This time, he will lift his foot to absorb the inital shockwave before stomping and releasing it again. This can still be dodged with a timely jump.
Valley of Slaughter Best Team and Roles
| Role | Explanation |
|---|---|
  Tank |
Weapon Combination: This weapon combo makes a great tank build with sufficient damage and CC to help the party get through the dungeon and fight Turka. Dungeon Role: Responsible for taking all of the mob's aggro and grouping them up for the DPS to clean up. Furthermore, they are responsible for stunning the Shadowmancers. Turka Role: Responsible for sticking close to Turka and tanking his basic attacks and prevent him from using his long ranged Eye Beam and Axe Charge attack. |
  DPS |
Weapon Combination: This weapon combo makes for a great DPS build, both for its AoE and single-target damage potential in close to mid range. Dungeon Role: Responsible for clearing the mobs the tank has grouped up. Furthermore, the DPS should prioritize the orcs' backlines to lessen clear times. Turka Role: Aside from dealing bulk of the damage in most fights, the DPS has the responsibility of quickly bursting down the Furry Bighorn Sheep. |
  Healer |
Weapon Combination: This weapon combo makes a great healer build to provide consistent healing to the party, especially to the tank. It also has some offensive options for additional damage. Even within Turka's range, the healer can sustain himself with their skills. Dungeon Role: Responsible for keeping the party healthy at all times. Furthermore, they are responsible for stunning the Shadowmancers by putting them to sleep with Cursed Nightmare. Turka Role: Since the tank will take the brunt of Turka's Damage, the healer should focus on keeping the whole party healthy while providing as many DoTs and buffs as possible. When a party member fails to do the mechanic, attempt to salvage the situation with a Blessed Barrier to mitigate Turka's damage. |
Valley of Slaughter Walkthrough
| Valley of Slaugther Walkthrough | |
|---|---|
| 1 | 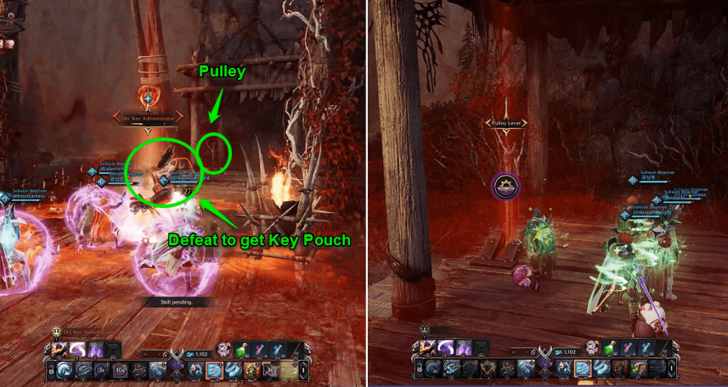 Ascend the Pulley Begin Valley of Slaughter by defeating the Orc Key Administrator. Collect the Pulley Key Pouch that they possess to activate the pulley's mechanism and ascend to the next area. Watch out for its Jumping Stomp, which stuns all players in its vicinity. |
| 2 | 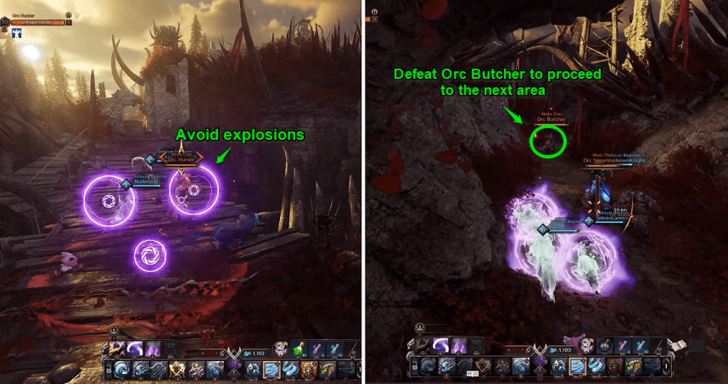 Exploding Bridge After ascending the pulley, you will need to cross a bridge and defeat an Orc Butcher. Keep an eye out for traps as they explode when you step near its area. Dodge the explosions or activate your defense skills like the Ironpoint Parry from GS (Greatsword). It is recommended to aggro the orcs on the bridge and deal with them after crossing it. After crossing the bridge, continue moving forward and turn right to find and defeat an Orc Butcher before being able to proceed to the Orc Shadow Elder's area. |
| 3 | 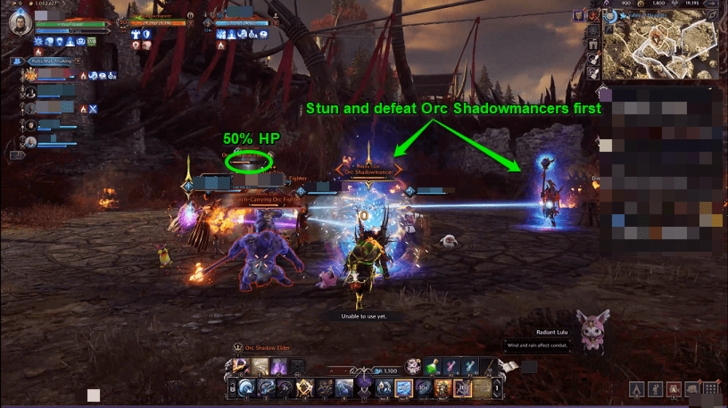 Orc Shadow Elder Defeat the Orc Shadow Elder to proceed to the next area. The Orc Shadow Elder will be accompanied by orc mobs, most notably two Orc Shadowmancers. The Orc Shadowmancers will spawn when the Orc Shadow Elder goes down to 50% HP. Prioritize in controlling and eliminating the Shadowmancers first as they make the Shadow Elder momentarily invulnerable. ┗ Shadowmancers |
| 4 | 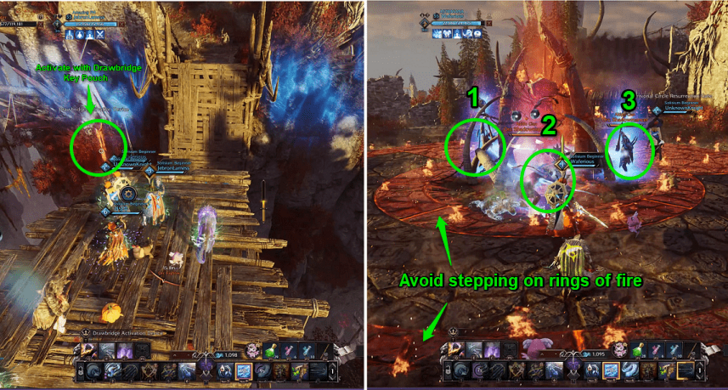 Shadowmancer Ritual Continue moving and dodging traps to encounter another Orc Key Administrator. Defeat the mob around it as well, especially a Shadowmancer that gives it an invulnerability buff. Collect its Drawbridge Key Pouch. Walk forward and let the party member who took the key interact with the Drawbridge Activation Device to reach the next area. In the orcs' plaza, you will see a group of orc mobs and three Shadowmancers. This will be the final area before the boss, but is rather tricky getting through! ┗ Shadowmancers |
Shadowmancers
The Shadowmancers are immune to damage while they are channeling. They are also surrounded by rings of flame that will bind the player upon contact. Avoid the flames by jumping or stepping on the non-flaming areas. It is recommended to clear the mobs first before targeting the Shadowmancers.
To be able to damage the Shadowmancers, three party members should inflict any kind of CC (Crowd Control) simultaneously before dealing damage. The best spell to use would be the Wand's Cursed Nightmare skill as the duration allows another party member to follow up consistently!
Valley of Slaughter New Equipment
Armor
| Armor | Stats |
|---|---|
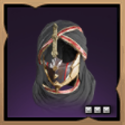 Gilded Raven Mask Gilded Raven Mask
|
Type: Head Armor Set: Gilded Raven Set Melee Def: 178 Ranged Def: 162 ・Strength 2 ・Fortitude 2 ・Mana Regen 12.75 |
Accessories
| Accessory | Stats |
|---|---|
 Bracers of Unrelenting Bracers of Unrelenting
|
Type: Bracelet Magic Def.: 180 Modifiers: ・Strength 2 ・Bind Resistance 43 ・Collision Resistance 27 |
 Dark Seraph Ring Dark Seraph Ring
|
Type: Ring Magic Def.: 180 Modifiers: ・Wisdom 2 ・Petrification Chance 38 ・Mana Regen 19.5 |
 Slayer's Quicksilver Pendant Slayer's Quicksilver Pendant
|
Type: Necklace Magic Def.: 180 Modifiers: ・Dexterity 4 ・Magic Evasion 94 |
Valley of Slaughter Best Rewards and All Drops
Shadow Harvester Mask
| Armor | Stats |
|---|---|
 Shadow Harvester Mask Shadow Harvester Mask
|
Type: Head Armor Set: Death Set Melee Def: 168 Ranged Def: 152 ・Dexterity 2 ・Wisdom 1 ・Cooldown Speed +1.8% |
The best armor drop from Valley of Slaughter is the Shadow Harvester Mask. The Dexterity, Wisdom, and Cooldown Speed it provides are all important stats and bonuses for a DPS build.
Pairing it with 2 or 4 more equipment from the Death Set will also give Critical Damage and Added Attack Speed bonuses respectively.
All Drops
Weapons
| All Weapon Drops |
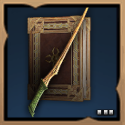 Treant Twig Treant Twig Treant Twig Wisdom 2
Weaken Chance 175 |
|---|
Armor
| All Armor Drops |
 Ascended Guardian Hood Ascended Guardian Hood Ascended Guardian Hood Perception 4
Cooldown Speed +3.1% |
 Gilded Raven Mask Gilded Raven Mask Gilded Raven Mask Strength 2
Fortitude 2 Mana Regen 12.75 |
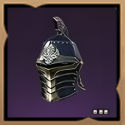 Helm of the Field General Helm of the Field General Helm of the Field General Perception 1
Stun Chance 37 Max Health 230 |
 Phantom Wolf Mask Phantom Wolf Mask Phantom Wolf Mask Dexterity 3
Mana Regen 13.5 Cooldown Speed +0.9% |
|---|---|---|---|
 Shadow Harvester Mask Shadow Harvester Mask Shadow Harvester Mask Dexterity 2
Wisdom 1 Cooldown Speed +1.8% |
 Shock Commander Visor Shock Commander Visor Shock Commander Visor Strength 3
Cooldown Speed +2.5% |
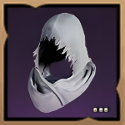 Swirling Essence Hat Swirling Essence Hat Swirling Essence Hat Wisdom 2
Weaken Chance 50 Cooldown Speed +1.6% |
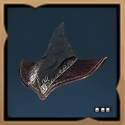 Elusive Hexweaver Hat Elusive Hexweaver Hat Elusive Hexweaver Hat Dexterity 3
Hit Chance 40 |
Accessories
| Accesory Drops | ||
|---|---|---|
 Bracers of Unrelenting Bracers of Unrelenting |
 Dark Seraph Ring Dark Seraph Ring |
 Slayer's Quicksilver Pendant Slayer's Quicksilver Pendant |
Items
| All Item Drops |
 Precious Polished Crystal Precious Polished Crystal
|
 Precious Stalon Ore Precious Stalon Ore
|
 Precious Emeret Ore Precious Emeret Ore
|
 Precious Rubrix Ore Precious Rubrix Ore
|
|---|---|---|---|
 Precious Marind Ore Precious Marind Ore
|
 Precious Parchment Precious Parchment
|
 Precious Omnipotence Parchment Precious Omnipotence Parchment
|
|
 Orc Heart Orc Heart
|
 Fermented Rotein Fermented Rotein
|
||
Other
| All Other Rewards | ||
|---|---|---|
| Dimensional Soul Shard: Turka | Abyssal Contract Token Points (x750) | Training Dew: 10,000 Points |
Valley of Slaughter Overview
| Required Level | Lv. 50 |
|---|---|
| Type | 2-Star Dimensional Circle |
| Contract Token |
|
| Min. Combat Power | |
| Description | |
| The Arkeum was pleased with Duke Magna's performance. However, Tuaren wanted to further test how strong his weapon could become. He performed another experiment at the risk of destroying Duke Magna. He drained the power from all of his spare test subjects and injected it directly into his creation. Empowered beyond the limits of his mortal shell. Duke Magna collapsed in agony, only to be resurrected a short time later as a supremely poowerful being, Turka. | |
Throne and Liberty (TL) Related Guides

All Co-op Dungeons: Dimensional Circles
Dungeon Guides
| 3-Star Co-op Dungeons | 2-Star Co-op Dungeons |
3-Star Dimensional Circle Coop Dungeons
 Rancorwood Rancorwood |
 Halls of Tragedy Halls of Tragedy |
 Chapel of Madness Chapel of Madness |
 Doomrot Grove Doomrot Grove |
 Twisted Laboratory Twisted Laboratory |
- |
2-Star Dimensional Circle Coop Dungeons
 Island of Terror Island of Terror |
 Voidwastes Voidwastes |
 Valley of Slaughter Valley of Slaughter |
 Carmine Rage Island Carmine Rage Island |
 Torture Chamber of Screams Torture Chamber of Screams |
- |
1-Star Dimensional Circle Coop Dungeons
 Death's Abyss Death's Abyss |
 Cursed Wasteland Cursed Wasteland |
 Temple of Slaughter Temple of Slaughter |
 Butcher's Canyon Butcher's Canyon |
 Tyrant's Isle Tyrant's Isle |
 Cave of Destruction Cave of Destruction |
Dimensional Circle Coop Dungeons
 Specter's Abyss Specter's Abyss |
 Roaring Temple Roaring Temple |
 Cave of Desperation Cave of Desperation |
Event Coop Dungeons
 Haunted Labyrinth Haunted Labyrinth |
Comment
Author
Throne and Liberty: Wilds of Talandre Walkthrough & Guides Wiki
Valley of Slaughter Dungeon: How to Beat Turka
improvement survey
03/2026
improving Game8's site?

Your answers will help us to improve our website.
Note: Please be sure not to enter any kind of personal information into your response.

We hope you continue to make use of Game8.
Rankings
- We could not find the message board you were looking for.
Gaming News
Popular Games

Genshin Impact Walkthrough & Guides Wiki

Honkai: Star Rail Walkthrough & Guides Wiki

Umamusume: Pretty Derby Walkthrough & Guides Wiki

Pokemon Pokopia Walkthrough & Guides Wiki

Resident Evil Requiem (RE9) Walkthrough & Guides Wiki

Monster Hunter Wilds Walkthrough & Guides Wiki

Wuthering Waves Walkthrough & Guides Wiki

Arknights: Endfield Walkthrough & Guides Wiki

Pokemon FireRed and LeafGreen (FRLG) Walkthrough & Guides Wiki

Pokemon TCG Pocket (PTCGP) Strategies & Guides Wiki
Recommended Games

Diablo 4: Vessel of Hatred Walkthrough & Guides Wiki

Fire Emblem Heroes (FEH) Walkthrough & Guides Wiki

Yu-Gi-Oh! Master Duel Walkthrough & Guides Wiki

Super Smash Bros. Ultimate Walkthrough & Guides Wiki

Pokemon Brilliant Diamond and Shining Pearl (BDSP) Walkthrough & Guides Wiki

Elden Ring Shadow of the Erdtree Walkthrough & Guides Wiki

Monster Hunter World Walkthrough & Guides Wiki

The Legend of Zelda: Tears of the Kingdom Walkthrough & Guides Wiki

Persona 3 Reload Walkthrough & Guides Wiki

Cyberpunk 2077: Ultimate Edition Walkthrough & Guides Wiki
All rights reserved
Published by Amazon Games under license. ©2023-2024 NCSOFT Corporation. All rights reserved. THRONE AND LIBERTY and the THRONE AND LIBERTY logo are trademarks of NCSOFT Corporation. Used by Amazon Games under license. Amazon Games, Amazon, and all related logos are trademarks of Amazon.com, Inc. or its affiliates. The “PS” Family logo and “PS5” are registered trademarks of Sony Interactive Entertainment Inc. Steam and the Steam logo are trademarks and/or registered trademarks of Valve Corporation in the U.S. and/or other countries.
The copyrights of videos of games used in our content and other intellectual property rights belong to the provider of the game.
The contents we provide on this site were created personally by members of the Game8 editorial department.
We refuse the right to reuse or repost content taken without our permission such as data or images to other sites.


