


This survey will take about 1 minute.
Your answers will help us to improve our website.
Throne and Liberty (TL)
Best Spellblade Dagger / Staff Build (PvP)
As of March 2025, Game8 has ended coverage of Throne and Liberty.
Thank you very much for your understanding and we hope you continue to enjoy Game8's guides!
This Spellblade Dagger and Staff PVP build for Throne and Liberty (TL) takes on the role of an assassin capable of taking down a single target in a flash in and out of range. Read on to learn how to use the Spellblade Dagger and Staff build for PVP, including the best gears to equip, skill rotations, traits, and more.
 Attention! Attention! |
This build was last updated on December 2024; changes to the game since then have not been reflected in this build. |
|---|
| All Spellblade Staff / Dagger Builds | |
|---|---|
| Best Dagger / Staff Build (PvP) | Best Dagger / Staff Build (PVE) |
List of Contents
Spellblade Dagger / Staff Build Overview
Build Summary
| Jump to a Section | |||
|---|---|---|---|
| Build Summary | |
|---|---|
  |
Focus: Small/Large Scale PvP, Burst Damage, Stealth Stat Priority: Strength, Perception |
| Skill Setup | |
Cleaving Moonlight Charges to a designated target up to 3m away, attacking every enemy within a 1.5m radius 3 times. Each attack deals 110% + 4, and Off-Hand Weapon Activation deals damage 4 times.
Shadow Strike Moves behind a target and deals damage equal to 200% of Base Damage. Has a 52% chance to Bind the target for 2s and apply Silence: Poison for 4s.
Camouflage Cloak Becomes Stealthed for 3.5s, unable to be targeted. Removes all Bind and Move Speed Reduction effects. Your first attack while Stealthed is a guaranteed Critical Hit. IF you are hit, or Morph, or becomes a target of Collision, Stun, or Sleep, you will no longer be Stealthed.
Inferno Wave A Fire skill that deals damage equal to 260% of Base Damage + 62 to all enemies within 3m of the target. Attacking a target that you applied Burning to will boost the damage by 3.1% per stack, with a 70% chance to apply Weaken: Burning. If you land a heavy attack on a target that applied Burning to, 2 stacks of Weaken: Burning are applied.
Inner Peace Increases Mana Regen by 400% for 6s. The skill becomes disabled if you move. The increase is doubled if you’re Wet: Mana Cost Efficiency increases by 40% for 6s after the skill is over if you’re not Wet.
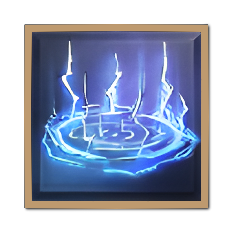
Judgement Lightning A lightning skill that deals 630% of Base Damage + 166. When the target is Wet, or Frosted by you, deals 420% + 110 damage up to 5 enemies within 5m. The damage is amplified by 40% against bosses. When used on an enemy Burned by you, the skill can be used again with a 2.5% chance for every 1 stack. When you land a Heavy Attack with this skill, it can be immediately used again, and when the second Judgement Lightning strikes the target as a Heavy Attack, reduces the cooldown by 30%.
Infernal Meteor A special growth skill that can only be grown with Precious Skill Growth Book: Omnipotence. A Fire skill that deals 830% of Base Damage + 51 damage to all enemies within 4m. If a hit becomes a heavy attack, it also applies 5 stacks of Weaken: Burning.
Victorious Energy Magic, Melee, and Ranged Hit 250 ▲ and Magic, Melee and Ranged Evasion 250 ▲ for 12s.
Ice Spear Bombardment An Ice Skill that hurls 8 ice spears, and each spear deals damage equal to 70% of Base Damage + 7 with a(n) 80% chance to Weaken the target, which decreases Move Speed by 51% for 3s. Frost is applied.
Chain Thunder Strikes targets with a lightning skill that deals 320% of Base Damage + 22 damage. Attacking a victim of the user's Burning increases damage by 4% per stack. The damage is amplified by 40% against monsters. Using the skill on a target with Wet or Frost inflicted by the user transfers damage to nearby targets within a 5m radius up to 3 times. Each transfer decreases damage by 20%. Transferred damage does not stack. Decreases the cooldown by 20% if the user is affected by Wet.
Lightning Infusion Adds Weaken: Thunderclouds effect to all attacks for 9s. Thunderclouds lasts for 6s, and decreases Melee, Ranged, Magic Endurance by 6 per stack. Stacks up to 20 times. Reusing the skill within 9s will trigger a stabbing attack with the both hands, where stab inflicts 110% + 4 damage, and then turn to inflict additional 240% + 9 damage. Applies Weaken: Thunderclouds to every target within a 3m radius of the target.
|
|
| Pros | Cons |
|
|
|
The Dagger / Staff weapon combination essentially fills in the role of safely securing the kills due to their ability to hop in and out of combat. The Staff / Dagger's playstyle revolves around pelting groups of enemies from afar, then swooping in on low-health targets at opportune moments!
Due to this playstyle and the build's squishy nature, it requires the player to have the wits, guts, and know-how to execute this combination properly.
Stat Allocation
| Stat | Total | Points From Lvl. | Points From Gear |
|---|---|---|---|
| Strength | 50 | 20 | 20 |
| Dexterity | 34 | 11 | 13 |
| Wisdom | 20 | 2 | 8 |
| Perception | 60 | 16 | 34 |
Note: Base stats are always 10!
As a general rule for most builds that make use of ranged, prioritize getting 60 Perception to increase the consistency of hitting your skill rotations as the majority of PVP builds will be stacking Evasion. Furthermore, this also increases your range, allowing you to stay in the backline. The additional buff duration also extends your Lightning Infusion and Victorious Energy!
The second priority would be 50 Strength to provide more durability, increasing your survivability in combat. Reaching 50 also offers additional Heavy Attack Chance to synergize with Judgement Lightning!
The remaining points should allow you to reach 30-40 Dexterity, which increases your chances of evading hits and ability to dole out critical hits.
Skills and Specialization
| Jump to a Section | |||
|---|---|---|---|
| Active Skills | |||||||
|---|---|---|---|---|---|---|---|
 Serial Fire Bombs Serial Fire Bombs Serial Fire Bombs A Fire skill that deals 120% of Base Damage + 22 damage and inflicts Weaken: Burning with an 80% chance to every enemy within 3m radius from the target. 2 Weaken: Burning is applied to the target (3, if the hit was critical). Burning lasts for 12s and deals 1% of Base Damage + 1 damage per stack per sec. Stacks up to 10 times. It can be used up to 3 times in a row. The casting time decreases and Mana cost increases as the skill is used consecutively. All Fire skills’ Weaken: Burning Damage is equal to Serial Fire Bombs.
|
Instant Activation The Casting Time becomes removed. Cannot be stacked with Focused Fire Bombs Specialization. Projectile Speed ▲ Fire Bombs speed increases by 200%. Range ▲ Applies the same damage to a 3m radius area from the target. Able to Move Can use skills while moving. |
||||||
 Inferno Wave Inferno Wave Inferno Wave A Fire skill that deals damage equal to 260% of Base Damage + 62 to all enemies within 3m of the target. Attacking a target that you applied Burning to will boost the damage by 3.1% per stack, with a 70% chance to apply Weaken: Burning. If you land a heavy attack on a target that applied Burning to, 2 stacks of Weaken: Burning are applied.
|
- | ||||||
 Chain Lightning Chain Lightning Chain Lightning A lightning skill that deals 320% of Base Damage + 22 damage. Deals 4% increased damage per stack against a target to which you applied Burning. Damage transfers to other enemies within a 5m radius from the target up to 3 times if the target is Wet, or Frosted by you. Damage decreases by 20% every time it transfers, and it will not transfer to a target already affected. Cooldown decreases by 20% if you’re Wet.
▼  Chain Thunder Chain Thunder Chain Thunder Strikes targets with a lightning skill that deals 320% of Base Damage + 22 damage. Attacking a victim of the user's Burning increases damage by 4% per stack. The damage is amplified by 40% against monsters. Using the skill on a target with Wet or Frost inflicted by the user transfers damage to nearby targets within a 5m radius up to 3 times. Each transfer decreases damage by 20%. Transferred damage does not stack. Decreases the cooldown by 20% if the user is affected by Wet.
|
Chain Damage The Chain Lightning damage is not mitigated upon transfer. Guaranteed Damage Transfer Using Chain Lightning on an enemy not affected by Wet or Frost status also transfers the damage. Chain Thunder Creates a 3m radius zone that lasts for 3 sec. Deals damage to every enemy within the area 48% of Base Damage + 3 per sec. |
||||||
 Ice Spear Ice Spear Ice Spear An Ice skill that hurls a 1.5m wide ice spear toward the target location, dealing damage equal to 350% of Base Damage + 35 with an 80% chance to Weaken the target, decreasing Move Speed by 51% for 3s. Applies Frost.
▼  Ice Spear Bombardment Ice Spear Bombardment Ice Spear Bombardment An Ice Skill that hurls 8 ice spears, and each spear deals damage equal to 70% of Base Damage + 7 with a(n) 80% chance to Weaken the target, which decreases Move Speed by 51% for 3s. Frost is applied.
|
Damage ▲ Damage boosts by 40%. Ice Spear Bombardment An Ice skill that hurls 8 ice spears, and each spear deals damage equal to 70% of Base Damage + 7 with an 80% chance to Weaken the target, which decreases Move Speed by 51% for 3s. Frost is applied. |
||||||
 High Focus High Focus High Focus Increases Cooldown Speed by 30% and Move Speed by 22% for 12s.
▼  Victorious Energy Victorious Energy Victorious Energy Magic, Melee, and Ranged Hit 250 ▲ and Magic, Melee and Ranged Evasion 250 ▲ for 12s.
|
Victorious Energy Magic, Melee, and Ranged Hit 250 ▲ and Magic, Melee, and Ranged Evasion 250 ▲ for 12s. |
||||||
 Judgement Lightning Judgement Lightning Judgement Lightning A lightning skill that deals 630% of Base Damage + 166. When the target is Wet, or Frosted by you, deals 420% + 110 damage up to 5 enemies within 5m. The damage is amplified by 40% against bosses. When used on an enemy Burned by you, the skill can be used again with a 2.5% chance for every 1 stack. When you land a Heavy Attack with this skill, it can be immediately used again, and when the second Judgement Lightning strikes the target as a Heavy Attack, reduces the cooldown by 30%.
|
Chain Damage The damage is not mitigated when Judgement Lightning is transferred. Guaranteed Damage Transfer Use Judgement Lightning on an enemy without Wet or Frost status also transfers the damage. |
||||||
 Infernal Meteor Infernal Meteor Infernal Meteor A special growth skill that can only be grown with Precious Skill Growth Book: Omnipotence. A Fire skill that deals 830% of Base Damage + 51 damage to all enemies within 4m. If a hit becomes a heavy attack, it also applies 5 stacks of Weaken: Burning.
|
- | ||||||
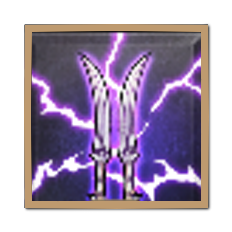
 Cleaving Moonlight Cleaving Moonlight Cleaving Moonlight Charges to a designated target up to 3m away, attacking every enemy within a 1.5m radius 3 times. Each attack deals 110% + 4, and Off-Hand Weapon Activation deals damage 4 times.
|
- | ||||||
 Shadow Strike Shadow Strike Shadow Strike Moves behind a target and deals damage equal to 200% of Base Damage. Has a 52% chance to Bind the target for 2s and apply Silence: Poison for 4s.
|
Range ▲ Range +40%. Shadow Escape Moves to the casting location if used again within 6s. |
||||||
 Inject Venom Inject Venom Inject Venom Adds Weaken: Poison effect to all attacks for 9s. Poison lasts for 6s and deals 2.3% of Base Damage + 1 damage per stack every second, while decreasing Health Regen by 4% per stack. Stacks up to 20 times. Reusing the skill within 9s will trigger a stabbing attack with the both hands, where stab inflicts 90% + 3 damage, and then turn to inflict additional 135% + 5 damage. The turning attack is increased by 2% per each Poison stack.
▼  Lightning Infusion Lightning Infusion Lightning Infusion Adds Weaken: Thunderclouds effect to all attacks for 9s. Thunderclouds lasts for 6s, and decreases Melee, Ranged, Magic Endurance by 6 per stack. Stacks up to 20 times. Reusing the skill within 9s will trigger a stabbing attack with the both hands, where stab inflicts 110% + 4 damage, and then turn to inflict additional 240% + 9 damage. Applies Weaken: Thunderclouds to every target within a 3m radius of the target.
|
Lightning Infusion Adds Weaken: Thunderclouds effect to all attacks for 9s. Thunderclouds last for 6s, and decreases Melee, Ranged, Magic Endurance by 17 per stack. Stacks up to 20 times. Reusing the skill within 9s will trigger a stabbing attack with the both hands, where each stab inflicts 120% +25 damage, then dealing an additional 180% +38 damage. Applies Weaken: Thunderclouds to every target within a 3m radius of the target. |
||||||
 Brutal Incision Brutal Incision Brutal Incision Deals 450% of Base Damage + 92 damage, and removes the target’s Thunderclouds effect. The damage is amplified by 15% against bosses. When the target’s remaining Health is 50% or less, Critical Hit 600% ▲. Critical Damage 20% ▲.
▼  Thunderclouds Bombing Thunderclouds Bombing Thunderclouds Bombing Deal 180% of Base Damage + 37 damage, and removes the target's Thunderclouds effect. The damage is amplified by 15% against monsters. When the target's remaining Health is 50% or less, Critical Hit Chance increases by 600. If the target is affected by Weaken: Thunderclouds, they take 36% + 7 Bonus Damage and the damage is boosted by 100% per stack. Critical Damage increases by 20%.
|
Thunderclouds Bombing Deals 240% of Base Damage +74 damage, and removes the target’s Thunderclouds effect. The damage is amplified by 15% against bosses. When the target’s remaining Health is 50% or less, Critical Hit increases by 600. If the target is affected by Weaken: Thunderclouds, they receive 48% +15 additional damage and the damage is boosted by 100% per stack. Critical Damage increases by 20%. Cannot be stacked with Damage ▲ Specialization. |
||||||
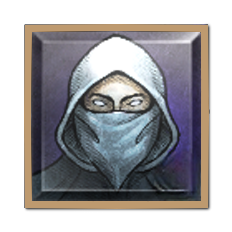 Camouflage Cloak Camouflage Cloak Camouflage Cloak Becomes Stealthed for 3.5s, unable to be targeted. Removes all Bind and Move Speed Reduction effects. Your first attack while Stealthed is a guaranteed Critical Hit. IF you are hit, or Morph, or becomes a target of Collision, Stun, or Sleep, you will no longer be Stealthed.
|
Cooldown ▼ Cooldown decreases by 10%. Cannot be stacked with Duration ▲ Specialization. Immune to CC When using the skill, immunity against Weaken, Stun, Petrification, Sleep, Silence, Terror, Bind, and Collision is added for 3s. Any already applied CC is not removed. |
||||||
| Passive Skills | |||||||
 Assassin's Step Assassin's Step Assassin's Step On defeating the target, Mana Regen 24 ▲ and Move Speed 12% ▲ for 6s. The first skill used within the duration will not consume any Mana. Lasts 9s at night.
|
 Assassin's Instincts Assassin's Instincts Assassin's Instincts Magic, Melee, and Ranged Critical hit 66 ▲.
|
 Shadow Walker Shadow Walker Shadow Walker After using a Mobility or Movement skill, Damage Reduction increases by 14 and Magic and Ranged Evasion increase by 270 for 6s.
|
 Wrathful Edge Wrathful Edge Wrathful Edge Critical Damage 9.6%▲.
|
||||
 Mana Amp Mana Amp Mana Amp Max Health increases by 360 and Max Mana Increases by 1,400.
|
 Flame Condensation Flame Condensation Flame Condensation Increases Burning Damage by 30%. If used on a target that you have Burned, Heavy Attack Chance increases by 10 per Burning stack.
|
 Echoic Barrier Echoic Barrier Echoic Barrier When Silenced, the silence duration decreases by 2s. If either Silence, Blind, Sleep is applied, the resistance for the applied effect increases by 290 for 9s.
|
 Forbidden Sanctuary Forbidden Sanctuary Forbidden Sanctuary All Mana Cost Efficiency decreases by 15%, and Skill Damage Boost Increases by 80.
|
||||
| Defensive Skill | |||||||
 Block Blade Block Blade Block Blade Defends against attacks. On defending against a Fury Attack while stationary, 180 Mana regenerates. On Defending against a Fury Attack within 0.5s, Block Blade changes to Poison Dagger for 3s. Wrath Attacks can’t be defended. Use with the directional buttons to defend against attacks while moving 4m to the designated direction for 0.5s. Becomes Stealthed for 3s to make yourself unable to be targeted and increase Mana Regen by 450 after defending against Fury or Wrath Attack. Block Blade changes to Poison Dagger. The first attack while Stealthed is a Critical Hit. Stealth ends when you attack or morph. Poison Dagger: Throws up to 5 daggers at enemies within a 5m radius, dealing 100% damage and applying Weaken: Poison. Distributes the attack if there are multiple enemies within range.
|
|||||||
Active Skills
For the active skills, this PVP will utilize a 5/7 split between the Staff and Dagger, mainly taking supplementary skills from the Dagger while focusing the main damage on the Staff.
The Staff skills will utilize Burning DoTs and Lightning burst potential along with Ice Spear Bombardment to prevent opponents from escaping. Furthermore Victorious Energy is included to answer situational moments during combat.
 Serial Fire Bombs - This will be your go-to skill for spreading the Burning weakness DoTs, enhancing your Lightning skills.
- Inferno Wave - Often a filler spell during rotations. Use this to quickly reach max Burning stacks after casting Serial Fire Bombs.
- Ice Spear Bombardment - Easily your highest damaging skill when you have not set up opponents with Burning and singles out an opponent within your range.
- Chain Thunder - Due to its quick refresh, always use this off cooldown to make use of the boost from Burning DoTs. Use this alongside Ice Spear Bombardment on a single target to fully capitalize on the DoT.
- Judgement Lightning - Best used after exiting stealth to get the guaranteed critical or to finish off low-health opponents.
- Infernal Meteor - Best used when all of your other skills are on cooldown and you are safe to proceed with casting down hellfire on groups of enemies. You can also remove Lightning Infusion's specialization to get the anti-healing!
- Victorious Energy - You can use this skill either defensively or offensively. Defensively, it allows you to have increased chances of evading key CCs. Offensively, you can use this to ensure your Execute combo.
The Dagger skills, on the other hand, are mainly included for its stealth package along with some skills that allow you to close in on enemies to execute them.
- Cleaving Moonlight - This will be your go-to skill when it comes to dealing damage up-close given its high burst damage with the Consecutive Use specialization.
- Shadow Strike - This skill is used to quickly teleport behind an enemy opponent after whittling them down with Staff Skills. With the Shadow Escape specialization, you can safely return to your prior position after killing a target. Shadow Strike has the same range as Ice Spear Bombardment when the Range specialization is applied.
- Lightning Infusion - Keep this buff active at all times to increase your overall damage by lessening your opponent's resistances. Remember to use the second cast after closing in on an enemy!
- Brutal Incision - Always use this skill last as it allows you to deal an absurd amount of burst damage on low-health enemies.
- Camouflage Cloak - No build with the Dagger does not include Camouflage Cloak. With stealth's utility, you can either use this offensively or defensively. With the immune to CC specialization, use this just before you are tagged with a CC skill to avoid getting burst down.
Prioritize leveling your Camouflage Cloak and all your Staff Skills afterward, especially Chain Thunder and Ice Spear Bombardment.
Passive Skills
The best passives to prioritize leveling are Shadow Walker and Mana Amp as they fully apply bonuses to this build's playstyle.
- Shadow Walker - Increases your resistances and evasion after using mobility skills.
- Mana Amp - Increases your HP and Mana by a decent flat amount, giving you more durability and leeway to cast your skills.
Assassin's Step is included because it lets you escape the thick of battle by increasing your speed after assassinating a target. The next skill you use will also be cost-free, so look to take advantage of that!
Assassin's Instincts, and Wrathful Edge, while simple, provide a massive increase to your critical hit economy by increasing the consistency and potency of the damage.
Furthermore, PVP is all about the up-time of your skills, so including Echoic Barrier to lessen your chances of being CC'ed or silenced will improve your overall value. Remember, staying alive is the best contribution to battle!
To further amp up the build's damage, Flame Condensation and Forbidden Sanctuary are slotted in. Flame Condensation allows your burning DoTs to deal more damage and increase your chances of a Heavy Attack. Forbidden Sanctuary further boosts your damage potential overall.
Active and Passive Alternatives
| Active Skill | Specialization | ||
|---|---|---|---|
|
Lightning Infusion Lightning Infusion Adds Weaken: Thunderclouds effect to all attacks for 9s. Thunderclouds lasts for 6s, and decreases Melee, Ranged, Magic Endurance by 6 per stack. Stacks up to 20 times. Reusing the skill within 9s will trigger a stabbing attack with the both hands, where stab inflicts 110% + 4 damage, and then turn to inflict additional 240% + 9 damage. Applies Weaken: Thunderclouds to every target within a 3m radius of the target.
|
> |
 Phantom Smokescreen Phantom Smokescreen Phantom Smokescreen A special skill that can only be grown with Precious Training Books: Omnipotence. Creates a 3m radius Phantom Smokescreen that lasts for 3s. Party members within the area always evade all Magic and Ranged projectiles.
|
Evasion ▲ Always evades melee projectiles. |
|
Lightning Infusion Lightning Infusion Adds Weaken: Thunderclouds effect to all attacks for 9s. Thunderclouds lasts for 6s, and decreases Melee, Ranged, Magic Endurance by 6 per stack. Stacks up to 20 times. Reusing the skill within 9s will trigger a stabbing attack with the both hands, where stab inflicts 110% + 4 damage, and then turn to inflict additional 240% + 9 damage. Applies Weaken: Thunderclouds to every target within a 3m radius of the target.
|
> |
 Frost Smokescreen Frost Smokescreen Frost Smokescreen An Ice skill that creates a 4m wide zone that lasts for 5s and teleports you 8m in the designated direction. Applies Weaken, decreasing Move Speed by 14%, to enemies in range. Applies Frost. Can be used up to 2 times.
|
Burning Smokescreen A Fire Skill that creates a 4m wide zone that lasts for 5s and teleports you 8m in the designated direction. Applies Weaken, decreasing Move Speed by 15%, to enemies in range. Applies Weaken: Burning every second. Can be used up to 2 times. |
|
Brutal Incision Brutal Incision Deals 450% of Base Damage + 92 damage, and removes the target’s Thunderclouds effect. The damage is amplified by 15% against bosses. When the target’s remaining Health is 50% or less, Critical Hit 600% ▲. Critical Damage 20% ▲.
|
> |
 Inner Peace Inner Peace Inner Peace Increases Mana Regen by 400% for 6s. The skill becomes disabled if you move. The increase is doubled if you’re Wet: Mana Cost Efficiency increases by 40% for 6s after the skill is over if you’re not Wet.
|
Immune to CC Instead of using Inner Peace, become immune to the following effects when they are applied: Stun, Petrification, Bind, Silence or Sleep. |
Depending on the situation, you can change some active skills around to suit your needs:
- Phantom Smoke Screen - If you are playing in largescale PVP and need a means to provide more ways for your allies to survive.
- Frost Smokescreen - If you need an extra means of mobility and self-peel by leaving an area that inflicts Burning DoTs.
- Inner Peace - If the enemy team has access to multiple means of CC that warrants a second means to negate CC.
Best Weapons
| Jump to a Section | |||
|---|---|---|---|
| Primary Weapon | |
|---|---|
 Talus's Crystalline Staff Talus's Crystalline Staff Talus's Crystalline Staff Dexterity 5
Critical Hit 124 |
・Heavy Attack Chance +80 ・Critical Hit +80 ・Hit +80 |
| Weapon Effect | When Stunned, trigger Petrification: Freeze for 1s to protect yourself. Cooldown 60s. |
Note: All of the traits shown here are of max value!
The primary weapon for this build will be Talus's Crystalline Staff mainly for its weapon effect, Talus's Cold Stone. It is best to improve your chances of survival by mitigating CC in PVP scenarios, which this effect covers since it turns the player to stone for a few seconds after getting engaged. This build perfectly counters weapon combinations such as the Dagger/Greatsword!
Furthermore, the weapon provides a whopping +9 to Dexterity, giving us an easy route to access the additional 100 Critical Hit and 15 Bonus Damage.
The best traits to give Talus's Crystalline Staff would be Hit, Heavy Attack, and Critical Hit to further synergize with our Staff Skills. It is best to prioritize Hit as it is the golden stat in PVP.
As an alternative, the Staff of the Umbramancer is a solid choice since it helps us reach our Strength and Perception caps while also trying to address the cooldown problems this build possesses.
| Secondary Weapon | |
|---|---|
 Lequirus's Wicked Thorns Lequirus's Wicked Thorns Lequirus's Wicked Thorns Wisdom 4
Perception 3 Critical Hit Chance 39 |
・Heavy Attack Chance +80 ・Critical Hit +80 ・Hit +80 |
| Weapon Effect | Base Damage 50 ▲ for 3s upon using Dagger Mobility Skills. |
Note: All of the traits shown here are of max value!
The secondary weapon for this build will be Lequirus's Wicked Thorns since it provides an additional boost to our Perception, allowing the build to increase its chances of hitting an opponent accurately.
Furthermore, its weapon effect Lequirus's Gale Blade increases this build's DPS by staying mobile. This weapon effect can be triggered reliably as this build constantly activates mobility skills to achieve its game plan.
Best Armors and Accessories
| Jump to a Section | |||
|---|---|---|---|
| Armors | |
|---|---|
 Ascended Guardian Hood Ascended Guardian Hood Ascended Guardian Hood Perception 4
Cooldown Speed +3.1% |
・Melee Evasion +160 ・Magic Evasion +160 ・Mana Regen +60 |
 Ancient Tapestry Mantle Ancient Tapestry Mantle Ancient Tapestry Mantle Ranged Evasion 80
Magic Evasion 74 Weaken Resistance 25 |
・Max Health +600 ・Skill Damage Resistance +80 ・Debuff Duration -6% |
 Shadow Harvester Tunic Shadow Harvester Tunic Shadow Harvester Tunic Bind Chance 41
Ranged Evasion 74 Stamina Regen 1.35 |
・Ranged Evasion +160 ・Magic Evasion +160 ・Buff Duration +6% |
 Ascended Guardian Gloves Ascended Guardian Gloves Ascended Guardian Gloves Perception 4
Mana Cost Efficiency +6.3% |
・Melee Evasion +160 ・Magic Evasion +160 ・Attack Speed +8% |
 Shadow Harvester Trousers Shadow Harvester Trousers Shadow Harvester Trousers Perception 3
Hit 22 Mana Regen 11.25 |
・Ranged Evasion +160 ・Magic Evasion +160 ・Mana Regen +60 |
 Sabatons of the Field General Sabatons of the Field General Sabatons of the Field General Movement Speed +2%
Strength 4 |
・Melee Evasion +160 ・Ranged Evasion +160 ・Move Speed +8% |
| Accessories | |
 Clasp of the Conqueror Clasp of the Conqueror Clasp of the Conqueror Strength 1
Perception 2 Mana Regen 27.75 |
・Max Health +600 ・Skill Damage Boost +80 ・Buff Duration +6% |
 Bracers of the Primal King Bracers of the Primal King Bracers of the Primal King Perception 4
Bonus Damage 7 |
・Max Health +600 ・Skill Damage Resistance +80 ・Debuff Duration -6% |
 Amber Dimensional Band Amber Dimensional Band Amber Dimensional Band Movement Speed +2.4%
Strength 1 Dexterity 2 |
・Max Health +600 ・Skill Damage Boost +80 ・Buff Duration +6% |
 Etched Alabaster Band Etched Alabaster Band Etched Alabaster Band Added Attack Speed +1.8%
Strength 2 Stun Chance 37 |
・Max Health +600 ・Skill Damage Boost +80 ・Buff Duration +6% |
 Belt of Bloodlust Belt of Bloodlust Belt of Bloodlust Move Speed +2%
Strength 2 Max Health 200 |
・Max Health +600 ・Skill Damage Resistance +80 ・Debuff Duration -6% |
Note: All of the traits shown here are of max value!
This Staff and Dagger equipment focuses on gathering as much Perception and Strength to reach the caps of your core skills. The sub-stats with the armor will be focused on stacking as much Evasion stats as possible while keeping the thresholds of Perception and Strength in mind.
The build also utilizes some 2-part bonuses that attempt to answer its Cooldown problems. The Ascended set provides an additional 21% to Cooldown Speed. The Shadow Harvester set then slots the build with a flat Critical Hit Damage.
The defensive traits focus more on Evasion rather than Endurance as you should always be in the backlines, meaning you should rarely tank hits and focus on proper positioning and timing to reliably avoid some attacks.
Furthermore, this build has a mediocre HP baseline, so if you would like more durability, you can trade Cooldown Speed for defenses with Heroic Hood of the Resistance.
| List of References | |
|---|---|
| List of All Armor | List of All Accessories |
Best Weapon Mastery
| Jump to a Section | |||
|---|---|---|---|
| Staff | ・Destroy (6 Pts) ・Attribute (9 Pts) |
|---|---|
| Dagger | ・Disguise (6 Pts) ・Assassination (9 Pts) |
For the Weapon Masteries, allocate your points to mastery trees that get Damage, Cooldown Speed, and Evasion as early as possible.
The Staff's Attribute tree provides a massive boost to Burning DoTs! After that, spend the remaining 6 points in the Destroy tree to provide additional Cooldown Speed, Skill Damage, and consistency with Critical Hits.
The Dagger's Assassination Tree provides the brunt of Skill Damage and the potency of Critical Hits! After that, spend the remaining 6 points in the Disguise Tree to provide some resistances and evasion.
How to Get Weapon Mastery Points
Best Guardian
| Jump to a Section | |||
|---|---|---|---|
| Best Guardian | |
|---|---|
 Lady Knight Kamarshea Lady Knight Kamarshea |
Creates a shield for 50% of your Max Mana. Cooldown Speed +40% while the shield is up. Summon ends when the Shield is removed. |
As this is a frail weapon combination, utilizing Lady Knight Kamarshea's mana shield as a panic button upon getting engaged is necessary to keep yourself alive after getting engaged on. Staying alive means you can take more opponents out before going down yourself!
For alternatives, you can slot in Pale Nemesis Hartach if you are confident that your ability to dole out damage can consistently proc the stealth after taking out a target.
Skill Rotations
| Jump to a Section | |||
|---|---|---|---|
| How to Play Staff / Dagger |
|---|
|
|
Note: If the skills icons are confusing, some of the skill icons indicated here are using their specialized variants.
Ranged AoE DPS
Lightning Infusion Adds Weaken: Thunderclouds effect to all attacks for 9s. Thunderclouds lasts for 6s, and decreases Melee, Ranged, Magic Endurance by 6 per stack. Stacks up to 20 times. Reusing the skill within 9s will trigger a stabbing attack with the both hands, where stab inflicts 110% + 4 damage, and then turn to inflict additional 240% + 9 damage. Applies Weaken: Thunderclouds to every target within a 3m radius of the target.
▶
Serial Fire Bombs A Fire skill that deals 120% of Base Damage + 22 damage and inflicts Weaken: Burning with an 80% chance to every enemy within 3m radius from the target. 2 Weaken: Burning is applied to the target (3, if the hit was critical). Burning lasts for 12s and deals 1% of Base Damage + 1 damage per stack per sec. Stacks up to 10 times. It can be used up to 3 times in a row. The casting time decreases and Mana cost increases as the skill is used consecutively. All Fire skills’ Weaken: Burning Damage is equal to Serial Fire Bombs.
x3 ▶
Ice Spear Bombardment An Ice Skill that hurls 8 ice spears, and each spear deals damage equal to 70% of Base Damage + 7 with a(n) 80% chance to Weaken the target, which decreases Move Speed by 51% for 3s. Frost is applied.
▶
Inferno Wave A Fire skill that deals damage equal to 260% of Base Damage + 62 to all enemies within 3m of the target. Attacking a target that you applied Burning to will boost the damage by 3.1% per stack, with a 70% chance to apply Weaken: Burning. If you land a heavy attack on a target that applied Burning to, 2 stacks of Weaken: Burning are applied.
▶
Chain Thunder Strikes targets with a lightning skill that deals 320% of Base Damage + 22 damage. Attacking a victim of the user's Burning increases damage by 4% per stack. The damage is amplified by 40% against monsters. Using the skill on a target with Wet or Frost inflicted by the user transfers damage to nearby targets within a 5m radius up to 3 times. Each transfer decreases damage by 20%. Transferred damage does not stack. Decreases the cooldown by 20% if the user is affected by Wet.
▶
Judgement Lightning A lightning skill that deals 630% of Base Damage + 166. When the target is Wet, or Frosted by you, deals 420% + 110 damage up to 5 enemies within 5m. The damage is amplified by 40% against bosses. When used on an enemy Burned by you, the skill can be used again with a 2.5% chance for every 1 stack. When you land a Heavy Attack with this skill, it can be immediately used again, and when the second Judgement Lightning strikes the target as a Heavy Attack, reduces the cooldown by 30%.
▶
Infernal Meteor A special growth skill that can only be grown with Precious Skill Growth Book: Omnipotence. A Fire skill that deals 830% of Base Damage + 51 damage to all enemies within 4m. If a hit becomes a heavy attack, it also applies 5 stacks of Weaken: Burning.
(optional) |
The main goal of this bread-n'-butter combo is to inflict as much damage from a safe distance by utilizing the staff's innate synergies between Burn-inflicting spells and Lightning skills.
After buffing yourself up with Lightning Infusion, sequence Serial Fire Bombs, Ice Spear Bombardment, and Inferno Wave to set up your additional burst damage with Chain Thunder and Judgement Lightning.
If the damage was insufficient in whittling their health down to less than 50%, you can repeat this rotation or reposition to find an opportune time to use Infernal Meteor.
The key for your Staff combos is to use your Fire skills as a primer for your Lightning skills, so if you choose to slot in other damaging spells, follow this philosophy to maximize your damage.
Finisher Combo
Victorious Energy Magic, Melee, and Ranged Hit 250 ▲ and Magic, Melee and Ranged Evasion 250 ▲ for 12s.
▶
Shadow Escape Moves behind a target and deals damage equal to 200% of Base Damage. Has a 52% chance to Bind the target for 2s and apply Silence: Poison for 4s. Can go back to the original casting location if used again within 6s.
▶
Cleaving Moonlight Charges to a designated target up to 3m away, attacking every enemy within a 1.5m radius 3 times. Each attack deals 110% + 4, and Off-Hand Weapon Activation deals damage 4 times.
x2 ▶
Brutal Incision Deals 450% of Base Damage + 92 damage, and removes the target’s Thunderclouds effect. The damage is amplified by 15% against bosses. When the target’s remaining Health is 50% or less, Critical Hit 600% ▲. Critical Damage 20% ▲.
▶
Shadow Escape Moves behind a target and deals damage equal to 200% of Base Damage. Has a 52% chance to Bind the target for 2s and apply Silence: Poison for 4s. Can go back to the original casting location if used again within 6s.
|
The main goal of this combo is to finish enemies off after whittling down an enemy with your spells from range or when you spot a vulnerable priority target that you are confident in bursting down.
After casting Victorious Energy to ensure your hits while avoiding getting burst down, quickly blink behind the opponent by using Shadow Escape and execute them by quickly bursting them down with Cleaving Moonlight. Finish the opponent with an enhanced Brutal Incision, then reposition back using Shadow Escape's second cast.
As an additional tip, you can weave in a Camouflage Cloak before or after the combo. Before the combo, it will increase your damage by guaranteeing criticals. After the combo, you can safely reposition to find your next target!
Stats
| Jump to a Section | |||
|---|---|---|---|
| Jump to a Stat |
|
|---|
Offensive Stats
| Stat | Value |
|---|---|
| Melee Hit | 520 |
| Ranged Hit | 520 |
| Magic Hit | 580 |
| Melee Crit. Hit | 335 |
| Ranged Crit. Hit | 275 |
| Magic Crit. Hit | 335 |
| Skill Damage Boost | 310 |
| Critical Damage | 6% |
| Buff Duration | 54% |
Defensive Stats
| Stat | Value |
|---|---|
| Melee Defense | 1,668 |
| Ranged Defense | 1,350 |
| Magic Defense | 1,655 |
| Melee Evasion | 550 |
| Ranged Evasion | 884 |
| Magic Evasion | 874 |
| Debuff Duration | -12% |
| Skill Damage Resistance | 240 |
Body Stats
| Stat | Value |
|---|---|
| Max Health | 11,855 |
| Max Mana | 5,995 |
| Max Stamina | 100 |
| Mana Cost Efficiency | 14.8% |
| Move Speed | 600 | 28.1% |
| Health Regen | 179 |
| Mana Regen | 659.4 |
| Stamina Regen | 3.6 |
| Cooldown Speed | 12.3% |
| Added Attack Speed | 19.2% |
Crowd Control Stats
| Stat | Value |
|---|---|
| Weaken Chance | 396 |
| Stun Chance | 393 |
| Petrification Chance | 300 |
| Sleep Chance | 300 |
| Silence Chance | 300 |
| Terror Chance | 300 |
| Bind Chance | 397 |
| Collision Chance | 300 |
| Weaken Resistancee | 81 |
Miscellaneous Stats
| Stat | Value |
|---|---|
| All Evasion | 105 |
| Bonus Damage | 13 |
| Off-Hand Weapon Attack Chance | 6% |
| Hit | 227 |
| Critical Hit | 508 |
| Heavy Attack Chance | 160 |
| Burning Damage | 10 |
| Burning Chance | 5 |
| Magic Damage Dealt | 5 |
Item Set Stats
| Stat | Value |
|---|---|
| Death Set | Critical Damage increases by 14%, but it cannot be applied while other set critical damage effect is being applied. |
| Transcended One Set | Cooldown Speed +7.50% |
Throne and Liberty Related Guides

Weapon Builds
 Spear Spear |
 Crossbows Crossbows |
Daggers |
 Greatsword Greatsword |
 Longbow Longbow |
 Staff Staff |
 Sword and Shield Sword and Shield |
 Wand Wand |
All Build Guides
All Role Guides
 Best Healer Build Best Healer Build |
 Best Tank Build Best Tank Build |
 Best DPS Build Best DPS Build |
 Best Mage Build Best Mage Build |
Comment
1  Anonymous over 1 year
very bad, stopped reading after seeing skill for gaining thundercloud stucks without thundercloud bombing. Makes absolutely no sense.
Author

Throne and Liberty: Wilds of Talandre Walkthrough & Guides Wiki
Best Spellblade Dagger / Staff Build (PvP)
Please participate in our site
improvement survey
03/2026
improvement survey
03/2026
Would you assist in
improving Game8's site?
improving Game8's site?

×
We are listening to our users' valuable opinions and discussing how to act on them.
The information collected through this survey will be used for the purpose of improving our services. In addition, the information will only be disclosed a part of a statistic in a format that will not allow identification of personal information.
Begin Survey
Not Now
×
Please rate each item regarding Game8.co's Advertisements.
Amount of Ads
Very Dissatisfied
Somewhat Dissatisfied
Fine
Somewhat Satisfied
Highly Satisfied
Placement of Ads
Timing of Ad Display
Ad Loading Speed
Safeness of Ads
Content of Ads
×
Please rate each item regarding Game8.co's Quality of Articles.
Amount of information
Very Dissatisfied
Somewhat Dissatisfied
Fine
Somewhat Satisfied
Highly Satisfied
Frequency of updates
Speed of new information
Accuracy of articles
Understandibility of articles
Readability of sentences
×
Please rate each item regarding Game8.co's Usability of the Site.
Ease of finding information
Very Dissatisfied
Somewhat Dissatisfied
Fine
Somewhat Satisfied
Highly Satisfied
Loading Speed
Use of Color
Font Size
Visibility of Images
Easy to Understand Layout
×
Please rate each item regarding Game8.co's Message Boards, Comments.
Ease of Writing
Very Dissatisfied
Somewhat Dissatisfied
Fine
Somewhat Satisfied
Highly Satisfied
Readability
Ease in Finding Information
Comment Quality
Comment Quantity
Admin Response
×
Please rate each item regarding Game8.co's Site's new design.
Please rate our site's new design
Very Dissatisfied
Somewhat Dissatisfied
Fine
Somewhat Satisfied
Highly Satisfied
Do you think that the website's design change makes the site easier to use?
Has the new design made it easier for you to find information on the site?
Has the new design improved the overall visual appeal of the site?
How would you rate your overall satisfaction with the new design of the site?
×
How likely are you to recommend Game8 to someone you know?
Very Unlikely
0
1
2
3
4
5
6
7
8
9
10
Very Likely
If you have other opinions regarding potential improvement to the website, please share them with us. We would appreciate your honest opinion.
Note: This is a free response section, so you can proceed without entering anything.
Note: Please be sure not to enter any kind of personal information into your response.
Note: Please be sure not to enter any kind of personal information into your response.
×
Thank You
×
Thank you for participating in our survey! Your answers will help us to improve the quality of our website and services.
We hope you continue to make use of Game8.
We hope you continue to make use of Game8.
Close
Rankings
- We could not find the message board you were looking for.
Gaming News


![Everwind Review [Early Access] | The Shaky First Step to A Very Long Journey](https://img.game8.co/4440226/ab079b1153298a042633dd1ef51e878e.png/thumb)

![Monster Hunter Stories 3 Review [First Impressions] | Simply Rejuvenating](https://img.game8.co/4438641/2a31b7702bd70e78ec8efd24661dacda.jpeg/thumb)
Popular Games
Genshin Impact Walkthrough & Guides Wiki
Honkai: Star Rail Walkthrough & Guides Wiki
Umamusume: Pretty Derby Walkthrough & Guides Wiki
Pokemon Pokopia Walkthrough & Guides Wiki
Resident Evil Requiem (RE9) Walkthrough & Guides Wiki
Monster Hunter Wilds Walkthrough & Guides Wiki
Wuthering Waves Walkthrough & Guides Wiki
Arknights: Endfield Walkthrough & Guides Wiki
Pokemon FireRed and LeafGreen (FRLG) Walkthrough & Guides Wiki
Pokemon TCG Pocket (PTCGP) Strategies & Guides Wiki


Recommended Games
Diablo 4: Vessel of Hatred Walkthrough & Guides Wiki
Fire Emblem Heroes (FEH) Walkthrough & Guides Wiki
Yu-Gi-Oh! Master Duel Walkthrough & Guides Wiki
Super Smash Bros. Ultimate Walkthrough & Guides Wiki
Pokemon Brilliant Diamond and Shining Pearl (BDSP) Walkthrough & Guides Wiki
Elden Ring Shadow of the Erdtree Walkthrough & Guides Wiki
Monster Hunter World Walkthrough & Guides Wiki
The Legend of Zelda: Tears of the Kingdom Walkthrough & Guides Wiki
Persona 3 Reload Walkthrough & Guides Wiki
Cyberpunk 2077: Ultimate Edition Walkthrough & Guides Wiki


All rights reserved
Published by Amazon Games under license. ©2023-2024 NCSOFT Corporation. All rights reserved. THRONE AND LIBERTY and the THRONE AND LIBERTY logo are trademarks of NCSOFT Corporation. Used by Amazon Games under license. Amazon Games, Amazon, and all related logos are trademarks of Amazon.com, Inc. or its affiliates. The “PS” Family logo and “PS5” are registered trademarks of Sony Interactive Entertainment Inc. Steam and the Steam logo are trademarks and/or registered trademarks of Valve Corporation in the U.S. and/or other countries.
The copyrights of videos of games used in our content and other intellectual property rights belong to the provider of the game.
The contents we provide on this site were created personally by members of the Game8 editorial department.
We refuse the right to reuse or repost content taken without our permission such as data or images to other sites.
Ascended Guardian Gloves don't have ranged evasion.