Death's Abyss Dungeon: How to Beat Karnix
As of March 2025, Game8 has ended coverage of Throne and Liberty.
Thank you very much for your understanding and we hope you continue to enjoy Game8's guides!

Death's Abyss is a 1-Star Dimensional Circle dungeon where you must fight Karnix in Throne and Liberty (TL). Read on to see an overview of Death's Abyss, a complete walkthrough of Death's Abyss, how to beat Karnix, as well as the possible rewards and drops upon completion!
List of Contents
How to Beat Karnix
Karnix Boss Showcase
Check out our 3-minute clear of Karnix with only 5 party members!
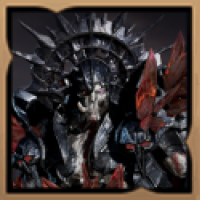
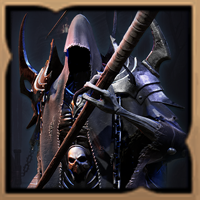
Karnix Overview
| Karnix | |
|---|---|
 |
|
| Type | Undead |
| Passive | Freedom Stance: Bind Resistance ▲ |
Karnix Mechanics
| Karnix Mechanics |
|---|
|
|
Use Defensive Skills for Fury Attacks
Defeating Karnix is a straighforward task since the fight doesn't have any notable special mechanics. Dealing damage, dodging attacks, and using Defensive Skill against its fury attacks are practically the only things needed to defeat it.
However, there are a few small details to note to avoid getting killed.
Run Around During the Spinning Scythes Attack
One of Karnix's attacks has the boss mark three targets, then summon three large spinning scythes that each chase after the marked targets.
During this attack, the best strategy is to have the three marked targets run around the arena while staying away from the rest of the party until the scythes disappear to prevent them from taking unecessary damage.
Gather Inside the Black Circle
Karnix's most powerful attack is to mark a target with a black circle below it, then teleport near the target and attack. After that, it will follow up with a fury attack.
It is imperative that everyone in the party go to the marked target. This will spread the damage to everyone in the circle. Anyone who isn't in the circle will be hit by a fear state as soon as Karnix executes his attack, so they will not be able to block the fury attack that Karnix executes afterwards.
To make things easier, just have all the party members, including the marked target, huddle somewhere in the middle of the arena once a target is marked. This does require the entire party to stop attacking since they have to rush towards the marked target.
The Staff's Salvation Chain can be used on party members who are further away from the black circle to help them reach it in time.
Karnix Attack Patterns
Teleport Attack
Karnix teleports around the arena, then unleashes a wave attack. It performs this attack about three (3) consecutive times.
Slam Attack
Karnix levitates in the air and charges up an attack, then slams the ground with its scythe, creating a wide shockwave. This is a blockable attack.
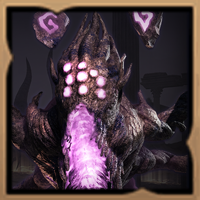
Spinning Scythes
Karnix marks the three (3) closest targets, then summons a large spinning scythe for each target that chases them around. This attack is unblockable.
Death Cleave
Karnix marks a target with a black circle, then teleports to the target and performs a slashing attack with his scythe. Damage is distributed to party members within the black circle. This attack is immediately followed by a fury attack that must be blocked.
Death's Abyss Best Team and Roles
| Role | Explanation |
|---|---|
  Tank |
Weapon Combination: The best tank class available, adept at mitigating damage and generating aggro. Dungeon Role: Confront enemies head-on, landing stuns on demand and for crowd control. Karnix Role: Tank most of Karnix's damage while making sure it faces away from the party to protect them from AoE attacks. |
  DPS |
Weapon Combination: Ranged DPS who can constantly reapply Deadly Marker to specific targets. Dungeon Role: Can spec AoE for faster mob clearing. Karnix Role: Can provide continuous DPS even if Karnix teleports to other players, provided the party remains in close formation. |
  DPS |
Weapon Combination: A short-range DPS that has arguably the highest single-target damage output of any of the playable classes. Dungeon Role: Able to take out specific key targets thanks to Mortal Mark and Weak Point Shot. Karnix Role: Focuses solely on DPS, but can easily deal with any mechanic thanks to it's high mobility. |
  DPS |
Weapon Combination: Self-sustaining ranged DPS with plenty of versatility. Dungon Role: Can deal DPS from a safe distance thanks to its ranged skills. Can specialize in single-target damage or AoE. Karnix Role: Boost the DPS of everyone in the party with Deadly Marker while dealing damage. Able to pull allies caught out of position with Salvation Chain. |
 Healer |
Weapon Combination: The best weapon combo for healing and increasing survivability by mitigating damage. Dungeon Role: Focuses on healing, and application of deadly Marker. Can take more damage skills if the party doesn't take too much damage. Karnix Role: Acts as the party's primary healer and secondary DPS. Can be replaced with a Wand / Staff class if Salvation Chain is needed. |
Death's Abyss Walkthrough
| Death's Abyss Sequences | |
|---|---|
| 1 |  First Room In the first room, just take the leftmost path and defeat the enemies in the path since none of the enemies in that room need to be defeated to progress the dungeon. Try to avoid the Enchanted Arkeum Arbiter that's patroling in the middle. |
| 2 |  First Secton of the Hallway Exiting the first room leads to a hallway where an Archer and a Healer stands guard on top of the stairs there that leads to the second section of the hall way and an Arbiter is patrolling back and forth. Wait until the Arbiter is far away from the two guards before taking its attention and defeating it. Afterwards, defeat the two guards before proceeding further. |
| 3 |  Second Section of the Hallway Two Arbiters, one Wizard, and one Healer fill the second section of the hallway. Focus on the Healer first to prevent any damage dealt by the party to be undone. All enemies in the room need to be defeated to proceed further. After defeating all enemies, the gates leading to the second room will open. |
| 4 | Second Room The second room is similar to the first one. Just stay at the leftmost portion of the room to proceed and avoid fighting. |
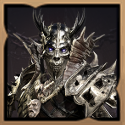
| 5 |  Third Room The third room is where the dungeon's first mini boss is located. Just head straight for the mini boss but be sure to proceed exactly in the middle of the room to avoid fighting the other enemies. ┗ How to defeat Elite Arkeum Shadowmancer |
| 6 |  Activating the Levers After defeating the mini boss, go back to hallway to activate the two (2) levers. If the party has a Dagger user, that member can use Camouflage Cloak to sneak past enemies and head straight for the lever to activate it while the rest of the party goes for the other lever. Otherwise, the party can either split into two (2) groups to activate each lever or remain together to activate them one by one. |
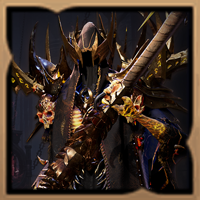
| 7 |  Fourth Room After activating the levers, the gate leading to the fourth room opens where an Elite Arkeum Riot Squad Captain is located, which is the second mini boss of the dungeon. Defeating the mini boss opens the gate leading to the final boss of the dungeon, Karnix. ┗ How to defeat Elite Arkeum Riot Squad Captain |
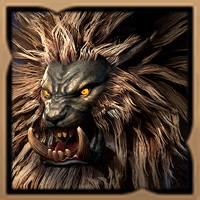
How to Defeat Elite Arkeum Shadowmancer
The Elite Arkeum Shadowmancer doesn't have any special mechanics to defeat it but does have an attack that is a guaranteed kill if it completes the attack, making it hard to proceed.
This attack has the mini boss trap and lift up three targets. The only way to counter the attack is by inflicting the mini boss with a hard crowd control like a stun during this attack to prevent the targets' death.
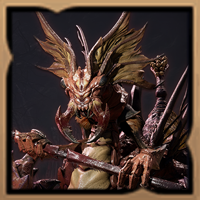
How to Defeat Elite Arkeum Riot Squad Captain
The Elite Arkeum Riot Squad Captain has the same attacks as Enchanted Arkeum Arbiters with just an additional special move. This special move has the mini boss say, Impossible!, then create a damage-mitigating shield on itself. After a few moments, the mini boss will yell, Die!
, and its shield turns red, then performs a devastating AOE attack.
When the shield turns red, stop dealing damage to it immediately. As soon as it screams Die!
, immediately use Fury attacks to break through its shield, and use a hard CC once the shield is down to stop its cast.
Death's Abyss Overview
| Required Level | Lv. 50 |
|---|---|
| Type | 1-Star Dimensional Circle |
| Contract Token |
|
| Min. Combat Power | |
| Description | |
| The Arkeum Legion sent one expedition after another into Syleus's Abyss, desperate to harness the dark power residing within. None were prepared to face the countless monsters roaming the passageways, nor navigate the labyrinth, Every expedition failed. Upon discovering Heliber, the Legion seized on the idea of using him to gain control over the Abyss. They eventually managed to capture him, imprisoning him in a stone casket. Yet even stone could not hold Heliber forever, and when he broke free of his prison, he was even stronger than before. The sole Arkeum Shadowmancer to survive the encounter called upon the specter Karnix for help. | |
Death's Abyss Best Rewards and All Drops
Best Weapon
| Weapon | Stats |
|---|---|
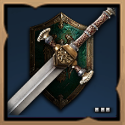
 Karnix's Netherblade Karnix's Netherblade Karnix's Netherblade Strength 6
Humanoid Bonus Damage 8 Max Health 1,005 |
Type:
Damage: 46~85Atk Spd: 0.522s Range: 2.5m Shield Block Chance: 10% Modifiers: ・Strength 6 ・Humanoid Bonus Damage 8 ・Max Health 1,005 |
Arguably the best weapon for sword and shield users due to the huge amount of Health it provides, as well as some extra Strength.
Sword and Shield Builds
All Drops
Weapons
| All Weapon Drops |
Karnix's Netherblade Karnix's Netherblade Strength 6
Humanoid Bonus Damage 8 Max Health 1,005 |
 Karnix's Netherbow Karnix's Netherbow Karnix's Netherbow Strength 7
Critical Hit 84 |
 Sword of Striking Sword of Striking Sword of Striking Strength 2
Collision Chance 175 |
|---|
Armor
| All Armor Drops |
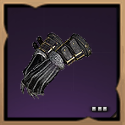 Grip of the Executioner Grip of the Executioner Grip of the Executioner Added Attack Speed +2.4%
Perception 2 Mana Regen 15 |
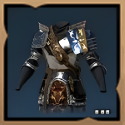
 Plate of the Field General Plate of the Field General Plate of the Field General Strength 2
Perception 1 Stun Chance 26` |
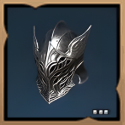
 Visor of the Infernal Herald Visor of the Infernal Herald Visor of the Infernal Herald Strength 2
Critical Hit Chance 23 Stun Chance 22 |
 Decorated Champion Armor Decorated Champion Armor Decorated Champion Armor Strength 2
Max Mana 300 |
|---|---|---|---|
 Gloom Guard Gauntlets Gloom Guard Gauntlets Gloom Guard Gauntlets Strength 2
Critical Hit 40 |
 Gloom Guard Greaves Gloom Guard Greaves Gloom Guard Greaves Wisdom 2
Mana Regen 30 |
 Gloom Guard Plate Armor Gloom Guard Plate Armor Gloom Guard Plate Armor Max Health 300
Stamina Regen 2 |
 Gloom Guard Sabatons Gloom Guard Sabatons Gloom Guard Sabatons Strength 2
Melee Endurance 80 |
 Gloom Guard Winged Helmet Gloom Guard Winged Helmet Gloom Guard Winged Helmet Critical Hit Chance 30
Max Health 375 |
|||
Accessories
| All Accessory Drops |
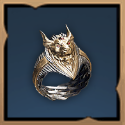
 Abyssal Grace Band Abyssal Grace Band Abyssal Grace Band Added Attack Speed +3.3%
Mana Cost Efficiency +7.7% |
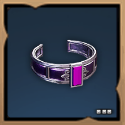 Kunzite Bangle Kunzite Bangle Kunzite Bangle Max Health 150
Silence Resistance 25 Bind Resistance 25 |
 Platinum Skull Band Platinum Skull Band Platinum Skull Band Critical Hit Chance 60
Max Health 225 |
|---|
Items
 Precious Polished Crystal
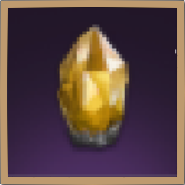 Precious Stalon Ore
 Precious Emeret Ore
 Precious Rubrix Ore
 Precious Marind Ore
 Precious Parchment
 Precious Omnipotence Parchment
 Dimension Soul Shard: Karnix
 Rare Polished Crystal
 Reaper's Soul
 Mana Blood
Other
| All Death's Abyss Other Rewards | ||
|---|---|---|
 Tormented Writer Glynt Tormented Writer Glynt
|
Abyssal Contract Token Points (x500) | Training Dew: 10,000 Points |
Throne and Liberty (TL) Related Guides
All Co-op Dungeons: Dimensional Circles
Dungeon Guides
| 3-Star Co-op Dungeons | 2-Star Co-op Dungeons |
3-Star Dimensional Circle Coop Dungeons
 Rancorwood Rancorwood |
 Halls of Tragedy Halls of Tragedy |
 Chapel of Madness Chapel of Madness |
 Doomrot Grove Doomrot Grove |
 Twisted Laboratory Twisted Laboratory |
- |
2-Star Dimensional Circle Coop Dungeons
 Island of Terror Island of Terror |
 Voidwastes Voidwastes |
 Valley of Slaughter Valley of Slaughter |
 Carmine Rage Island Carmine Rage Island |
 Torture Chamber of Screams Torture Chamber of Screams |
- |
1-Star Dimensional Circle Coop Dungeons
 Death's Abyss Death's Abyss |
 Cursed Wasteland Cursed Wasteland |
 Temple of Slaughter Temple of Slaughter |
 Butcher's Canyon Butcher's Canyon |
 Tyrant's Isle Tyrant's Isle |
 Cave of Destruction Cave of Destruction |
Dimensional Circle Coop Dungeons
 Specter's Abyss Specter's Abyss |
 Roaring Temple Roaring Temple |
 Cave of Desperation Cave of Desperation |
Event Coop Dungeons
 Haunted Labyrinth Haunted Labyrinth |
Comment
Author

Throne and Liberty: Wilds of Talandre Walkthrough & Guides Wiki
Death's Abyss Dungeon: How to Beat Karnix
Rankings
- We could not find the message board you were looking for.
Gaming News

![Death Stranding 2: On The Beach [PC] Review | A Port That Delivers](https://img.game8.co/4447392/15310a0c9aa1b6843bb713b2ea216930.jpeg/show)


Popular Games

Genshin Impact Walkthrough & Guides Wiki
Umamusume: Pretty Derby Walkthrough & Guides Wiki
Crimson Desert Walkthrough & Guides Wiki
Monster Hunter Stories 3: Twisted Reflection Walkthrough & Guides Wiki
Honkai: Star Rail Walkthrough & Guides Wiki
Pokemon Pokopia Walkthrough & Guides Wiki
The Seven Deadly Sins: Origin Walkthrough & Guides Wiki
Wuthering Waves Walkthrough & Guides Wiki
Zenless Zone Zero Walkthrough & Guides Wiki
Arknights: Endfield Walkthrough & Guides Wiki


Recommended Games
Fire Emblem Heroes (FEH) Walkthrough & Guides Wiki
Diablo 4: Vessel of Hatred Walkthrough & Guides Wiki
Cyberpunk 2077: Ultimate Edition Walkthrough & Guides Wiki
Yu-Gi-Oh! Master Duel Walkthrough & Guides Wiki
Super Smash Bros. Ultimate Walkthrough & Guides Wiki
Pokemon Brilliant Diamond and Shining Pearl (BDSP) Walkthrough & Guides Wiki
Elden Ring Shadow of the Erdtree Walkthrough & Guides Wiki
Monster Hunter World Walkthrough & Guides Wiki
The Legend of Zelda: Tears of the Kingdom Walkthrough & Guides Wiki
Persona 3 Reload Walkthrough & Guides Wiki


All rights reserved
Published by Amazon Games under license. ©2023-2024 NCSOFT Corporation. All rights reserved. THRONE AND LIBERTY and the THRONE AND LIBERTY logo are trademarks of NCSOFT Corporation. Used by Amazon Games under license. Amazon Games, Amazon, and all related logos are trademarks of Amazon.com, Inc. or its affiliates. The “PS” Family logo and “PS5” are registered trademarks of Sony Interactive Entertainment Inc. Steam and the Steam logo are trademarks and/or registered trademarks of Valve Corporation in the U.S. and/or other countries.
The copyrights of videos of games used in our content and other intellectual property rights belong to the provider of the game.
The contents we provide on this site were created personally by members of the Game8 editorial department.
We refuse the right to reuse or repost content taken without our permission such as data or images to other sites.