Haunted Labyrinth Dungeon: How to Beat Embergourd
As of March 2025, Game8 has ended coverage of Throne and Liberty.
Thank you very much for your understanding and we hope you continue to enjoy Game8's guides!
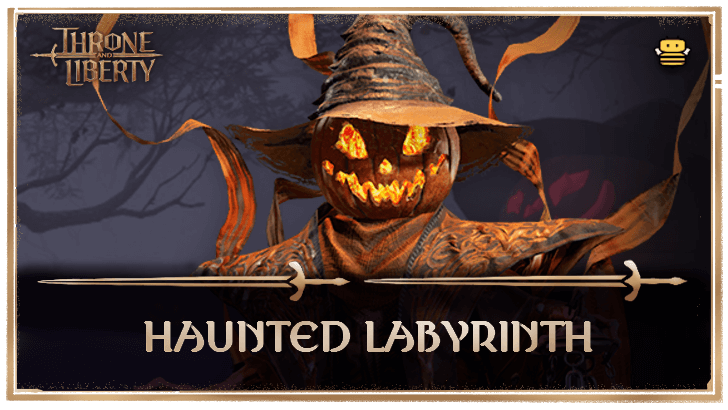
To clear the Haunted Labyrinth in Throne and Liberty (TL), push the lanterns that Embergourd spawns and avoid the bats during the fly transformation mechanic. See an overview of Haunted Labyrinth, a complete walkthrough of Haunted Labyrinth, how to beat Embergourd, and the possible rewards and drops upon completion!
List of Contents
How to Beat Embergourd
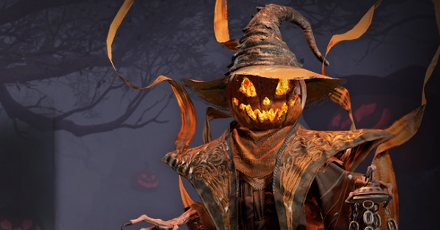
Embergourd Overview
| Embergourd | |
|---|---|
 |
|
| Type | Undead |
| Passive | Deathly Mind's Eye: Night: All Hit ▲ |
Embergourd Mechanics
| Embergourd Mechanics |
|---|
|
|
Pumpkin Lanterns
Embergourd will envelop itself in a shield reminiscent of a pumpkin and spread three lanterns in the arena. The goal of this mechanic is to have everybody push the lanterns toward Embergourd. Successfully doing so will remove the massive pumpkin shield and stun Embergourd for some time, allowing you to deal damage!
If you and your party fail to push the lanterns near Embergourd, the lanterns will explode and Embergourd will inflict a party-wide stun that inflicts a significant amount of damage and keep its shield. To remove the shield after failing, inflict as much damage as possible!
Wave o' Pumpkins
Embergourd's second mechanic will have him spawn three waves of Pumpkins that knock you and your party members back upon being hit. However, some consumable pumpkins are highlighted with a bright orange hue, which can be touched by a player to turn into a pumpkin.
After the third wave, Embergourd will channel an arena-wide explosion where everyone in a pumpkin flies to avoid damage. Failing to hide inside a pumpkin will instead deal high burst damage, often killing players without good resistance!
The key here is to begin splitting the party up and positioning far back as soon as Embergourd starts the first wave so anyone unable to get a pumpkin can prepare themselves for the second and third waves.
Fly Transformation
Often his last mechanic after reaching critical health, Embergourd will warp the players at the southern side of the arena and transform them into flies. Embergourd will then begin casting a binding spell, causing magic to ripple through the ground.
To safely pass this mechanic, press the button assigned to your first hotkey when the wave of arcana reaches Embergourd and he reels back before saying Gotcha
to avoid his binding attack.
After landing, do not forget to press the hotkey again to be able to move. Repeat this while avoiding the bats until you reach the green circle near Embergourd, removing the fly transformation.
Embergourd Attack Patterns
Embergourd follows and repeats this pattern the whole fight before using a mechanic:
| Fireballs ▶ Ghastly Pull ▶ Fireballs ▶ Stunning Magma (Fury Attack) ▶ Lantern Embers ▶ |
Fireballs
Embergourd will consecutively sling three fireballs, serving as his basic attacks The one that Embergourd will be targeting is the party member that is being followed by an orange light.
Ghastly Pull
Embergourd raises his two hands to pull every player near him and begins conjuring a ball of fire. An area near him will be highlighted with an orange tinge before exploding. After evading the initial explosion, another ring will present itself along the outer ridges of the first one.
The trick to avoid this is to morph as soon as you are pulled exit the first attack's range, and then use a skill to dash back to Embergourd quickly.
Stunning Magma
Embergourd will begin charging up and fire off slags of homing magma, stunning any player upon getting hit. This is Embergourd's average Fury Attack, meaning you can parry this attack to activate your defense skill's extra effects!
Lantern Embers
Embergourd raises his lantern into the air and bellows "Trick... or be eaten!" before sending two waves of its embers on the highlighted target, leaving behind two trails of flame that deal damage over time.
Haunted Labyrinth Best Team and Roles
| Role | Explanation |
|---|---|
  Tank |
Weapon Combination: This weapon combo makes a great tank build to help the party by grabbing the attention of the numerous Pumpkin Soldiers encountered in the dungeon. Dungeon Role: Responsible for taking all of the mob's aggro to allow the DPS and Healer to safely interact with the pumpkins. Embergourd Role: Responsible for sticking close to Embergourd to take its aggro to redirect its burn inflicting Fury Attacks. |
  DPS |
Weapon Combination: This weapon combo makes for the best single target and AoE damage for PVE. Dungeon Role: Responsible for clearing the mobs after searching for the Key and gathering Pumpkins. Embergourd Role: Responsible for dealing as much damage to Embergourd while keeping themselves prepared for the mechanics. Also, they are responsible for pushing the lanterns towards Embergourd. |
  Healer |
Weapon Combination: This weapon combo makes a great support build to provide consistent healing to the party. It also has strong DoT potential with Curses and Burning. Dungeon Role: Responsible for keeping the Tank healthy while they aggro groups. Also tasked with finding the keys and picking up Pumpkins. Embergourd Role: Responsible for keeping the whole party healthy during the fight whilst dealing as much damage as possible. |
Haunted Labyrinth Walkthrough
| Haunted Labyrinth Sequences | |
|---|---|
| 1 | Find the Pumpkin Key The first sequence of the Haunted Labyrinth will have you find the key hidden inside a random pumpkin. The path towards the pumpkin patch is fairly simple, just have the Tank gather aggro to quickly progress. As you reach the pumpkin patch, quickly focus on interacting with as many pumpkins as you can while the Tank lures the mobs away. Always be mindful enough to parry the fury attacks of the Pumpkin Mandrakes that spawn. If any of the players get the key, a notification will pop up at the top-most portion of your screen, indicating that you should progress to the locked door on the right of the staircase. Proceed quickly by mounting the pumpkin wagon and swiftly activating the mechanism or risk being swarmed! |
| 2 | Fuel the Pumpkin Wagon After flying with the pumpkin wagon, it will lose fuel and you will need to supply it with three more pumpkins to hitch another ride. Simply ascend the staircase to repeat the pumpkin harvesting, where you must focus on finding the smaller pumpkins to use as fuel. As an additional tip, there will be 1-2 small pumpkins that spawn at the base of the staircase! To fuel the pumpkin wagon, insert a pumpkin into the pumpkin slot in front of the wagon, specifically on the carving that is its mouth. Board it once more to get to the next section of the dungeon. As you take yet another ride with the pumpkin wagon and before reaching the mini-boss, two Pumpkin Soldiers will begin flying and perform a fury attack that may cause you to fall. Simply parry it then clear the remaining mobs to engage with the Pumpkin Watch Captain! ┗ Pumpkin Watch Captain |
| 3 | Avoid the Rolling Pumpkins After defeating the Pumpkin Watch Captain, you will need to go through a platforming section where you will be turned into pumpkins yourselves while two huge pumpkins repeatedly roll back and forth, knocking anyone unconscious when hit. To get through unscathed, simply be patient and utilize the indented sections to avoid being squashed. You will only need one party member to get through and you and the other players can just respawn before the arena of Embergourd. |
Pumpkin Watch Captain
While the mini-boss itself is easy, the Pumpkin Watch Captain has certain moves you should look out for:
| Attack | Description |
|---|---|
| Exploding Pumpkins | The Watch Captain spawns three pumpkin heads that will track one player each and explode at the end of the timer. To avoid having to deal with the explosions and being trapped in a pumpkin, have the players being followed lure them into the open graves. |
| Bouncing Pumpkin | The Watch Captain deploys a pumpkin that bounces to random players close to each other. To mitigate having multiple instances of burst damage, communicate with your team to stay apart from each other to lessen the bounces! |
| Pumpkin Flamethrower | The Watch Captain will begin conjuring up a pumpkin that, upon completion, will release a cone of flame in front of it. Simply be mindful of the orange lines that appear while the Watch Captain is winding up the attack. |
Haunted Labyrinth Overview
| Required Level | Lv. 50 |
|---|---|
| Type | Event |
| Contract Token |
|
| Min. Combat Power | |
| Description | |
| Pumpkin Jack, the Lord Embergourd, is trying to make the best pumpkin field in the Solisium into his personal stronghold. With the help of his watchers and treacherous traps, he was able to steal the land from its rightful. Adventurers are gathering to reclaim the pumpkin field. | |
Haunted Labyrinth Best Rewards and Drops
Farm Dimension Pumpkins
You'll mainly be farming the Haunted Labyrinth to collect Dimension Pumpkins, the main currency for the Halloween event and a guaranteed drop from the dungeon. Use these at the Dimension Pumpkin Exchange Merchants around the map to buy Trait Unlockstones, Trait Extraction Stones, and Enchanted Ink.
The Cosmetic, Amitoi, and Morphs are rare drops for if you get lucky, but these can also be bought with Dimension Pumpkins, so simply logging in daily and spending your Candy Corn to run the dungeon will ensure that you earn enough to buy all of the exclusive cosmetic items.
All Drops
| Haunted Labyrinth Drops | |||
|---|---|---|---|
| Dimension Pumpkin | Pumpkin Lord Headpiece (Cosmetic) | Jack-o'-Lantern Izzy (Amitoi) | Hallow-Knight (Morph) |
| Punky Pumpkin (Morph) | Abundance Bundle | Spooky Pumpkin Pie | Choco-Spider Cookie |
| Quality Cooking Ingredient Selection Basket | 500,000 Sollant | Ornate Coin x20 | - |
Throne and Liberty (TL) Related Guides

All Co-op Dungeons: Dimensional Circles
Dungeon Guides
| 3-Star Co-op Dungeons | 2-Star Co-op Dungeons |
3-Star Dimensional Circle Coop Dungeons
 Rancorwood Rancorwood |
 Halls of Tragedy Halls of Tragedy |
 Chapel of Madness Chapel of Madness |
 Doomrot Grove Doomrot Grove |
 Twisted Laboratory Twisted Laboratory |
- |
2-Star Dimensional Circle Coop Dungeons
 Island of Terror Island of Terror |
 Voidwastes Voidwastes |
 Valley of Slaughter Valley of Slaughter |
 Carmine Rage Island Carmine Rage Island |
 Torture Chamber of Screams Torture Chamber of Screams |
- |
1-Star Dimensional Circle Coop Dungeons
 Death's Abyss Death's Abyss |
 Cursed Wasteland Cursed Wasteland |
 Temple of Slaughter Temple of Slaughter |
 Butcher's Canyon Butcher's Canyon |
 Tyrant's Isle Tyrant's Isle |
 Cave of Destruction Cave of Destruction |
Dimensional Circle Coop Dungeons
 Specter's Abyss Specter's Abyss |
 Roaring Temple Roaring Temple |
 Cave of Desperation Cave of Desperation |
Event Coop Dungeons
 Haunted Labyrinth Haunted Labyrinth |
Comment
Author
Throne and Liberty: Wilds of Talandre Walkthrough & Guides Wiki
Haunted Labyrinth Dungeon: How to Beat Embergourd
improvement survey
03/2026
improving Game8's site?

Your answers will help us to improve our website.
Note: Please be sure not to enter any kind of personal information into your response.

We hope you continue to make use of Game8.
Rankings
- We could not find the message board you were looking for.
Gaming News
Popular Games

Genshin Impact Walkthrough & Guides Wiki

Honkai: Star Rail Walkthrough & Guides Wiki

Umamusume: Pretty Derby Walkthrough & Guides Wiki

Pokemon Pokopia Walkthrough & Guides Wiki

Resident Evil Requiem (RE9) Walkthrough & Guides Wiki

Monster Hunter Wilds Walkthrough & Guides Wiki

Wuthering Waves Walkthrough & Guides Wiki

Arknights: Endfield Walkthrough & Guides Wiki

Pokemon FireRed and LeafGreen (FRLG) Walkthrough & Guides Wiki

Pokemon TCG Pocket (PTCGP) Strategies & Guides Wiki
Recommended Games

Fire Emblem Heroes (FEH) Walkthrough & Guides Wiki

Diablo 4: Vessel of Hatred Walkthrough & Guides Wiki

Yu-Gi-Oh! Master Duel Walkthrough & Guides Wiki

Super Smash Bros. Ultimate Walkthrough & Guides Wiki

Pokemon Brilliant Diamond and Shining Pearl (BDSP) Walkthrough & Guides Wiki

Elden Ring Shadow of the Erdtree Walkthrough & Guides Wiki

Monster Hunter World Walkthrough & Guides Wiki

The Legend of Zelda: Tears of the Kingdom Walkthrough & Guides Wiki

Persona 3 Reload Walkthrough & Guides Wiki

Cyberpunk 2077: Ultimate Edition Walkthrough & Guides Wiki
All rights reserved
Published by Amazon Games under license. ©2023-2024 NCSOFT Corporation. All rights reserved. THRONE AND LIBERTY and the THRONE AND LIBERTY logo are trademarks of NCSOFT Corporation. Used by Amazon Games under license. Amazon Games, Amazon, and all related logos are trademarks of Amazon.com, Inc. or its affiliates. The “PS” Family logo and “PS5” are registered trademarks of Sony Interactive Entertainment Inc. Steam and the Steam logo are trademarks and/or registered trademarks of Valve Corporation in the U.S. and/or other countries.
The copyrights of videos of games used in our content and other intellectual property rights belong to the provider of the game.
The contents we provide on this site were created personally by members of the Game8 editorial department.
We refuse the right to reuse or repost content taken without our permission such as data or images to other sites.


![Slay the Spire 2 Review [Early Access] | Still the Deckbuilder to Beat](https://img.game8.co/4433115/44e19e1fb0b4755466b9e516ec7ffb1e.png/thumb)

![Resident Evil Village Review [Switch 2] | Almost Flawless Port](https://img.game8.co/4432790/e1859f64830960ce4248d898f8cd38d9.jpeg/thumb)


