 Precious Polished Crystal
 Precious Stalon Ore
 Precious Emeret Ore
 Precious Rubrix Ore
 Precious Marind Ore
 Precious Parchment
 Precious Omnipotence Parchment
 Dimensional Soul Shard: Duke Magna
 Rare Polished Crystal
 Orc Heart
 Fermented Rotein
This survey will take about 1 minute.
Your answers will help us to improve our website.
Throne and Liberty (TL)
Butcher's Canyon Dungeon: How to Beat Duke Magna
As of March 2025, Game8 has ended coverage of Throne and Liberty.
Thank you very much for your understanding and we hope you continue to enjoy Game8's guides!
To finish Butcher's Canyon and beat Duke Magna in Throne and Liberty (TL), stick close to prevent his eye beams, then reach the edge of the rings of flames to be safe from his wrath. Read on to see an overview of Butcher's Canyon, a complete walkthrough of Butcher's Canyon, how to beat Duke Magna, as well as the best rewards and drops upon completion!
List of Contents
How to Beat Duke Magna
Duke Magna Boss Showcase
Note: This clear was done in the KR server!
Check out our 7-minute clear of Duke Magna with minimal gear investments and only 5 party members!
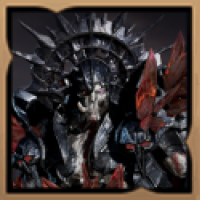
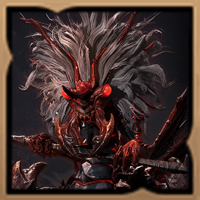
Duke Magna Overview
| Duke Magna | |
|---|---|
 |
|
| Type | Humanoid |
| Passive | Blood Rush: Max Health ▲ |
Duke Magna Mechanics
| Duke Magna Mechanics |
|---|
|
|
Rings of Flame: Sheep
Duke Magna, upon reaching 90% HP, will drag everyone into the center and spawn rings of flame that stick the player into place upon contact. After this, two Orc Shapeshifters will spawn on the east and west totems, then one person will morph into a sheep. This starts a timed sequence that will result in either one or multiple players dying upon failure.
The player who has been morphed as a sheep is barred from jumping, so you and your party will have to coordinate to get the curse outside of the rings of flame, requiring you to jump over the flames. For more safety while jumping, morph into your ground morph!
The key here is to assign two players to line up at the edges of the rings leading up to the Shapeshifters. As soon as the Sheep is out, quickly bursts down the Shapeshifter to spawn the blue ritual circle that removes the morph. Successfully doing so will end in Duke Magna giving you a timeframe to deal damage.
After the totem variant of this mechanic, Duke Magna will repeat this section after reaching 40% HP. The difference found here is that the rings of fire will cover more ground, limiting the places the party can jump to. Simply repeat the process but be more careful of your positioning!
Rings of Flame: Totems
After the first mechanic and reaching 60-70% HP, Duke Magna will pull everyone into the center yet again, spawning the same rings of flame that bind the player to the ground.
After that, you should have noticed that two of the totems will now glow red instead of blue. Simply interact with two of the red totems to complete the mechanic safely. Duke Magna will end up inactive for some time again, allowing you to deal significant damage.
Like the first mechanic, Duke Magna will repeat this as his fourth and last mechanic after reaching 10% HP. The same differences apply, wherein the rings of fire will block off certain sections to limit the players from easily getting out.
Duke Magna Attack Patterns
Duke Magna follows and repeats this pattern the whole fight:
| Axe Swings ▶ Fury Attack ▶ Meteor Fall ▶ Tremor Stomp ▶ Fury Attack ▶ Axe Swing (1) ▶ Meteor Fall ▶ Axe Swing (2) |
Note: Axe Swing (1) pertains to the first part of his basic attack, while Axe Swing (2) will have Duke Magna slam his axe down.
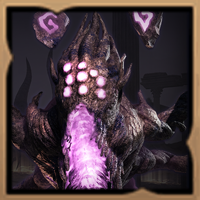
Eye Beam
If even one player is not within Duke Magna's striking range, Duke Magna will replace his basic attack by shooting out an exploding beam that deals massive arena-wide AoE damage. Stop him from doing this by communicating to your team that everyone should play inside the circle Duke Magna is standing in.
Axe Swings
Duke Magna's basic attacks will have him swing his axe two times, ending with him raising his arm and then slamming his axe down on the ground. When he does this attack, it means your party is following the rule that everyone stays within his range.
Axe Spin
After Duke Magna finishes his Axe Swings, he will always use his telegraphed Axe Spin. This attack is considered a Fury Attack, meaning you can easily this to activate your Defense Skill's passives.
Meteor Fall
Duke Magna will begin to glow a magma-reminiscent color and raise his axe into the air, calling down meteors on all of the players in the arena. While intimidating to look at, dodging it by going the opposite way.
The hard part about this is that if you and your allies are spread apart, the meteors will have more coverage. It is best to coordinate your movement with the party as soon as you see Duke Magna performing the attack!
Tremor Stomp
Duke Magna will stomp on the ground to cause an arena-wide tremor, knocking any player caught within its radius prone. To avoid this reliably, jump instantly when he does its starting animation. If you mistime for even a second, you will be prone.
Butcher's Canyon Best Team and Roles
| Role | Explanation |
|---|---|
  Tank |
Weapon Combination: This weapon combo makes a great tank build with sufficient damage and CC to help the party get through the dungeon and fight Duke Magna. Dungeon Role: Responsible for taking all of the mob's aggro and grouping them up for the DPS to clean up. Furthermore, they are responsible for stunning one of the two immune Shadowmancers and removing the traps. Duke Magna Role: Responsible for sticking close to Duke Magna and tanking some of his basic attacks to prevent him from using their AoE Eye Beam attack. |
  DPS |
Weapon Combination: This weapon combo makes for a great DPS build, both for its AoE and single-target damage potential in close range. Dungeon Role: Responsible for clearing the mobs the tank has grouped up. Furthermore, the DPS should prioritize the backline of the orcs to lessen clear times. Duke Magna Role: Aside from dealing as much damage as possible to Duke Magna while sticking close to prevent the Eye Beam attack, the DPS has the responsibility of quickly bursting down the Shadowmancers during the mechanic to remove the Sheep Curse. |
  Healer |
Weapon Combination: This weapon combo makes a great healer build to provide consistent healing to the party, especially to the tank. It also has some offensive options for additional damage. Even within Duke Magna's range, the healer can sustain himself with their skills. Dungeon Role: Responsible for keeping the party healthy at all times. Furthermore, they are responsible for stunning one of the two immune Shadowmancers by putting them to sleep with Cursed Nightmare. Duke Magna Role: Since the tank will take the brunt of Duke Magna's Damage, the healer should focus on keeping them healthy while providing as many DoTs as possible. When a party member fails to do the mechanic, attempt to salvage the situation with a Blessed Barrier to mitigate Duke Magna's damage. |
Butcher's Canyon Walkthrough
| Butcher's Canyon Sequences | |
|---|---|
| 1 | Ascend the Pulley Starting Butcher's Canyon, you will be positioned in front of a pulley. You must first defeat the Orc Key Administrator as they possess the key that activates the pulley's mechanism which allows you to ascend. For the most part, the fight is easy as the only attack you need to look out for is its Belly Flop, which stuns all players in its vicinity after flopping! |
| 2 | Trap-Laced Bridge After ascending the pulley, you will cross a narrow bridge. This bridge is also laced with traps, which you can utilize to easily activate your defense skills like the Ironpoint Parry from GS (Greatsword) as you deal with the Orc mobs. As an additional tip, the skill Fierce Clash from the SnS (Sword and Shield) can push enemies off the bridge to quicken progress! Just before proceeding to the Orc Shadow Elder, you will encounter some Orc Shapeshifters that will turn one of your members into a meek sheep. While in Sheep form, you will not be able to do your usual skill rotations! ┗ Sheep Mechanic |
| 3 | Orc Shadow Elder After going through the Sheep shenanigans, you will have to face the Orc Shadow Elder along with some other mobs found near the center. While not entirely complicated, the mobs the Elder spawns might be troublesome. It would be best to focus on the Shapeshifters as soon as they spawn. |
| 4 | Drawbridge Intersection As soon as you beat the Orc Shadow Elder, you will then encounter another Orc Key Administrator, simply take its key then proceed further. You will come across an intersection, choose to go to the left to access the drawbridge as the right will not hold anything of value. The party member who took the key should let the drawbridge down. After that, you will have reached the final area before the boss. In the orcs' plaza, you will see a group of orc mobs and two Shadowmancers. This will be the final area before the boss, but is rather tricky getting through! ┗ Two Shadowmancers |
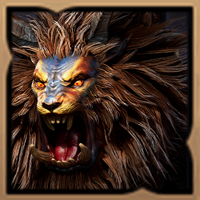
Sheep Mechanic
As soon as you are turned into a sheep, this portion of the dungeon almost acts like a game of hot potato! When a party member comes into the red radius, they take on the sheep curse, curing you in the progress. Failing to do so results in the sheep getting instantly killed after the orc icon above their head turns completely red!
However, you and your party cannot repeat this indefinitely as someone who has been. The trick to this is to simply kill the Orc Shapeshifter, causing a blue ritual circle to spawn. Have the inflicted party member enter this circle to end the cycle!
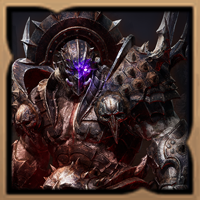
Two Shadowmancers
The Shadowmancers, currently immune to any damage, are surrounded by rings of flame that will bind the player upon contact. However, you can jump over to the areas that are not highlighted. It is recommended to focus all of your resources on clearing the mobs first.
To be able to damage the Shadowmancers, two party members should inflict any kind of CC (Crowd Control) simultaneously before dealing damage. The best spell to use would be the Wand's Cursed Nightmare skill as the duration allows another party member to follow up consistently!
Butcher's Canyon Overview
| Required Level | Lv. 50 |
|---|---|
| Type | 1-Star Dimensional Circle |
| Contract Token |
|
| Min. Combat Power | |
| Description | |
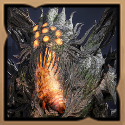
| The giant orc King Verte was a powerful being created by dark magic, but proved too uncontrollable to serve Arkeum as a weapon of war. Instead, Tuaren used King Verte's experiment as a template, ultimately creating an even more advanced weapon. Althrough smaller and more tempered, Duke Magna wields highly concentrated dark magic, making him more powerful and even more dangerous. | |
Butcher's Canyon Best Rewards and All Drops
Duke Magna's Fury Warblade
| Weapon | Stats |
|---|---|
 Duke Magna's Fury Warblade Duke Magna's Fury Warblade Duke Magna's Fury Warblade Dexterity 6
Cooldown Speed +5.7% |
Type:
Damage: 88~144Atk Spd: 0.675s Range: 2.5m Modifiers: ・Dexterity 6 ・Cooldown Speed +5.7% |
The best weapon drop you can get from Butcher's Canyon would be Duke Magna's Fury Warblade due to the additional stats you gain for Dexterity and Cooldown Speed. Most builds that use a Greatsword and focus on its stun package utilize this weapon.
Duke Magna's Berserk attempts to further boost the viability of the Greatsword's stun abilities by increasing your chances of landing a heavy attack!
Butcher's Belt
| Accessory | Stats |
|---|---|
 Butcher's Belt Butcher's Belt
|
Type: Belt Magic Def.: 180 Modifiers: ・Max Health 225 ・Damage Reduction 6 ・Weaken Resistance 33 |
The go-to accessory if you need more resistance and durability is the Butcher's Belt. Most PVE builds often use this accessory since it provides maximum health, Damage Reduction, and Weaken Resistance, which are perfect additions when you are lacking survivability.
All Drops
Weapons
| All Weapon Drops |
Duke Magna's Fury Warblade Duke Magna's Fury Warblade Dexterity 6
Cooldown Speed +5.7% |
 Duke Magna's Provoking Warblade Duke Magna's Provoking Warblade Duke Magna's Provoking Warblade Strength 3
Max Health 1,305 |
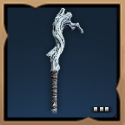 Malevolent Staff Malevolent Staff Malevolent Staff Hit 100
Weaken Chance 75 |
|---|
Armor
| All Armor Drops |
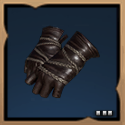
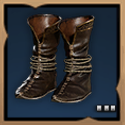
 Ascended Guardian Gloves Ascended Guardian Gloves Ascended Guardian Gloves Perception 4
Mana Cost Efficiency +6.3% |
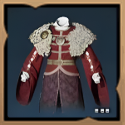
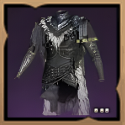 Coat of the Executioner Coat of the Executioner Coat of the Executioner Strength 1
Critical Hit 40 Weaken Chance 46 |
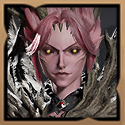
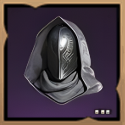 Divine Justiciar Mask Divine Justiciar Mask Divine Justiciar Mask Dexterity 3
Critical Hit Chance 83 |
|---|---|---|---|
 Permafrost Gloves Permafrost Gloves Permafrost Gloves Added Attack Speed +2.6%
Wisdom 1 Mana Regen 7.5 |
 Permafrost Hood Permafrost Hood Permafrost Hood Wisdom 2
Weaken Chance 25 |
 Permafrost Pants Permafrost Pants Permafrost Pants Hit 10
Weaken Chance 50 |
 Permafrost Shoes Permafrost Shoes Permafrost Shoes Wisdom 2
Hit Chance 10 Weaken Chance 25 |
 Permafrost Vestment Permafrost Vestment Permafrost Vestment Wisdom 2
|
|||
Accessories
| All Accessory Drops |
Butcher's Belt Butcher's Belt Max Health 225
Damage Reduction 6 Weaken Resistance 33 |
 Astral Armlet Astral Armlet Astral Armlet Mana Cost Efficiency +4.5%
Weaken Resistance 56 |
 Ecliptic Pendant Ecliptic Pendant Ecliptic Pendant Mana Regen 37.5
Cooldown Speed +2% |
|---|
Items
Other
| All Other Rewards | ||
|---|---|---|
 Steel Fist Dentwerp Steel Fist Dentwerp
|
Abyssal Contract Token Points (x500) | Training Dew: 10,000 Points |
Throne and Liberty (TL) Related Guides

All Co-op Dungeons: Dimensional Circles
Dungeon Guides
| 3-Star Co-op Dungeons | 2-Star Co-op Dungeons |
3-Star Dimensional Circle Coop Dungeons
 Rancorwood Rancorwood |
 Halls of Tragedy Halls of Tragedy |
 Chapel of Madness Chapel of Madness |
 Doomrot Grove Doomrot Grove |
 Twisted Laboratory Twisted Laboratory |
- |
2-Star Dimensional Circle Coop Dungeons
 Island of Terror Island of Terror |
 Voidwastes Voidwastes |
 Valley of Slaughter Valley of Slaughter |
 Carmine Rage Island Carmine Rage Island |
 Torture Chamber of Screams Torture Chamber of Screams |
- |
1-Star Dimensional Circle Coop Dungeons
 Death's Abyss Death's Abyss |
 Cursed Wasteland Cursed Wasteland |
 Temple of Slaughter Temple of Slaughter |
 Butcher's Canyon Butcher's Canyon |
 Tyrant's Isle Tyrant's Isle |
 Cave of Destruction Cave of Destruction |
Dimensional Circle Coop Dungeons
 Specter's Abyss Specter's Abyss |
 Roaring Temple Roaring Temple |
 Cave of Desperation Cave of Desperation |
Event Coop Dungeons
 Haunted Labyrinth Haunted Labyrinth |
Comment
Author

Throne and Liberty: Wilds of Talandre Walkthrough & Guides Wiki
Butcher's Canyon Dungeon: How to Beat Duke Magna
Please participate in our site
improvement survey
03/2026
improvement survey
03/2026
Would you assist in
improving Game8's site?
improving Game8's site?

×
We are listening to our users' valuable opinions and discussing how to act on them.
The information collected through this survey will be used for the purpose of improving our services. In addition, the information will only be disclosed a part of a statistic in a format that will not allow identification of personal information.
Begin Survey
Not Now
×
Please rate each item regarding Game8.co's Advertisements.
Amount of Ads
Very Dissatisfied
Somewhat Dissatisfied
Fine
Somewhat Satisfied
Highly Satisfied
Placement of Ads
Timing of Ad Display
Ad Loading Speed
Safeness of Ads
Content of Ads
×
Please rate each item regarding Game8.co's Quality of Articles.
Amount of information
Very Dissatisfied
Somewhat Dissatisfied
Fine
Somewhat Satisfied
Highly Satisfied
Frequency of updates
Speed of new information
Accuracy of articles
Understandibility of articles
Readability of sentences
×
Please rate each item regarding Game8.co's Usability of the Site.
Ease of finding information
Very Dissatisfied
Somewhat Dissatisfied
Fine
Somewhat Satisfied
Highly Satisfied
Loading Speed
Use of Color
Font Size
Visibility of Images
Easy to Understand Layout
×
Please rate each item regarding Game8.co's Message Boards, Comments.
Ease of Writing
Very Dissatisfied
Somewhat Dissatisfied
Fine
Somewhat Satisfied
Highly Satisfied
Readability
Ease in Finding Information
Comment Quality
Comment Quantity
Admin Response
×
Please rate each item regarding Game8.co's Site's new design.
Please rate our site's new design
Very Dissatisfied
Somewhat Dissatisfied
Fine
Somewhat Satisfied
Highly Satisfied
Do you think that the website's design change makes the site easier to use?
Has the new design made it easier for you to find information on the site?
Has the new design improved the overall visual appeal of the site?
How would you rate your overall satisfaction with the new design of the site?
×
How likely are you to recommend Game8 to someone you know?
Very Unlikely
0
1
2
3
4
5
6
7
8
9
10
Very Likely
If you have other opinions regarding potential improvement to the website, please share them with us. We would appreciate your honest opinion.
Note: This is a free response section, so you can proceed without entering anything.
Note: Please be sure not to enter any kind of personal information into your response.
Note: Please be sure not to enter any kind of personal information into your response.
×
Thank You
×
Thank you for participating in our survey! Your answers will help us to improve the quality of our website and services.
We hope you continue to make use of Game8.
We hope you continue to make use of Game8.
Close
Rankings
- We could not find the message board you were looking for.
Gaming News


Popular Games

Genshin Impact Walkthrough & Guides Wiki
Honkai: Star Rail Walkthrough & Guides Wiki
Umamusume: Pretty Derby Walkthrough & Guides Wiki
Pokemon Pokopia Walkthrough & Guides Wiki
Resident Evil Requiem (RE9) Walkthrough & Guides Wiki
Monster Hunter Wilds Walkthrough & Guides Wiki
Wuthering Waves Walkthrough & Guides Wiki
Arknights: Endfield Walkthrough & Guides Wiki
Pokemon FireRed and LeafGreen (FRLG) Walkthrough & Guides Wiki
Pokemon TCG Pocket (PTCGP) Strategies & Guides Wiki


Recommended Games
Diablo 4: Vessel of Hatred Walkthrough & Guides Wiki
Fire Emblem Heroes (FEH) Walkthrough & Guides Wiki
Yu-Gi-Oh! Master Duel Walkthrough & Guides Wiki
Super Smash Bros. Ultimate Walkthrough & Guides Wiki
Pokemon Brilliant Diamond and Shining Pearl (BDSP) Walkthrough & Guides Wiki
Elden Ring Shadow of the Erdtree Walkthrough & Guides Wiki
Monster Hunter World Walkthrough & Guides Wiki
The Legend of Zelda: Tears of the Kingdom Walkthrough & Guides Wiki
Persona 3 Reload Walkthrough & Guides Wiki
Cyberpunk 2077: Ultimate Edition Walkthrough & Guides Wiki


All rights reserved
Published by Amazon Games under license. ©2023-2024 NCSOFT Corporation. All rights reserved. THRONE AND LIBERTY and the THRONE AND LIBERTY logo are trademarks of NCSOFT Corporation. Used by Amazon Games under license. Amazon Games, Amazon, and all related logos are trademarks of Amazon.com, Inc. or its affiliates. The “PS” Family logo and “PS5” are registered trademarks of Sony Interactive Entertainment Inc. Steam and the Steam logo are trademarks and/or registered trademarks of Valve Corporation in the U.S. and/or other countries.
The copyrights of videos of games used in our content and other intellectual property rights belong to the provider of the game.
The contents we provide on this site were created personally by members of the Game8 editorial department.
We refuse the right to reuse or repost content taken without our permission such as data or images to other sites.