 DLC
DLC Story Walkthrough
 Maps and Locations
 NPCs
NPCs Tips and Tricks
 Talismans
 Spirit Ashes
 Bell Bearings
 Great Runes
 Whetblades
 Items
Items Endings
 Bosses
 Weapons
 Magic Spells
 Armor
Armor Builds
 Starting Classes
 Ashes of War
 Divine Towers
 Smithing Stones
 Scrolls
 News and Game Info
 Patch Notes
 Message Boards
 Dungeons
This survey will take about 1 minute.
Your answers will help us to improve our website.
Elden Ring
Limgrave & Weeping Peninsula Walkthrough

Traverse Limgrave and the Weeping Peninsula and uncover all dungeons and bosses and items with our complete Elden Ring walkthrough.
| Limgrave Guides | |
|---|---|
| Limgrave Interactive Map | Limgrave Walkthrough |
List of Contents
Limgrave Walkthrough
| Jump to a Section | |
|---|---|
| Limgrave | Weeping Peninsula |
Limgrave Map
Track your progress through Limgrave with our interactive map of the region.
Limgrave Region Interactive Map
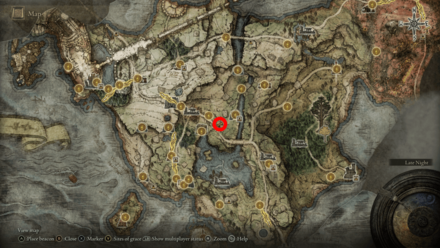
Limgrave Objectives
| 1 |  After the opening cutscene, your character will arrive at the Chapel of Anticipation. You will also receive The Ring gesture if you pre-ordered the game. |
|---|---|
| 2 | 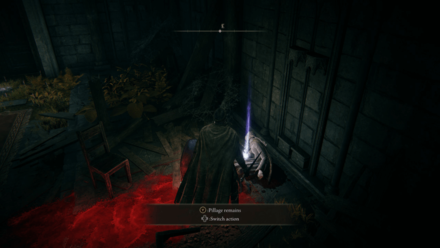 Head to the right side of the room and loot the corpse of the Finger Maiden to receive the Tarnished's Wizened Finger. This item allows you to leave messages that other players can see and appraise. Note: This is a missable item, but you can still leave messages using the message tab on the menu. |
| 3 | 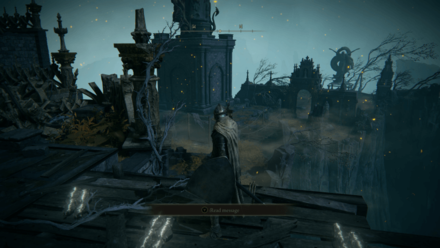 Exit the building and follow the path and then cross the rope bridge to the north and into the next area. |
| 4 | 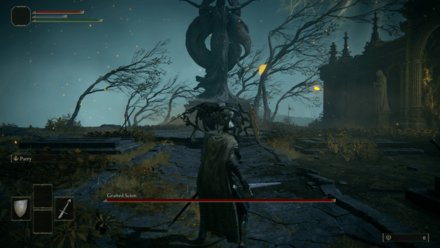 Enter the next area and approach the Statue of Marika to start the boss battle against the Grafted Scion The story will proceed even if you lose the fight and you'll arrive in the Stranded Graveyard after short cutscene. ▶ Can you Beat the Tutorial Boss? | How to Beat Grafted Scion |
| 4.5 | If you manage to beat the Grafted Scion, exit to your right and follow the path until you reach the cliff where you will fall down and die. This will transport you to the Stranded Graveyard as well. |
| 5 | 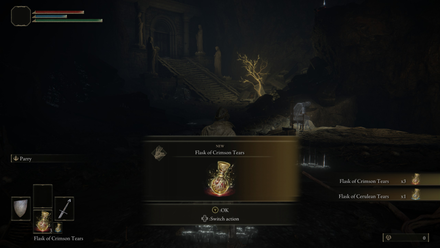 You will receive the Flask of Crimson Tears and Flask of Cerulean Tears after the cutscene. Note: If you didn't pick the Golden Seed as your starting gift, grab the the Golden Seed at the base of the Golden Tree. |
| 6 |  Approach the ghost sitting on a chair and drop down the cliff to start a short tutorial through the Cave of Knowledge. |
| 6.5 | 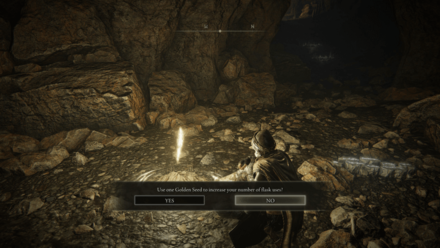 Rest at the Site of Grace and use the Golden Seed to increase the number of your flask uses. |
| 7 | 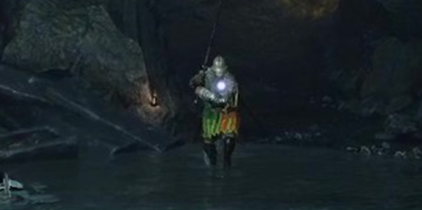 Near the end of the tutorial, pass through the fog to the next area and defeat the Soldier of Godrick boss. This boss is easier than the Grafted Scion boss so take your time to master the combat basics. ▶ How to Beat Soldier of Godrick |
| 8 | 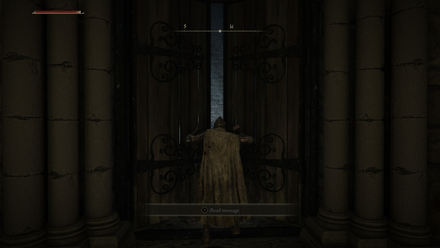 After defeating the boss, continue onward until you reach the area where you fell from earlier, then open the doors to proceed to the next area. |
| 8.5 | 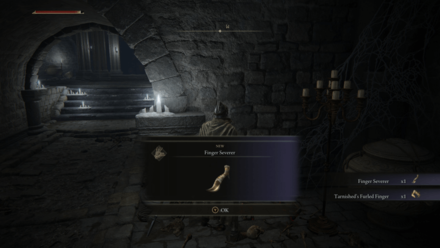 Loot the corpse north east of the Site of Grace to receive the Finger Severer and the Tarnished's Furled Finger. |
| 9 |  Ride the elevator and open the doors to exit the Stranded Graveyard and arrive in Limgrave. Note: Make sure to touch the Site of Grace just a few steps ahead of the exit. |
| 9.5 | 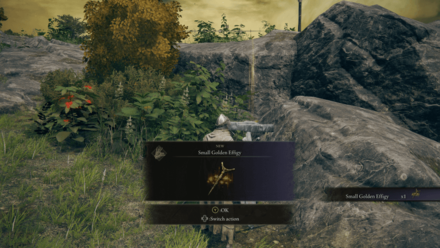 Head a few steps west of the Site of Grace and down a few steps and take the Small Golden Effigy from the Martry Effigy. |
| Optional | 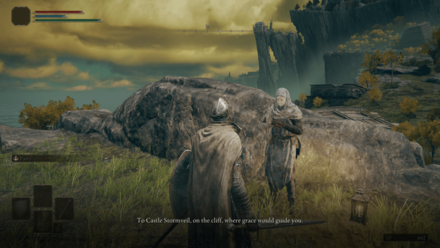 Talk to White-Faced Varre, who will direct you to Stormveil Castle. |
| 10 | 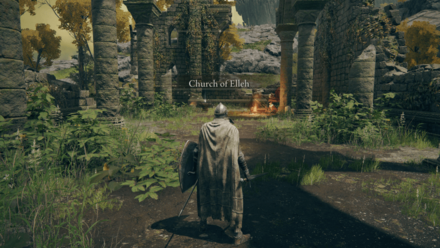 Head north, taking care to avoid the patrolling Tree Sentinel, and activate the Site of Grace inside the Church of Elleh. |
| 11 | 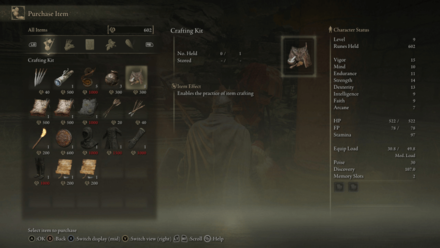 Speak with Merchant Kale, who will recommend you purchase a Crafting Kit for 300 Runes. |
| 11.5 | 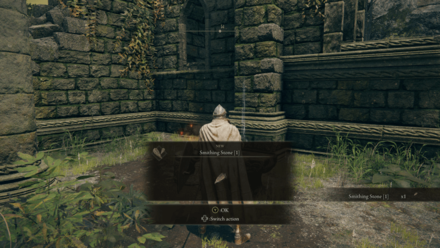 Make sure to grab the Smithing Stone 1 from the anvil and upgrade your weapon before leaving the church. |
| 12 | 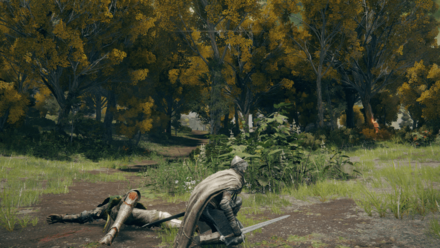 Head north from the Church of Elleh and into a small forest patrolled by a few Godrick Soldiers, though you can easily backstab these enemies by using the bushes as cover and sneaking up behind them. |
| 13 |  Head north from the forest and into Gatefront Ruins. This area is populated by many Godrick Soldiers, a couple of wolves, and a spear-wielding Godrick Knight. You can lure each enemy out in the open one by one to avoid getting mobbed by several enemies. |
| 13.5 | 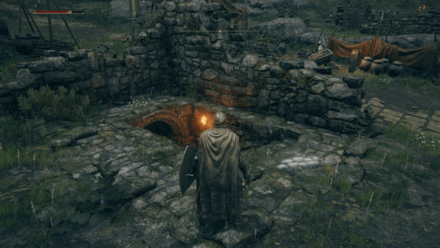 Look for some stairs heading underground in the south-eastern part of the area.  Open the doors and loot the chest to receive the Ash of War: Storm Stomp and a Whetstone Knife. 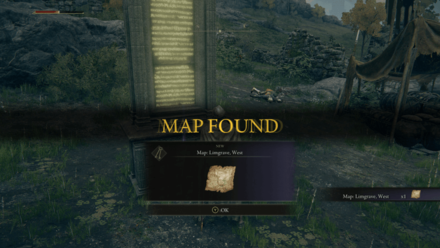 Head to the monument in the middle of the ruins and grab the Map: Limgrave, West 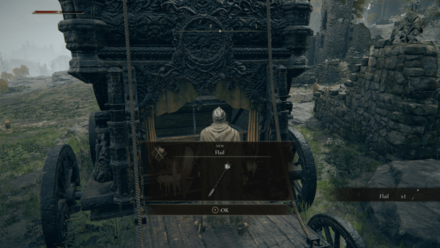 Open the chest on the parked carriage on the eastern side to get a Flail. The carriage on the western side close to the Gatefront Ruins Site of Grace has a chest that contains a Lordsworn's Greatsword. |
| 14 | 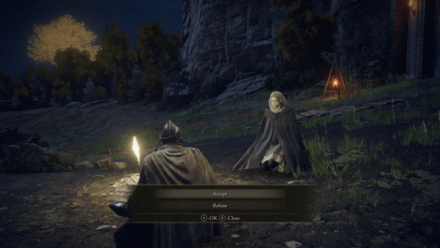 Rest at the Gatefront Ruins Site of Grace to activate a cutscene. Melina will appear and offer you an accord, as well as unlock the ability to level up. She will then give you the Spectral Steed Whistle that lets you summon and ride Torrent for faster travel. ▶ Rune Farming Guide ▶ How to Find and Ride the Horse Mount |
| 14.5 | 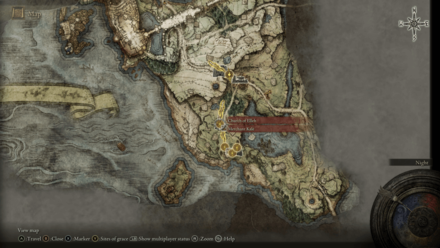 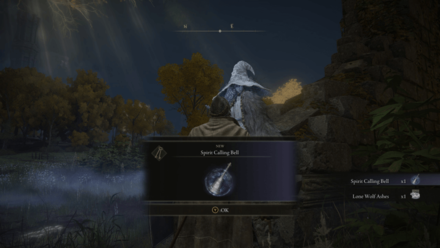 Fast travel to the Church of Elleh to encounter the Witch Renna. Respond with I can call the spectral steed and she will give you the Spirit Calling Bell and the Lone Wolf Ashes. Note: Renna will only appear at night and by fast travelling to the Church of Elleh. |
| 15 | 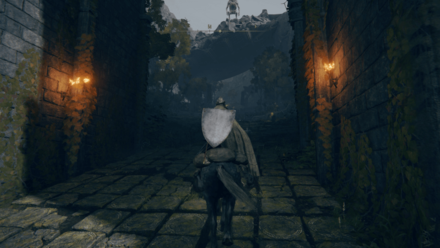  Make your way back to Gatefront Ruins and head to the path towards Stormveil Castle, making sure to grab the Golden Seed past the group of enemies. |
| 15.5 |  Head to the nearby Stormhill Shack and activate the Sign of Grace, making sure to loot the nearby corpse for a Stonesword Key. 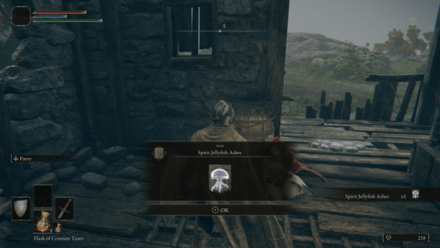 Speak with the woman sitting on the shack and exhaust her dialogue to receive the Sitting Sideways gesture and the Spirit Jelly Ashes. |
| 16 | 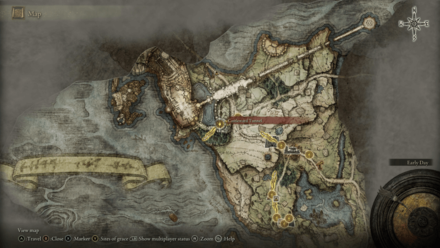 Follow the road north and then west towards the Casteward Tunnel, making sure to activate the SIte of Grace there. 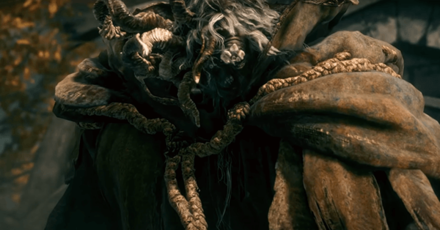 Exit the tunnel on the other side where Margit the Fell Omen will appear and engage you in a fight! ▶ How to Beat Margit the Fell Omen |
Limgrave Optional Areas
Stormveil Castle Guide
You can head straight to Margit to get access to Stormveil Castle.
Stormveil Castle Walkthrough
After you picked up all of the loot at Stormveil Castle you can check out a few other optional areas worth visiting that will give you new weapons and talismans, spirit ashes, and more experience to level up your character.
Other Optional Locations
| Map Location | What You Can Find |
|---|---|
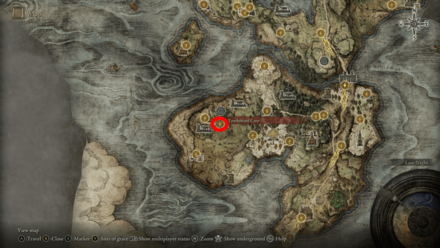
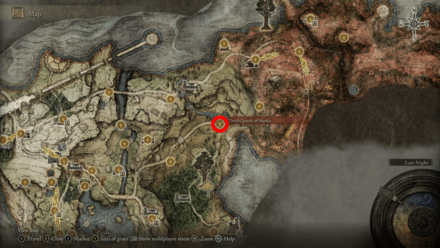 View Full Image Third Church of Marika |
・Sacred Tear x 1 ・Flask of Wondrous Physick ・Crimson Crystal Tear x 1 Note: Melina will share spoken echoes of Queen Marika when resting at the Site of Grace. |
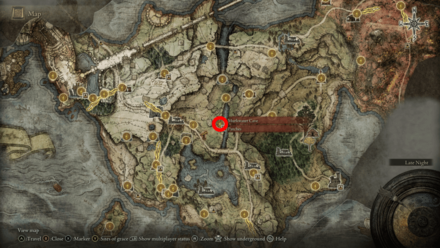
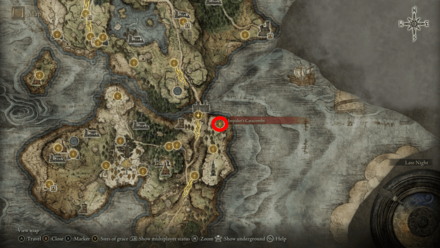
 View Full Image Mistwood Ruins |
・Axe Talisman ・Smithing Stone 2 x 1 Note: You can find Blaidd the Half-Wolf in this location whose personal quest is an optional part of Ranni's Questline. |
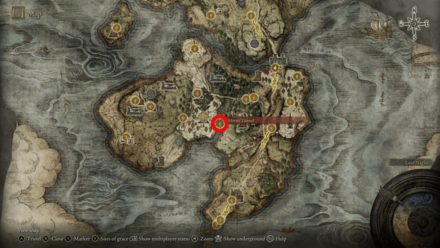
 View Full Image Murkwater Cave |
Note: You can start Patches' questline by sparing him during his boss fight, and will unlock his shop that sells important items such as Margit's Shackle and Missionary's Cookbook 2 |
 View Full Image Southwest of Saintsbridge |
Note: You can start Iron Fist Alexander's questline by heading to the small cliff southwest of the Saintsbridge Site of Grace. |
 View Full Image Southeast of Gatefront Ruins |
Note: You can start Boc the Seamster's questline by heading to the small area filled with trees southeast of the Agheel Lake North Site of Grace |
Weeping Peninsula Walkthrough
Note: The Weeping Peninsula is an optional area, but it's recommended that you go through it before heading to Stormveil Castle. This area contains useful weapons, spirit ashes, and talismans on top of letting you earn more experience to level up your character.
| 1 |  Head to the Agheel South Lake Site of Grace, which is the closest location in Limgrave to the Weeping Peninsula. Note: Make sure to follow the road towards the Site of Grace and avoid the lake itself as getting too close to the center will trigger Flying Dragon Agheel's boss fight. |
|---|---|
| 2 | 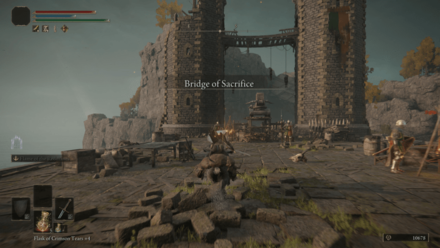 Head south from the Site of Grace and cross the Bridge of Sacrifice. You can simply ignore the enemies or pick them off one by one, being careful to avoid getting shot by the ballista. 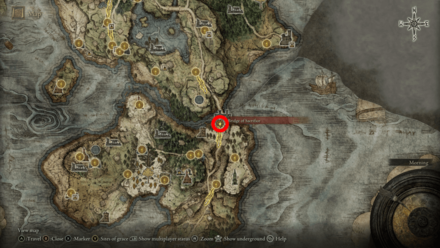 Once past the bridge, activate the nearby Bridge of Sacrifice Site of Grace. |
| 3 | 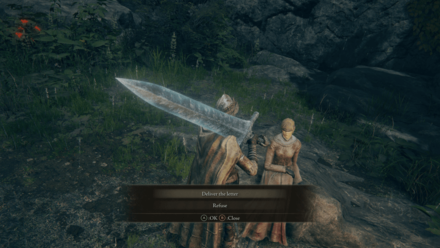 Speak with Irina sitting slightly northwest of the Site of Grace to start her questline which will take you to Castle Morne. ▶ Irina Questline Walkthrough |
| 4 |  Use the Spiritspring Vortex near the Castle Morne Rampart Site of Grace to head up the cliff to get access to Oridys's Rise. Solve the riddle of the tower to retreive the Memory Stone from the chest. ▶ Oridys's Rise Walkthrough |
| 5 | 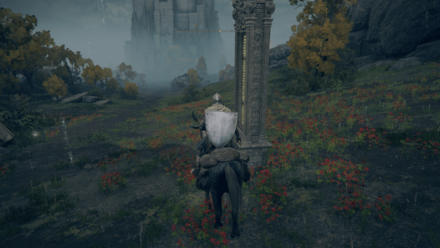 Head north from the Castle Morne Rampart Site of Grace and grab the Weeping Peninsula Map from the monument. |
| 5.5 | 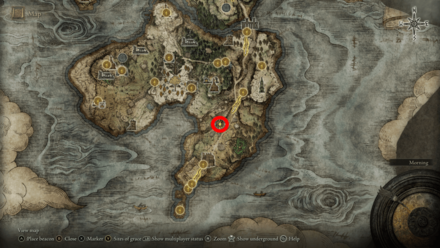 From the Castle Morne Rampart Site of Grace, head northwest and up the rocky outcropping and grab the Golden Seed from the edge of the small cliff. |
| 6 | 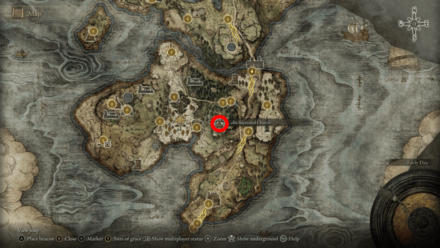 Head to the the Ailing Village west of the Castle Morne Rampart Site of Grace. You can get a Sacred Tear and The Flame of Frenzy incantation from the Callu Baptismal Church. |
| 7 | 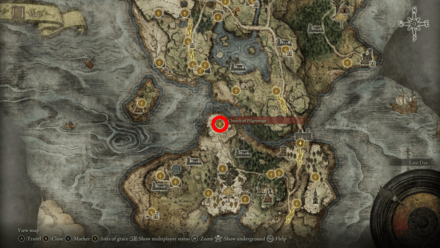 Travel northwest to the Church of Pilgrimage where you can find a Sacred Tear. Note: Melina will share spoken echoes of Queen Marika when resting at the Site of Grace. |
| 8 | 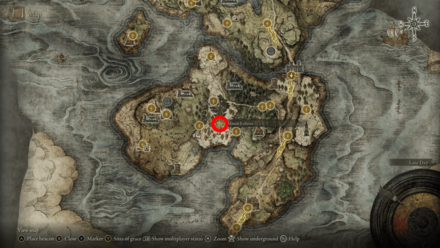 Travel south from the Church of Pilgrimage and to the Minor Erdtree. Defeat the Erdtree Avatar to get the Opaline Bubbletear, Crimsonburst Crystal Tear, and some runes. ▶ How to Beat the Erdtree Avatar |
| 9 |  Head southwest from the Church of Pilgrimage to the Fourth Church of Marika where you can find another Sacred Tear. |
| 10 | 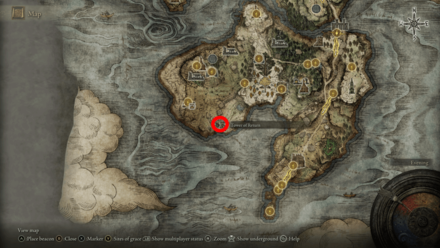 Slightly southeast of the Fourth Church of Marika is the Tower of Return. Climb the tower and activate the transporter chest, which will teleport you to a section of Leyndell where you can get the Blessed Dew Talisman from a chest guarded by a Guardian Golem. |
| 11 | 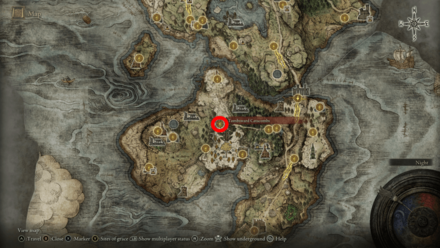 Head south of the Church of Pilgrimage and head inside Tombsward Catacombs. Defeat the relatively weak Cemetery Shade to receive Lhutel the Headless' Spirit Ashes. ▶ Tombsward Catacombs Walkthrough |
Weeping Peninsula Optional Areas
The Weeping Peninsula has some other locations worth visiting before taking on Margit and Stormveil Castle.
| Map Location | What You Can Find |
|---|---|
 View Full Image Tombsward Cave |
・Nomadic Warrior's Cookbook 8 ・Viridian Amber Medallion Note: The cave has several Cave Moss that you can use to craft Neutralizing Boluses and Stanching Boluses. |
 View Full Image Demi-Human Forest Ruins |
・Faith-knot Crystal Tear ・Shield of the Guilty ・Demi-Human Queen's Staff ・Crystal Burst |
 View Full Image Impaler's Catacombs |
・Demi-Human Ashes ・Prattling Pate "Please Help" Note: You can find a Grave Glovewort 1 and two Ghost Glovewort 2 that you can use to upgrade your Spirit Ashes. |
 View Full Image Morne Tunnel |
・Rusted Anchor Note: The tunnel has a total of nine Smithing Stone 1 and three Somber Smithing Stone 1 that can help you upgrade your weapons. |
Elden Ring Related Guides

Recommended Guides
Comment
Author

Limgrave & Weeping Peninsula Walkthrough
Please participate in our site
improvement survey
03/2026
improvement survey
03/2026
Would you assist in
improving Game8's site?
improving Game8's site?

×
We are listening to our users' valuable opinions and discussing how to act on them.
The information collected through this survey will be used for the purpose of improving our services. In addition, the information will only be disclosed a part of a statistic in a format that will not allow identification of personal information.
Begin Survey
Not Now
×
Please rate each item regarding Game8.co's Advertisements.
Amount of Ads
Very Dissatisfied
Somewhat Dissatisfied
Fine
Somewhat Satisfied
Highly Satisfied
Placement of Ads
Timing of Ad Display
Ad Loading Speed
Safeness of Ads
Content of Ads
×
Please rate each item regarding Game8.co's Quality of Articles.
Amount of information
Very Dissatisfied
Somewhat Dissatisfied
Fine
Somewhat Satisfied
Highly Satisfied
Frequency of updates
Speed of new information
Accuracy of articles
Understandibility of articles
Readability of sentences
×
Please rate each item regarding Game8.co's Usability of the Site.
Ease of finding information
Very Dissatisfied
Somewhat Dissatisfied
Fine
Somewhat Satisfied
Highly Satisfied
Loading Speed
Use of Color
Font Size
Visibility of Images
Easy to Understand Layout
×
Please rate each item regarding Game8.co's Message Boards, Comments.
Ease of Writing
Very Dissatisfied
Somewhat Dissatisfied
Fine
Somewhat Satisfied
Highly Satisfied
Readability
Ease in Finding Information
Comment Quality
Comment Quantity
Admin Response
×
Please rate each item regarding Game8.co's Site's new design.
Please rate our site's new design
Very Dissatisfied
Somewhat Dissatisfied
Fine
Somewhat Satisfied
Highly Satisfied
Do you think that the website's design change makes the site easier to use?
Has the new design made it easier for you to find information on the site?
Has the new design improved the overall visual appeal of the site?
How would you rate your overall satisfaction with the new design of the site?
×
How likely are you to recommend Game8 to someone you know?
Very Unlikely
0
1
2
3
4
5
6
7
8
9
10
Very Likely
If you have other opinions regarding potential improvement to the website, please share them with us. We would appreciate your honest opinion.
Note: This is a free response section, so you can proceed without entering anything.
Note: Please be sure not to enter any kind of personal information into your response.
Note: Please be sure not to enter any kind of personal information into your response.
×
Thank You
×
Thank you for participating in our survey! Your answers will help us to improve the quality of our website and services.
We hope you continue to make use of Game8.
We hope you continue to make use of Game8.
Close
Rankings
- We could not find the message board you were looking for.
Gaming News


![Everwind Review [Early Access] | The Shaky First Step to A Very Long Journey](https://img.game8.co/4440226/ab079b1153298a042633dd1ef51e878e.png/thumb)

![Monster Hunter Stories 3 Review [First Impressions] | Simply Rejuvenating](https://img.game8.co/4438641/2a31b7702bd70e78ec8efd24661dacda.jpeg/thumb)
Popular Games

Genshin Impact Walkthrough & Guides Wiki
Honkai: Star Rail Walkthrough & Guides Wiki
Umamusume: Pretty Derby Walkthrough & Guides Wiki
Pokemon Pokopia Walkthrough & Guides Wiki
Resident Evil Requiem (RE9) Walkthrough & Guides Wiki
Monster Hunter Wilds Walkthrough & Guides Wiki
Wuthering Waves Walkthrough & Guides Wiki
Arknights: Endfield Walkthrough & Guides Wiki
Pokemon FireRed and LeafGreen (FRLG) Walkthrough & Guides Wiki
Pokemon TCG Pocket (PTCGP) Strategies & Guides Wiki


Recommended Games
Diablo 4: Vessel of Hatred Walkthrough & Guides Wiki
Fire Emblem Heroes (FEH) Walkthrough & Guides Wiki
Yu-Gi-Oh! Master Duel Walkthrough & Guides Wiki
Super Smash Bros. Ultimate Walkthrough & Guides Wiki
Pokemon Brilliant Diamond and Shining Pearl (BDSP) Walkthrough & Guides Wiki
Elden Ring Shadow of the Erdtree Walkthrough & Guides Wiki
Monster Hunter World Walkthrough & Guides Wiki
The Legend of Zelda: Tears of the Kingdom Walkthrough & Guides Wiki
Persona 3 Reload Walkthrough & Guides Wiki
Cyberpunk 2077: Ultimate Edition Walkthrough & Guides Wiki


All rights reserved
ELDEN RING™ & ©BANDAI NAMCO Entertainment Inc. / ©2021 FromSoftware, Inc.
The copyrights of videos of games used in our content and other intellectual property rights belong to the provider of the game.
The contents we provide on this site were created personally by members of the Game8 editorial department.
We refuse the right to reuse or repost content taken without our permission such as data or images to other sites.