This survey will take about 1 minute.
Your answers will help us to improve our website.
Elden Ring
Nokron, Eternal City Walkthrough and Location
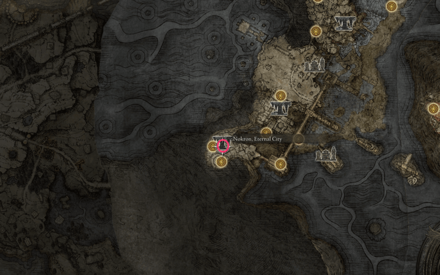
Nokron, Eternal City is a Minor Dungeon in Elden Ring that can be found in Siofra River. Read on to learn more about Nokron, Eternal City, including its location on the map, walkthrough, and obtainable items!
List of Contents
Nokron, Eternal City Location
How to Get to Nokron, Eternal City
| Nokron, Eternal City | |
|---|---|
 View Full Map |
|
| Type | Minor Dungeon |
| Region | Siofra River |
| Location | Siofra River, southwest area |
After defeating Starscourge Radahn, you'll be able to access another part of Nokron, Eternal City. Head all the way south from the Mistwood Outskirts Site of Grace until you find a crater. Then, platform from rock to rock around the crater until you can jump to a cave entrance. In the cave, drop down several levels, then head through the door to enter Nokron.
Nokron, Eternal City Walkthrough
Siofra River Map
Track your progress through Nokron with our interactive map of the Siofra River region where the Eternal City is located.
Nokron, Eternal City Objectives
| 1 | 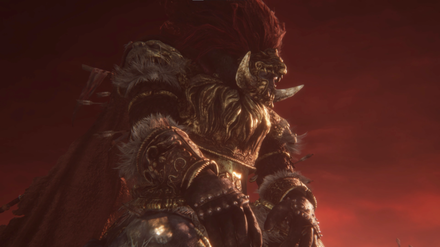
To access Nokron, you need to defeat Starscourge Radahn. You can access his arena from Redmane Castle by progressing through Blaidd and Ranni's Questline or by activating any Site of Grace in the Altus Plateau. ▶ How to Beat Starscourge Radahn |
|---|---|
| 1.5 | 
Nokron, Eternal City is part of Siofra River so it's a good idea to grab the Siofra River Map from the Hallowhorn Grounds in Siofra River for easier navigation of the area. ▶ Siofra River Walkthrough |
| 2 | 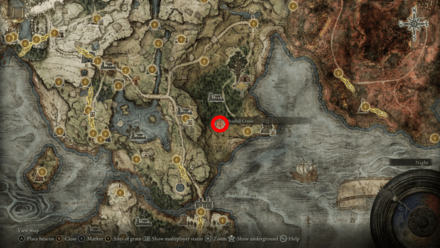 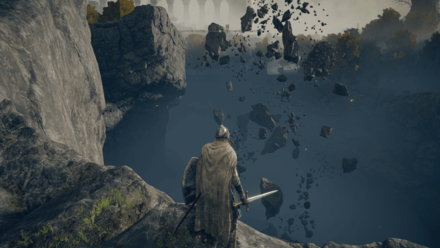 After Starscourge Radahn's post-battle cutscene, head to Starfall Crater slightly northwest of Fort Haight in Eastern Limgrave. Note: The game will automatically mark the location on your map. |
| 3 | 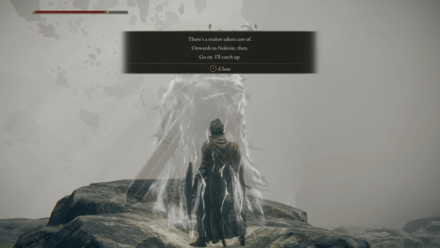 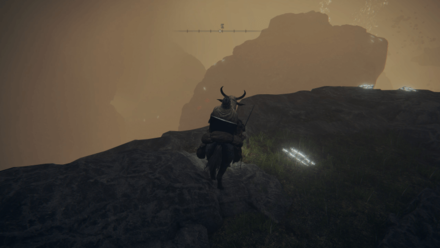 Head to the northern part of Starfall Crater where you can follow a path down, then leap down onto floating boulders to proceed. Blaidd the Half-Wolf will leave a message pointing you in the right direction. |
| 4 | 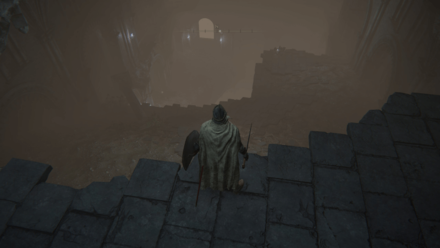 Head inside the ruined entrance, dropping down each level carefully. Loot the two corpses here for a Golden Rune 5 and two Soporific Grease and head into the archway to enter Nokron. |
| 5 | 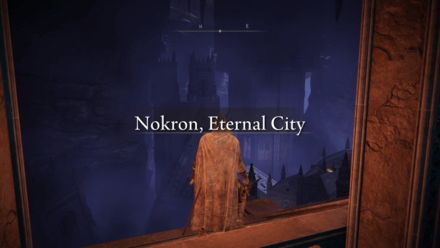 Head north and pass through the archways, then head to the closest rooftop with the Silver Tear enemy. |
| Optional | 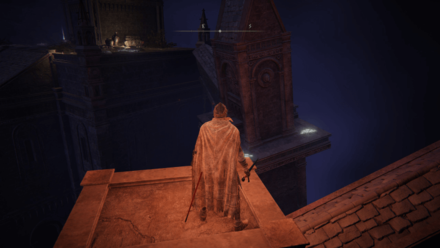 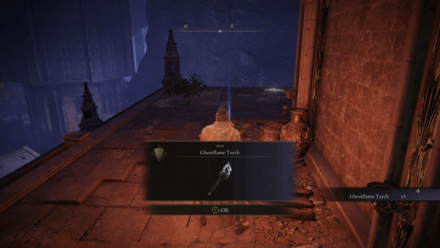 Before heading down the rooftrop, you can do a running jump to the nearby platform to access the top rooftop. Loot the corpse for a Ghostflame Torch. |
| 6 | 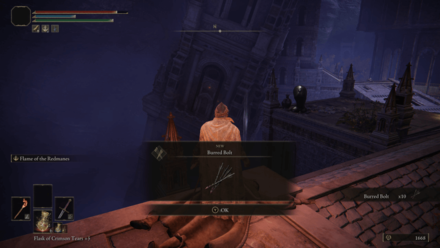 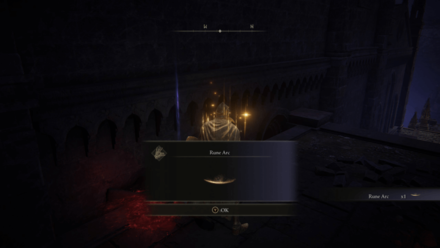 Jump across the rooftops as you head north to the large ruined building. There are two corpses here that have 10 Burred Bolts and a Rune Arc. Note: While it's possible to avoid the Silver Tear enemies, it's better to defeat them as they have projectile attacks that can knock you back while you're navigating the archways. |
| 7 | 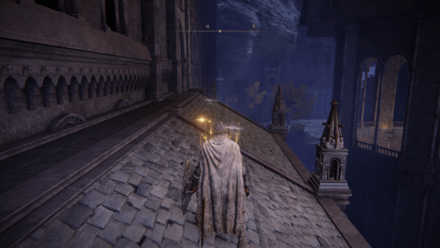 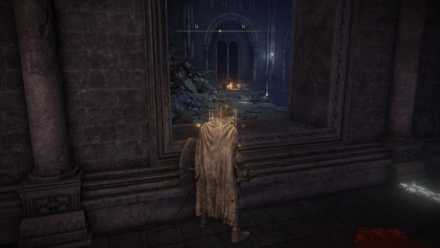 Press forward and enter the opening on the left side of the building. |
| 7.5 | 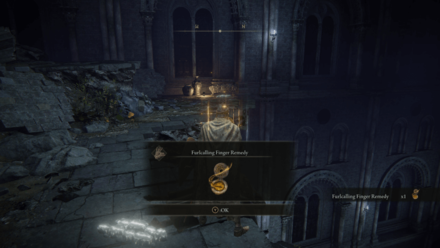 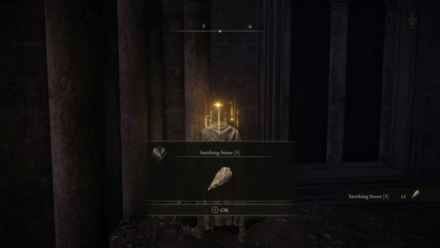 Once inside, grab the Furlcalling Finger Remedy from the nearby corpse and the Smithing Stone 5 on the corpse in the back of the room. |
| 8 | 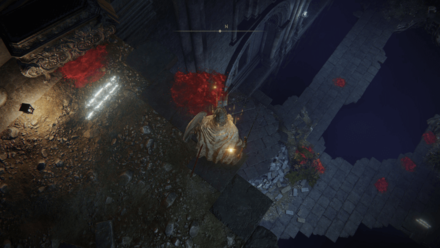 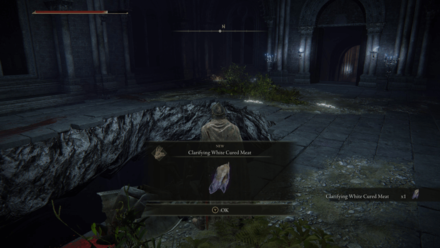 Carefully drop down the ledge and grab the Clarifying White Cured Meat from the nearby corpse. Note: While you can avoid the Fallen Hawks, they can quickly close the distance and stagger you with their sword attacks. Keep a good distance if you're planning to avoid them. |
| 9 | 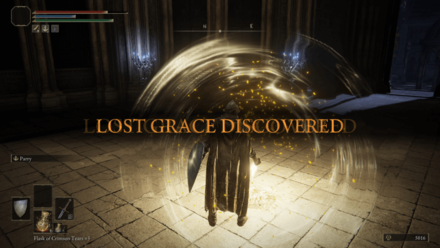 Enter the archway and light the Nokron, Eternal City Site of Grace. |
| 10 | 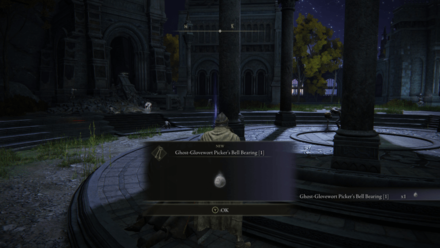 Head north from the site of grace and grab the Ghost-Glovewort Picker's Bell Bearing 1 from the corpse on the gazebo. Note: The nearby Fallen Hawk will at first not notice you but begin following you after grabbing the Bell Bearing. Defeat it before it equips its greatshield to prevent it from aggroing the other nearby Fallen Hawks. |
| 10.5 | 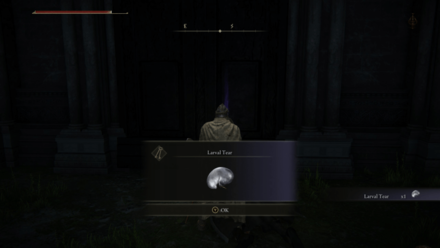 Head east from the gazebo and enter the chapel, and grab the Larval Tear from the corpse. |
| 11 | 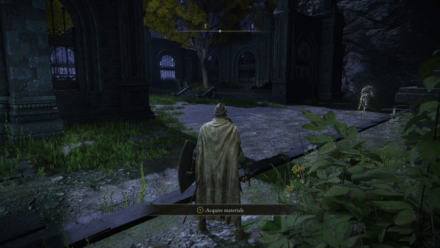 Head northeast from the gazebo and into a small courtyard. Lure out the Fallen Hawks one by one to avoid getting overwhelmed by their attacks. |
| 11.5 | 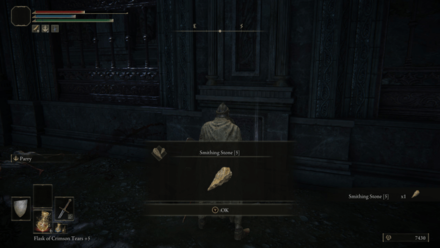 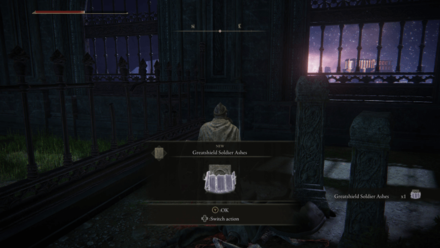 Defeat the Fallen Hawks on the right garden area and grab the Smithing Stone 5 and the Greatshield Soldier Ashes from the two corpses. |
| 12 | 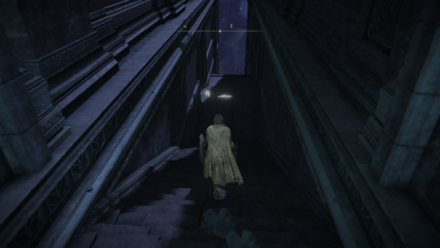 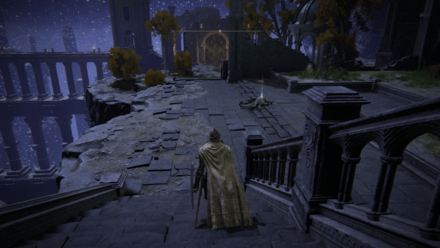 Head down the stairs north of the gazebo and turn right at the end to arrive at a pathway to the boss. Take care looting the nearby corpse with a Golden Rune 5 as a Nox Swordstress and a Silver Tear will attack you as they head up the stairs. |
| 13 | 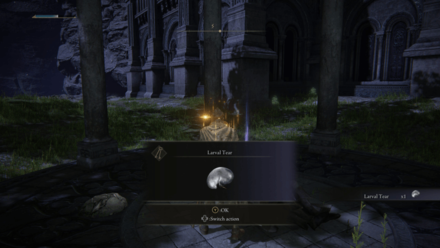 Further down is another gazebo with a Larval Tear that you can loot from a corpse. Three Silver Tears will drop down from the roof once you get close. You can also grab the Golden Rune 7 on the corpse overlooking the cliff west of this gazebo. |
| 14 | 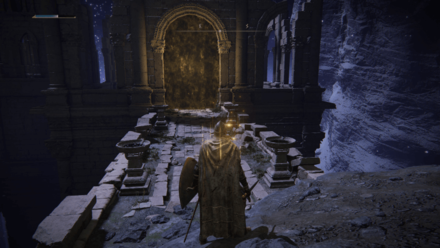 Head further down to the arena and grab the Rune Arc from the corpse behind you. Pass through the fog gate to engange the Mimic Tear in a boss battle! ▶ How to Beat the Mimic Tear |
Ancestral Woods Objectives
| 1 | 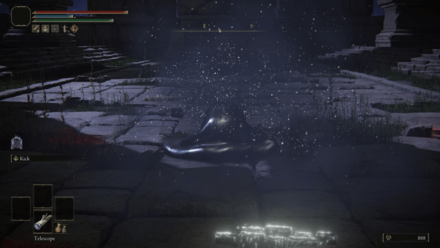
To access the Ancestral Woods, you need to defeat the Mimic Tear boss at the end of Nokron, Eternal City. ▶ How to Beat the Mimic Tear |
|---|---|
| 2 | 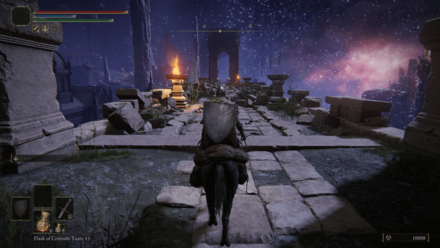 From the Mimic Tear Site of Grace, exit the boss area and make your way across the bridge. Note: You can ride Torrent across the bridge. |
| 3 | 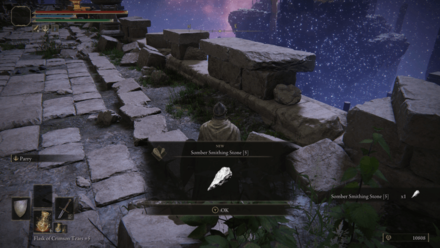 Kill the nearby Scarab hiding near the right side of the bridge for a Somber Smithing Stone 5. |
| 3.5 | 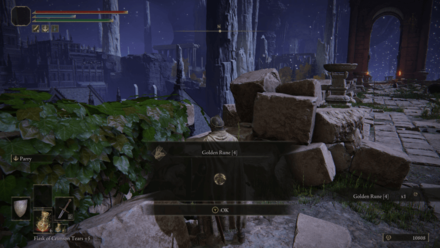 Loot the corpse on the left side of the bridge for a Golden Rune 4. |
| 4 | 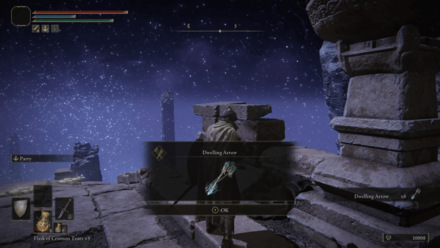 Once you reach the small archway, head right and loot the corpse near the edge of the bridge for 8 Dwelling Arrows. |
| 5 | 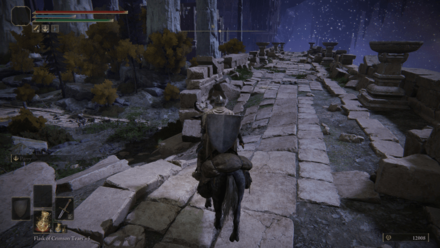 Continue north across the bridge until you can step off the path and enter the Ancestral Woods. Loot the nearby corpse for a Nascent Butterfly. |
| 5.5 | 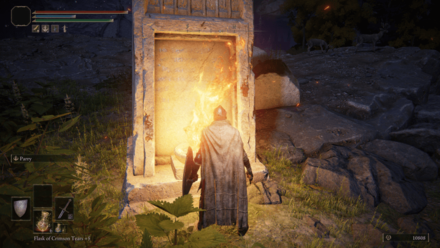 Light the flame on the nearby obelisk. You will need to light 5 more obelisks to activate the boss fight in this area. |
| 6 | 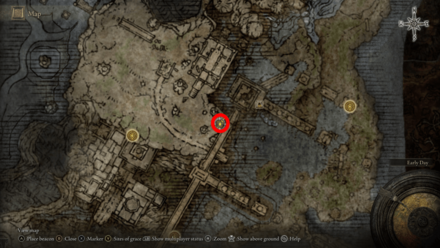 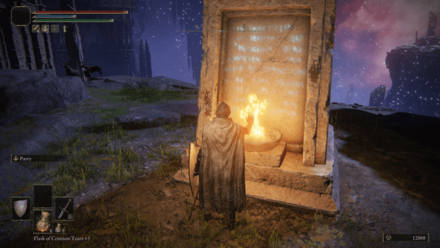 From the first obelisk, head east into the woods and light the second obelisk. Note: Avoid idling too long in this location as there are patrolling Ancestral Followers nearby that will attack you. |
| 7 | 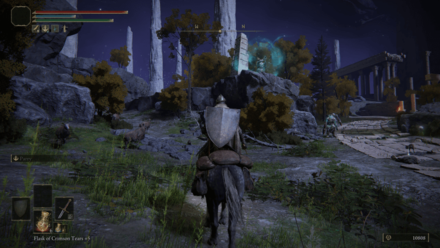 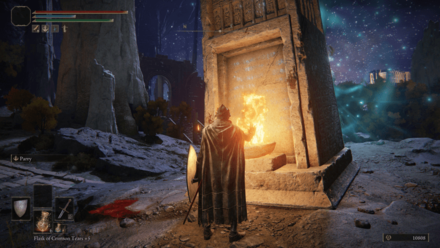 Return to the first obelisk and head north towards the singing Ancestral Follower on a small rocky hill. Approach the area from the left side to avoid aggroing the ancestral followers, and then light the third obelisk. |
| 8 | 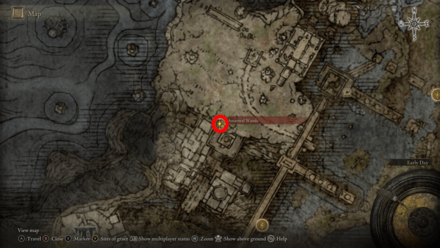 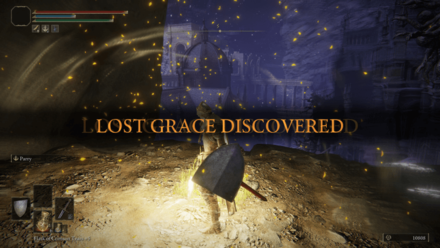 Head west from the second obelisk and light the Ancestral Woods Site of Grace. |
| 9 | 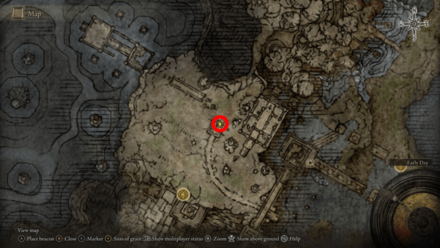  From the Ancestral Woods Site of Grace, head north following the road until you reach a small temple with an Ancestor Spirit corpse in the center and an obelisk behind it. Lure out and defeat the Ancestral Followers one by one before lighting the fourth obelisk. |
| 10 | 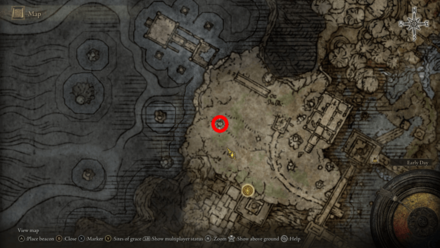 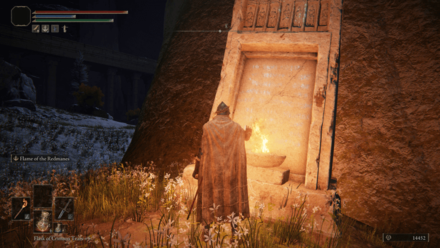 Head northwest from the Ancestral Woods Site of Grace and head towards the large tree with the patrolling Red Wolf of Radagon. Head to the left side of the tree and light the fifth obelisk. |
| Optional |  You can also fight the Red Wolf of Radagon mini boss patrolling the area. Take note that it's often accompanied by a large pack of wolves and can use the same sorceries as the boss version in the Academy of Raya Lucaria. ▶ How to Beat the Red Wolf of Radagon |
| 11 | 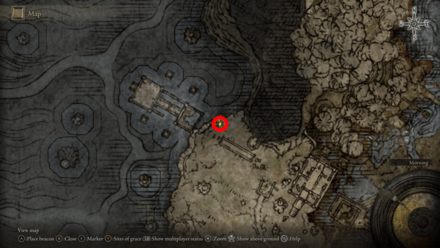 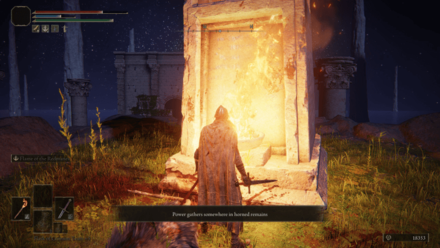 Head north from the fifth obelisk and into a cliff edge with two singing Ancestral Followers and some giant rats. Lure out each enemy one by one and defeat them so you can safely light the sixth obelisk. Note: A message saying Power gathers somewhere in horned remains will appear if you successfully lit all six obelisks. |
| 12 | 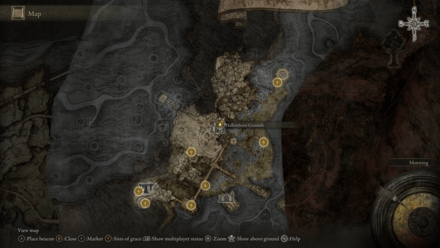 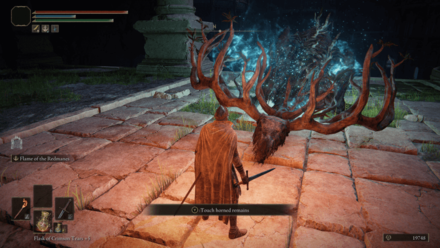 Head north from the Ancestral Woods Site of Grace to reach the Hallowhorn Grounds. The corpse at the end of the temple area will now glow and a prompt to touch the horned remains will appear. |
| 12.5 | 
Touching the horned remains will transport you to a new area. Pass through the fog to engage the Regal Ancestor Spirit in a boss battle! ▶ How to Beat the Regal Ancestor Spirit |
Ancestral Woods Optional Areas
The unmarked Sunken Ruins in the northwestern part of the Ancestral Woods is the location's only optional area and requires careful platforming to reach.
| 1 | 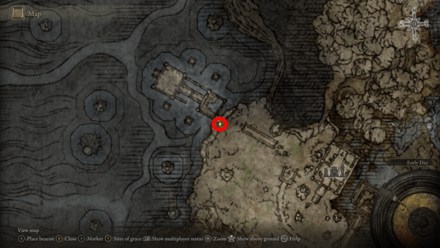 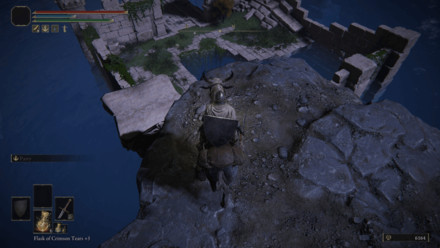 Head northwest from the Ancestral Woods Site of Grace and head to cliff edge overlooking the leftmost column of the sunken ruins. Note: The cliff edge is close to the two singing Ancestral Followers and Giant Rats south of the sixth obelisk. |
|---|---|
| 2 | 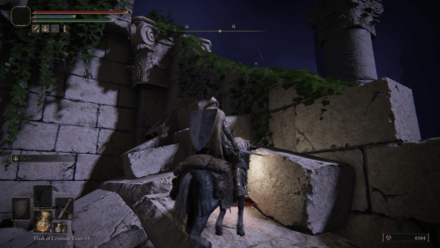 Drop down the column and head to the upper right part of the ruins and climb the ruined ledge and up the columns. Note: Before climbing the ruined ledge, make sure to loot the nearby corpse for a Golden Rune 12. |
| 3 | 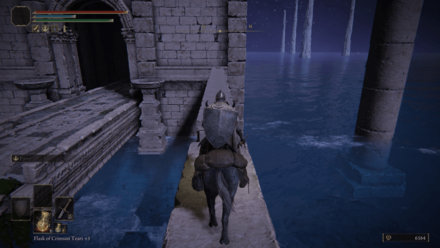 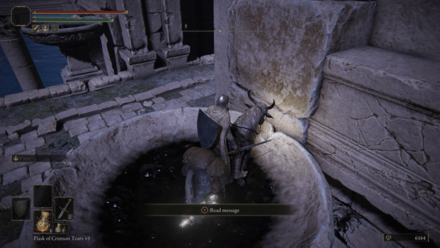 Travel across the column until you reach the end and then carefully jump on the torch cauldron and down to the ruin's entrance. |
| 4 | 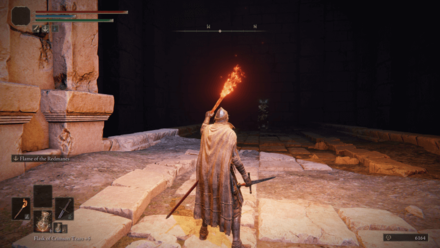 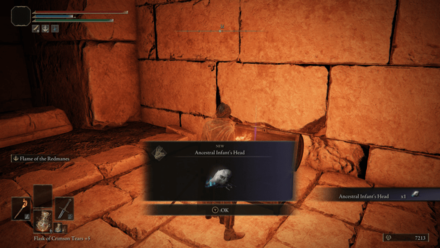 A lone singing Ancestral Follower is guarding a treasure chest inside the ruins. Lure her out and defeat her so you can safely loot the chest for an Ancestral Infant's Head. |
Night's Sacred Ground Objectives
| 1 | 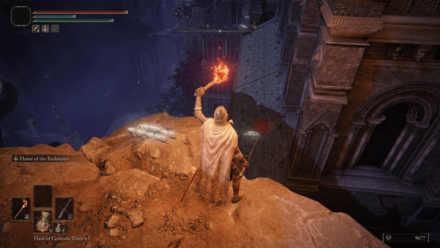 From the Ancestral Woods Site of Grace, head to the cliff edge overlooking a nearby building. Carefully drop down the roof to enter Night's Sacred Ground. |
|---|---|
| 2 | 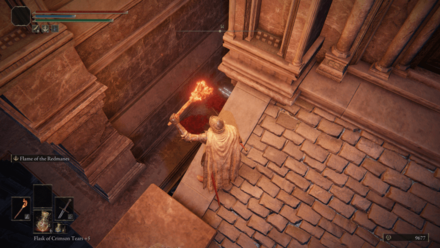 Head to the edge of the roof and drop carefully drop down the narrow ledge. |
| 3 | 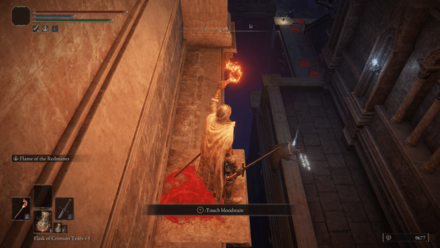 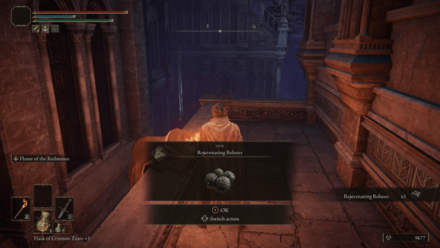 Head right on the ledge until you can hop off to the next rooftop balcony. Make sure to grab the Rejuvenating Boluses from the corpse. |
| 4 | 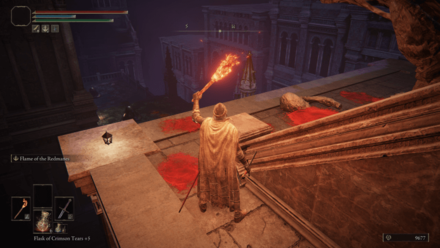 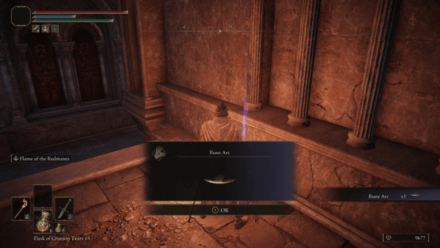 Head north from the balcony until you reach the edge. The two Silver Tears on the next balcony area will transform as soon as you reach the edge. Before jumping to the next rooftop, head up the roof and grab the Rune Arc from the corpse. |
| 5 | 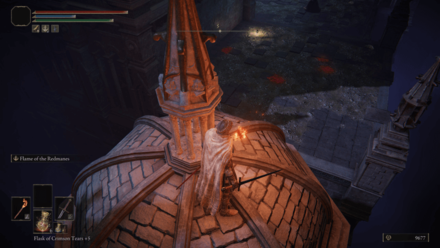 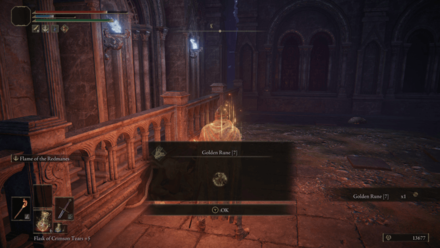 Drop down the circular rooftop so you can safely head to next balcony area with the Silver Tears. Defeat them and head left, making sure to grab the Golden Rune 7 from the nearby corpse. |
| 6 | 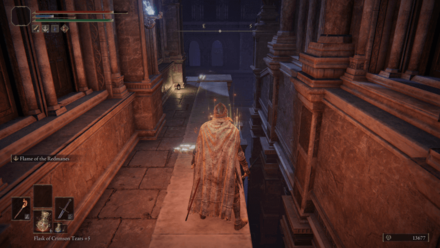 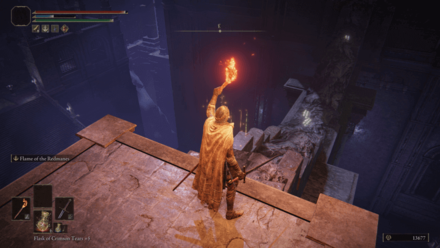 Head north following the path on the ledge until you reach the edge with the ruined pillar connecting the balcony and the next building. Carefully make your way across the ruined pillar and onto the next building. |
| 7 | 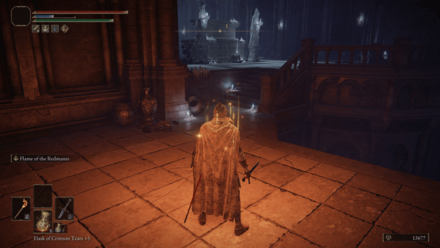  Head inside the building through the open window. Once inside, head to the altar area and grab the Black Whetblade from the corpse. |
| 8 | 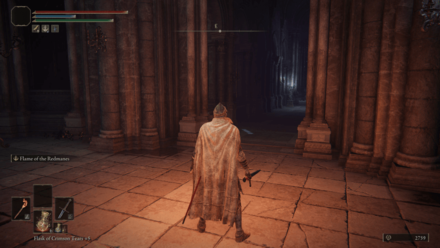 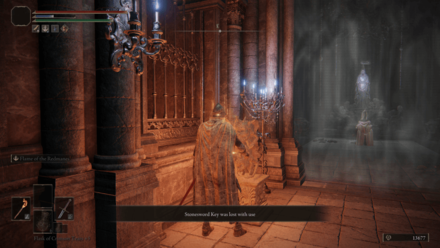 Head into the small hallway northeast of the altar area and use a Stonesword Key to unlock the Imp Statue Seal. |
| 8.5 | 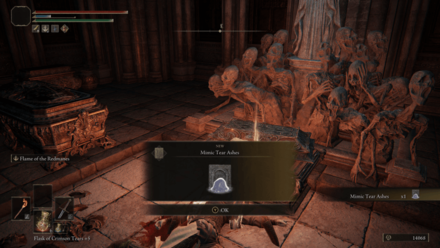 Kill the Nox Priestess inside the small room and open the chest to receive the Mimic Tear Ashes. |
| 9 | 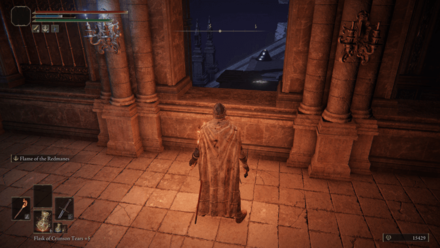 Exit the hallway through the open window on the right side and follow the path to the rooftop, taking care to defeat the lone Silver Tear near the ledge. |
| 9.5 | 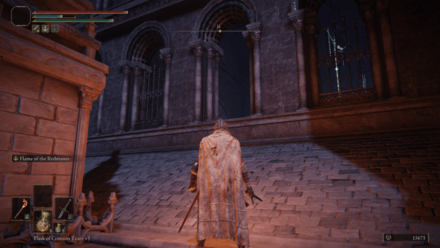 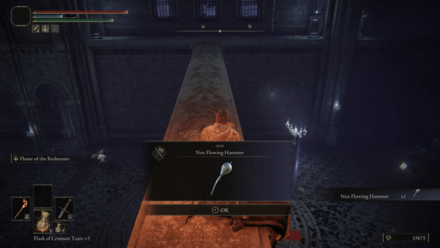 Head up the roof and enter the open window. Once inside, drop down the pillar and grab the Nox Flowing Hammer from the corpse. |
| 9 | 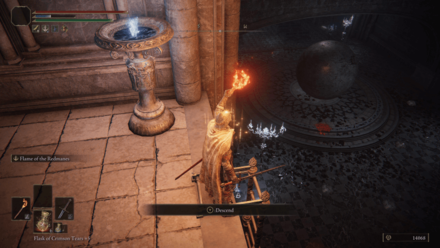 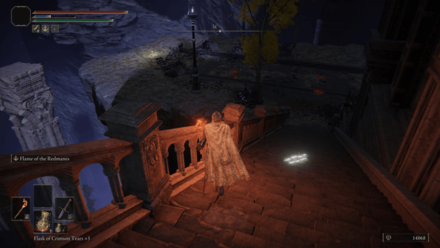 Backtrack to the hallway and climb down the ladder to the building's first floor. There is a Silver Ball and a nearby Nox Priestess here, along with a Nox Monk hiding on the upper right part of the area. Note: The Silver Ball and Nox Priestess will not aggro unless you either attack them or get too close to the hidden Nox Monk. Stick to the left side of the area to safely exit the building. |
| Optional | 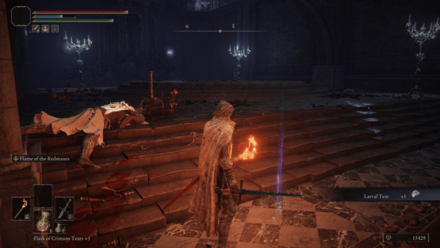 Alternatively, you can simply attack the Silver Ball who will drop one Silver Tear upon defeat.Note: The Silver Ball can damage the Nox Priestess and Nox Monk if they get in the way when it's rolling. |
| 10 | 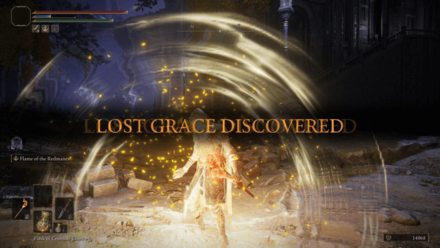 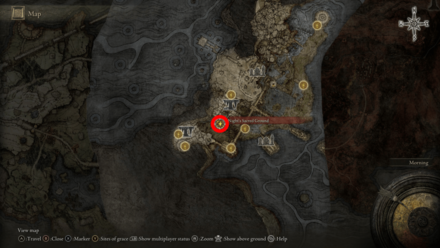 Head down the stairs and touch the Night's Sacred Ground Site of Grace. Note: You can summon Spirit Ashes which you can use to distract the many Silve Tears in the area. |
| 11 | 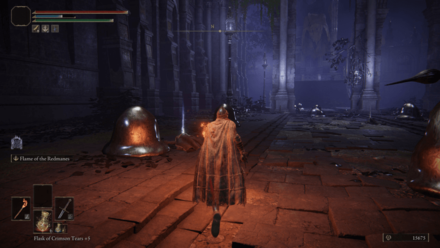 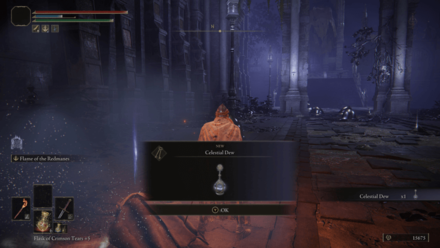 Head north from the Site of Grace and grab the Celestial Dew from the corpse on the left side of the path. Note: The Silver Tears will start transforming into humanoid enemies as you pass them. |
| 11.5 | 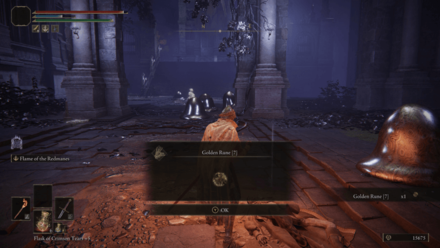 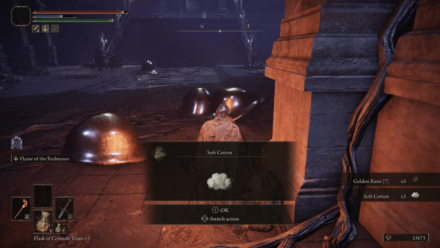 Continue north along the path, making sure to grab the Golden Rune 7 and Soft Cotton from the nearby corpses. |
| 12 | 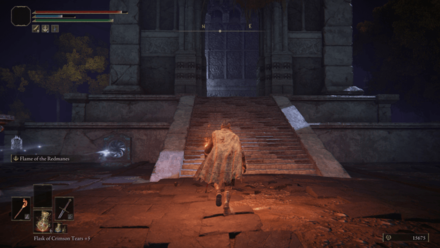 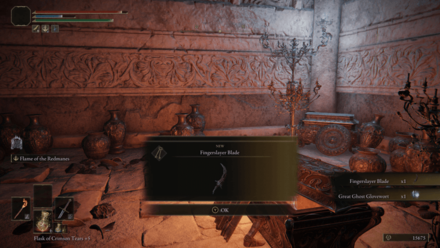 Head inside the small mausoleum at the end of the path and open the chest to receive the Fingerslayer Blade and a Great Ghost Glovewort. Note: The Fingerslayer Blade is a key item used to progress Ranni's questline. ▶ Ranni the Witch Questline |
| 13 | 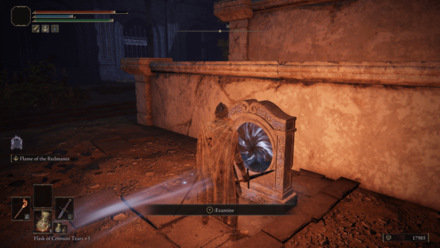 Head outside the mausoleum and activate the nearby Arcane Waygate. Using the waygate will take you back to the Ancestral Woods Site of Grace. |
Elden Ring Related Guides
DLC Dungeon Walkthroughs
Gravesite Plain Dungeons
Scadu Altus Dungeons
Land of the Tower Dungeons
| Enir-Ilim | Scorpion River Catacombs | Taylew's Ruined Forge |
| Belurat, Tower Settlement | Northern Nameless Mausoleum | - |
Shadow Keep Dungeons
| Shadow Keep (Main) | Specimen Storehouse | Church District |
| Shadow Keep Back Gate | Scadutree Chalice | - |
Dungeon Walkthroughs
Limgrave Minor Dungeons
Liurnia of the Lakes Minor Dungeons
Caelid Minor Dungeons
Altus Plateau Minor Dungeons
Ainsel River Minor Dungeons
| Nokstella, Eternal City | Grand Cloister | Lake of Rot |
Siofra River Minor Dungeons
| Nokron, Eternal City | Hallowhorn Grounds (South) | Hallowhorn Grounds (North) |
| Siofra Aqueduct |
Mountaintops of the Giants Minor Dungeons
Comment
Author

Nokron, Eternal City Walkthrough and Location
Please participate in our site
improvement survey
03/2026
improvement survey
03/2026
Would you assist in
improving Game8's site?
improving Game8's site?

×
We are listening to our users' valuable opinions and discussing how to act on them.
The information collected through this survey will be used for the purpose of improving our services. In addition, the information will only be disclosed a part of a statistic in a format that will not allow identification of personal information.
Begin Survey
Not Now
×
Please rate each item regarding Game8.co's Advertisements.
Amount of Ads
Very Dissatisfied
Somewhat Dissatisfied
Fine
Somewhat Satisfied
Highly Satisfied
Placement of Ads
Timing of Ad Display
Ad Loading Speed
Safeness of Ads
Content of Ads
×
Please rate each item regarding Game8.co's Quality of Articles.
Amount of information
Very Dissatisfied
Somewhat Dissatisfied
Fine
Somewhat Satisfied
Highly Satisfied
Frequency of updates
Speed of new information
Accuracy of articles
Understandibility of articles
Readability of sentences
×
Please rate each item regarding Game8.co's Usability of the Site.
Ease of finding information
Very Dissatisfied
Somewhat Dissatisfied
Fine
Somewhat Satisfied
Highly Satisfied
Loading Speed
Use of Color
Font Size
Visibility of Images
Easy to Understand Layout
×
Please rate each item regarding Game8.co's Message Boards, Comments.
Ease of Writing
Very Dissatisfied
Somewhat Dissatisfied
Fine
Somewhat Satisfied
Highly Satisfied
Readability
Ease in Finding Information
Comment Quality
Comment Quantity
Admin Response
×
Please rate each item regarding Game8.co's Site's new design.
Please rate our site's new design
Very Dissatisfied
Somewhat Dissatisfied
Fine
Somewhat Satisfied
Highly Satisfied
Do you think that the website's design change makes the site easier to use?
Has the new design made it easier for you to find information on the site?
Has the new design improved the overall visual appeal of the site?
How would you rate your overall satisfaction with the new design of the site?
×
How likely are you to recommend Game8 to someone you know?
Very Unlikely
0
1
2
3
4
5
6
7
8
9
10
Very Likely
If you have other opinions regarding potential improvement to the website, please share them with us. We would appreciate your honest opinion.
Note: This is a free response section, so you can proceed without entering anything.
Note: Please be sure not to enter any kind of personal information into your response.
Note: Please be sure not to enter any kind of personal information into your response.
×
Thank You
×
Thank you for participating in our survey! Your answers will help us to improve the quality of our website and services.
We hope you continue to make use of Game8.
We hope you continue to make use of Game8.
Close
Rankings
- We could not find the message board you were looking for.
Gaming News


![Monster Hunter Stories 3 Review [First Impressions] | Simply Rejuvenating](https://img.game8.co/4438641/2a31b7702bd70e78ec8efd24661dacda.jpeg/thumb)
Popular Games

Genshin Impact Walkthrough & Guides Wiki
Honkai: Star Rail Walkthrough & Guides Wiki
Umamusume: Pretty Derby Walkthrough & Guides Wiki
Pokemon Pokopia Walkthrough & Guides Wiki
Resident Evil Requiem (RE9) Walkthrough & Guides Wiki
Monster Hunter Wilds Walkthrough & Guides Wiki
Wuthering Waves Walkthrough & Guides Wiki
Arknights: Endfield Walkthrough & Guides Wiki
Pokemon FireRed and LeafGreen (FRLG) Walkthrough & Guides Wiki
Pokemon TCG Pocket (PTCGP) Strategies & Guides Wiki


Recommended Games
Diablo 4: Vessel of Hatred Walkthrough & Guides Wiki
Cyberpunk 2077: Ultimate Edition Walkthrough & Guides Wiki
Fire Emblem Heroes (FEH) Walkthrough & Guides Wiki
Yu-Gi-Oh! Master Duel Walkthrough & Guides Wiki
Super Smash Bros. Ultimate Walkthrough & Guides Wiki
Pokemon Brilliant Diamond and Shining Pearl (BDSP) Walkthrough & Guides Wiki
Elden Ring Shadow of the Erdtree Walkthrough & Guides Wiki
Monster Hunter World Walkthrough & Guides Wiki
The Legend of Zelda: Tears of the Kingdom Walkthrough & Guides Wiki
Persona 3 Reload Walkthrough & Guides Wiki


All rights reserved
ELDEN RING™ & ©BANDAI NAMCO Entertainment Inc. / ©2021 FromSoftware, Inc.
The copyrights of videos of games used in our content and other intellectual property rights belong to the provider of the game.
The contents we provide on this site were created personally by members of the Game8 editorial department.
We refuse the right to reuse or repost content taken without our permission such as data or images to other sites.