Unmoored World Walkthrough
The Unmoored World is the apocalyptic post-game world of Dragon's Dogma 2 (DD2). See a summarized walkthrough of the events in the Unmoored World!
List of Contents
Unmoored World Guide
Unmoored World Map Pointers
Full Interactive Map and Map Locations
| Unmoored World Summary |
|---|
└ Destruction can be prevented if you clear the red light in the pinned locations on the map or restart Talos. |
In the Unmoored World, overall difficulty is increased. The map will erode over time; this can be prevented by resolving the red beam of light at the targeted settlement. Resting at an inn is highly not recommended as it will hasten the destruction of the Unmoored World. It is recommended to stock up on Wakestones and Allheal Elixirs.
Things to Prepare
| ・The more wakestones you have, the easier it is to explore since you won't have to worry about starting over if you die. ▶︎ How to Get Wakestones |
|
| ・Allheal Elixirs fully restore your health without having to sleep, including the health gauge lost from taking successive hits in battle. | |
| ・Portcrystals are best placed in areas where there are none. A good example of this would either be Bakbattahl, the Volcanic Island Camp, and the Agamen Ruins. ▶︎ All Portcrystal Locations |
|
| Sufficient Level | ・It is highly recommended to be over Level 40 to be able to handle the strong enemies found in the Unmoored World. ▶︎ Leveling Guide: How to Level Up Fast |
How to Speedrun the True Ending
It is possible to reach the end of the Unmoored World by sleeping at an inn or at your house for 10 straight days. The destruction of the world will progress as the days go by. Once you reach the morning of the 10th day you will no longer be able to sleep. Instead you can go directly to the Seafloor Shrine to summon the dragon once more and reach the true ending. This is not recommended because you will not be able to acquire the items from the Dragonforged without the necessary Wrymslife Crystals.
Endings Guide: How to Get the True Ending
Time Limit Explained
Time works differently in the Unmoored World. Destruction of the world is triggered only by resting at an inn. The passing of time will feel the same, but days are only counted when you sleep. You are only given 10 days of rest or until the complete destruction of the world. Should you decide to resolve the red beams of light in the map as soon as you arrive, you will be able to stay longer.
Unmoored World Walkthrough
Unmoored World Quest Walkthrough
There are three main quests to complete in the Unmoored World: Dreams Apart, A Scholarly Pursuit, and Halls of the First Dawn. The Halls of the First Dawn branches into several subquests in order to finish the evacuation of the citizens of this world.
Dreams Apart
| Dreams Apart | |
|---|---|
| 1 |  |
A Scholarly Pursuit
| A Scholarly Pursuit | |
|---|---|
| 2 |  |
| 3 | 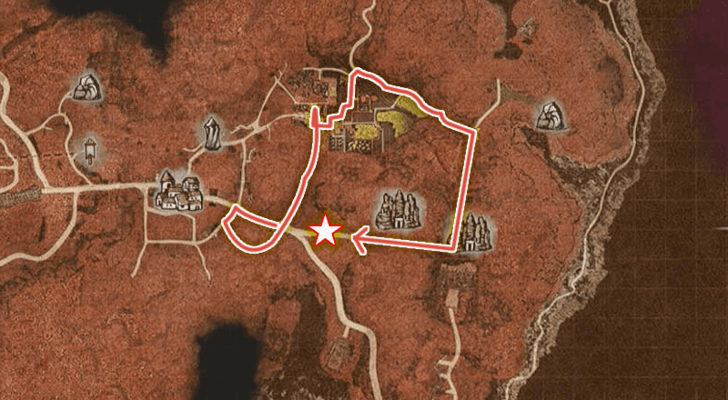 |
| 4 |  └ Rewards: 20000XP, 20000G, Wrymslife Crystal ×35 |
Halls of the First Dawn
| Halls of the First Dawn | |
|---|---|
| 1 | 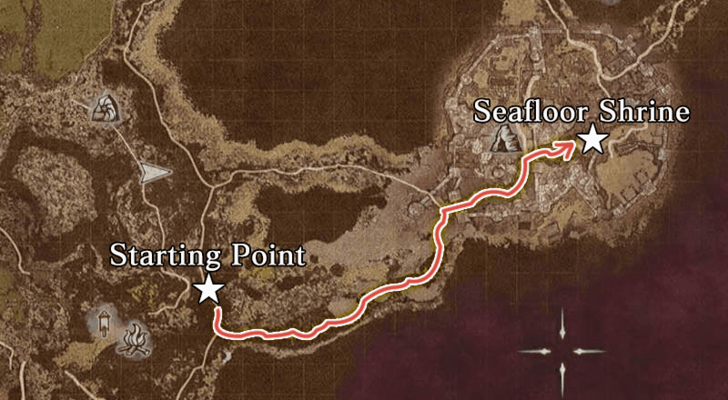 |
| Evacuation Subquests | |||||
|---|---|---|---|---|---|
| Bakbattahl | Volcanic Island Camp | Excavation Site | |||
| Sacred Arbor | Vernworth | ||||
Civil Unrest
| Civil Unrest | |
|---|---|
| 1 |  |
| 2 | 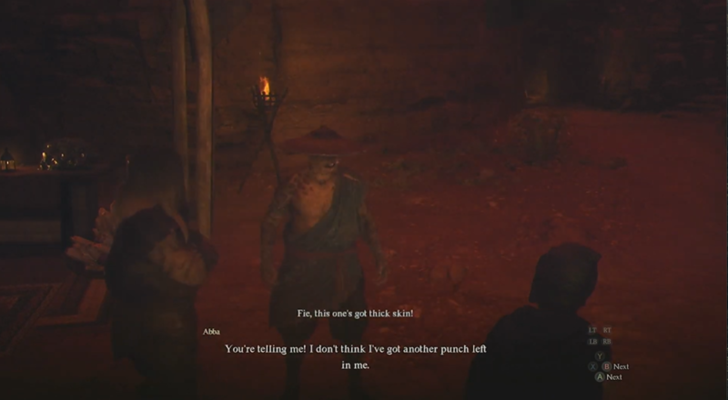 |
| 3 |  └ Give some non-rotten fruit to the child. Afterwards the two men will settle their differences on their own. |
| 4 |  |
| 5 | Go back and report to Manella. |
| 6 |  └ Reward: 20000 XP, 20000 G, Wrymslife Crystal × 35, Allheal Elixir × 1 |
The Importance of Aiding Ernesto
| The Importance of Aiding Ernesto | |
|---|---|
| 1 | 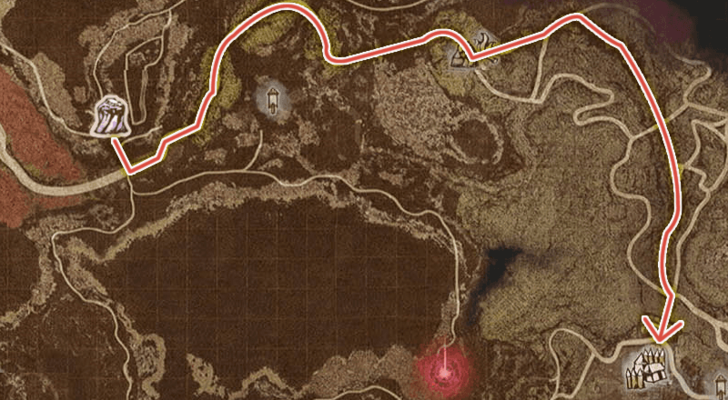 |
| 2 | 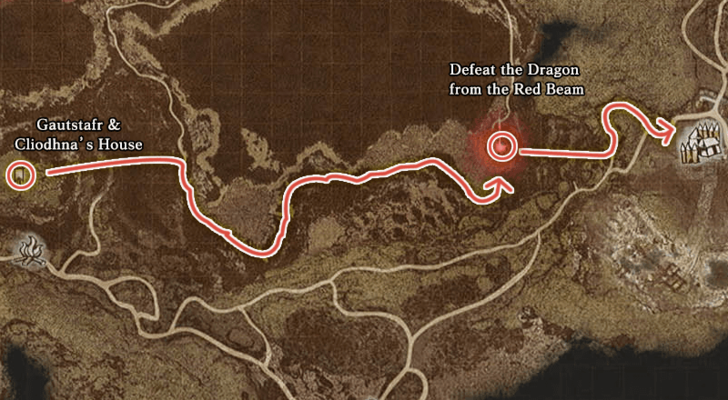 Defeat the dragon from the red beam similar to the one in Bakbattahl. └ Reward: Wrymslife Crystal × 90 |
| 3 | Escort the elderly couple back to camp and speak with Ernesto. |
| 4 |  Speak to Lamond. Convince him to evacuate. If you have given him enough Newt Liquer, he may be persuaded easier.
 |
| 5 |  Return to Ernesto to complete the quest.
 └ Reward: 20000 XP, 15000 G, Wrymslife Crystal × 40 |
Shepherd of the Pawns
| Shepherd of the Pawns | |
|---|---|
| 1 |  |
| 2 |  |
| 3 |  |
| 4 | 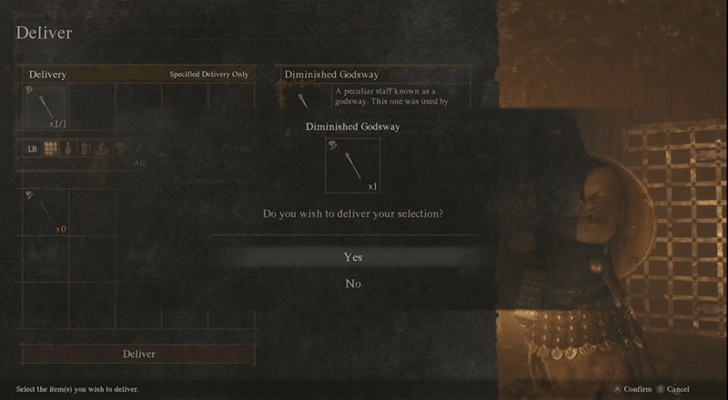 └ Reward: 20000 XP, 15000 G, Wyrmslife Crystal × 30 |
| 5 | 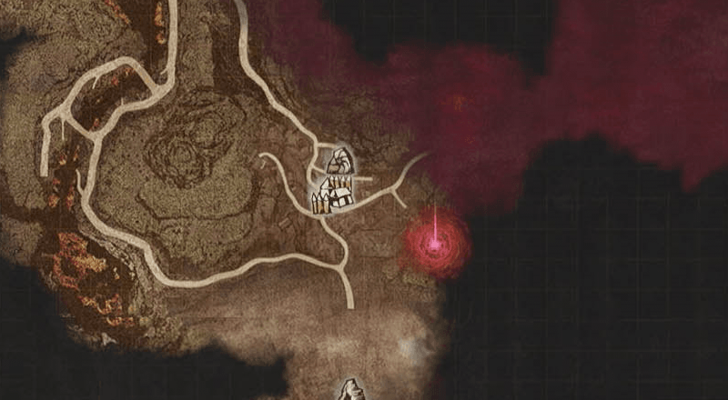 |
The Regentkin's Resolve
| The Regentkin's Resolve | |
|---|---|
| 1 | 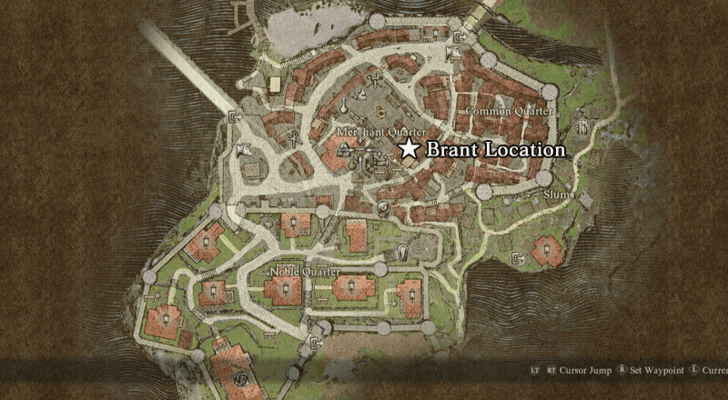 |
| 2 | 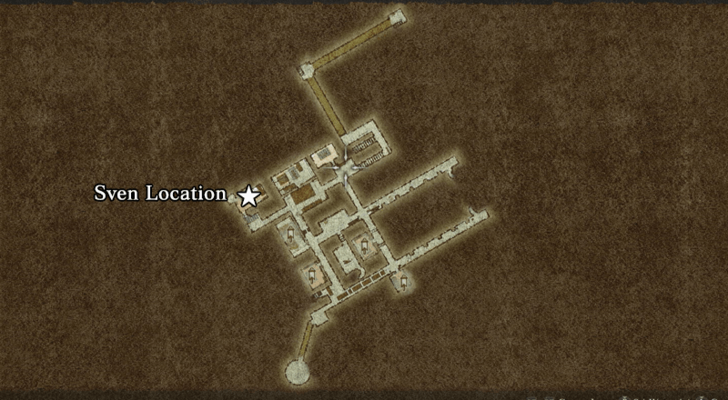 |
| 3 |  |
| 4 | 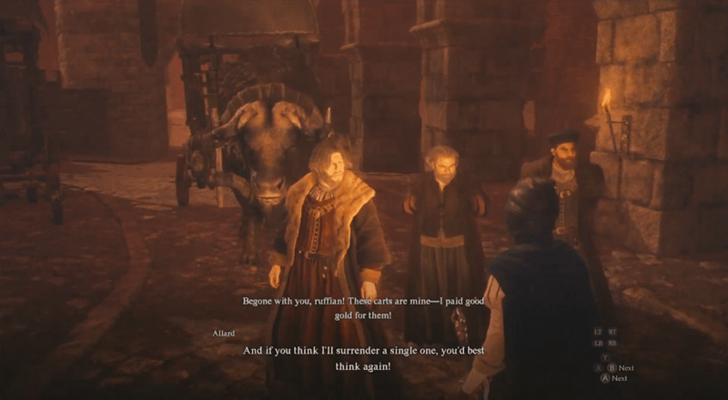 |
| 5 | Return to Sven and talk to him to complete the quest. └ Reward: 20000 XP, 25000 G, Wyrmslife Crystal × 35 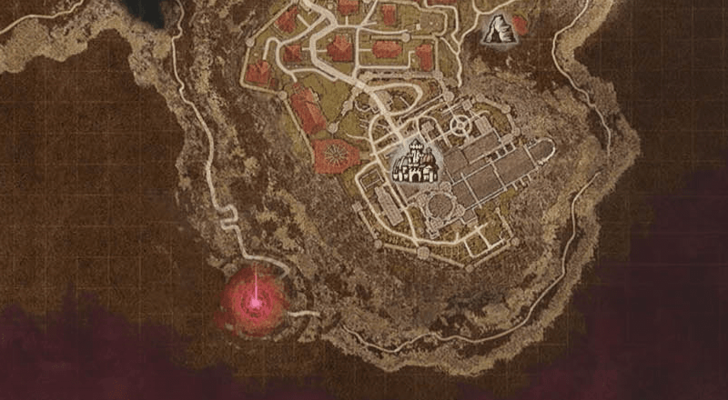 |
Wandering Roots
| Wandering Roots | |
|---|---|
| 1 | 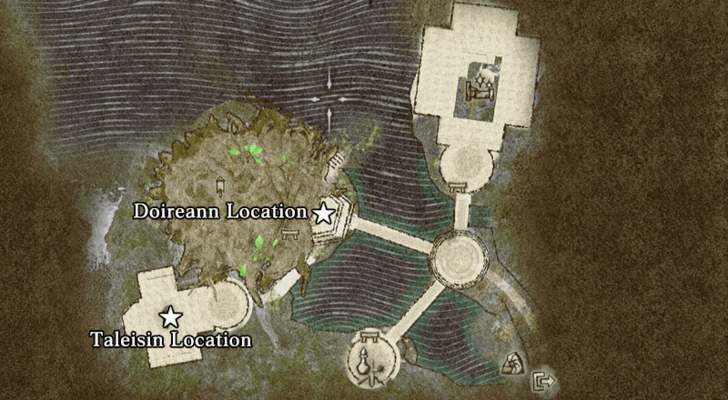 |
| 2 | 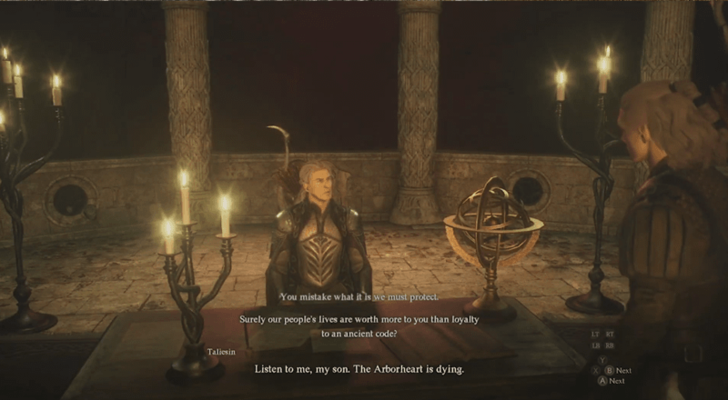 |
| 3 | Talk to Glyndwr and he will reveal that gwyfencha is “scalecinder” in the common tongue. If you have a pawn with the Woodland Wordsmith specialization, translating will be much easier. |
| 4 | 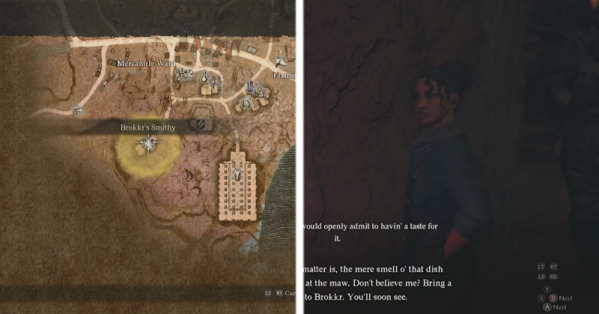 |
| 5 | 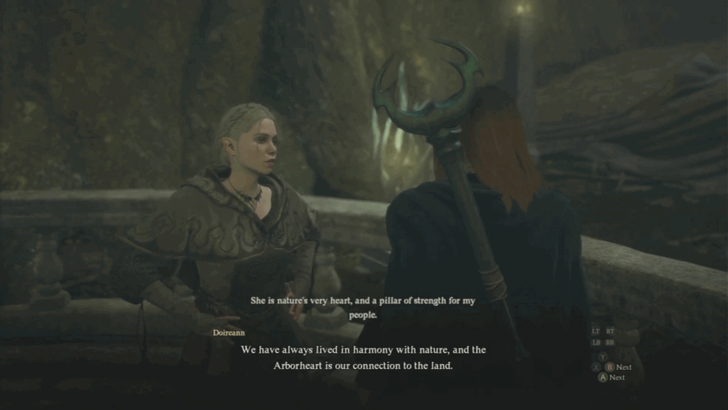 └ Reward: 20000 XP, 25000 G, Wyrmslife Crystal × 30 |
| 6 |  |
| Halls of the First Dawn (cont.) | |
|---|---|
| 2 | 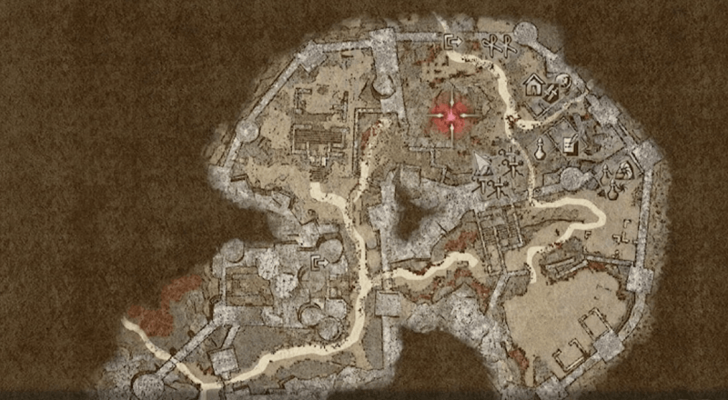 |
| 3 |  |
| 4 |  Afterwards a cutscene will play to signal the end of the game. You will be taken back to the title screen where the title will now read “Dragon's Dogma II” and you will be able to start a New Game +! Afterwards a cutscene will play to signal the end of the game. You will be taken back to the title screen where the title will now read “Dragon's Dogma II” and you will be able to start a New Game +! |
How to Unlock the Unmoored World
Use the Godsbane Blade on the Dragon
Use the Empowered Godsbane Blade on the Dragon's chest when you ride on its back on the way to the final battle in the Legacy Main Quest to trigger the Unmoored World and reach the True Ending.
Unmoored World NPCs
NPCs involved in the Evacuation
| Bakbattahl Evacuation | |||||||||||
|---|---|---|---|---|---|---|---|---|---|---|---|
 Phaseus Phaseus |
 Manella Manella |
 Nadinia Nadinia |
|||||||||
| Volcanic Island Evacuation | |||||||||||
 Ernesto Ernesto |
 Gautstafr Gautstafr |
 Cliodhna Cliodhna |
 Lamond Lamond |
||||||||
| Excavation Site Evacuation | |||||||||||
 Henrique Henrique |
|||||||||||
| Vernworth Evacuation | |||||||||||
 Brant Brant |
 Sven Sven |
 Disa Disa |
|||||||||
| Sacred Arbor Evacuation | |||||||||||
 Taliesin Taliesin |
 Glyndwr Glyndwr |
 Doireann Doireann |
 Sara Sara |
||||||||
The following NPCs are involved in the post-game quest of evacuating the people before the destruction of the world. Some leaders may not appear like Nadinia, if they are killed before entering the Unmoored World. Completing the questlines from these NPCs will ensure that all settlement inhabitants will be evacuated.
Unmoored World Trophies
 Closure
G: 30 |
Experience the end of the cycle. |
|
The Guardian
G: 30 |
Lead the people to safety in the unmoored world. |
|
The Hero
G: 30 |
Overcome all the trials of the unmoored world. |
 I, Talos
G: 10 |
Help the gigantus walk again. |
The following trophies are trophies that can only be acquired in the Unmoored World.
Trophy Guide and List of Achievements
Dragon's Dogma 2 (DD2) Related Guides

Walkthrough and Progression Guide
| Walkthrough Guides | |
|---|---|
| What to Do First | What to Do Before Coronation |
| Endings Guide | Post Game Content |
| Unmoored World Walkthrough | - |
Comment
Sometimes you gotta use wakestones to bring back npcs.
Author
Unmoored World Walkthrough
Rankings
- We could not find the message board you were looking for.
Gaming News


![Monster Hunter Stories 3 Review [First Impressions] | Simply Rejuvenating](https://img.game8.co/4438641/2a31b7702bd70e78ec8efd24661dacda.jpeg/thumb)
Popular Games

Genshin Impact Walkthrough & Guides Wiki
Honkai: Star Rail Walkthrough & Guides Wiki
Umamusume: Pretty Derby Walkthrough & Guides Wiki
Pokemon Pokopia Walkthrough & Guides Wiki
Resident Evil Requiem (RE9) Walkthrough & Guides Wiki
Monster Hunter Wilds Walkthrough & Guides Wiki
Wuthering Waves Walkthrough & Guides Wiki
Arknights: Endfield Walkthrough & Guides Wiki
Pokemon FireRed and LeafGreen (FRLG) Walkthrough & Guides Wiki
Pokemon TCG Pocket (PTCGP) Strategies & Guides Wiki


Recommended Games
Diablo 4: Vessel of Hatred Walkthrough & Guides Wiki
Cyberpunk 2077: Ultimate Edition Walkthrough & Guides Wiki
Fire Emblem Heroes (FEH) Walkthrough & Guides Wiki
Yu-Gi-Oh! Master Duel Walkthrough & Guides Wiki
Super Smash Bros. Ultimate Walkthrough & Guides Wiki
Pokemon Brilliant Diamond and Shining Pearl (BDSP) Walkthrough & Guides Wiki
Elden Ring Shadow of the Erdtree Walkthrough & Guides Wiki
Monster Hunter World Walkthrough & Guides Wiki
The Legend of Zelda: Tears of the Kingdom Walkthrough & Guides Wiki
Persona 3 Reload Walkthrough & Guides Wiki


All rights reserved
©CAPCOM CO., LTD. ALL RIGHTS RESERVED.
The copyrights of videos of games used in our content and other intellectual property rights belong to the provider of the game.
The contents we provide on this site were created personally by members of the Game8 editorial department.
We refuse the right to reuse or repost content taken without our permission such as data or images to other sites.
Very late to the party, but make sure you complete Manella's quest (Civil Unrest) and evacuate the city before interacting with the red bean of light outside the Flamebearer Palace. After some quick testing, I noticed that Menella has a very high chance of dying during the chaos that happened after interacting with the red bean of light. This is a big problem because the Morgue is useless in Unmoored World and NPC don't have time to respawn.