Sphinx Riddle Solutions and Location
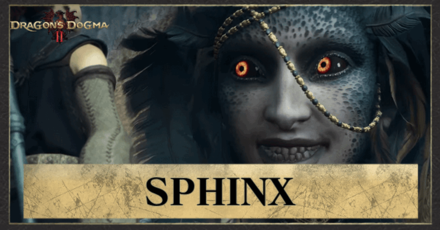
The Sphinx is a Monster in Dragon's Dogma 2 that offers 10 Riddles in exchange for rewards. See all the Sphinx's riddle answers, the shrine locations, what the Sphinx Parent is, all the riddle rewards, and how to beat it using the Unmaking Arrow here!
| Sphinx Guides | |
|---|---|
| Sphinx Riddle Solutions | Should You Kill the Sphinx? |
List of Contents
All Sphinx Riddles and Answers
Sphinx Riddle Solutions
| Riddle | Solution | Reward |
|---|---|---|
| Riddle of Eyes | Submit the Sealing Phial found at a chest on top of the doorway the Sphinx just opened | Wakestone |
| Riddle of Madness | Bring a Pawn or an NPC whom you have the most affinity with to the Sphinx. | Portcrystal |
| Riddle of Wisdom | Bring a Pawn named SphinxFather / SphinxMother / SphinxParent to the Sphinx | Rift Crystals |
| Riddle of Conviction | Submit any Item | Submitted Item |
| Riddle of Rumination | Submit a Finder's Token | Ferrystone |
| Riddle of Reunion | Go to the Frontier Shrine in Battahl | Gold |
| Riddle of Recollection | Correct amount of statues to the Sphinx. | Unmaking Arrow |
| Riddle of Contest | Defeat the Enemy | Ring of Ambition |
| Riddle of Futility | Deliver the Amphora to Maurits | Eternal Bond |
| Riddle of Differentiation | Bring either Vergil or Dante to the Sphinx | Whimsical Daydream |
Sphinx Riddles in Mountain Shrine
Riddle of Eyes
| Riddle | |
|---|---|
| Our eyes are our allies, yet oft do they betray, for eyes tell lies, so I advise, and thence do lead astray. Yet how will your eyes advise you? Venture through yonder door, and retrieve that which is of greatest value. |
|
| Solution | |
| Submit the Sealing Phial found at a chest on top of the doorway the Sphinx just opened | |
| Reward: | Wakestone |
How to Get the Sealing Phial
| 1 | Enter the now opened doorway that the Sphinx has opened for the riddle. |
|---|---|
| 2 | As you enter the doorway, look on top of the doorway and you'll see a chest containing the Sealing Phial. Climb the debris to get to the chest and loot its contents. Note: You don't have to explore the whole cave. |
Riddle of Madness
| Riddle | |
|---|---|
| Love is as twin to madness, they say. They are bound fast, as night is to day. So bring forth your most beloved to me, that I might gauge the depth of your insanity. |
|
| Solution | |
| Bring a Pawn or an NPC whom you have the most affinity with to the Sphinx. | |
| Reward: | Portcrystal |
Offer Your Pawn Instead
As there's no black-and-white way to gauge the level of Affinity with NPCs, we strongly recommend offering your Pawn instead of an NPC, as this is more efficient and doesn't risk failing to solve this riddle!
Simply carry your Pawn and position them over the Sphinx's platform to proceed. There's also no need to use the Sealing Phial, which you could save for later!
Riddle of Wisdom
| Riddle | |
|---|---|
| The parent knows the child, yet the reverse is far from true. The child knows not the parent: such is the parent's due. I am a lost child; for kinship do I yearn. So bring to me my "Parent," that I might better learn. |
|
| Solution | |
| Bring a Pawn named SphinxFather / SphinxMother / SphinxParent to the Sphinx | |
| Reward: | 1200 Rift Crystals |
Where to Get a Pawn with a Unique Moniker
You can get the Pawn with a Unique Moniker from the Riftstone of Fellowship, in Herve Village. Make sure to only hire Pawns that are named SphinxParent, SphinxFather, or SphinxMother.
Then, head back to the Mountain Shrine and place the Pawn atop the platform in front of the Sphinx before talking to her.
Moniker Meaning and Difference from Name
Riddle of Conviction
| Riddle | |
|---|---|
| Life is an enigma—a lender of mortal debt. Yet lighter pack makes fleeter foot and challenge nimbly met. So grant to me what you most prize, and thence elude your ponderous demise. |
|
| Solution | |
| Submit any Item | |
| Reward: | Whichever Item you Submitted |
Riddle of Rumination
| Riddle | |
|---|---|
| It's ever the first we keep fond in our breast, and ever the first that eclipses the rest. You know of the Seeker's Tokens, I trust? those keepsakes of a fondly remembered journey? Yet where was it that you found your first? Retrace your steps, if you can—you might make a new discovery. Seven days, shall we say, ere you return? May your journey be a pleasant one. |
|
| Solution | |
| Submit a Finder's Token which you can find at the location of the first Seeker's Token you found | |
| Reward: | x3 Ferrystone |
Beware of How Much Days Have Passed
The Riddle of Rumination is, by far, the trickiest Riddle of the Sphinx, as it can be easy to forget where you've gotten your first Seeker's Token. You would have to to proactively count how many days have passed, as you're only limited to 7 days before failing this riddle!
How to Get to Mountain Shrine
Pass Thru the Worldsend Cavern
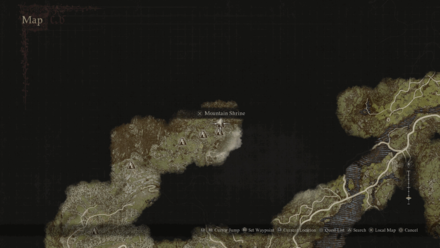
| Map View | Overworld View |
|---|---|
 |
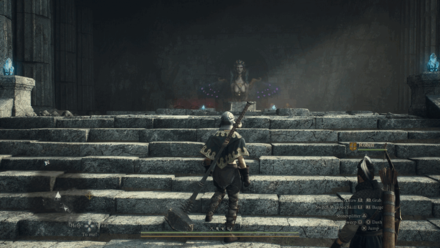 |
The Sphinx is first located at the Mountain Shrine, positioned north of the Ancient Battleground. There are two ways to get there: first is by passing through the Misty Marshes, and the other one is heading inside the Worldsend Cavern.
We strongly recommend going through the Worldsend Cavern—albeit the longer route to the Shrine—as it generally yields more rewards, plus you get to meet Oskar, the quest giver of Tolled to Rest!
How to Reach the Mountain Shrine
| Sphinx in the Mountain Shrine | |
|---|---|
| 1 | 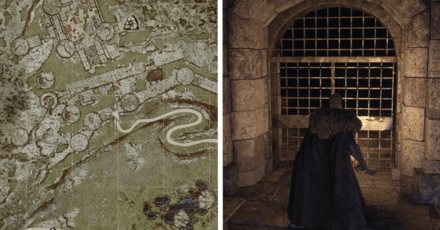 To reach the Worldsend Cavern, you must first locate the Ancient Battleground, a ruined castle housing a bunch of Skeleton and Undead enemies. If you're progressing Tolled to Rest with Oskar, you can skip this step as he's guiding you around the castle; otherwise, go past the metal door located right of the ruin's entrance. |
| 2 | 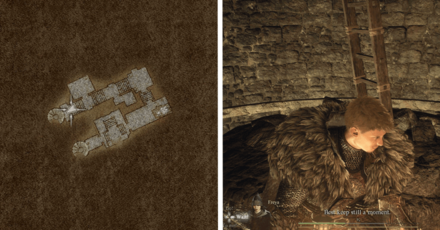 Then, turn left just past the rubble, then make another sharp turn to your left. Keep going until you see a doorway with a spiral staircase inside. Ascend the staircase, then use the wooden ladder atop it to reach the outside of the castle. |
| 3 | 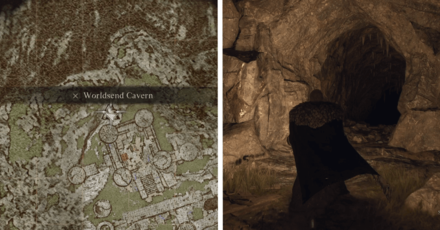 There's a nearby Armored Golem a few steps away from the ladder, so make sure to defeat it first. Afterwards, go straight behind the ruins, just past the Golem, until you see a cave that sends you straight into the Worldsend Cavern. |
| 4 | 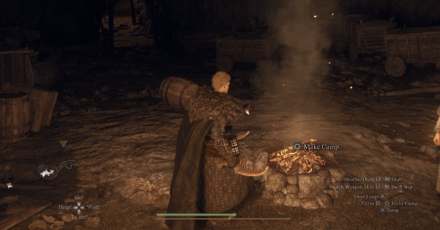 Once inside, go forward until you see a mob of enemies. Fortunately, defeating them frees the camp, which we recommend your party to use, as the Cavern is riddled with more enemies. There's an easily-missable Grass-Patterned Camping Kit nearby, so make sure to grab it, as well! |
| 5 | 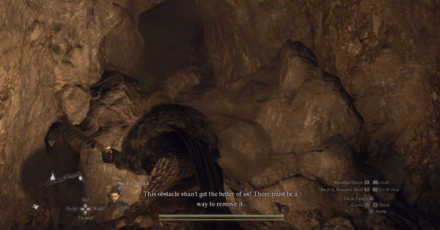 From the camp, go straight ahead until you see a forked tunnel with a hole on the ground in between. Make a sharp turn to your right and destroy the boulder blocking the way. Continue, until you see a chamber with Phantom enemies inside. There's also a Seeker's Coin nearby, so make sure to bag it before proceeding. |
| 6 | 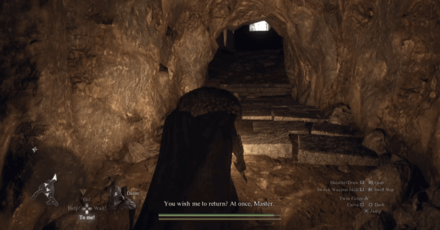 Then, continue forward until you see another chamber with Phantom enemies. You can opt out of the fight by going past them or fight them for their Miasmite loot, but either way, the tunnel in front of you should take you out of the castle! |
| 7 | 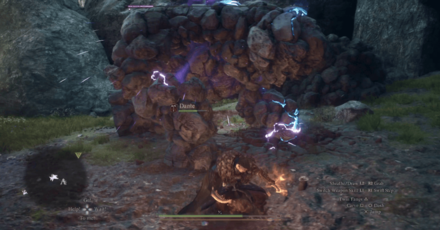 There's an Ancient Golem waiting outside, which could be a tricky fight if you keep on hitting it anywhere else but the two glowing Runic patterns in its body. If your Arisen excels at melee combat, make sure to only attack when its arm is on the ground! |
| 8 | 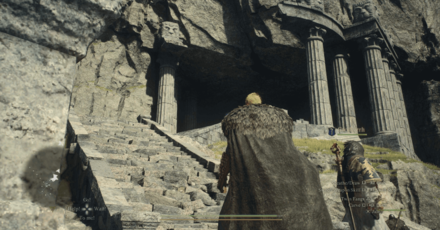 Once the Golem is defeated, just continue forward and make a sharp turn to your right until you see a flight of stairs that should direct you straight to the Mountain Shrine. |
Sphinx Riddles in Frontier Shrine
Riddle of Reunion
| Riddle | |
|---|---|
| And so the time has come for me to fly. If you are not yet satisfied, seek me at my new abode. But for now, I bid you farewell, dogged adventurer. |
|
| Solution | |
| Go to the Frontier Shrine in Battahl | |
| Reward: | 100,000 Gold |
Randomized Riddles After Reunion
| Note: All the remaining riddles after solving the Riddle of Reunion is given at random, hence it's important to prepare first before proceeding! |
How to Prepare for the Last 4 Riddles
| Frontier Shrine Checklist |
|---|
• Similar with the Mountain Shrine, a Portcrystal is necessary to be placed in the Frontier Shrine to save you time, and resources going back and forth to places! |
• You also need to place a Portcrystal at the Border Town, as this will give you a quick access to fetch either Vergil or Dante fro the Riddle of Differentiation! |
| • One of the most important things to do before going back to the Sphinx is switching your vocation to an Archer/Warfarer. This lets you equip the Unmaking Arrow to easily kill the Sphinx! |
• Maurits is an important NPC to solve the Riddle of Futility, but you can only get to him at the Mural Byway in Bakbattahl. If you haven't been to the city proper before, the road to Bakbattahl is riddled with monsters, which could break the Amphora you're supposed to deliver to him. • The workaround here is to use the Sealing Phial on Maurits first, and keep him in your inventory until you're ready to take on the last 4 Riddles! |
• The reason why you must have at least 3 Ferrystones is for you to easily traverse between the Border Town and the Frontier Shrine. • Provided you've done the items above in order, use 1 Ferrystone to go back to the Frontier Shrine, and start the riddles. • Once you've gotten the Riddle of Differentiation, immediately warp back to the Border Town using 1 Ferrystone, and get either Dante/Vergil, depending on the image provided by the Sphinx. • Head back to the Frontier Shrine with Dante/Vergil saddled on your shoulder using the last Ferrystone, to complete the Riddle! |
Riddle of Recollection
| Riddle | |
|---|---|
| Now, questions beget questions, and I have one for you: How many riddles have you solved thus far? My memory failes me, you see. Remind me, and make it plain. Let yonder statues be your means. For every question aplty answered, bring one here before me. |
|
| Solution | |
| The statues correspond to how many riddles you've solved since the first set up to this point. Bring the correct amount of statues to the Sphinx. | |
| Reward: | Unmaking Arrow |
How to Solve the Riddle of Recollection
The easiest way to solve the Riddle of Recollection is to simply count all the opened chests behind the Sphinx, and add 5 (Mountain Shrine Riddles). For instance, if there are two opened chests behind the Sphinx, bring 7 Statues on the dais to solve the riddle!
Riddle of Contest
| Riddle | |
|---|---|
| Though ours is a battle of wits, tests of mettle are more to your strength. Is that not so? Come, try your arm—though he shall be your opponent, not I. However, I am not one to be amused by a simple duel. Bear this ring into battle, that I might gauge your true strength. |
|
| Solution | |
| Stagger your opponent to be able to carry him and throw him off the cliff. | |
| Reward: | Ring of Ambition |
Unequip the Ring of Derision After
Once you've completed the riddle, unequip the Ring of Derision as it won't automatically get removed from your equipped gears!
Riddle of Futility
| Riddle | |
|---|---|
| How easily the mind unravels! Some say it's pain that does it best, others darkness—but I say neither. Rather, I say a mind cannot be more soundly broken than when it beholds its earnest efforts laid low in a single stroke. Could you survive such despair? We shall see. Here I have an amphora destined for Ser Maurits in Battahl. Deliver it to him, but beware; it's rather fragile. I do hope your struggle will amuse. |
|
| Solution | |
| Deliver the Amphora to Maurits, or bring Maurits directly to the Amphora. | |
| Reward: | Eternal Bond |
Riddle of Differentiation
| Riddle | |
|---|---|
| So vast is this world, and full of life; you are but one of many. Indeed, in the grand scheme, we are as distinct from one another as pebbles on a beach—yet we do so love to extol our differences. But are these differences so great? If you believe so, this next task should prove exceedingly simple. I seek this man. If men are so distinct, I'm sure you'll find him in a trice. |
|
| Solution | |
| Bring either Vergil or Dante from the Border Town or the Checkpoint Rest Town. Use your R2 or RT, and use a Ferrystone to return to the Sphinx. | |
| Reward: | Whimsical Daydream |
How to Know Which NPC to Bring?
Luckily for the Riddle of Differentiation, the Sphinx will only show either Dante or Vergil. These two NPCs are extremely visually similar, however there are still noticeable differences, so long as you take a look closely!
Dante resides in the Checkpoint Rest Town, and has a medium-length hair, that flows straight down. He also has a side-swept bangs on the right side of his face. Meanwhile, Vergil, who's in the Border Town, has slightly wavier hair, and has a side-swept bangs on the left side of his face!
How to Get to the Frontier Shrine
Go Beneath the Checkpoint Rest Town
| Map View | Overworld View |
|---|---|
 |
 |
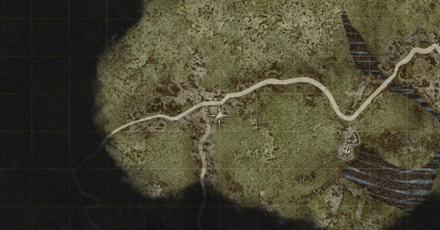
The second location of the Sphinx is at the Frontier Shrine in Battahl. You can reach the Frontier Shrine either thru the Ennoa'Battahl Forest, or the river beneath the Checkpoint Rest Town, but we recommend using the latter, as it's the most straightforward!
Just a fair warning, however, this path would eventually have you fight a Cyclops, a Minotaur, and a Chimera, so make sure your party is optimized before you continue!
How to Reach the Frontier Shrine
| Sphinx in the Frontier Shrine | |
|---|---|
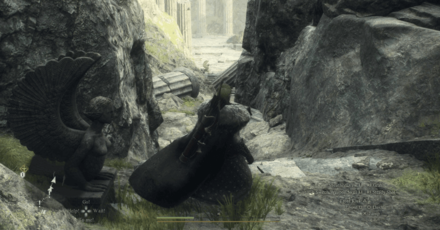
| 1 | 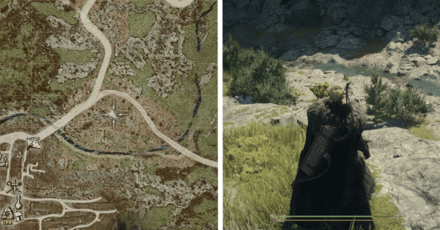 To reach the Frontier Shrine, go to the river beneath the Checkpoint Rest Town. It should be easy to spot, as it's the area located just before the town's entrance! |
| 2 | 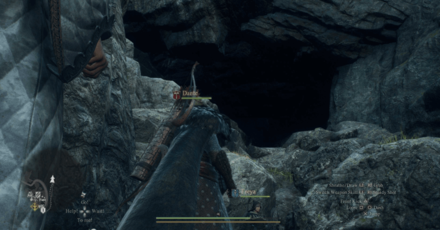 Continue treading along the river, until you reach a cavern with Geo Saurian enemies. At the end of the cavern, climb over the rubble to your right, instead of going to the left, as that direction leads to a dead-end! |
| 3 | 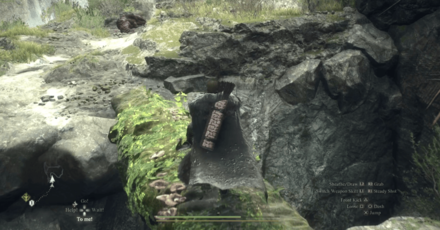 Then, make a turn to your right, just past the mossy log. There are still Saurians lurking around, take them on if you want to. |
| 4 | 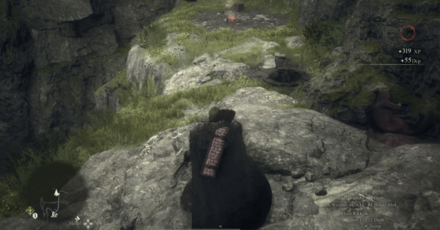 Continue going forward without making any turns, until you see a wooden bridge nearby a small waterfall. Few steps from the bridge is a forked path. The one on the right leads closer to the Shrine, however, we recommend resting at the camp at the end of the left path! |
| 5 | 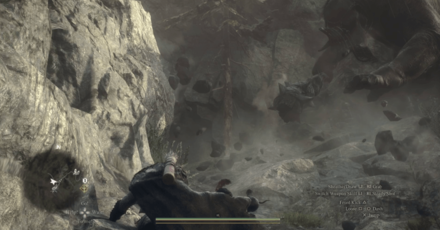 After your party has rested, go back to the forked path, this time continue going to the right. Few steps in, a Cyclops will attack your party, but simply keep your distance, and you should be safe. |
| 6 | 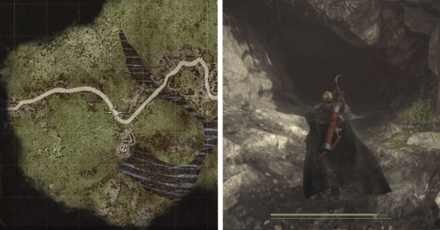 Once the Cyclops has been defeated, keep going forward until you see another cave. It's important to go inside fully-healed, as there's a Minotaur and Chimera waiting to ambush your team! |
| 7 | 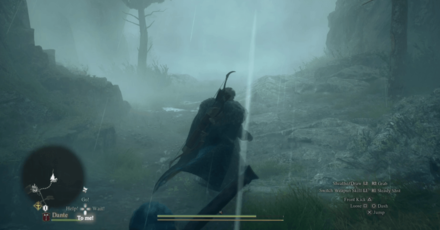 We recommend taking them separately, but ensure that none of your Pawns stray away from you. To do this, walk towards the group of rabbits nearby a chest to your right, and immediately head back to the cave opening. |
| 8 | 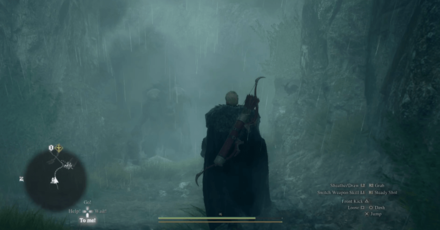 You'll notice that the Minotaur is right behind your back. Do not fight the Minotaur yet, until you reach the opening of the cave. This is to take away any risk of triggering the nearby Chimera, which could prove fatal, if it joins in the fray! |
| 9 | 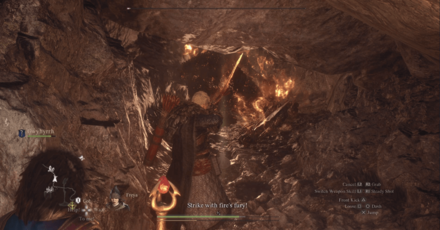 The opening of the cave is a bit small for the Minotaur to use, which means your party is safe outside the cave while you're poking it out to death. Keep doing it until you've slain the enemy. |
| 10 | 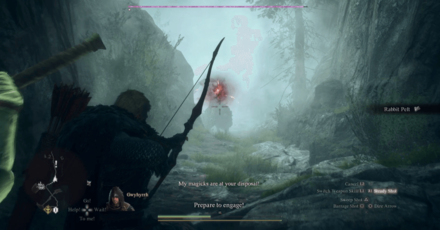 Afterwards, head further into the misty area where the Chimera is lurking. It will immediately attack your party, but you have the option to take it head on, or you can lure it towards the cave opening, and slay it the same you did the Minotaur! |
| 11 | 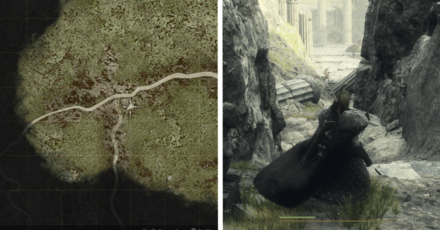 Once both enemies have been killed, simply jump over the ledge to your left, and continue towards the light! The opening should lead you straight to the Frontier Shrine. |
Sphinx Riddle Rewards
All Riddle Rewards
| Chest | Reward |
|---|---|
| Chest #1 | Wakestone |
| Chest #2 | Portcrystal |
| Chest #3 | 1200 Rift Crystals |
| Chest #4 | The same item you submitted |
| Chest #5 | x3 Ferrystone |
| Chest #6 | 100000 Gold |
| Chest #7 | Unmaking Arrow |
| Chest #8 | Ring of Ambition |
| Chest #9 | Eternal Bond |
| Chest #10 | Whimsical Daydream |
| Chest #11 (After Beating the Sphinx) |
Eternal Wakestone |
To open the chest with the Eternal Wakestone, which is the biggest chest in the group, you'll have to beat the Sphinx and get the Key of Sagacity.
Dragon's Dogma 2 Related Guides

All Monsters
| All Monsters and Enemies | |||
|---|---|---|---|
 The Dragon |
 Goblin |
 Hobgoblin |
 Wolf |
 Harpy |
 Saurian |
 Chimera |
 Golem |
 Ogre |
 Slime |
 Skeleton |
 Undead |
 Griffin |
 Chopper |
 Rattlers |
 Cyclops |
 Minotaur |
 Knacker |
 Wight |
 Talos |
 Dullahan |
 Drake |
 Sphinx |
 Medusa |
 The Brine |
Rabbit | Phantom | Venin Harpy |
| Redwolf | Asp | Gore Harpy | Grim Ogre |
 Gorechimera |
Warg |
 Goreminotaur |
 Lich |
 Lesser Dragon |
 Spider |
 Magma Scale |
 Garm |
Comment
SphinxMother is infected with the DragonsPlague Beware!
Author
Sphinx Riddle Solutions and Location
improvement survey
03/2026
improving Game8's site?

Your answers will help us to improve our website.
Note: Please be sure not to enter any kind of personal information into your response.

We hope you continue to make use of Game8.
Rankings
- We could not find the message board you were looking for.
Gaming News
Popular Games

Genshin Impact Walkthrough & Guides Wiki

Honkai: Star Rail Walkthrough & Guides Wiki

Umamusume: Pretty Derby Walkthrough & Guides Wiki

Pokemon Pokopia Walkthrough & Guides Wiki

Resident Evil Requiem (RE9) Walkthrough & Guides Wiki

Monster Hunter Wilds Walkthrough & Guides Wiki

Wuthering Waves Walkthrough & Guides Wiki

Arknights: Endfield Walkthrough & Guides Wiki

Pokemon FireRed and LeafGreen (FRLG) Walkthrough & Guides Wiki

Pokemon TCG Pocket (PTCGP) Strategies & Guides Wiki
Recommended Games

Diablo 4: Vessel of Hatred Walkthrough & Guides Wiki

Fire Emblem Heroes (FEH) Walkthrough & Guides Wiki

Yu-Gi-Oh! Master Duel Walkthrough & Guides Wiki

Super Smash Bros. Ultimate Walkthrough & Guides Wiki

Pokemon Brilliant Diamond and Shining Pearl (BDSP) Walkthrough & Guides Wiki

Elden Ring Shadow of the Erdtree Walkthrough & Guides Wiki

Monster Hunter World Walkthrough & Guides Wiki

The Legend of Zelda: Tears of the Kingdom Walkthrough & Guides Wiki

Persona 3 Reload Walkthrough & Guides Wiki

Cyberpunk 2077: Ultimate Edition Walkthrough & Guides Wiki
All rights reserved
©CAPCOM CO., LTD. ALL RIGHTS RESERVED.
The copyrights of videos of games used in our content and other intellectual property rights belong to the provider of the game.
The contents we provide on this site were created personally by members of the Game8 editorial department.
We refuse the right to reuse or repost content taken without our permission such as data or images to other sites.





![Monster Hunter Stories 3 Review [First Impressions] | Simply Rejuvenating](https://img.game8.co/4438641/2a31b7702bd70e78ec8efd24661dacda.jpeg/thumb)


There are many pawns with that name, not just one. Dragon plague is only dangerous when your pawn's eyes start to glow and pulse red and will basically tell you to fuck off if you issues any commands like "go" or "wait". It's not instant and takes a long time to incubate so their is alot of time to notice signs, but you can also just kill them and resummon at a rift stone specifically to cure them at any time if you're scared. Throw them into water from time to time