What to Do First
The vast world of Dragon's Dogma 2 can be daunting and knowing which quest and what to do first is important for your survival. See which quests and what to do first in Dragon's Dogma 2, as well as other beginner tips that can help you progress through the game with ease!
List of Contents
Quests to Do First
Best Quest Order Upon Arriving at Vernworth
Proceed the main questline until Seat of the Sovran, which brings you to the largest early game point-of-interest, Vernworth. Here, you'll have to meet up with Brant, who will have a total of 7 quests that you can mostly do in any order. Below is the best quests to do first, including the side quests that have great early game unlockables.
| What Quests to Do First |
|---|
┗ Repel the Dragon ┗ Talk to Sigurd (Unlocks Mystic Spearhand Vocation) ┗ Readvent of Calamity (Side Quest) ┗ Head to Harve Village ┗ Scaly Invaders (Side Quest) ┗ Trouble on the Cape → Ulrika Romance (Side Quest) ┗ The Heel of History (Sub-quest) ┗ Jump out the window of Allard's room to encounter Wilhelmina ┣ Complete An Unsettling Encounter ┗ Talk to Wilhelmina to auto-progress The Stolen Throne (no need to attend the masquerade) ┣ Talk to Brant to complete The Stolen Throne. ┗ Talk to Wilhelmina → Rest at an inn → Talk to her again to do Wilhelmina Romance |
All Quests List and Quest Guides
Quests to Do First Walkthrough
| 1 | Complete Disa's Plot quest |
|---|---|
| First, do Brant's Disa's Plot quest ("Tell me of the queen regent."), as it's one of Brant's shortest quests and it will help you obtain the Marcher's Armor, Marcher's Cuisses, Marcher's Helm, which you'll need to walk around Vernworth Castle at night undetected. This armor set is used in this mission as well as An Unsettling Encounter later on. | |
| 2 | Go Back to Melve |
| After completing 1 Brant Quest, you can take an oxcart back to Melve to witness a dragon attacking it during the Readvent of Calamity side quest.
(Additional: taking the oxcart back to Melve is related to the Oxcart Courier side quest.) |
|
Repel the Dragon to unlock Mystic Spearhand and Ulrika Romance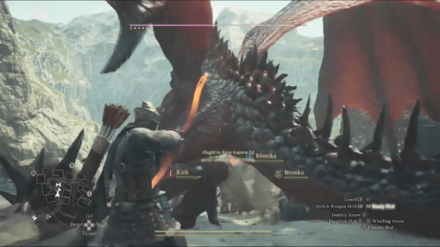 If you repel the dragon (the first objective of Readvent of Calamity), talk to Sigurd and ask about his manner of fighting in order to unlock the Mystic Spearhand vocation. This is one of the best vocations. Additionally, Readvent of Calamity is the first quest in the Ulrika Romance questline. We recommend doing this at this point, since you won't be able to after completing Feast of Deception later on. |
|
| 3 | Go Back to Vernworth and Complete Monster Culling |
| Head back to Vernworth and take on 2 quests; Vocation Frustration at the Vocation Guild and the next Brant Quest, Monster Culling ("Tell me of monster culling"). The latter is considerably longer and combat-centric, but it will bring you to locations with useful unlocks and you'll be well-equipped with the Mystic Spearhand vocation now. | |
Loot the Archistaff and Greatsword at Trevo Mines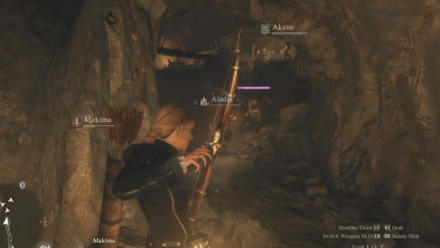 One of the locations Monster Culling brings you to is Trevo Mines. Trevo Mines is also where you can obtain the Archistaff and Greatsword for Vocation Frustration. Bringing back both these items to the Vocation Guild unlocks the Advanced Vocations: Warrior and Sorcerer. That's three birds with one stone. |
|
Go to Harve Village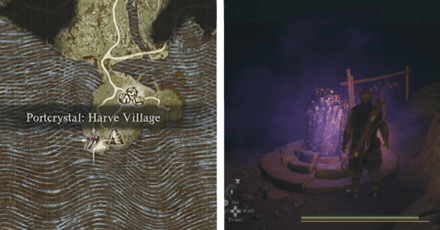 Monster Culling will also bring you to Harve Village. Make sure to activate Harve Village Portcrystal so you can fast travel back here at later times. After completing the Monster Culling section near Harve Village, head back to the village to trigger the Scaly Invaders side quest. This is the second quest in Ulrika's Romance questline. |
|
| 4 | (Optional) Complete Ulrika's Romance Questline |
 If you're interested in finishing out Ulrika's Romance questline, go back to Harve Village some time after completing Scaly Invaders to do Trouble on the Cape and Home Is Where the Hearth Is.
 |
|
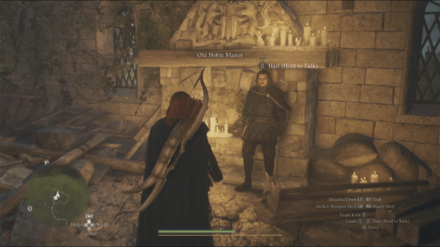
| 5 | (Optional - for Thieves) The Nameless Village |
 |
|
| 6 | Complete The Caged Magistrate |
 |
|
| 7 | Complete An Unsettling Encounter |
| The last couple of Brant Quests you can do is An Unsettling Encounter ("Tell me of the rumors about Allard") and The Stolen Throne ("Tell me of the masquerade"). Doing An Unsettling Encounter first will automatically progress The Stolen Throne for you as long as you talk to Wilhelmina afterward, so we recommend you do that to save time. | |
| Jump out of Allard's window during Unsettling Encounter Make sure to jump out of Allard's window during An Unsettling Encounter in order to encounter Wilhelmina in the castle courtyard. Don't pass Allard's front door since that'll make you miss Wilhelmina entirely. Complete An Unsettling Encounter by talking to Brant, then talk to Wilhelmina at the Rose Chateau Bordelrie to also auto-progress The Stolen Throne (you won't need to attend the masquerade anymore). Talk to Brant after to complete The Stolen Throne. |
|
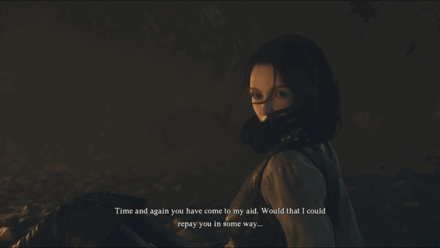
(Optional) Wilhelmina Romance Quest While not required, you could finish out the Wilhelmina-Allard storyline during the quest Every Rose Has Its Thorn by waiting a day after finishing An Unsettling Encounter. |
|
| 8 | Complete Feast of Deception |
| Feast of Deception ("Tell me of the coronation.") is the last Brant Quest. It unlocks when you do 5 of his 6 previous quests. Obtain the Courtly Tunic and Courtly Breeches, then do this quest before heading off to Bakbattahl as part of the story. |
What to Do First
| Early Game Tips |
|---|
|
|
Create Your Character
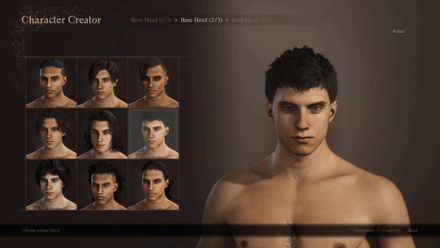
Creating your character in Dragon's Dogma 2 can be done immediately after starting the game. The game boasts a wide array of selection when it comes to customizing your character. Some players can even make their character look the same as popular movie characters like Paul Atreides from Dune.
If you ever want to change your character's appearance, simply head to a barber shop or use a transumation item.
Race Can't Be Changed Afterwards
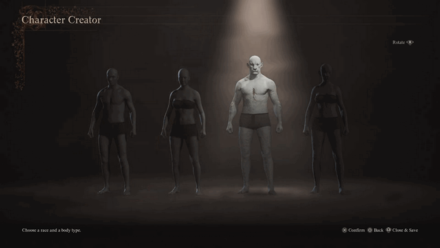
While you can change your character anytime in the game, note that the race that you picked in the initial character creation can't be changed afterwards.
Choose a Vocation
| Vocation | Explanation |
|---|---|
|
|
・Uses a one-handed sword and a shield. ・Excels at close combat. |
|
|
・Excels at long-distance attacks using bows and arrows. ・Good distance management and positioning is important. |
|
|
・Holds a dagger in both hands. ・Can dish out quick consecutive attacks and boasts high mobility. |
|
|
・Fights using magic. ・Can use recovery magic that's useful for beginners. |
Aside from character creation, you'll also be prompted to pick a vocation for your character early in the game. Each vocation has completely different fighting styles, so make sure to pick one that suits your playstyle best!
Best Starting Class and Starter Vocation
You Can Change Your Vocation Anytime at a Vocation Guild
If you happen to pick a vocation that you don't like, you can change it at a Vocation Guild situated in each town. We recommend trying out the different vocations first, so you can find which one you like best.
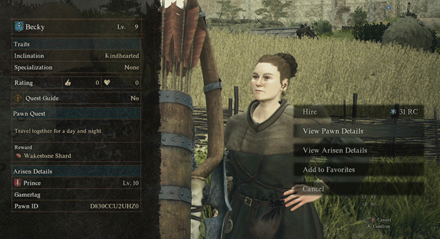
Hire Pawns for Support in Combat and Quests

Hiring Pawns is one of the most essential mechanics in Dragon's Dogma 2 and should be done at all stages of the game. Pawns are vital support characters that can help both in combat and quests.
Your party can have up to three Pawns, including your Main Pawn. Some Pawns possess relevant information for quests as indicated by the hand symbol on the quest list. Simply set the quest as Priority and issue the “Go!” command and the Pawn will lead the way to the quest location.
Support Pawns Do Not Rank Up, So Hire Them Again
Unfortunately, support pawns do not rank up from the level they were at when they were hired. Because of this, we recommend hiring new pawns every time you rank up. If you feel that your support pawns aren't performing at their best, feel free to hire a new pawn at a Riftstone.
Rank Up Your Vocation to Get Augments
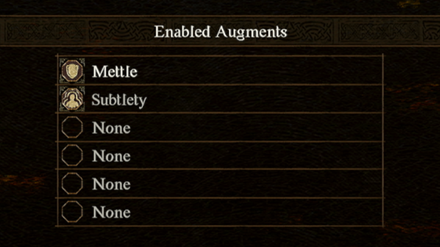
It's also important to rank up your vocation by earning Discipline Points (DCP). Increasing your vocation rank rewards you with augments that aid you in combat and exploration.
Augments can be equipped to any vocation but you can only equip 6 of them at a time. Similar to changing your vocation, you can change the augments you're equipped with at a Vocation Guild.
Should You Level All Vocations?
Clear Timed Side Quests

Some side quests in Dragon's Dogma 2 are time sensitive. They need to be completed within a certain time, else you won't be able to reap their rewards.
Because of this, we recommend clearing timed side quests right away. Doing so will make sure that you won't miss out on any of their rewards. Just like other side quests, you'll be rewarded with EXP, money, and various items upon finishing them.
Don't miss out on any side quest in the game by talking to NPCs in the overworld.
Clear “A Place to Call Home” Quest
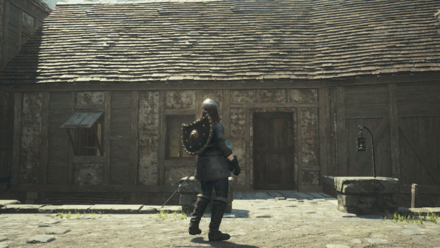
One side quest that we recommend completing is the quest “A Place to Call Home” that you can unlock in Vernworth. Completing this quest lets you purchase your own private dwelling for 20,000 Gold.
The house that you will purchase in this quest works the same as an inn. Here you can recover your health and use the warehouse as much as you like for free!
How to Get Houses and All Houses List
Unlock Portcrystals at Vernworth and Harve Village
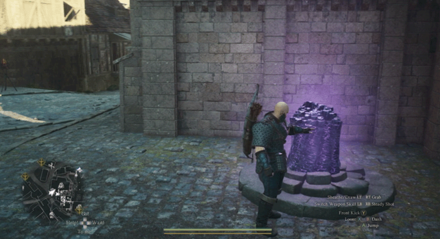
Aside from oxcarts, there are 2 Fast Travel points that you can unlock to make the northern section of the map easier to traverse.
The first Fast Travel point is the Portcrystal in Vernworth that becomes available during the Seat of the Sovran main quest. The second one is in Harve Village where Captain Brant issues the Vernworth Quest named Monster Culling. Take note that you'll need a Ferrystone to be able to teleport to Portcrystals!
Find an Oxcart Station Bell at Nighttime
If it's nighttime and you need to fast travel to another location, simply find an Oxcart Station Bell and hold B and circle to skip time to the following morning.
All Fast Travel Points: How to Fast Travel
Always Keep At Least One Ferrystone With You
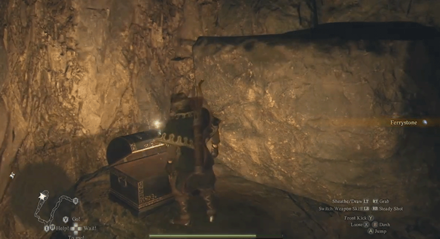
When you're out exploring especially during the night or in dark areas, it's a good idea to have at least one Ferrystone in your inventory to use in emergencies.
There's always a chance of getting ambushed by enemies when you least expect. You may even encounter a boss that can overwhelm your party! If you need to make a tactical retreat, simply pop a Ferrystone to get to safety instantly.
Don't Go Past Your Weight Limit
Your character, including your Main Pawn, can only carry a set amount of weight. Carrying more than this limit will overencumber you, drastically increasing the amount of stamina consumed, making exploration and combat more difficult.
Temporarily Store Items at an Inn or to a Pawn to Lighten Your Load
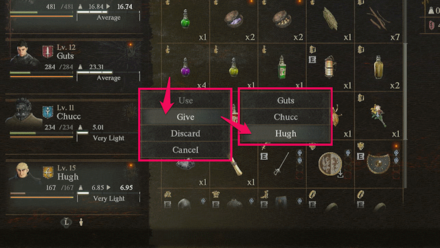
Items that you don't have an immediate need for can be deposited at an Inn to reduce your load.
If you're out exploring and don't have easy access to an inn, you can give some of your items to your Pawns for a quick fix.
Don't Forget to Collect Items After Defeating Enemies
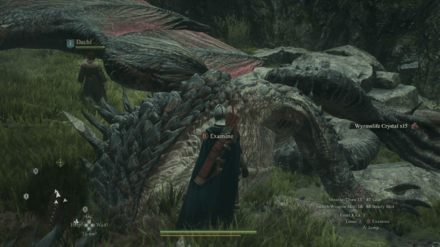
Examine fallen enemies after every battle to collect your spoils. Enemy corpses that have available items to be looted glow white, so always scan your surroundings after fighting.
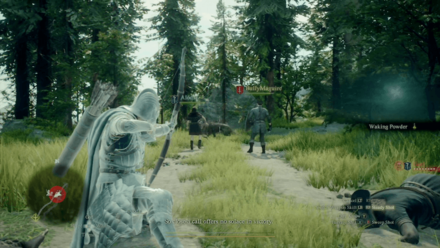
What To Do If You Can't Win Against Enemies
| How to Deal with Strong Enemies |
|---|
|
|
Hire New Pawns and Mix Up Your Team Composition
It's important to hire new pawns at all stages of the game and try out different team compositions. Hired Pawns do not level up unlike the Arisen and Main Pawn, so you need to constantly hire new ones to keep up with progressively stronger enemies.
Always Hire Mages
Mages should be a staple in every party as they can deal heavy damage with and provide healing with their spells. They are incredibly versatile and will prove useful in most situations.
Level Up and Raise Vocation Ranks

Raise your Vocation ranks to get access to useful and stronger Core Skills, Weapon Skills, and Augments.
Take note that you only have limited slots to equip your skills and augments, so choose the ones that fit your play style the best.
How to Level Up Fast: Leveling Guide
Study Attack Patterns and Exploit Weaknesses

Bosses and enemies have certain tells in their attacks that you can use to avoid. If you encounter an enemy for the first time, consider staying on the defensive until you recognize their openings and then retaliate.
Some enemies also have weak spots and elemental weaknesses that you can take advantage of to deal bonus damage and end fights quickly.
List of All Bosses and Boss Drops
Dragon's Dogma 2 Related Guides

Walkthrough and Progression Guide
| Walkthrough Guides | |
|---|---|
| What to Do First | What to Do Before Coronation |
| Endings Guide | Post Game Content |
| Unmoored World Walkthrough | - |
Comment
Author

What to Do First
Rankings
- We could not find the message board you were looking for.
Gaming News
![Animal Crossing: New Horizons Review [Switch 2] | Needlessly Crossing Over to a New Generation](https://img.game8.co/4391759/47d0408b0b8a892e453a0b90f54beb8a.png/show)


Popular Games

Genshin Impact Walkthrough & Guides Wiki
Honkai: Star Rail Walkthrough & Guides Wiki
Arknights: Endfield Walkthrough & Guides Wiki
Umamusume: Pretty Derby Walkthrough & Guides Wiki
Wuthering Waves Walkthrough & Guides Wiki
Pokemon TCG Pocket (PTCGP) Strategies & Guides Wiki
Abyss Walkthrough & Guides Wiki
Zenless Zone Zero Walkthrough & Guides Wiki
Digimon Story: Time Stranger Walkthrough & Guides Wiki
Clair Obscur: Expedition 33 Walkthrough & Guides Wiki


Recommended Games
Fire Emblem Heroes (FEH) Walkthrough & Guides Wiki
Pokemon Brilliant Diamond and Shining Pearl (BDSP) Walkthrough & Guides Wiki
Diablo 4: Vessel of Hatred Walkthrough & Guides Wiki
Super Smash Bros. Ultimate Walkthrough & Guides Wiki
Yu-Gi-Oh! Master Duel Walkthrough & Guides Wiki
Elden Ring Shadow of the Erdtree Walkthrough & Guides Wiki
Monster Hunter World Walkthrough & Guides Wiki
The Legend of Zelda: Tears of the Kingdom Walkthrough & Guides Wiki
Persona 3 Reload Walkthrough & Guides Wiki
Cyberpunk 2077: Ultimate Edition Walkthrough & Guides Wiki


All rights reserved
©CAPCOM CO., LTD. ALL RIGHTS RESERVED.
The copyrights of videos of games used in our content and other intellectual property rights belong to the provider of the game.
The contents we provide on this site were created personally by members of the Game8 editorial department.
We refuse the right to reuse or repost content taken without our permission such as data or images to other sites.