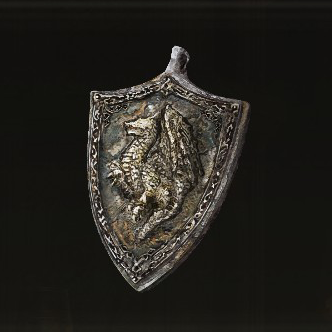
Elden Ring

How to Get Dragoncrest Shield Talisman: Effects and Locations

Dragoncrest Shield Talisman is a type of Talisman in Elden Ring. Read on to learn Dragoncrest Shield Talisman's effects, location, lore description, and where to get it!

Dragoncrest Shield Talisman Overview

Dragoncrest Shield Talisman Effect

Dragoncrest Shield Talisman IconDragoncrest Shield Talisman
Effect
Boosts physical damage negation.
Type Weight
Talisman 0.8

Dragoncrest Shield Talisman Lore Description

Lore Description
"Wrought iron talisman depicting an ancient dragon.
Boosts physical damage negation.

The ancient dragons, who ruled in the prehistoric era before the Erdtree, would protect their lord as a wall of living rock.
And so it is that the shape of the dragon has become symbolic of all manner of protections."

Dragoncrest Shield Talisman +1 Effect

Dragoncrest Shield Talisman +1 IconDragoncrest Shield Talisman +1
Effect
Greatly boosts physical damage negation.
Type Weight
Talisman 0.8

Dragoncrest Shield Talisman +1 Lore Description

Lore Description
"Wrought iron talisman depicting a duo of ancient dragons.
Greatly boosts physical damage negation.

The ancient dragons, who ruled in the prehistoric era before the Erdtree, would protect their lord as a wall of living rock.
And so it is that the shape of the dragon has become symbolic of all manner of protections."

Dragoncrest Shield Talisman +2 Effect

Dragoncrest Shield Talisman +2 IconDragoncrest Shield Talisman +2
Effect
Vastly boosts physical damage negation.
Type Weight
Talisman 0.8

Dragoncrest Shield Talisman +2 Lore Description

Lore Description
"Wrought iron talisman depicting a trio of ancient dragons.
Vastly boosts physical damage negation.

The ancient dragons, who ruled in the prehistoric era before the Erdtree, would protect their lord as a wall of living rock.
And so it is that the shape of the dragon has become symbolic of all manner of protections."

How to Get the Dragoncrest Shield Talisman

Dragoncrest Shield Talisman - Lowest Part of the Bestial Sanctum

A bug in Version 1.03 renders the Dragoncrest Shield Talisman unobtainable due to a killbox on the second tree root. Update the game to Version 1.03.2 to fix this bug.

You can find the Dragoncrest Shield Talisman on the lowest part of the outer walls of the Bestial Sanctum in the Caelid region. Reaching the item requires carefully jumping off platforms as one misstep leads to a one-hit KO.

See the table below to learn how to obtain the Dragoncrest Shield Talisman.

Steps to Obtain the Dragoncrest Shield Talisman
1
Head to the western part outside the Bestial Sanctum in the Caelid region. Look down to find a part of a tree branch that you can jump off to.
2
Look down again to find another set of tree branches. Jump off to this platform.
3
Look left to find a dome of a church. You can either walk or roll towards it to land safely.
4
From the dome, jump off to the wide area below it.
5
Look left to find the half arch structure that extends to the lower part of the outer wall. Walk towards the ledge until you reach the area marked with a red circle in the image above.
6
From the ledge, look down to find another ledge that you can land on safely. Walk slowly as you jump off. While falling, you can tilt the left thumbstick to move your character slightly to the direction of the ledge.
7
From the ledge, look towards the outer wall to find another ledge that you can jump towards. Summon Torrent and jump towards the ledge.
8
Drop down to the wide area and move towards the pillar's ledge marked with a red circle in the image above.
9
Head to the wider area of the pillar and look down to find a small ledge marked with a red circle in the image above. Jumping towards this ledge allows you to land safely.
10
From the small ledge, drop down to the wide area.
11
Head north until you reach a balcony with statues. You can loot the body in this area to obtain the Cinquedea.
12
Head north from the balcony past the giant bat enemy to find the dead body that contains the Dragoncrest Shield Talisman.

Dragoncrest Shield Talisman +1 - Inside Sainted Hero's Grave

World Veiw Map Location

View Full Image
Elden Ring - Dragoncrest Shield Talisman +1 Map Location
View Full Image

You can find the Dragoncrest Shield Talisman +1 in one of the locked rooms inside Sainted Hero's Grave at the Altus Plateau. The cave can be found northeast of the Altus Highway Junction site of grace.

Sainted Hero's Grave Location and What to Do

Dragoncrest Shield Talisman +2 - Crumbling Farum Azula

Map Location

View Full Image

You can find the Dragoncrest Shield Talisman +2 on the floating platform east of the Dragon Temple Lift in the Crumbling Farum Azula.

Crumbling Farum Azula Interactive Map and Region Guide

Elden Ring Related Guides

Elden Ring - Items Partial Banner
List of Items

List of Item Categories

Spirit Ashes IconSpirit Ashes Key Item IconKey Items Crafting Material IconCrafting Materials
Arrow and Bolt IconArrows and Bolts Bolstering Material IconBolstering Materials Tool IconTools
Talisman IconTalismans - -

Item Guides

Elden Ring - Best Talismans List.pngBest Talismans Best Spirit Summons Elden Ring.pngBest Spirit Summons

List of Talismans

Ancestral SpiritAncestral Spirit's Horn ArrowArrow's Reach Talisman ArrowArrow's Sting Talisman
Arsenal Charm IconArsenal Charm Arsenal Charm +1 IconArsenal Charm +1 AssassinAssassin's Cerulean Dagger
AssassinAssassin's Crimson Dagger Axe Talisman IconAxe Talisman Blessed Dew Talisman IconBlessed Dew Talisman
Blue Dancer Charm IconBlue Dancer Charm Blue-Feathered Branchsword IconBlue-Feathered Branchsword Boltdrake Talisman IconBoltdrake Talisman
Boltdrake Talisman +1 IconBoltdrake Talisman +1 Boltdrake Talisman +2 IconBoltdrake Talisman +2 Bull-GoatBull-Goat's Talisman
Carian Filigreed Crest IconCarian Filigreed Crest Cerulean Amber Medallion IconCerulean Amber Medallion Cerulean Amber Medallion +1 IconCerulean Amber Medallion +1
Cerulean Amber Medallion +2 IconCerulean Amber Medallion +2 Cerulean Seed Talisman IconCerulean Seed Talisman Clarifying Horn Charm IconClarifying Horn Charm
Clarifying Horn Charm +1 IconClarifying Horn Charm +1 Claw Talisman IconClaw Talisman Companion Jar IconCompanion Jar
Concealing Veil IconConcealing Veil CrepusCrepus's Vial Crimson Amber Medallion IconCrimson Amber Medallion
Crimson Amber Medallion +1 IconCrimson Amber Medallion +1 Crimson Amber Medallion +2 IconCrimson Amber Medallion +2 Crimson Seed Talisman IconCrimson Seed Talisman
Crucible Feather Talisman IconCrucible Feather Talisman Crucible Knot Talisman IconCrucible Knot Talisman Crucible Scale Talisman IconCrucible Scale Talisman
Curved Sword Talisman IconCurved Sword Talisman DaedicarDaedicar's Woe Dagger Talisman IconDagger Talisman
Dragoncrest Greatshield Talisman IconDragoncrest Greatshield Talisman Dragoncrest Shield Talisman IconDragoncrest Shield Talisman Dragoncrest Shield Talisman +1 IconDragoncrest Shield Talisman +1
Dragoncrest Shield Talisman +2 IconDragoncrest Shield Talisman +2 ErdtreeErdtree's Favor ErdtreeErdtree's Favor +1
ErdtreeErdtree's Favor +2 FaithfulFaithful's Canvas Talisman Fire Scorpion Charm IconFire Scorpion Charm
Flamedrake Talisman IconFlamedrake Talisman Flamedrake Talisman +1 IconFlamedrake Talisman +1 Flamedrake Talisman +2 IconFlamedrake Talisman +2
FlockFlock's Canvas Talisman Furled FingerFurled Finger's Trick-Mirror Godfrey Icon IconGodfrey Icon
Godskin Swaddling Cloth IconGodskin Swaddling Cloth Gold Scarab IconGold Scarab Graven-Mass Talisman IconGraven-Mass Talisman
Graven-School Talisman IconGraven-School Talisman Great-JarGreat-Jar's Arsenal Greatshield Talisman IconGreatshield Talisman
Green Turtle Talisman IconGreen Turtle Talisman Haligdrake Talisman IconHaligdrake Talisman Haligdrake Talisman +1 IconHaligdrake Talisman +1
Haligdrake Talisman +2 IconHaligdrake Talisman +2 Hammer Talisman IconHammer Talisman HostHost's Trick-Mirror
Immunizing Horn Charm IconImmunizing Horn Charm Immunizing Horn Charm +1 IconImmunizing Horn Charm +1 Kindred of RotKindred of Rot's Exultation
Lance Talisman IconLance Talisman Lightning Scorpion Charm IconLightning Scorpion Charm Longtail Cat Talisman IconLongtail Cat Talisman
Lord of BloodLord of Blood's Exultation Magic Scorpion Charm IconMagic Scorpion Charm MarikaMarika's Scarseal
MarikaMarika's Soreseal MillicentMillicent's Prosthesis Moon of Nokstella IconMoon of Nokstella
Mottled Necklace IconMottled Necklace Mottled Necklace +1 IconMottled Necklace +1 Old LordOld Lord's Talisman
Pearldrake Talisman IconPearldrake Talisman Pearldrake Talisman +1 IconPearldrake Talisman +1 Pearldrake Talisman +2 IconPearldrake Talisman +2
PerfumerPerfumer's Talisman Primal Glintstone Blade IconPrimal Glintstone Blade Prince of DeathPrince of Death's Cyst
Prince of DeathPrince of Death's Pustule Prosthesis-Wearer Heirloom IconProsthesis-Wearer Heirloom Radagon Icon IconRadagon Icon
RadagonRadagon's Scarseal RadagonRadagon's Soreseal Red-Feathered Branchsword IconRed-Feathered Branchsword
Ritual Shield Talisman IconRitual Shield Talisman Ritual Sword Talisman IconRitual Sword Talisman Roar Medallion IconRoar Medallion
Rotten Winged Sword Insignia IconRotten Winged Sword Insignia Sacred Scorpion Charm IconSacred Scorpion Charm Sacrificial Twig IconSacrificial Twig
ShabririShabriri's Woe Shard of Alexander IconShard of Alexander Silver Scarab IconSilver Scarab
Spear Talisman IconSpear Talisman Spelldrake Talisman IconSpelldrake Talisman Spelldrake Talisman +1 IconSpelldrake Talisman +1
Spelldrake Talisman +2 IconSpelldrake Talisman +2 Stalwart Horn Charm IconStalwart Horn Charm Stalwart Horn Charm +1 IconStalwart Horn Charm +1
Stargazer Heirloom IconStargazer Heirloom Starscourge Heirloom IconStarscourge Heirloom TakerTaker's Cameo
Twinblade Talisman IconTwinblade Talisman Two Fingers Heirloom IconTwo Fingers Heirloom Viridian Amber Medallion IconViridian Amber Medallion
Viridian Amber Medallion +1 IconViridian Amber Medallion +1 Viridian Amber Medallion +2 IconViridian Amber Medallion +2 Warrior Jar Shard IconWarrior Jar Shard
Winged Sword Insignia IconWinged Sword Insignia

Author

    Walkthrough Menu

    All rights reserved