This survey will take about 1 minute.
Your answers will help us to improve our website.
STALKER 2 Heart of Chornobyl
Garbage Region Guide
★ Best Weapons | Best Armor | Best Artifacts
☆ All Door Code Locations and Solutions
★ How to Unlock All Endings
☆ All Main Mission and Side Mission Guides
★ Locations: All Bases | All Artifact Farms
☆ How to Get All Unique Weapons
Garbage is one of the explorable regions in the Chornobyl Exclusion Zone in STALKER 2: Heart of Chornobyl. See a list of bases found in this region, including artifact farming locations, unique weapons, stashes, side missions, door codes, and points of interest!
List of Contents
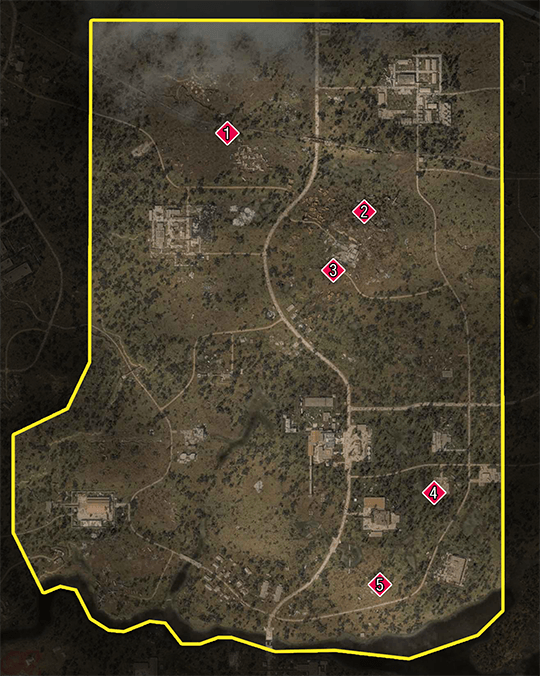
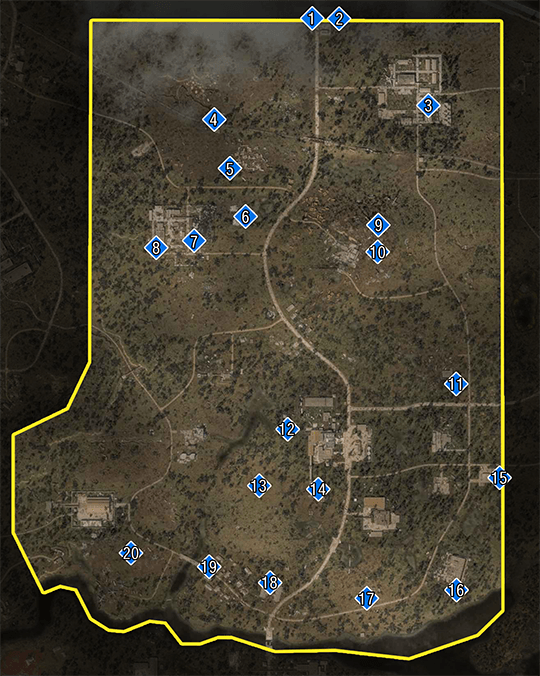
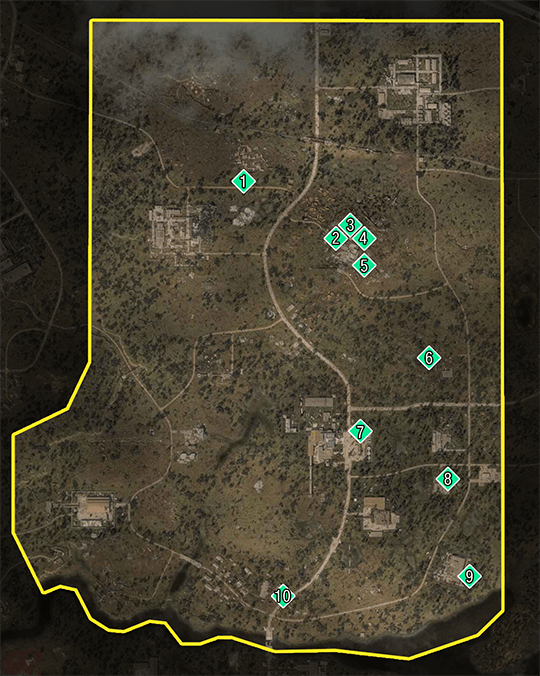
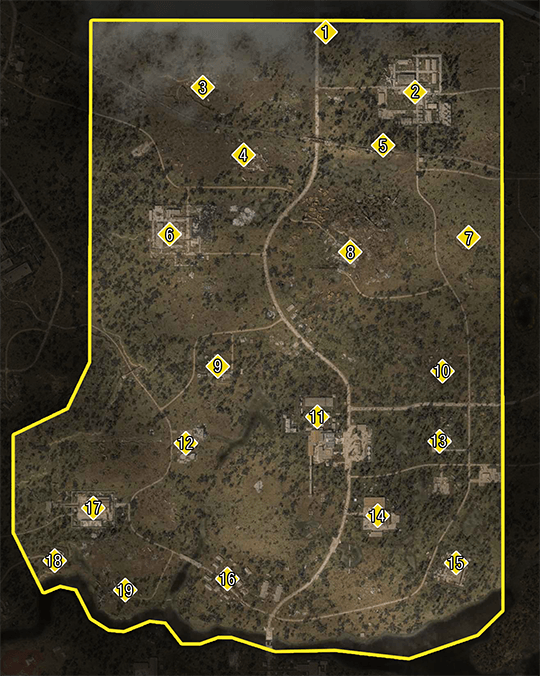
Garbage Region Map
| Garbage Region Map | |
|---|---|
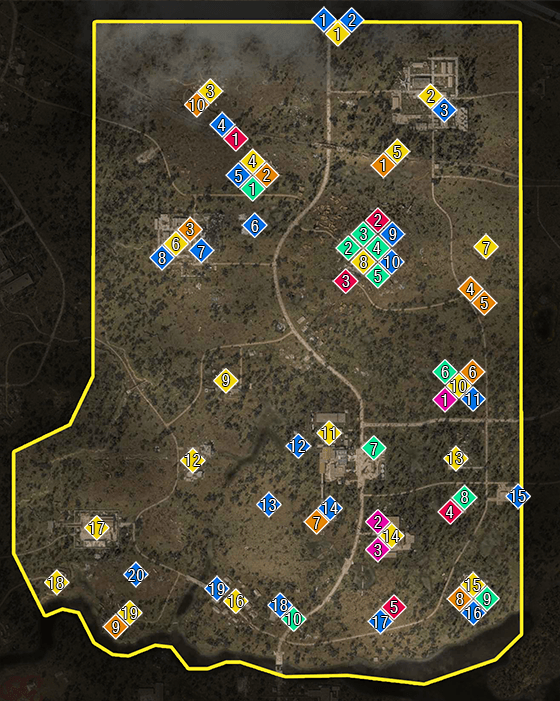 (Click to View Full Size Map) |
|
| Legend | |
Garbage is located in the middle of the Zone, directly north of the Lesser Zone (the region you first start in). This region is bordered by Rostok to the west, the Cement Factory to the east, Wild Island to its southeast, and the Chemical Plant to its southwest.
You'll be able to unlock and explore this region after you finish the main mission, Behind Seven Seals. Additionally, if you sided with Richter during A Needle in a Haystack, you'll exit via the Lesser Zone's northern checkpoint, immediately placing you within Garbage.
Garbage Artifact Farming Locations
| Garbage Artifact Locations | ||
|---|---|---|
 (Click to See Full Size Image) |
||
| # | Location | Possible Artifacts |
| 1 |  This area has many Springboard and Vortex anomalies in its vicinity making it a good farming spot for Gravitational Artifacts. |
|
| 2 |  A random Thermal artifact spawns among the maze of abandoned vehicles. |
|
| 3 |  This area is a potential artifact farming site filled with thermal anomaly. While some are your typical burners, some anomalies are lavaspouts. |
|
| 4 |  |
|
| 5 | |
|
| 6 |  A random Electro artifact may spawn among the electro anomaly in the area particularly on the roof. |
|
| 7 |  A random artifact can be found beside the dead body under end of the long corridor above you. Watch out for the sniper above you though. |
Random Artifact |
| 8 |  A random Thermal artifact may spawn in the basement or at the rooftop of the Detenion Center. |
|
| 9 | 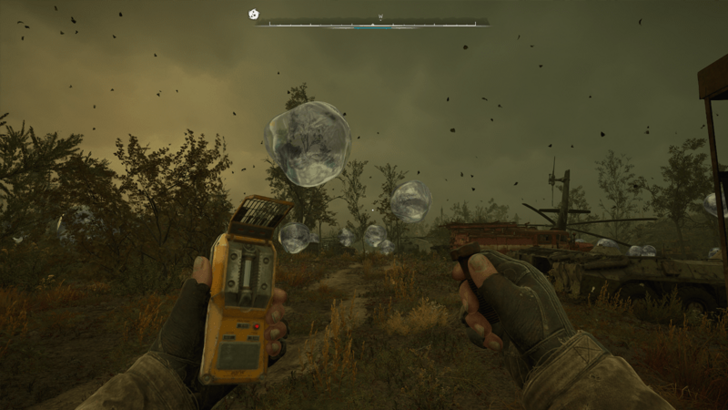 This anomaly field can be a farming spot for acid artifacts. The area is filled with giant acid bubbles that can burst and deal acid damage over time. |
|
| 10 | 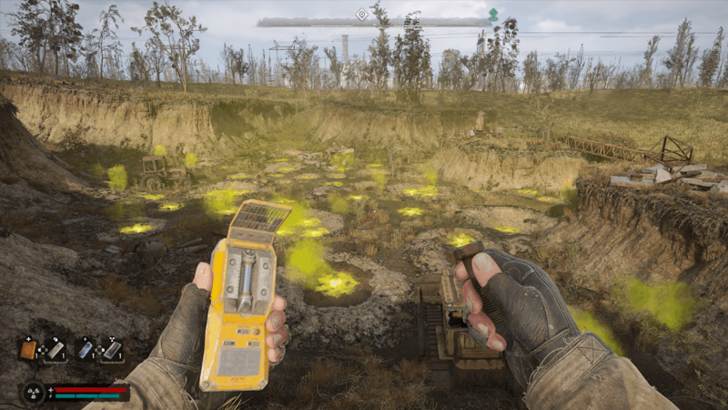 This location is distinguished with the multiple fruit punch and gas cloud anomalies in the vicinity. This is a good farming spot for Acid Artifacts. |
|
All Artifact Farming Locations
Garbage Unique Weapons
| Garbage Unique Weapons Locations | ||
|---|---|---|
 (Click to See Full Size Image) |
||
| # | Weapon | How to Get |
| 1 |
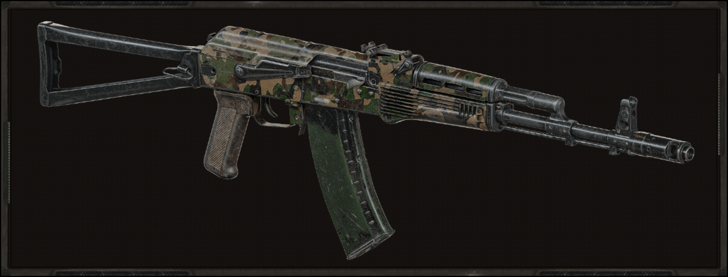
 Shah's Mate Shah's Mate
|
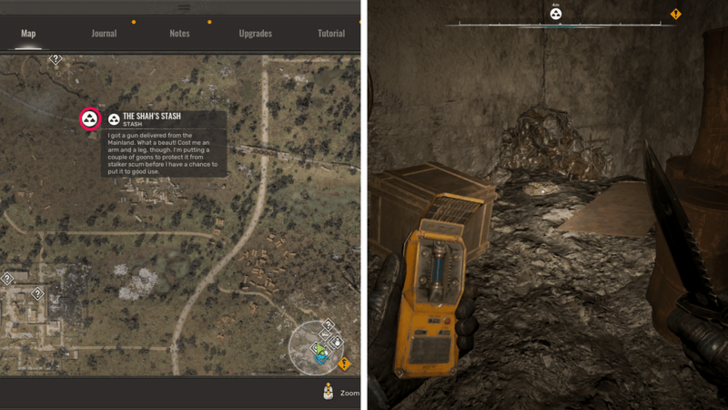 Obtained from the Shah's Stash to the northwest of Slag Heap. In order to get this stash to spawn, you will need to spare Docent during the side mission, No Honor Among Thieves. |
| 2 |
 Combatant Combatant
|
 Reward from Col. Korshunov if you show him the Unusual PDA during Back to Slag Heap. Do note that you'll only have a chance to get it if you see Korshunov with the weapon as you enter the room. |
| 3 |
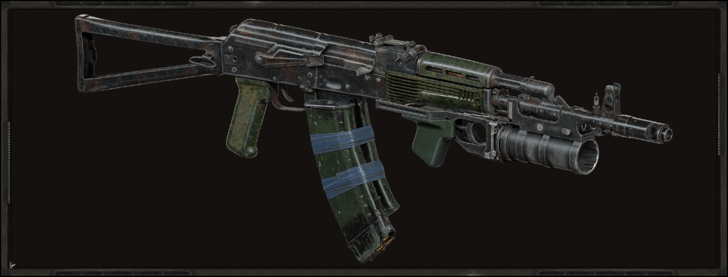 Drowned Drowned
|
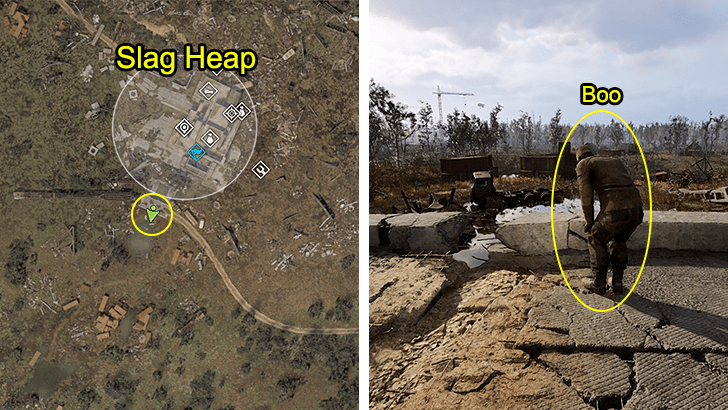 Obtained during the side activity with Boo - an NPC found on the small southern bridge of Slag Heap. You must opt to keep it for yourself to get the gun. |
| 4 |
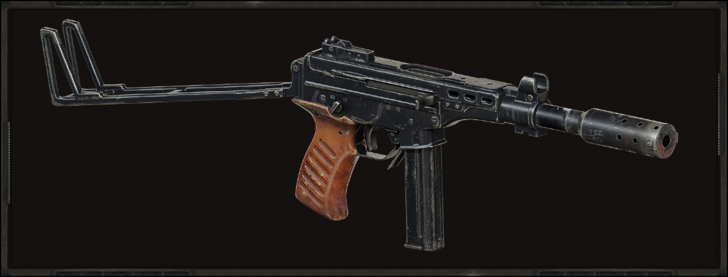 Spitter Spitter
|
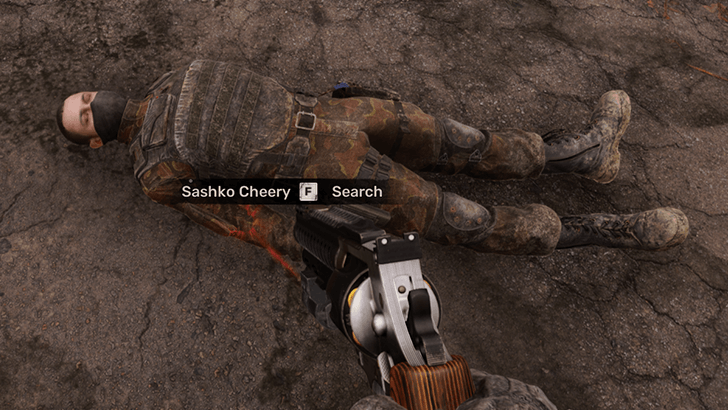 Looted from Sashko Cheery's body after you kill him in the Thug's Den. You'll encounter him and his group during the side mission, A Big Score. |
| 5 |
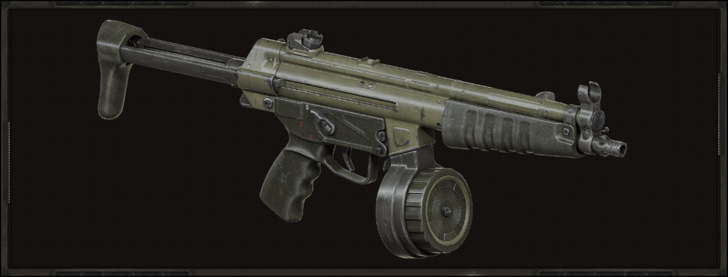
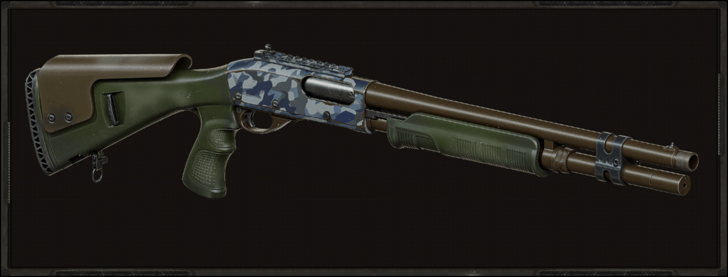 M860 Monolith M860 Monolith
|
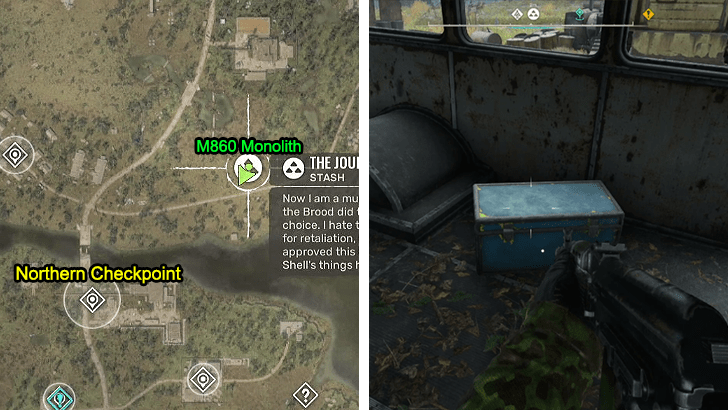 Looted from a Journalist's Stash inside a ruined minivan to the west of the Detention Center. |
List of All Unique Weapons and Map Locations
Garbage Stashes
| Garbage Stash Locations | ||
|---|---|---|
 (Click to See Full Size Image) |
||
| # | Stash | Map and Contents |
| 1 | Checkpoint Backpack Stash | 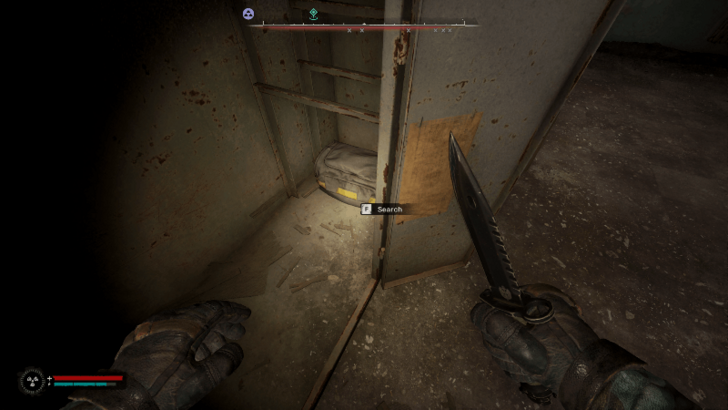 This stash can be found inside a locker in the small house at the right side of the Iron Forest Gate. Use a knife to destroy the boxes to access the stash. |
| 2 | Checkpoint Roof Stash | 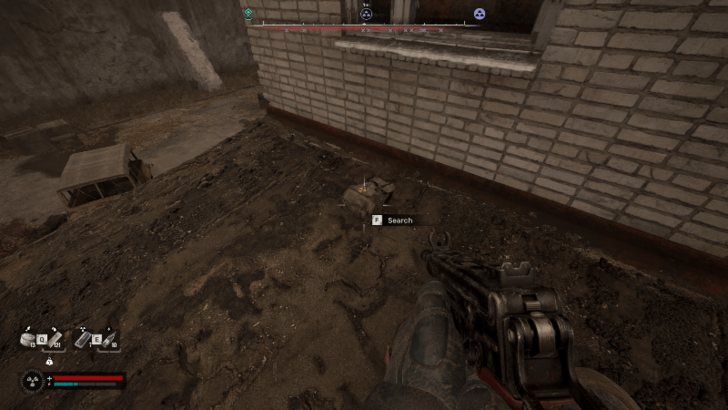 This stash can be found in the Iron Forest Gate. Jump on the brick wall and climb on top of the open doorway. Then, climb on the platform above the open doorway to reach the ledge where the stash is located. |
| 3 | Commissary Stash | 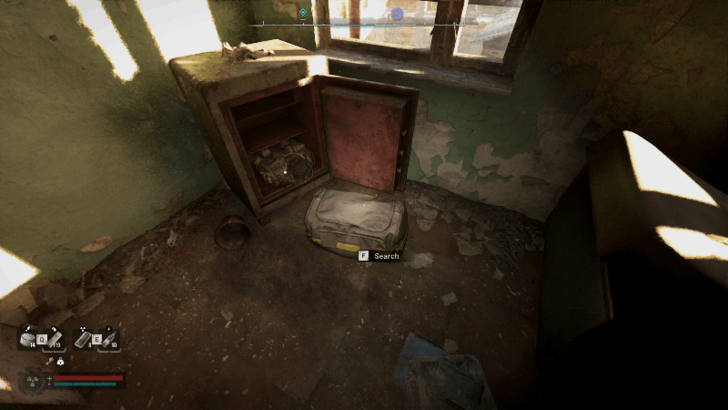 This stash is found beside the safe in the room at the second floor of the Commissary. |
| 4 | Shah's Stash | The Shah's Stash which contains the Shah's Mate can be found in one of the alcoves of an underpass to the southeast of the Poisonous Hole. This stash only spawns if you spare Docent during the side mission, No Honor Among Thieves. |
| 5 | Tourist Suit Journalist's Stash | 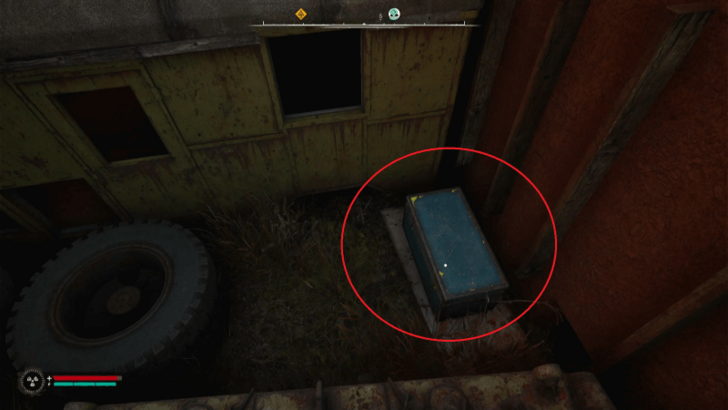 This Journalist's Stash is found inside the Maze, between a blue vehicle and red tanker. Loot it to get the Tourist Suit (Pre-Order Bonus DLC). |
| 6 | Budmo! Concrete Blocks Stash | 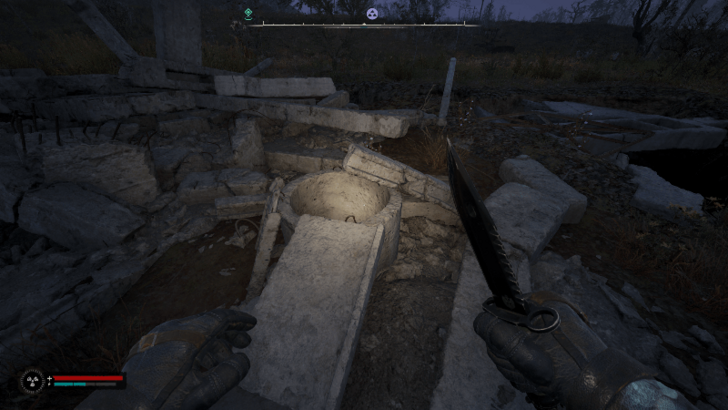 This stash can be found during the side mission, Budmo!. Look for a boarded-up circular piece of concrete to the east of The Brood and place Vodka inside before taking the other items in the stash. |
| 7 | PSZ-5V Guardian of Freedom Suit Stash | 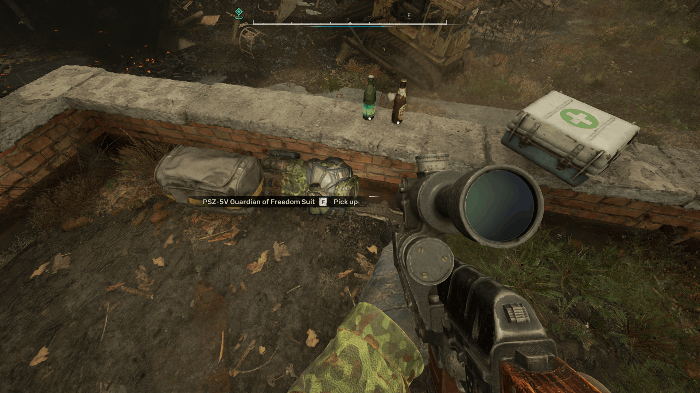 This stash is found on top of the roof of The Brood. It will have a free PSZ-5V Guardian of Freedom Suit right beside it. |
| 8 | The Brood Backpack Stash | 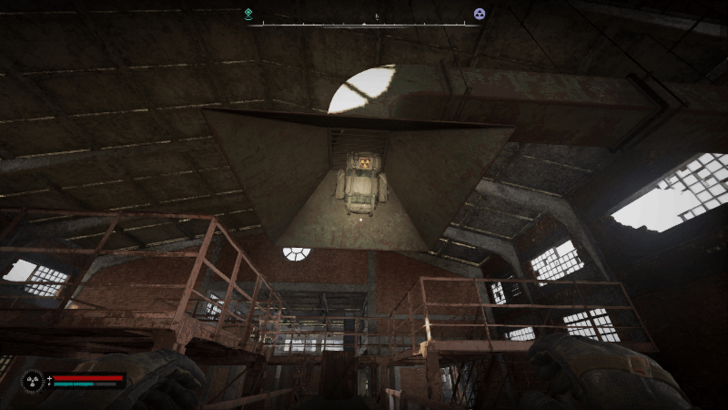 This stash is found hanging at the end of the vent inside the abandoned warehouse west of The Brood. |
| 9 | Slag Heap Hanging Stash | 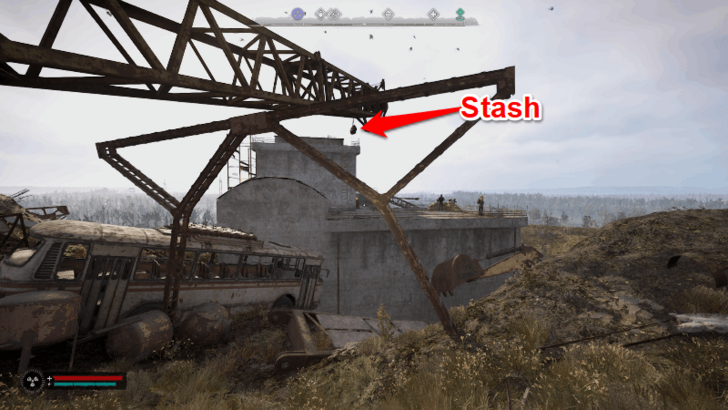 This stash is hanging on the crane near the pile of radioactive garbage north of Slag Heap. |
| 10 | Slag Heap Scaffolding Stash | 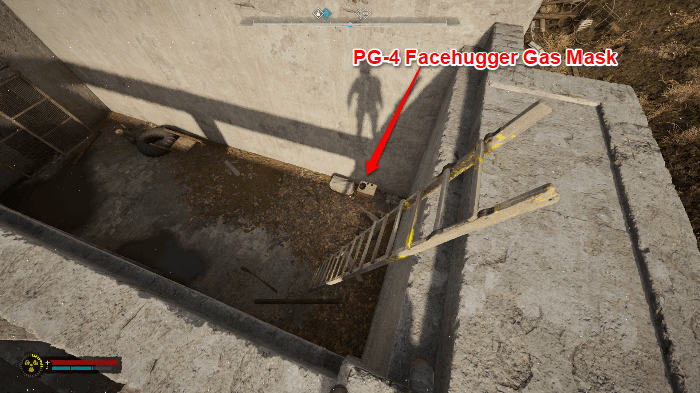 This stash is located on top of the scaffolding at the side of the Slag Heap building. Climb the scaffoldings and the hill to reach the highest point of the rooftop. Climb down into the alcove to find the stash beside a PG-4 Facehugger Gas Mask. |
| 11 | Electric Field Safe |  This safe is found in the second floor of the Electric Field main building. Enter from the south side and use the code, 1708 to open and loot the safe. |
| 12 | Plant Roof Stash |  This stash is found on top of the abandoned construction site west of the Plant. |
| 13 | Sphere 20 Aramid Lining Safe |  This safe will be found on top of a ruined concrete structure in a field to the southwest of the Plant. To reach it, you will need to jump into the large spatial anomaly in Rostok (via the underground bar of the base). Loot it to get the Sphere 20 Aramid Lining blueprint. |
| 14 | Plant Corridor Stash |  This stash is located at the end of the corridor that extends from the Plant (POI where you meet Varan in Deal With the Devil). It will be guarded by a sniper as well as multiple Glass Shard anomalies. |
| 15 | Gas Station Stash | 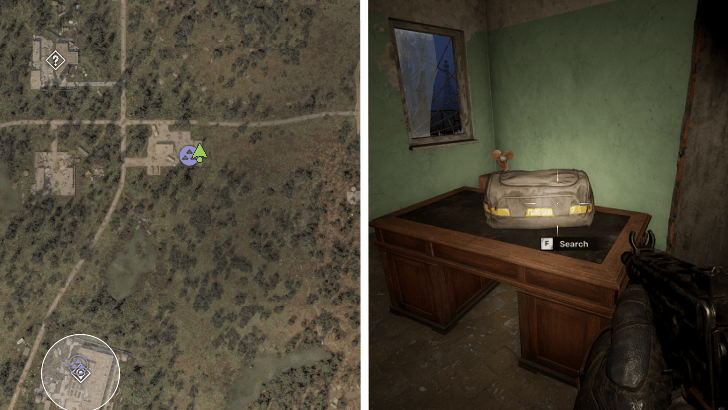 This stash is found behind a locked backroom of the unmarked gas station north of the Detention Center. Jump over the fence filled with rats at the back of the gas station to reach the backroom. A second stash is located behind the counter. |
| 16 | Detention Center Roof Trunk |  This large blue trunk will be found on the roof of the Detention Center. Explore the upper floors to find a ruined room that leads to the roof. Then, navigate the fire anomalies to reach the blue trunk next to a corpse. |
| 17 | M860 Monolith Journalist’s Stash | Contains the M860 Monolith (Deluxe Edition DLC), a unique M860 Cracker. The stash can be found inside a ruined minivan to the west of the Detention Center. |
| 18 | Koldyba's Pigsty Stash | 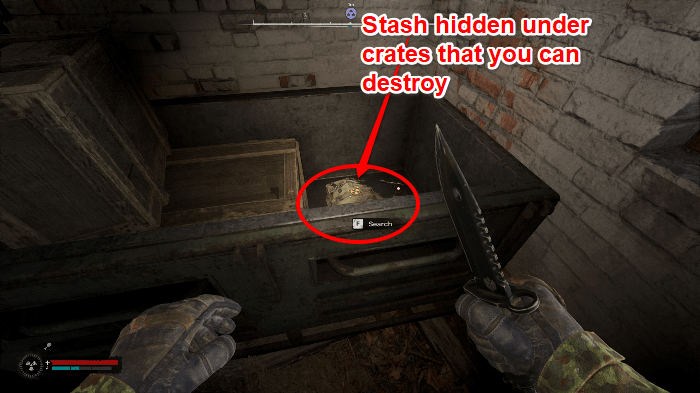 This stash is tied to the side activity nearby that triggers when you approach the Pigsty for the first time. Help the bandits or Koldyba, then, look for the stash under a bunch of crates at the pigsty near the road at Hlynka. |
| 19 | Hlynka Stash | 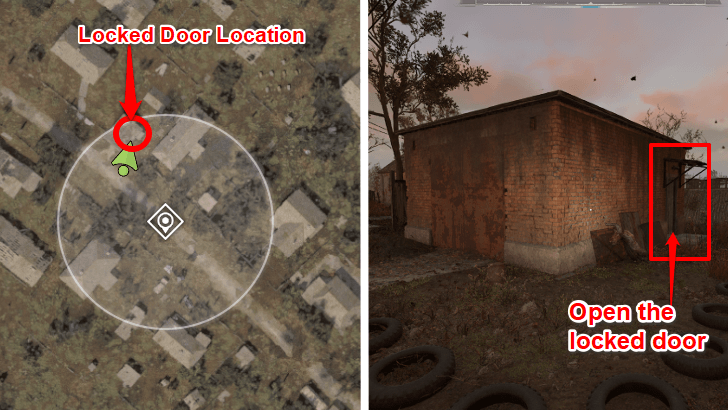 Stash is found inside the locked red brick garage in Hlynka. Pick up the key from the TV inside the white house at the northeastern side. The stash will have a High-Capacity AKM-74 Magazine. |
| 20 | Acid Cloud Cave Stash | 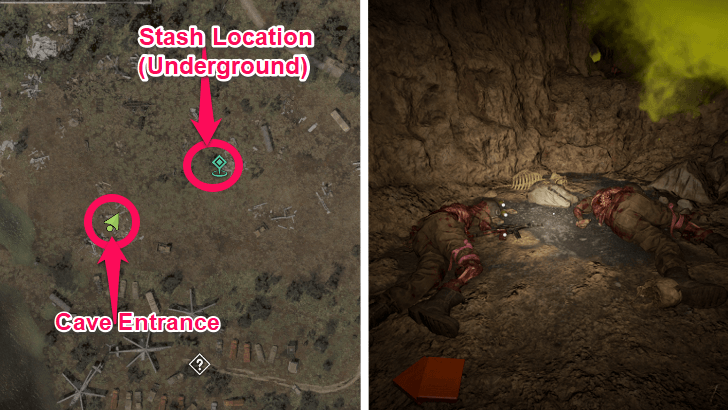 Stash is located inside a cave to the north of the Vehicle Graveyard. It will be surrounded by two dead bodies amongst the acid anomalies. |
Garbage Side Missions
| Garbage Side Mission Locations | ||
|---|---|---|
 (Click to See Full Size Image) |
||
| # | Side Mission | Mission Info |
| 1 | Save Doctorant Zhytnychenko | 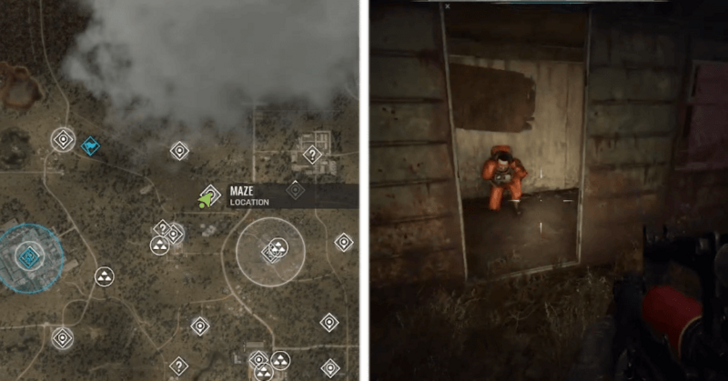 Doctorant Zhytnychenko will call out to you for help in the Maze (northwest of Slag Heap). Talk to him to begin the side mission. Do note that this mission won't spawn if you're currently doing the Price Goes Up main mission. |
| 2 | No Honor Among Thieves | 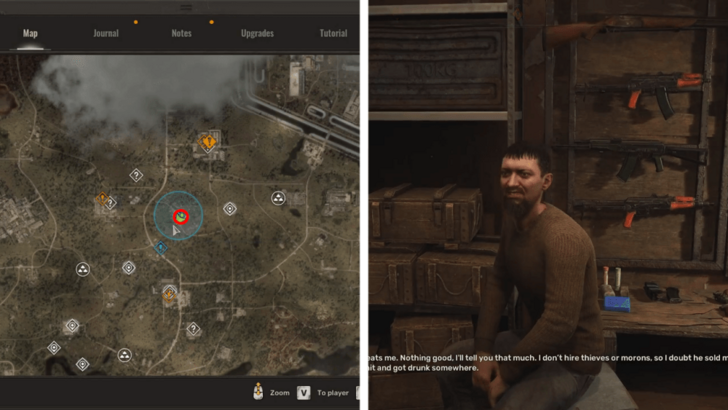 Can be started as soon as you reach Slag Heap for the first time. Look for Huron the trader and talk to him to get the side mission. |
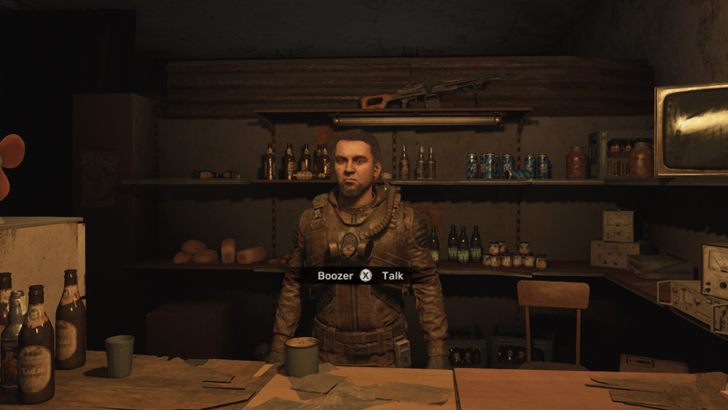
| 3 | A Job from Boozer |  Boozer is the bartender of Slag Heap. Speak to him and pick from 1 of 3 side jobs to start this mission. |
| 4 | A Big Score | 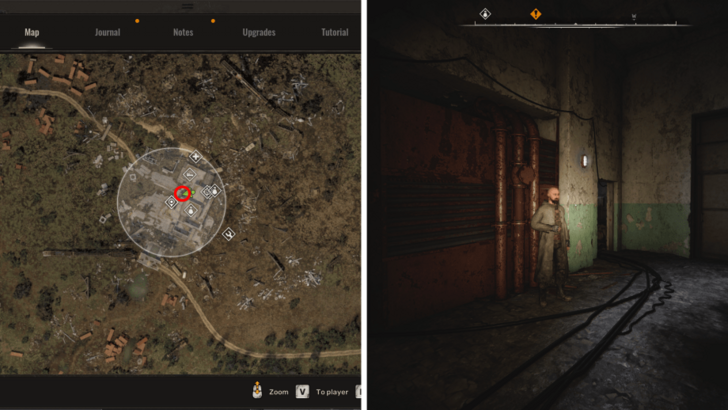 Zakhar Babay will be standing a few steps away from the Slag Heap Guide. Speak to him to trigger the side mission. |
| 5 | Budmo! |  To start this side mission, find and speak to Misha Boxer and Grisha at the bar area of Slag Heap. |
| 6 | Save Vova Amalgam | 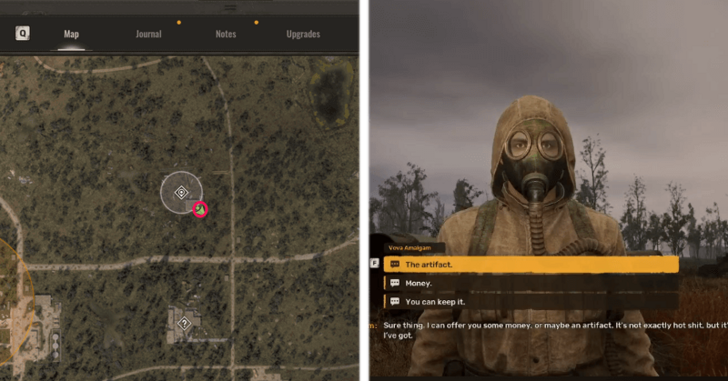 When you approach the Electric Field for the first time, Vova Amalgam will call out to you for help. Guide him out of the anomaly field to complete the mission. |
| 7 | Answer for Tymokha's Death | Approaching the 2-story building to the east of the Plant will trigger dialogue with some bandits. They'll accuse you of killing Tymokha before demanding payment. Pay or kill them to complete the mission. |
| 8 | Deceive the Deceiver | 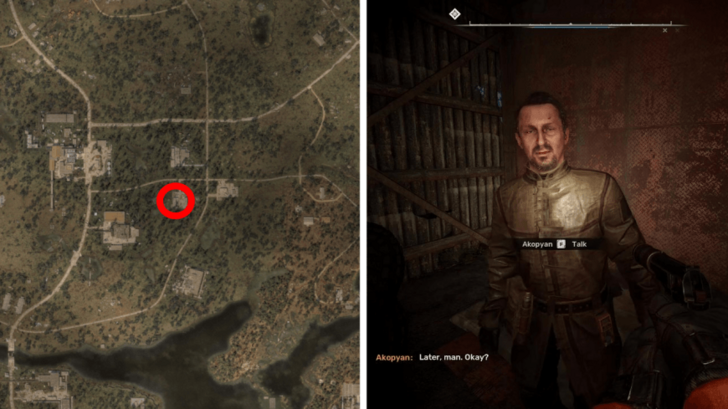 This is the follow-up quest to A Big Score. After dealing with Zakhar Babay's men at the Plant Boiler Station, rescue Akopyan to trigger this mission. |
| 9 | The Road to Salvation |  This side mission can only be triggered if you gave the Ward Sensors to Richter. Speak to Star at the Detention Center during Answers Come at a Price to get this side mission. |
| 10 | Save Vovchyk Koldyba |  On the eastern road leading to Hlynka, you'll encounter a Loner, Vovchyk Koldyba, as he's cornered by bandits. Help the bandits or Koldyba to start the mission. |
List of All Side Missions and Map
Garbage Door and Safe Codes
| Garbage Door and Safe Code Locations | ||
|---|---|---|
 (Click to See Full Size Image) |
||
| # | Door or Safe | Code and Location |
| 1 | Electric Field Safe | 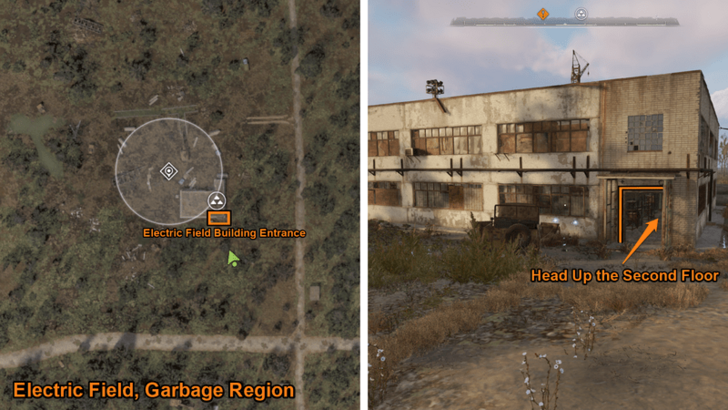 (Solution: 1708) The safe is on the second floor of Electric Field's sole building. The stash will show up on the PDA map by picking up the slip of white paper on the roof of the building. |
| 2 | Factory Top Floor Door |  (Solution: 2603) Can be found after you access the basement lab underneath the Factory during Answers Come at a Price. This barred door leads to your first meeting with Scar. |
| 3 | Factory Lab Door | 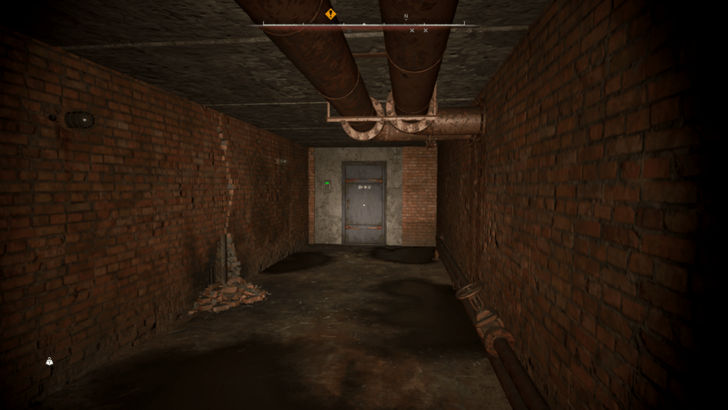 (Solution: 2605) Found in the basement of the Factory. You'll gain access to this door and its code during Answers Come at a Price (if you gave the Ward Sensors to Richter). |
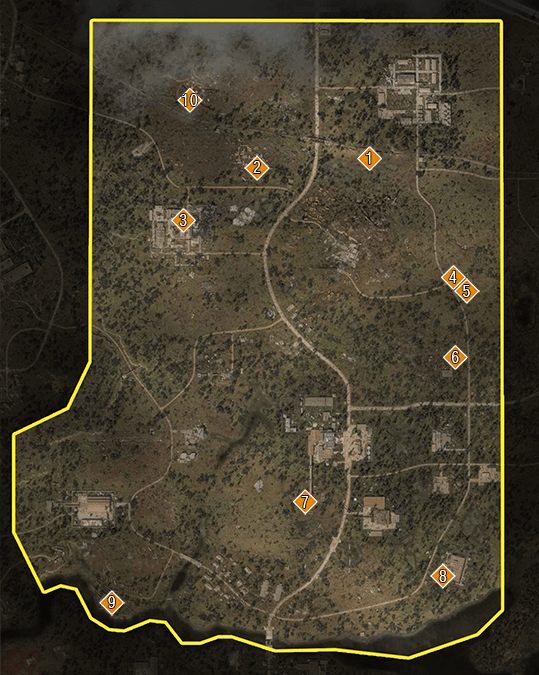
Garbage Points of Interest
| Garbage Points of Interest | |
|---|---|
 (Click to See Full Size Image) |
|
| # | Point of Interest |
| 1 | Iron Forest Gate |
| 2 | Commissary |
| 3 | Poisonous Hole This location is an Acid Anomaly Field. You can explore this with a Detector to farm for Acid Artifacts. |
| 4 | Maze You have the option of visiting this location during the main mission, The Price Goes Up. |
| 5 | Explosion Funnel This location is an Gravity Anomaly Field. You can explore this with a Detector to farm for Gravity Artifacts. |
| 6 | The Brood You'll have the option of visiting this location during the side mission, King of the Hill. You can also use the Shah's Mate if you have it to gain entrance to this hostile location. |
| 7 | Dig Site You have the option of visiting this location during the main mission, The Price Goes Up. |
| 8 | Slag Heap This is the only Base and safe zone in the Garbage region. Other locations like The Brood will be hostile towards you. |
| 9 | Hydroelectric Station This location houses Diode's Workshop - a key area you'll have to visit during the main mission, The Price Goes Up. It'll be guarded by a Flashbang Anomaly. |
| 10 | Electric Field This is an Electro Anomaly Field. You can farm this area for Electro Artifacts using a Detector, rescue Vova Amalgam, or open the Electric Field Safe. |
| 11 | Plant This is the home base of Varan and his bandits. You'll visit this area during the main mission, Deal with the Devil. |
| 12 | Flea Market This is the location of Lex the Legend - a grifter that teaches people like Vova Amalgam how to be a Stalker. |
| 13 | Plant Boiler Station This is the location where you end the side mission, A Big Score. It is also where you start the follow-up mission, Deceive the Deceiver. |
| 14 | Factory If you gave the Ward Sensors to Richter, you'll visit this location on behalf of the Spark Faction during the main mission, Answers Come at a Price. This is also where you first meet Scar. |
| 15 | Detention Center If you gave the Ward Sensors to Richter, you'll visit this location during the main mission, Answers Come at a Price. |
| 16 | Hlynka Has a stash that contains the High-Capacity AKM-74 Magazine. |
| 17 | Depot If you gave the Ward Sensors to Captain Zotov, you'll visit this location during the main mission, Answers Come at a Price. Here, you'll kill Chornozem and his bandits to aid Korshunov's investigation. |
| 18 | Ward Outpost If you gave the Ward Sensors to Captain Zotov, you'll visit this location during the main mission, Answers Come at a Price. This is where you meet Col. Korshunov for the first time. |
| 19 | Vehicle Graveyard This location is an Acid Anomaly Field. You can explore this with a Detector to farm for Acid Artifacts. |
Garbage Bases
Slag Heap is Found to the Northeast
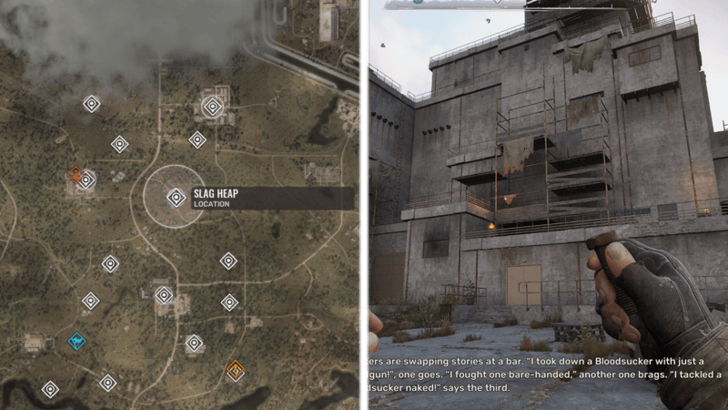
Slag Heap is the only base in the Garbage region. If you're entering Garbage from the Northern Checkpoint in the Lesser Zone, simply follow the main road north until you reach the large mountain of junk that is Slag Heap (you'll see it to your right while on the main road).
If you're coming from the Chemical Plant (after siding with the Ward during A Needle in a Haystack), then you'll have to head northeast since you'll be entering the region via the Depot (where you helped kill a group of bandits led by Chornozem).
Garbage Notable NPCs
Slag Heap NPCs
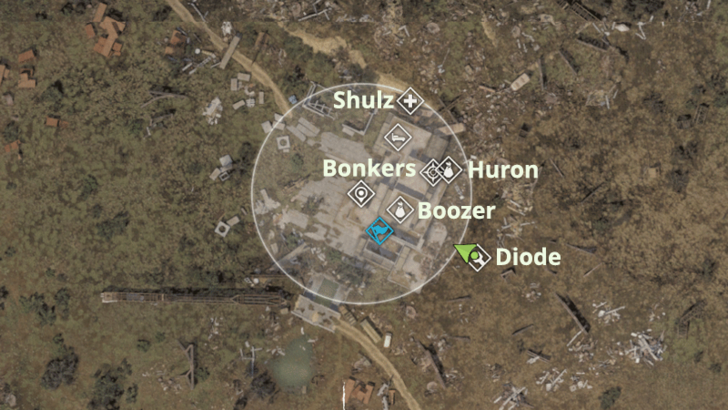
These NPCs can be found in Slag Heap. Technicians are merchants that can repair and upgrade your armor. Guides allow you to fast travel to previously unlocked areas. Traders can you money in exchange for Artifacts. Medics sell you healing and recovery items for the road.
| NPC | NPC Type |
|---|---|
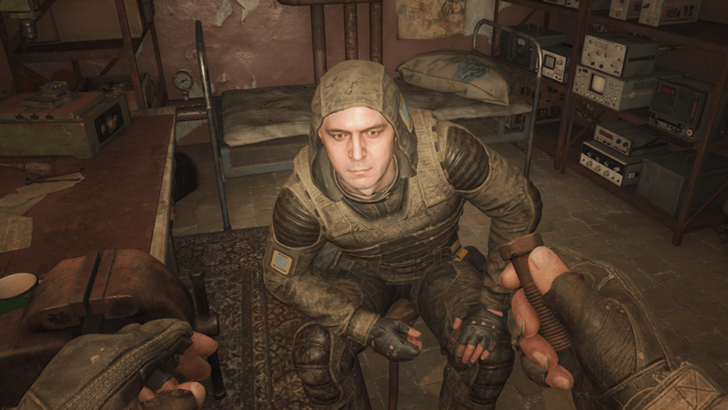 |
Talk to this NPC to upgrade and repair your weapons and armor. |
 |
Bartender of Slag Heap. Talk to this NPC to trade for Consumables. |
 |
Talk to this NPC to fast travel to Bases you've already visited. |
 |
Talk to this NPC to buy weapons and armor or sell surplus items. |
 |
Talk to this NPC for medical treatment and healing for free. |
Note: For a short period of time during and after the main mission, Back to Slag Heap, Diode will be unavailable as a Technician in Slag Heap. Come back after progressing the story to get him to return.
The Brood NPCs
Bruise is one of the only notable NPCs in The Brood. After dealing with the Shah, you'll be able to speak to him since the POI becomes friendly territory.
| NPC | NPC Type |
|---|---|
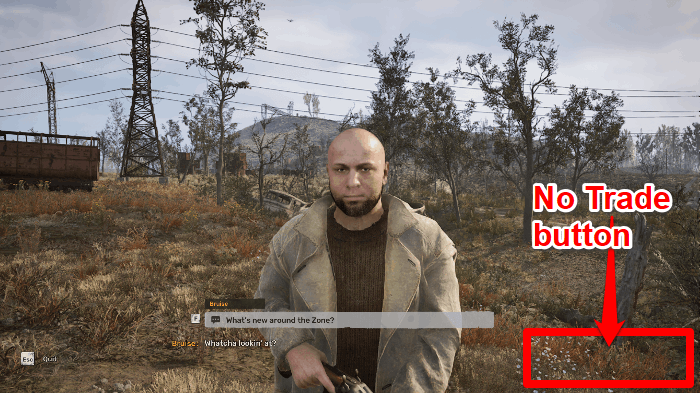 |
The only trader in The Brood. Despite being marked a Trader, you won't be able to trade with him even after he becomes friendly. |
Can You Trade With Bruise the Trader?
STALKER 2 Related Guides
All Regions
| All Regions in The Zone | ||
|---|---|---|
| Lesser Zone | Cordon | Garbage |
| Rostok | Chemical Plant | Malachite |
| Duga | Burnt Forest | Wild Island |
| Cement Factory | Cooling Towers | Zaton |
| Swamps | Yantar | Red Forest |
| Yaniv | Jupiter | Prypiat |
All Map Guides
| All Map Guides | |
|---|---|
| How to Leave the Lesser Zone | How to Get to Prypiat |
Author

Garbage Region Guide
Please participate in our site
improvement survey
03/2026
improvement survey
03/2026
Would you assist in
improving Game8's site?
improving Game8's site?

×
We are listening to our users' valuable opinions and discussing how to act on them.
The information collected through this survey will be used for the purpose of improving our services. In addition, the information will only be disclosed a part of a statistic in a format that will not allow identification of personal information.
Begin Survey
Not Now
×
Please rate each item regarding Game8.co's Advertisements.
Amount of Ads
Very Dissatisfied
Somewhat Dissatisfied
Fine
Somewhat Satisfied
Highly Satisfied
Placement of Ads
Timing of Ad Display
Ad Loading Speed
Safeness of Ads
Content of Ads
×
Please rate each item regarding Game8.co's Quality of Articles.
Amount of information
Very Dissatisfied
Somewhat Dissatisfied
Fine
Somewhat Satisfied
Highly Satisfied
Frequency of updates
Speed of new information
Accuracy of articles
Understandibility of articles
Readability of sentences
×
Please rate each item regarding Game8.co's Usability of the Site.
Ease of finding information
Very Dissatisfied
Somewhat Dissatisfied
Fine
Somewhat Satisfied
Highly Satisfied
Loading Speed
Use of Color
Font Size
Visibility of Images
Easy to Understand Layout
×
Please rate each item regarding Game8.co's Message Boards, Comments.
Ease of Writing
Very Dissatisfied
Somewhat Dissatisfied
Fine
Somewhat Satisfied
Highly Satisfied
Readability
Ease in Finding Information
Comment Quality
Comment Quantity
Admin Response
×
Please rate each item regarding Game8.co's Site's new design.
Please rate our site's new design
Very Dissatisfied
Somewhat Dissatisfied
Fine
Somewhat Satisfied
Highly Satisfied
Do you think that the website's design change makes the site easier to use?
Has the new design made it easier for you to find information on the site?
Has the new design improved the overall visual appeal of the site?
How would you rate your overall satisfaction with the new design of the site?
×
How likely are you to recommend Game8 to someone you know?
Very Unlikely
0
1
2
3
4
5
6
7
8
9
10
Very Likely
If you have other opinions regarding potential improvement to the website, please share them with us. We would appreciate your honest opinion.
Note: This is a free response section, so you can proceed without entering anything.
Note: Please be sure not to enter any kind of personal information into your response.
Note: Please be sure not to enter any kind of personal information into your response.
×
Thank You
×
Thank you for participating in our survey! Your answers will help us to improve the quality of our website and services.
We hope you continue to make use of Game8.
We hope you continue to make use of Game8.
Close
Rankings
- We could not find the message board you were looking for.
Gaming News


![Monster Hunter Stories 3 Review [First Impressions] | Simply Rejuvenating](https://img.game8.co/4438641/2a31b7702bd70e78ec8efd24661dacda.jpeg/thumb)
Popular Games

Genshin Impact Walkthrough & Guides Wiki
Honkai: Star Rail Walkthrough & Guides Wiki
Umamusume: Pretty Derby Walkthrough & Guides Wiki
Pokemon Pokopia Walkthrough & Guides Wiki
Resident Evil Requiem (RE9) Walkthrough & Guides Wiki
Monster Hunter Wilds Walkthrough & Guides Wiki
Wuthering Waves Walkthrough & Guides Wiki
Arknights: Endfield Walkthrough & Guides Wiki
Pokemon FireRed and LeafGreen (FRLG) Walkthrough & Guides Wiki
Pokemon TCG Pocket (PTCGP) Strategies & Guides Wiki


Recommended Games
Diablo 4: Vessel of Hatred Walkthrough & Guides Wiki
Cyberpunk 2077: Ultimate Edition Walkthrough & Guides Wiki
Fire Emblem Heroes (FEH) Walkthrough & Guides Wiki
Yu-Gi-Oh! Master Duel Walkthrough & Guides Wiki
Super Smash Bros. Ultimate Walkthrough & Guides Wiki
Pokemon Brilliant Diamond and Shining Pearl (BDSP) Walkthrough & Guides Wiki
Elden Ring Shadow of the Erdtree Walkthrough & Guides Wiki
Monster Hunter World Walkthrough & Guides Wiki
The Legend of Zelda: Tears of the Kingdom Walkthrough & Guides Wiki
Persona 3 Reload Walkthrough & Guides Wiki


All rights reserved
S.T.A.L.K.E.R. 2 is a registered trademark of GSC Game World Global Ltd. © 2024 GSC Game World Global Ltd. GSC Game World and its logos are Trademarks or Registered Trademarks Of GSC Game World Global Ltd. © S.T.A.L.K.E.R. 2 HEART OF CHORNOBYL a game developed GSC Game World. All other trademarks, registered trademarks or logos belong to their respective owners.
The copyrights of videos of games used in our content and other intellectual property rights belong to the provider of the game.
The contents we provide on this site were created personally by members of the Game8 editorial department.
We refuse the right to reuse or repost content taken without our permission such as data or images to other sites.
Why are there no map pictures next to the anomalies?