This survey will take about 1 minute.
Your answers will help us to improve our website.
STALKER 2 Heart of Chornobyl
Down Below Walkthrough
★ Best Weapons | Best Armor | Best Artifacts
☆ All Door Code Locations and Solutions
★ How to Unlock All Endings
☆ All Main Mission and Side Mission Guides
★ Locations: All Bases | All Artifact Farms
☆ How to Get All Unique Weapons

Down Below is a main mission in STALKER 2: Heart of Chornobyl. Read on for a complete walkthrough of Down Below, as well as the rewards for completing the mission.
| ◄ Previous Mission | Next Mission ▶ |
|---|---|
| The Road to the Foundation |
Strelok or Kaymanov Route: The Last Wish Ward Route: Eye of the Storm Spark Route: Through the Valley of the Shadow of Death |
List of Contents
Down Below Walkthrough
| List of Objectives | ||||||
|---|---|---|---|---|---|---|
| 1 | Rendezvous with Your Allies | |||||
| 2 | Eliminate Warden Troops | |||||
| 3 | Search the Bodies | |||||
| 4 | Find the Tunnel Leading to the Foundation | |||||
| 5 | Get to the Foundation | |||||
| 6 |
After reaching the Foundation, the objectives of this mission will change depending on your current Ending route. Pick from the following routes to navigate to its respective walkthrough: ① Strelok or Kaymanov Ending Route ② Ward Ending Route ③ Spark Ending Route |
|||||
Rendezvous with Your Allies
| Rendezvous Points | |
|---|---|
| Polissya Hotel | Olympia Cafe |
Rendezvous at Polissya Hotel

Go to the Polissya Hotel in Prypiat. Proceed with caution as the hotel will be swarming with either the Spark or Warden soldiers, depending on the faction you sided with.
Unfortunately, your allies will already be dead on arrival, so you'll have to face all these soldiers on your own.
Rendezvous at Olympia Cafe

An alternate objective would be to rendezvous at Olympia Cafe. Similar to Polissya Hotel, the cafe will be heavily guarded by Spark or Warden soldiers and your allies have already been killed by them.
Eliminate Troops at Polissya Hotel or Olympia Cafe

Kill all Spark or Warden Troops at Polissya Hotel or Olympia Cafe (whichever place was assigned to you).
Since this segment will mostly be close-quarters combat, a Shotgun is the most preferable choice of weapon to engage them. You can also use grenades to flush out the soldiers hiding behind corners.
Search the Bodies

Search one of the dead bodies to acquire a Tunnel Entrance Key Card. The body that you should be searching for will be marked on your compass.
Find the Tunnel Leading to the Foundation
| Tunnel Locations | |
|---|---|
| Polissya Hotel | Olympia Cafe |
Via Polissya Hotel

For players who went to Polissya Hotel, go behind the building where you fought the troops. Use the Tunnel Entrance Key Card on the card terminal to unlock the door.
Continuing down the tunnels that leads to the Foundation marks the point of no return. You won't be able to return to the Zone until you finish this mission (and the two that follow), and all your ongoing side missions will also be cancelled.
All Missables and Points of No Return
Via Olympia Cafe

For players who went to the Olympia Cafe, the tunnel leading to the foundation is located in the basement of the cafe (marked on your compass). Swipe the Tunnel Entrance Key Card on the card terminal to unlock the tunnel.
Going through this tunnel also marks the point of no return, and you won't be able to return to the Zone until you finish the mission, as well as the two succeeding missions that follow. All your ongoing side missions will also be cancelled.
Get to the Foundation
| Tunnel Routes | |
|---|---|
| Polissya Hotel Tunnel | Olympia Cafe Tunnel |
Polissya Hotel Tunnel Route
| 1 | 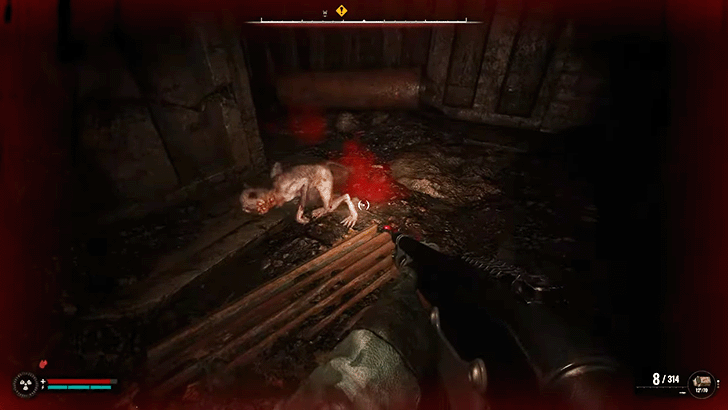 Jump down the sewage system and open your flashlight to light up the dark path ahead. Be prepared to fight Bayuns along the way. |
|---|---|
| 2 | 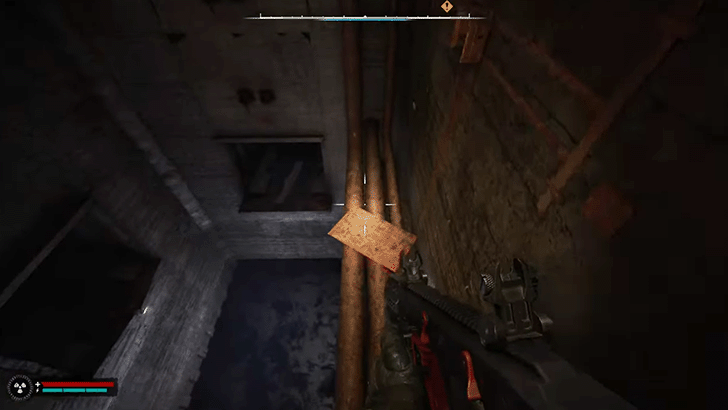 Next, drop down from one pipe to another. There will be four paths that you can enter at the bottom of the pit. Go through the path to the west. |
| 3 | 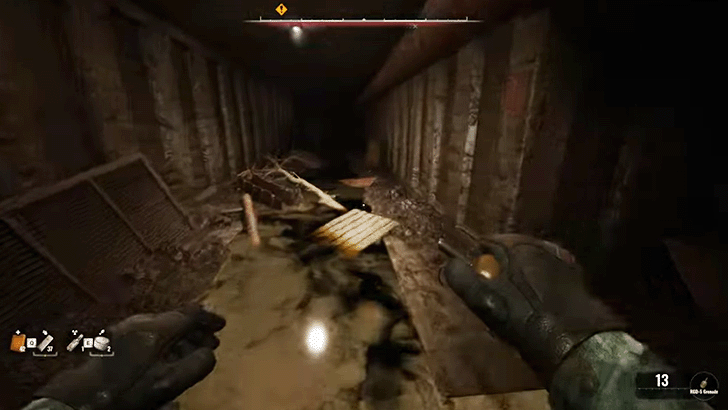 Rats will suddenly appear out of nowhere. You can use grenades to deal with them before moving forward. |
| 4 | 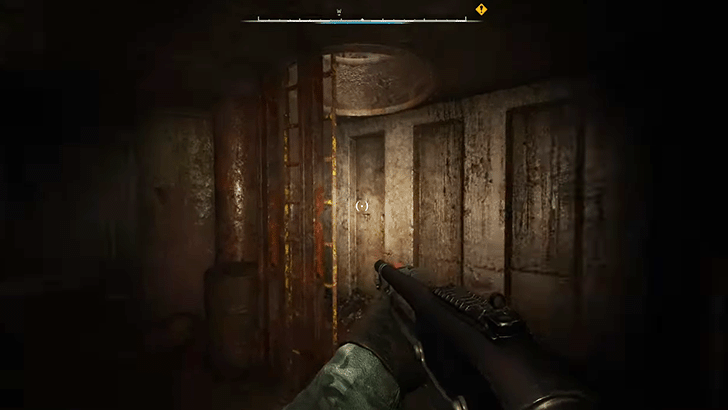 Keep following the path until you reach a ladder. Climb up the ladder to reach a subway system. |
| 5 | 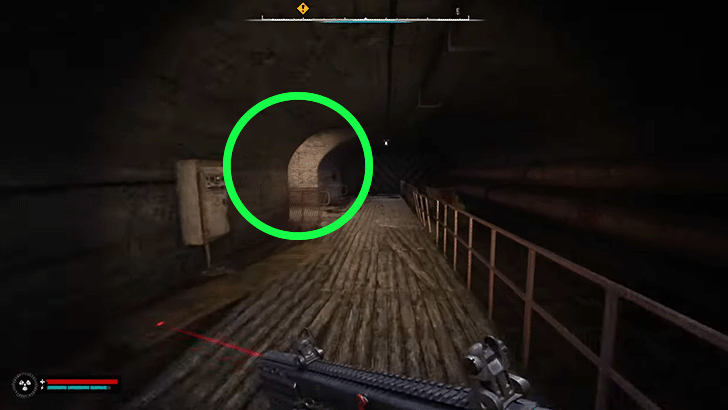 Go to the other end of the subway system and enter the room on the left side. Once inside, press the red button to open the locked door. |
| 6 | 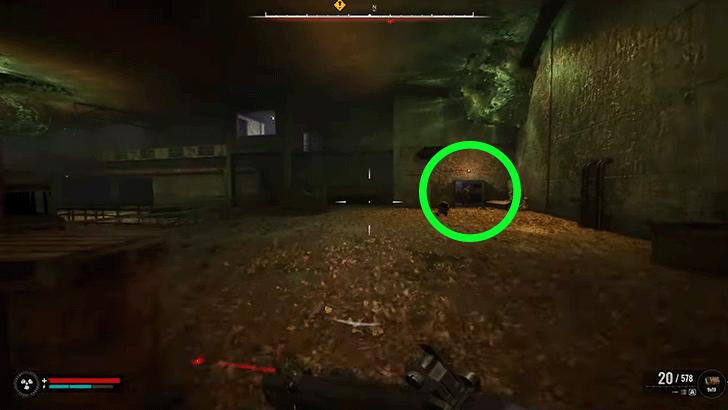 There will be multiple anomalies and zombies in this room. Drop down the catwalk and follow your waypoint that will lead you to another room on the other side. |
| 7 |  Climb up the first set of stairs that you'll see. This will lead you to the control room. |
| 8 | 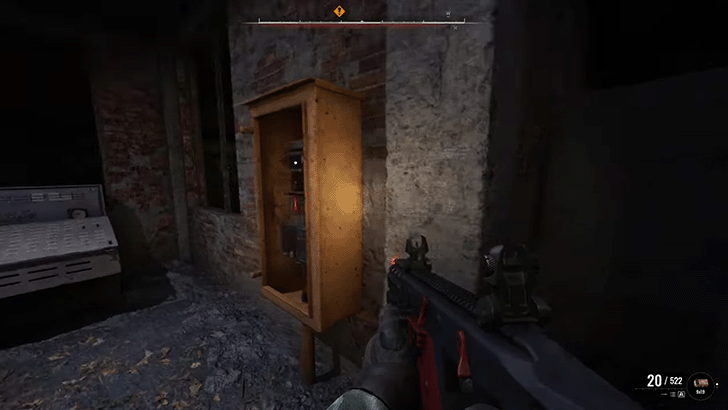 Once in the control room, kill the Controller at the balcony outside. Afterward, flip the switch on the circuit breaker. |
| 9 | 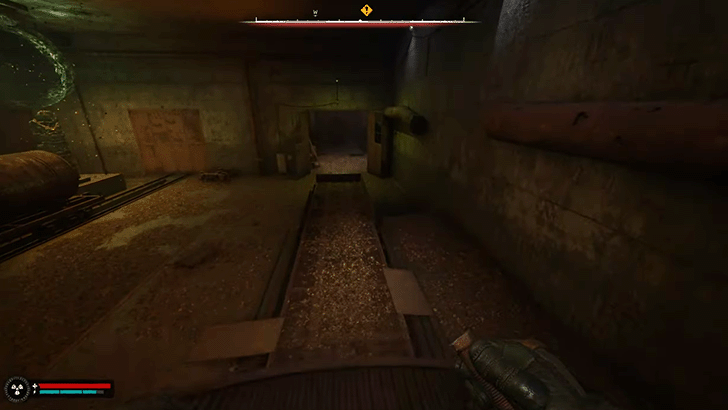 Leave the room via the balcony where you killed the Controller. Drop down and head west towards the end of the tunnel. |
| 10 |  Climb up the boxes to reach the ventilation shaft on the second level. |
| 11 | 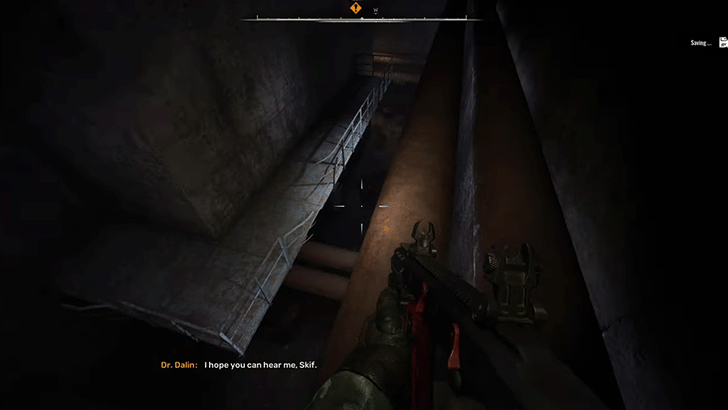 Drop down the pipes and follow your waypoint. This will lead you to an office area and eventually the entrance to the Foundation. |
Olympia Cafe Tunnel Route
| 1 | 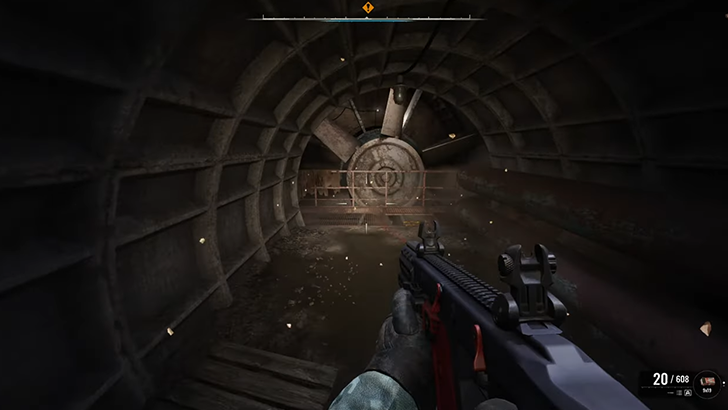 Enter the tunnels and immediately turn right towards a large fan. Go near the fan and climb down the ladder. |
|---|---|
| 2 | 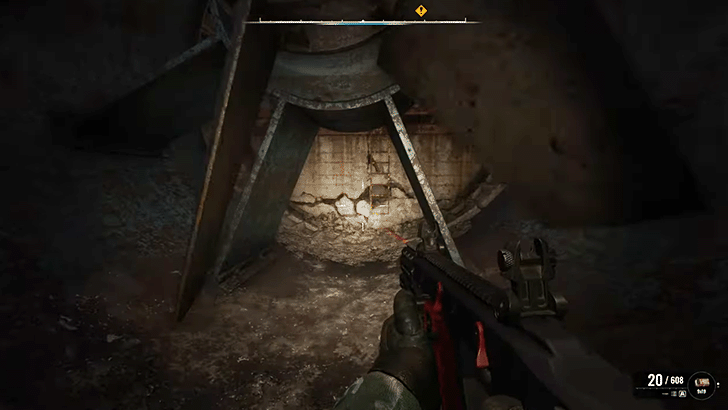 Next, you'll have to time your sprint to avoid getting hit by the blades of the fan. After successfully getting through it, climb up the ladder. |
| 3 | 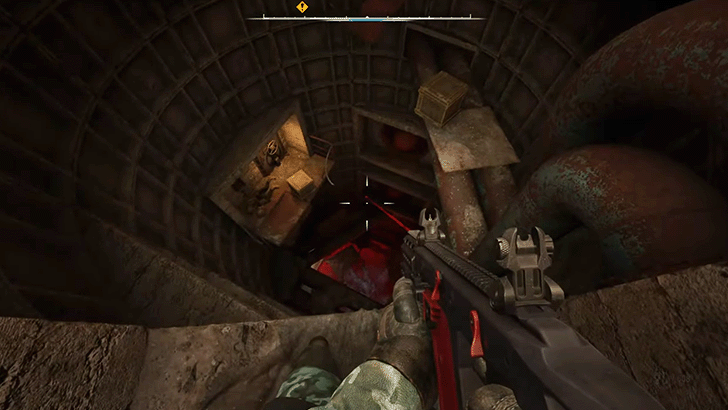 From the ladder, turn right and then jump all the way down to the bottom. You will not die from falling since the air from the ventilation shaft will break your fall. |
| 4 | 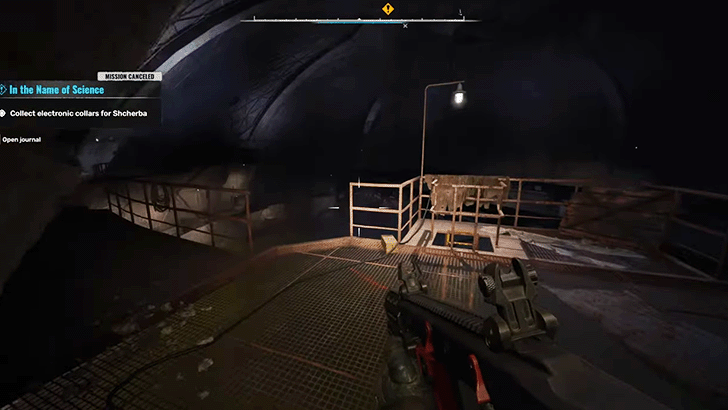 Navigate through the hallways until you reach an atrium. Climb down the first ladder that you'll see. |
| 5 | 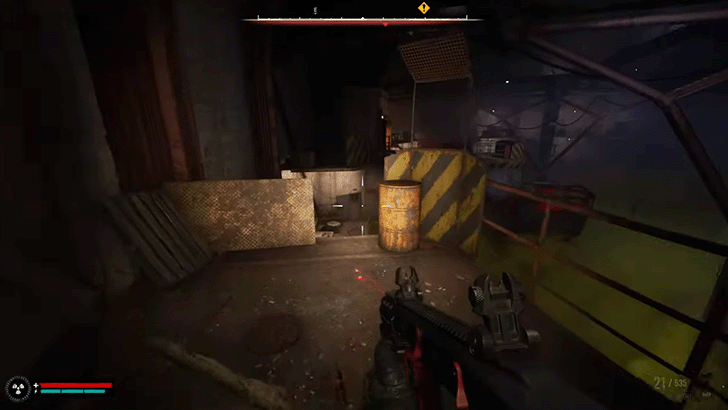 Move along the catwalk while fighting Monolith soldiers. Once you reach the end of the catwalk, drop down to the lower level. |
| 6 | 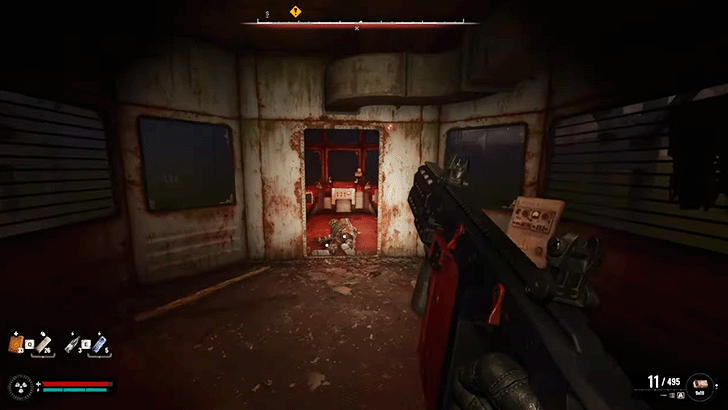 Enter the room ahead and flip the switch at the control panel. |
| 7 | 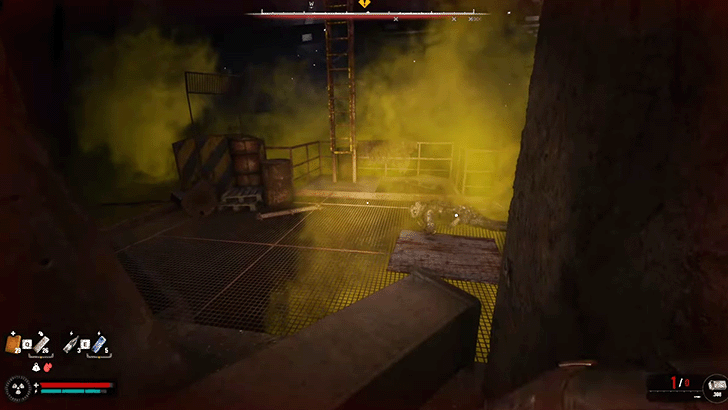 Leave the control panel room and turn right. Defeat another wave of Monolith soldiers while moving across the catwalk and then climb up the ladder at the end, surrounded by green toxic smoke. |
| 8 |  Turn left and fight your way again towards a small outpost. |
| 9 | 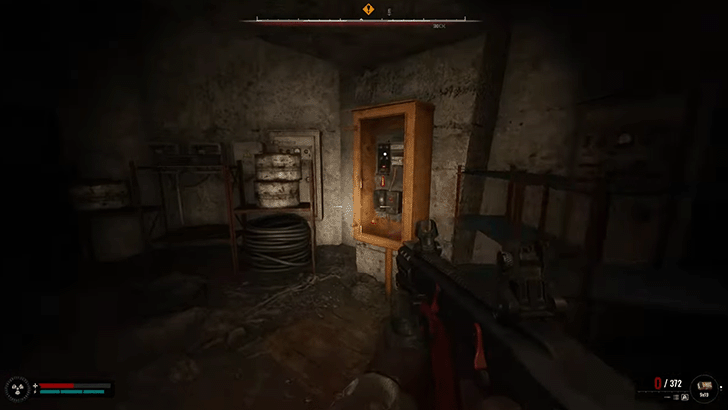 Go inside and flip the switch on the circuit breaker. |
| 10 | 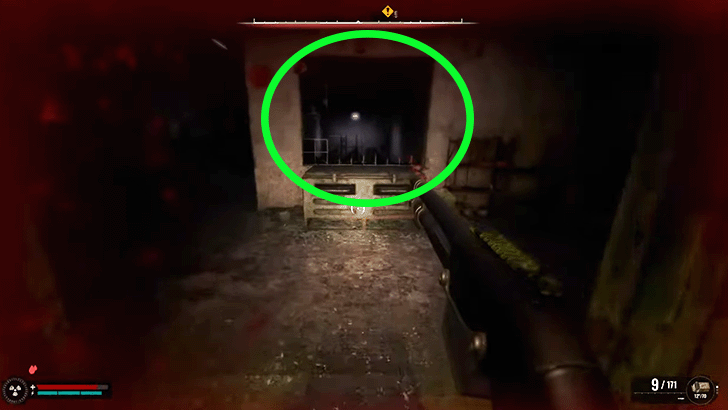 Leave the room and turn left. Move forward and enter another outpost entrance on the left side. Jump through the window and climb down the set of stairs. |
| 11 | 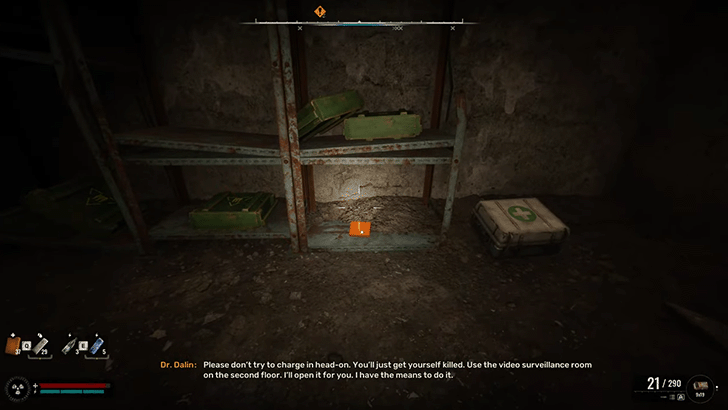 Feel free to resupply with medkits and bandages before moving off to the next area where you'll meet Col. Degtyarev at the Foundation entrance. |
Strelok-Kaymanov Ending Route
| All Down Below Ending Routes | ||
|---|---|---|
| Strelok-Kaymanov Route | Ward Route | Spark Route |
If you chose Life is for the Living after Scar confronts you in Subtle Matter as well as Escape when caught by Col. Korshunov in Dangerous Liaisons, then you'll be forced to confront Korshunov alongside Degtyarev. Stop the Ward in order to finish the mission.
| # | Objectives |
|---|---|
| 1 |  After trekking through the horrors of the tunnels, speak to Col. Degtyarev at the hallway leading to the Foundation to trigger a cutscene. |
| 2 |  Enter the lab and kill Colonel Korshunov and his troops. Korshunov will be wearing a highly durable armor, the Exoskeleton, so you'll have to shoot his head to destroy his shield and stun him. Once he's stunned, approach him to trigger a short melee cutscene. You will have to do this twice. Repeat the same process again to finally put him out of his misery. |
| 3 |  After killing Colonel Korshunov, get Faust's Pendant from the Colonel's dead body. Afterward, head back up to the Control Unit and talk to Dr. Dalin who can be seen cowering behind a computer terminal. |
| 4 | 
Talk to Strelok in the Enerhetyk Palace of Culture and then take the X7 Suit from the safe nearby. |
| 5 |  Speak to Richter and tell him you're ready to leave. Afterward, you will immediately arrive at the Red Forest and start The Last Wish main mission. |
Ward Ending Route
| All Down Below Ending Routes | ||
|---|---|---|
| Strelok-Kaymanov Route | Ward Route | Spark Route |
If you chose to side with the Ward when Col. Korshunov confronts you in Dangerous Liaisons, then you'll be forced to fight Richter and his Sparker allies. Defeat them to pave the forward for Korshunov and his men.
| # | Objectives |
|---|---|
| 1 | 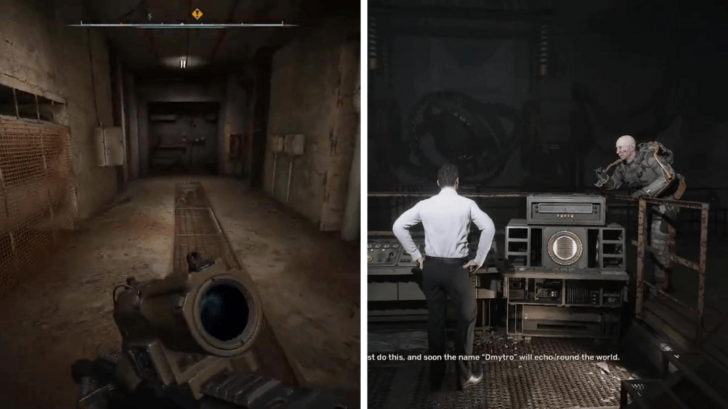 After traversing the tunnels, head downstairs and open the door leading deeper inside the foundation. It will immediately start a cutscene where you talk to Dr. Dalin and Col. Korshunov. |
| 2 |  Richter and his troops will attack after the cutscene finishes. His troops will have armor but not him, making him an easier opponent than others. Grenades will be good to use on this part to kill multiple soldiers quickly. You can check Richter's corpse and take his Player after. You can listen to his playlist whenever you like, even if the mission is still ongoing. |
| 3 | 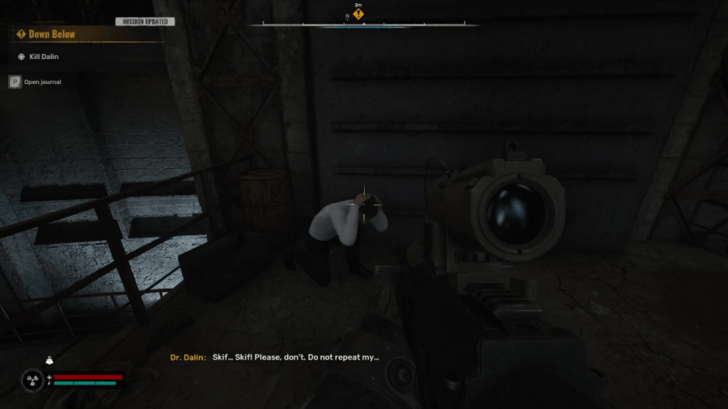 Approach Col. Korshunov and kill Dalin cowering in the corner. You can then go to the Control Unit after the cutscene with Agatha, Prof. Hermann, and Col. Korshunov. |
| 4 |
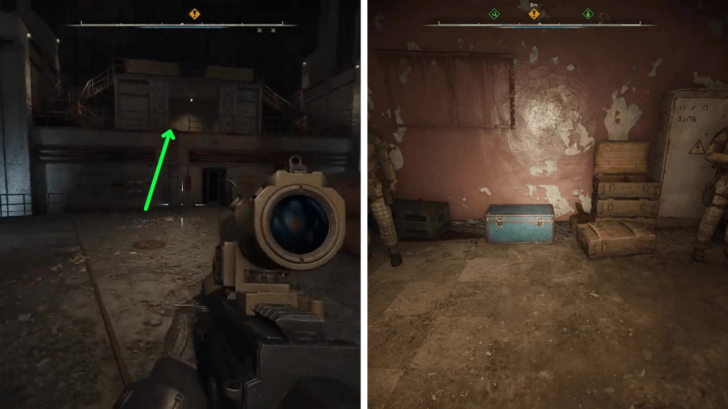 Head into the control room on the second level using the ladders and take the X7 Suit that should help you in the Dead Valley. You can find it inside a blue stash near two Warden soldiers. |
| 5 | 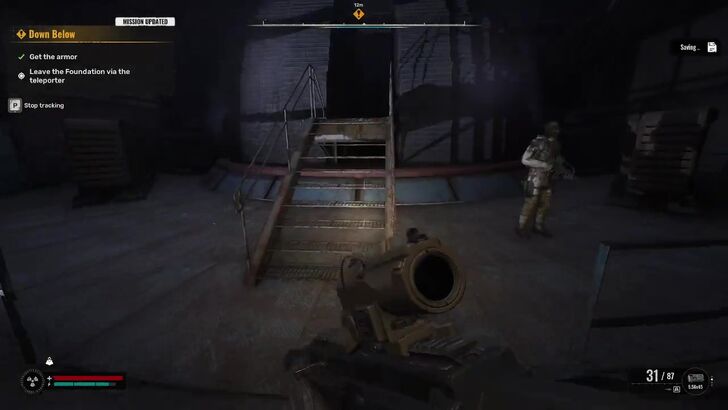 Walk inside the teleporter to exit the foundation. It should take you to the Dead Valley in the Generators Region, and the Eye of the Storm main mission will start. |
Spark Ending Route
| All Down Below Ending Routes | ||
|---|---|---|
| Strelok-Kaymanov Route | Ward Route | Spark Route |
If you sided with Spark with during the Dangerous Liaisons main mission, you will have to fight Col. Korshunov and other Warden soldiers on this part. Kill them to make way for Richter and the Sparker troops in the foundation.
| # | Objectives |
|---|---|
| 1 | 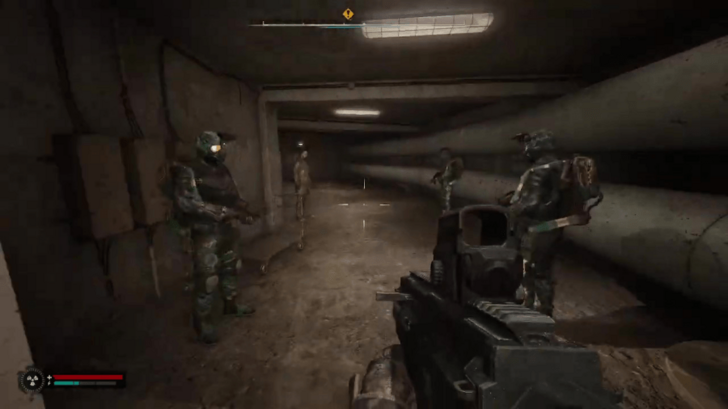 You will meet Richter and his men in the hallway next to the security room. Talk to him and go to the door to start a cutscene. It should take you inside andget into a battle against Korshunov and the Wardens immediately. |
| 2 | 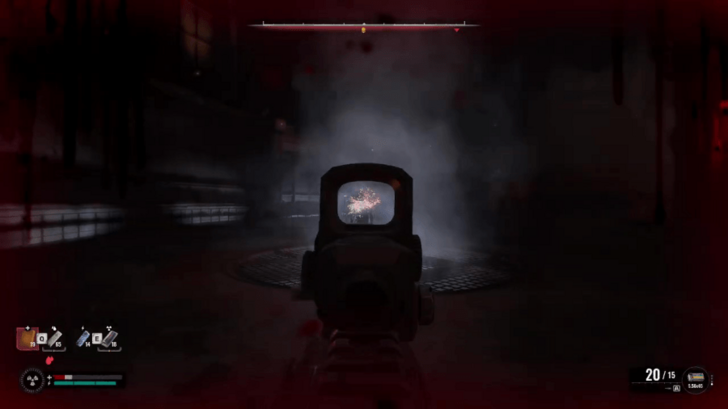 Storm the place and start attacking Korshunov. You can focus on Korshunov as Richter will fight the Wardens for you. Korshunov wears an Exoskeleton armor that is hard to chip away, so focus on hitting his head to stun him. Once stunned, get close to him and to trigger a short melee cutscene. Repeat this one more time to defeat him. |
| 3 | Take Faust's Pendant after killing Korshunov. Talk to Dr. Dalin after that to enter another cutscene. |
| 4 | 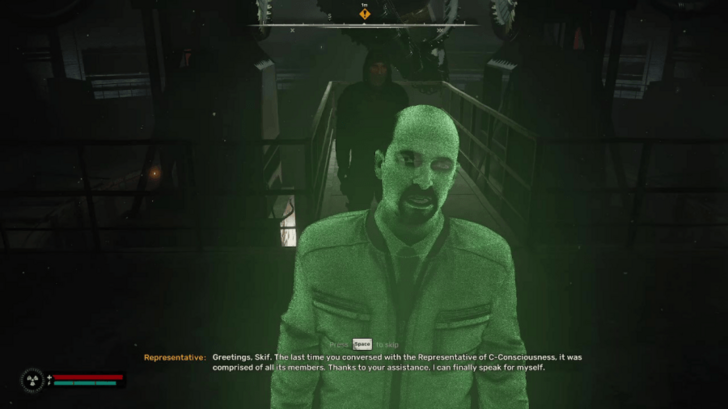 Talk to the Representative (Dalin's father) after the cutscene. He will tell you the next thing you need to do. |
| 5 | 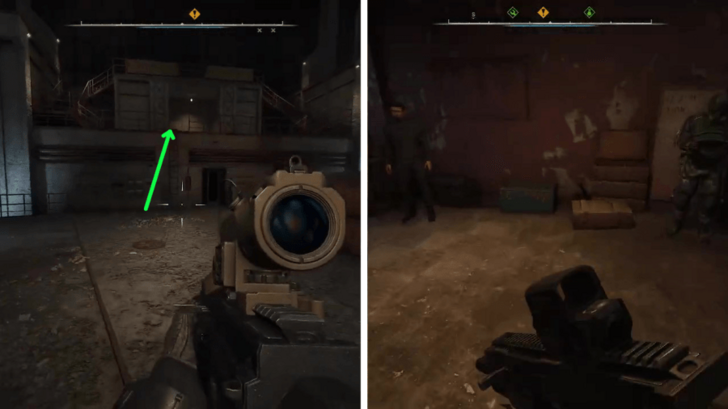 Head to the Control Unit Room to grab the X7 Suit after the discussion with the Representative. You should find it in a stash near two Sparkers. |
| 6 | 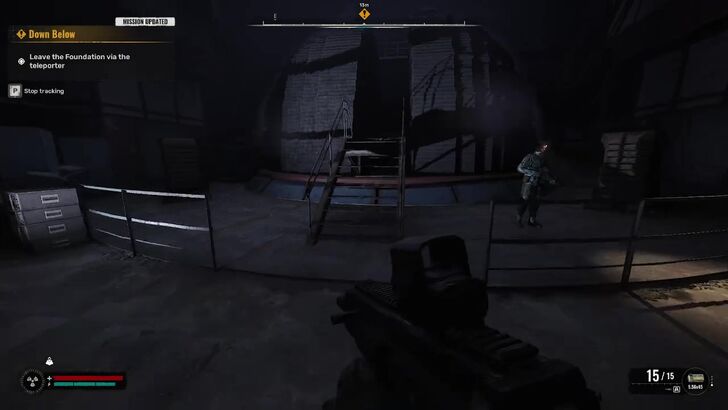 Enter the teleporter after getting the armor. It will take you to the Dead Valley and start the Through the Valley of the Shadow Death main mission. |
Down Below Rewards
Mission Rewards
| Rewards |
|---|
| Strelok or Kaymanov Routes: ・Sotnyk (found at the table behind Strelok) ・X7 Suit (obtained from the safe beside Strelok) Ward Route: ・Richter's Player (found on Richter's Body) ・X7 Suit (from the stash in the Control Unit) Spark Route: ・X7 Suit (from the stash in the Control Unit) |
Down Below Overview
Location and Mission Info
| Down Below Mission Info | |
|---|---|
| Starting Location | Prypiat |
| Quest Giver | Starts immediately after The Road to the Foundation |
STALKER 2 Related Guides

All Main Missions
Comment
1  BCramer about 1 year
For the Cafe Route, before jumping down the ladder before the Fans, take a left. Multiple trip wires in the room, but you can turn off the fans to make it easier on you.
Author

Down Below Walkthrough
Please participate in our site
improvement survey
03/2026
improvement survey
03/2026
Would you assist in
improving Game8's site?
improving Game8's site?

×
We are listening to our users' valuable opinions and discussing how to act on them.
The information collected through this survey will be used for the purpose of improving our services. In addition, the information will only be disclosed a part of a statistic in a format that will not allow identification of personal information.
Begin Survey
Not Now
×
Please rate each item regarding Game8.co's Advertisements.
Amount of Ads
Very Dissatisfied
Somewhat Dissatisfied
Fine
Somewhat Satisfied
Highly Satisfied
Placement of Ads
Timing of Ad Display
Ad Loading Speed
Safeness of Ads
Content of Ads
×
Please rate each item regarding Game8.co's Quality of Articles.
Amount of information
Very Dissatisfied
Somewhat Dissatisfied
Fine
Somewhat Satisfied
Highly Satisfied
Frequency of updates
Speed of new information
Accuracy of articles
Understandibility of articles
Readability of sentences
×
Please rate each item regarding Game8.co's Usability of the Site.
Ease of finding information
Very Dissatisfied
Somewhat Dissatisfied
Fine
Somewhat Satisfied
Highly Satisfied
Loading Speed
Use of Color
Font Size
Visibility of Images
Easy to Understand Layout
×
Please rate each item regarding Game8.co's Message Boards, Comments.
Ease of Writing
Very Dissatisfied
Somewhat Dissatisfied
Fine
Somewhat Satisfied
Highly Satisfied
Readability
Ease in Finding Information
Comment Quality
Comment Quantity
Admin Response
×
Please rate each item regarding Game8.co's Site's new design.
Please rate our site's new design
Very Dissatisfied
Somewhat Dissatisfied
Fine
Somewhat Satisfied
Highly Satisfied
Do you think that the website's design change makes the site easier to use?
Has the new design made it easier for you to find information on the site?
Has the new design improved the overall visual appeal of the site?
How would you rate your overall satisfaction with the new design of the site?
×
How likely are you to recommend Game8 to someone you know?
Very Unlikely
0
1
2
3
4
5
6
7
8
9
10
Very Likely
If you have other opinions regarding potential improvement to the website, please share them with us. We would appreciate your honest opinion.
Note: This is a free response section, so you can proceed without entering anything.
Note: Please be sure not to enter any kind of personal information into your response.
Note: Please be sure not to enter any kind of personal information into your response.
×
Thank You
×
Thank you for participating in our survey! Your answers will help us to improve the quality of our website and services.
We hope you continue to make use of Game8.
We hope you continue to make use of Game8.
Close
Rankings
- We could not find the message board you were looking for.
Gaming News


![Monster Hunter Stories 3 Review [First Impressions] | Simply Rejuvenating](https://img.game8.co/4438641/2a31b7702bd70e78ec8efd24661dacda.jpeg/thumb)
Popular Games

Genshin Impact Walkthrough & Guides Wiki
Honkai: Star Rail Walkthrough & Guides Wiki
Umamusume: Pretty Derby Walkthrough & Guides Wiki
Pokemon Pokopia Walkthrough & Guides Wiki
Resident Evil Requiem (RE9) Walkthrough & Guides Wiki
Monster Hunter Wilds Walkthrough & Guides Wiki
Wuthering Waves Walkthrough & Guides Wiki
Arknights: Endfield Walkthrough & Guides Wiki
Pokemon FireRed and LeafGreen (FRLG) Walkthrough & Guides Wiki
Pokemon TCG Pocket (PTCGP) Strategies & Guides Wiki


Recommended Games
Diablo 4: Vessel of Hatred Walkthrough & Guides Wiki
Cyberpunk 2077: Ultimate Edition Walkthrough & Guides Wiki
Fire Emblem Heroes (FEH) Walkthrough & Guides Wiki
Yu-Gi-Oh! Master Duel Walkthrough & Guides Wiki
Super Smash Bros. Ultimate Walkthrough & Guides Wiki
Pokemon Brilliant Diamond and Shining Pearl (BDSP) Walkthrough & Guides Wiki
Elden Ring Shadow of the Erdtree Walkthrough & Guides Wiki
Monster Hunter World Walkthrough & Guides Wiki
The Legend of Zelda: Tears of the Kingdom Walkthrough & Guides Wiki
Persona 3 Reload Walkthrough & Guides Wiki


All rights reserved
S.T.A.L.K.E.R. 2 is a registered trademark of GSC Game World Global Ltd. © 2024 GSC Game World Global Ltd. GSC Game World and its logos are Trademarks or Registered Trademarks Of GSC Game World Global Ltd. © S.T.A.L.K.E.R. 2 HEART OF CHORNOBYL a game developed GSC Game World. All other trademarks, registered trademarks or logos belong to their respective owners.
The copyrights of videos of games used in our content and other intellectual property rights belong to the provider of the game.
The contents we provide on this site were created personally by members of the Game8 editorial department.
We refuse the right to reuse or repost content taken without our permission such as data or images to other sites.
What is this control switch for in the cabin ? Nobody explain anywhere . I progressed without turning it .