List of All Choices
★ Best Weapons | Best Armor | Best Artifacts
☆ All Door Code Locations and Solutions
★ How to Unlock All Endings
☆ All Main Mission and Side Mission Guides
★ Locations: All Bases | All Artifact Farms
☆ How to Get All Unique Weapons
This is a list of all choices in STALKER 2 Heart of Chornobyl. Read on to see all major story and dialogue choices, including their consequences.
| Warning: major story related spoilers lie ahead. |
All Major Choices
Major Choices for Endings
Note: Major story choices are those that affect the ending of STALKER 2. Not included in this list are choices that only affect the outcomes of certain missions.
| Mission and Choices | Effects |
|---|---|
| Subtle Matter ① Eternal spring. or I need more time. ② Life is for the living. | 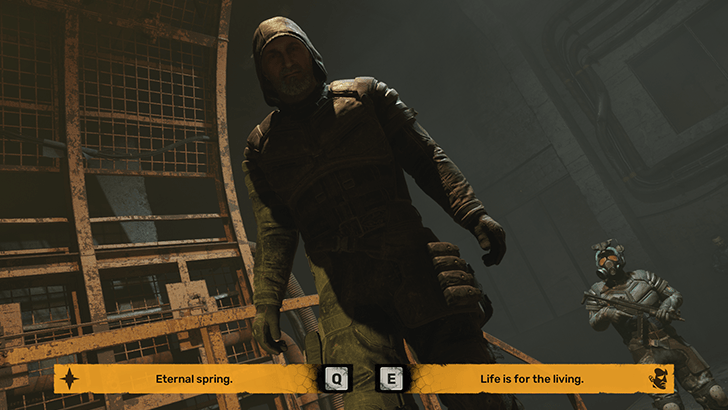 Answering Eternal spring will lock you into the Spark ending, while Life is for the living progresses Strelok's ending. If you sided with the Ward during Wishful Thinking, choose I need more time if you want to get the Spark ending (since Eternal spring will not be available). |
| Dangerous Liaisons ① I'm not your enemy. ② Escape. |  Answering I'm not your enemy will lock you to the Ward ending, while [Escape] progresses either the Strelok or Spark endings based on what you answered in Subtle Matter. |
| The Last Wish ① [Lower the Gun] ② [Fire] | 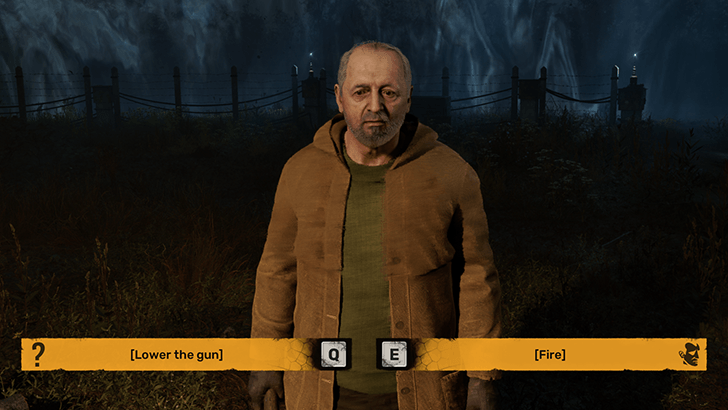 Choosing Lower the gun will lock you to Kaymanov's ending, while Fire locks you to Strelok's ending. |
Not All Main Story Choices Affect the Ending
Not all choices you make during the main story will be a major story choice. Most of the early to mid-game main story choices will only affect either the outcome of the mission, how future missions play out, or how you access the next main story mission.
For example, killing or sparing Solder will only affect the difficulty of The Hornet's Nest main mission (without affecting the outcome). It is the same for the Unusual PDA, where showing or hiding it only affects how you unlock the main mission, Hot on the Trail.
List of All Choices
Main Mission Choices
| Click to Jump to a Section! | |
|---|---|
| Main Mission Choices | Side Mission Choices |
This is a list of key choices during the main story missions of STALKER 2. This list of choices is arranged by mission order.
| Mission | Choices | Results |
|---|---|---|
| A Needle in a Haystack After finding Squint at the Old Mill, you'll have to decide to either help or kill him to get the Ward Sensors. ▶ Should You Help or Kill Squint? |
[Mission] What's your escape plan? | Triggers additional dialogue. Follow along with his plan to trigger the side mission, Piece of Cake. |
| [Attack] I don't help murderers and looters. | Kill Squint and retrieve the Ward Sensors from his corpse. | |
| A Needle in a Haystack After obtaining the Ward Sensors, you'll have the option to give it to either Zotov or Richter. ▶ Give the Ward Sensors to Richter or Captain Zotov? |
Give the Ward Sensors to Richter. | Adds more objectives before you can enter the Sphere during Behind Seven Seals. Sides you with the Spark faction until you can decide again during Back to Slag Heap. Influences the main missions you do until that point. |
| Give the Ward Sensors to Zotov. | Triggers the final act of Behind Seven Seals. Sides you with the Ward faction until you can decide again during Back to Slag Heap. Influences the main missions you do until that point. |
|
| Behind Seven Seals After infiltrating the Sphere and confronting Solder, you will get a timed decision to either kill or spare him. ▶ Should You Shoot Solder or Knock Him Out? |
[Shoot] | Solder dies and you won't get additional help during the main mission, The Hornet's Nest. |
| [Knock him out] | Solder lives and helps you shut off the psi-emitter during The Hornet's Nest. | |
| Deal with the Devil In order to meet one of Nestor's attackers, you'll have to do a bit of work for Varan. You can choose to pay him, work for him, or kill him. ▶ Should You Kill Varan? |
[20000] Here's your money. | You gain access to the room holding Nestor and his attacker immediately. You lose 20000 Coupons and Varan still betrays you after examining the attacker's body. |
| Any other options? | Triggers the main mission, King of the Hill, where Varan tells you to kill Shah or Roosevelt (or both) before he allows you to meet Nestor's attacker. Varan betrays you after you examine the attacker's body. |
|
| [Attack] Or I could kill you? | Varan and his men become hostile but you don't have to pay or do additional tasks for him. Loot the key from his body to meet the attacker. | |
| King of the Hill This choice is only available if you chose the Any other options? dialogue choice while cutting a deal with Varan in Deal with the Devil. ▶ Should You Kill Shah or Roosevelt? |
Kill Roosevelt | You gain access to Nestor's attacker after submitting Roosevelt's PDA to Varan. You lose access to a peaceful resolution when confronting Roosevelt's men in Legends of the Zone. |
| Kill Shah | You gain access to Nestor's attacker after submitting Shah's PDA to Varan. Locks you out of interacting with the Brood. |
|
| Kill Both | Changed PDA submission dialogue with Varan. Grants you access to Nestor and the attacker. You lose access to a peaceful resolution when confronting Roosevelt's men in Legends of the Zone. Locks you out of interacting with the Brood. |
|
| Back to Slag Heap You've obtained an Unusual PDA that belonged to a Monolithian. The option to show it to the Ward and Spark factions will pop up during this mission. ▶ Should You Show the Unusual PDA? |
Show the Unusual PDA to Dalin and Korshunov. (Ward) |
Get rewarded with the Ward Badge which makes future missions and interactions easier. If you gave the Ward Sensors to Richter, you will also get the Combatant. |
| Do not show the Unusual PDA to Dalin and Korshunov. (Ward) |
Sets you up to trigger the side mission, A Heavy Burden before you unlock the next main mission, Hot on the Trail. | |
| Show the Unusual PDA to Scar. (Spark) |
Sets you up to trigger the side mission, A Heavy Burden before you unlock the next main mission, Hot on the Trail. | |
| Do not show the Unusual PDA to Scar. (Spark) |
Sets you up to trigger the side mission, A Heavy Burden before you unlock the next main mission, Hot on the Trail. | |
| Chasing Ghosts Foma is a Monolithian guarding the tower of Azimuth Station. Speaking to him while he is downed will trigger this choice. ▶ Should You Kill Foma? |
You're Finished | You kill Foma. He drops an SVDM-2 that you can loot. |
| I'm Leaving | Foma will go on a monologue before dying. He drops an SVDM-2 for you to loot. | |
| In Search of a Guide Nimble was the guide that led Faust and his Monolithians to you at the start of the game (the ones who stole the scanner from you). During this mission you'll have the option to kill or spare him. ▶ Should You Kill Nimble? |
You're a fool, Nimble | Nimble gives you Kalancha's Map as well as the coordinates to the Clear Sky Base to trigger Ad astra per aspera. Rewards you with 2699 Coupons. Additional dialogue after he gets up. |
| That's no Excuse | You kill Nimble. You'll need to loot Kalancha's Map to get the coordinates to the Clear Sky Base and trigger Ad astra per aspera. | |
| Wishful Thinking When you first enter Agatha's office in SIRCAA, you'll find Hermann tied up and bloodied. Agatha will give you the choice of killing or letting Hermann go. ▶ Should You Kill Hermann? |
Let him go. | Agatha let's Hermann go free. You'll meet Hermann again during Down Below if you're on the Ward ending route. Both he and Agatha will comment that you chose right by sparing Hermann. |
| He has to die. | You shoot Hermann but later learn in Down Below (if you're on the Ward ending route) that it wasn't real. Agatha comments that she let you think you shot Hermann in order to get you to cool off. | |
| Wishful Thinking After dealing with Hermann, Agatha will ask you if there are any groups looking to disrupt Dalin's experiment. You'll have the choice to tell her about Noontide or hide their plans. ▶ Should You Tell Agatha? |
The experiment is in danger. | You tell Agatha about Spark and Noontide but it will not affect the outcome of the Noontide assault, later on. |
| I don't know anything. | Agatha remains silent but she plays a recording of Strider contacting you about the presence of the Monolith in SIRCAA. Even if she already knows about the attack, this will not affect the outcome of the Noontide assault, later on. | |
| Subtle Matter This is a major story choice. Scar catches you using the visiograph in Orbita Station. You have the option to defy him or placate him. The first choice will change depending on who you sided with until this point. ▶ Eternal Spring or Life is For the Living? |
Eternal spring. (Spark) I need more time. (Ward) |
Both answers will allow you to progress towards the Spark Ending as long as you choose the option to Escape during Dangerous Liaisons. Locks you out of the Strelok and Kaymanov Endings. |
| Life is for the living. | Allows you to progress towards the Strelok, Kaymanov, or Ward Endings. Locks you out of the Spark Ending. |
|
| Dangerous Liaisons This is a major story choice. At the end of the mission, you'll be apprehended by Korshunov's troops. You'll have the option of siding with the Ward or attempting to escape. ▶ I'm Not Your Enemy or Escape? |
I'm not your enemy. | Locks you into the Ward Ending and triggers the main mission, The Boundary. Locks you out of the Strelok and Kaymanov Endings. |
| Escape. | Allows you to progress towards the Strelok and Kaymanov Endings if you chose Life is for the living in Subtle Matter. Locks you into the Spark Ending if you chose Eternal spring or I need more time in Subtle Matter. Locks you out of the Ward Ending. |
|
| The Last Wish This is a major story choice. If you chose Life is for the living in Subtle Matter and Escape in Dangerous Liaisons, you'll unlock the mission, The Last Wish, as well as this choice when confronting Dr. Kaymanov. ▶ Lower the Gun or Fire? |
[Fire] | You kill Dr. Kaymanov. This locks you into the Strelok Ending of STALKER 2. |
| [Lower the gun.] | You spare Dr. Kaymanov. This triggers an additional visit to Orbita Station where you find out how the Zone was created. Locks you into the Kaymanov Ending of STALKER 2. |
Side Mission Choices
| Click to Jump to a Section! | |
|---|---|
| Main Mission Choices | Side Mission Choices |
This is a list of choices you make during certain Side Missions of STALKER 2. This list of choices is arranged alphabetically by quest name.
| Mission | Choices | Results |
|---|---|---|
| A Sign of Hope During the mission, you'll have to confront a zombie atop the Noontider base. You have the option of killing it (following Lodochka's advice) or sparing it (following the pleas of the Noontiders). ▶ Should You Kill the Zombie on the Roof? |
Kill the Zombie | Zombie drops its weapon that you can sell for Coupons. Lodochka rewards you with a Bear Detector. |
| Spare the Zombie | Khors will reward you with extra Coupons for not killing the zombie. Lodochka still rewards you with a Bear Detector. |
|
| Dangerous Visitors After rescuing Gloomy from the bandits, he will offer you a reward. Choose from the 3 options to get your reward. ▶ Which Gloomy Reward Should You Choose? |
[Echo Detector] The detector will do. | You get the Echo Detector as a reward but Gloomy won't tell you about his dropped stash in the Magnetic Cave. You can still get his stash from Magnetic Cave by simply exploring it. |
| [Reward] I have a detector. | Gloomy will keep the Echo Detector and tell you about his dropped stash the Magnetic cave nearby. | |
| [Reward] Got anything else? | Gloomy will keep the Echo Detector and tell you about his dropped stash the Magnetic cave nearby. | |
| Lost Boys Ninth is an ex-Monolithian that you find helping Mastiff - the stalker you were told to rescue. You can choose to help or kill the Ninth when more bounty hunters appear to try killing him. ▶ Should You Help the Ninth or Dew? |
I want to help you. | Dew and his gang become hostile. Help the Ninth fight them off to receive the M10 Gordon Rubber Layer Blueprint. Lens still rewards you for helping find Mastiff. Later, Mastiff will be found in Lens' garage. Speak to him to get the location of his stash (his reward to you for aiding the Ninth). |
| [Attack] You deserve to die. | The Ninth will become hostile. Kill him to get your reward from Lens. | |
| No Honor Among Thieves At the end of the mission, you'll confront Docent about Huron's stolen shipment. You can either spare or kill him. ▶ Should You Kill Docent? |
Go on. | Docent gives you the coordinates to Shah's Stash where you can get the Shah's Mate SMG. |
| No Way. | You kill Docent. This choice locks you out of getting Shah's Mate. Cannot use Shah's Mate to enter The Brood base later on. |
|
| The Poppy Field While at the Poppy Field, you'll meet Pomor - an opportunistic loner. Once you have the religious icon, you can either deliver it to Mityay directly or trade it to Pomor (before killing him) to get both possible quest rewards. ▶ Should You Give the Religious Icon to Pomor or Mityay? ▶ Should You Kill Pomor? |
Give the Icon to Mityay | Mityay rewards you with 1000 Coupons. You'll later see the icon above his family's grave. |
| Trade the Icon to Pomor | Pomor rewards you with the Unknown Stalker's AR416 with low durability. | |
| Kill Pomor (after trading the Icon) | You still get the Unknown Stalker's AR416 since you traded the icon first. The Religious Icon can then be looted from Pomor's corpse, allowing you to submit it to Mityay to get 1000 Coupons. |
Do Choices Matter?
Choices Determine Which Main Missions You Do
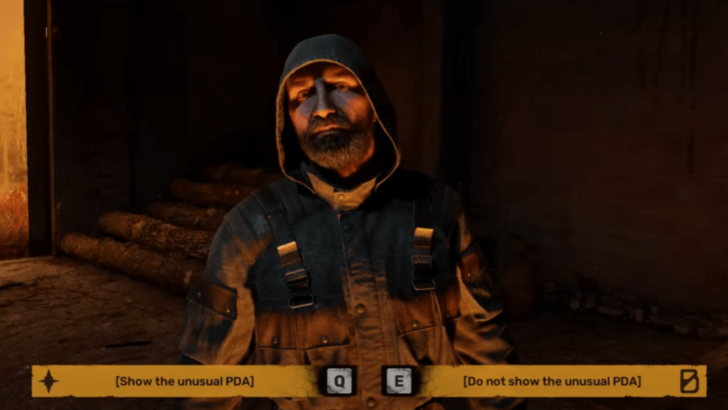
Early to mid-game choices in STALKER 2 will determine which main missions you do since they will play out differently depending on the faction you sided with (Spark or Ward). Compared to siding with Ward, Spark faction playthroughs will have to do more solo main and side missions during the main story.
However, do note that these do not affect the ending of STALKER 2. The only choices that matter to the ending will play out from Subtle Matter onwards. Choices before this late game mission will only affect the main missions you get and how they play out.
Endgame Choices Determine the Ending You Get

In total, there are 3 major choices in STALKER 2 that affect the ending of the game. Make sure you have manual saves before you progress the Subtle Matter, Dangerous Liaisons, and the Last Wish main missions. As long as you have saves for these 3, it'll be easy to get and view all 4 endings of STALKER 2.
STALKER 2 Related Guides

STALKER 2 Heart of Chornobyl Walkthrough Wiki
STALKER 2 Wiki
Recommended Guides
Comment
Author
List of All Choices
improvement survey
03/2026
improving Game8's site?

Your answers will help us to improve our website.
Note: Please be sure not to enter any kind of personal information into your response.

We hope you continue to make use of Game8.
Rankings
- We could not find the message board you were looking for.
Gaming News
Popular Games

Genshin Impact Walkthrough & Guides Wiki

Honkai: Star Rail Walkthrough & Guides Wiki

Umamusume: Pretty Derby Walkthrough & Guides Wiki

Pokemon Pokopia Walkthrough & Guides Wiki

Resident Evil Requiem (RE9) Walkthrough & Guides Wiki

Monster Hunter Wilds Walkthrough & Guides Wiki

Wuthering Waves Walkthrough & Guides Wiki

Arknights: Endfield Walkthrough & Guides Wiki

Pokemon FireRed and LeafGreen (FRLG) Walkthrough & Guides Wiki

Pokemon TCG Pocket (PTCGP) Strategies & Guides Wiki
Recommended Games

Diablo 4: Vessel of Hatred Walkthrough & Guides Wiki

Fire Emblem Heroes (FEH) Walkthrough & Guides Wiki

Yu-Gi-Oh! Master Duel Walkthrough & Guides Wiki

Super Smash Bros. Ultimate Walkthrough & Guides Wiki

Pokemon Brilliant Diamond and Shining Pearl (BDSP) Walkthrough & Guides Wiki

Elden Ring Shadow of the Erdtree Walkthrough & Guides Wiki

Monster Hunter World Walkthrough & Guides Wiki

The Legend of Zelda: Tears of the Kingdom Walkthrough & Guides Wiki

Persona 3 Reload Walkthrough & Guides Wiki

Cyberpunk 2077: Ultimate Edition Walkthrough & Guides Wiki
All rights reserved
S.T.A.L.K.E.R. 2 is a registered trademark of GSC Game World Global Ltd. © 2024 GSC Game World Global Ltd. GSC Game World and its logos are Trademarks or Registered Trademarks Of GSC Game World Global Ltd. © S.T.A.L.K.E.R. 2 HEART OF CHORNOBYL a game developed GSC Game World. All other trademarks, registered trademarks or logos belong to their respective owners.
The copyrights of videos of games used in our content and other intellectual property rights belong to the provider of the game.
The contents we provide on this site were created personally by members of the Game8 editorial department.
We refuse the right to reuse or repost content taken without our permission such as data or images to other sites.
 Main Missions
 Side Missions
 Weapons
 Armor
Armor Interactive Map
 Choices
 Endings
 Tips and Tricks
 Artifacts
 Factions
 Bases
Bases Attachments
 Ammo
Ammo Detectors
 Puzzles and Codes
 Anomalies
 Technicians
 Vendors and NPCs
 Stashes
 Mutants
 Achievements
 Bugs and Errors
 Multiplayer
 News
News Blueprints
 Consumables





![Everwind Review [Early Access] | The Shaky First Step to A Very Long Journey](https://img.game8.co/4440226/ab079b1153298a042633dd1ef51e878e.png/thumb)

![Monster Hunter Stories 3 Review [First Impressions] | Simply Rejuvenating](https://img.game8.co/4438641/2a31b7702bd70e78ec8efd24661dacda.jpeg/thumb)


