Once More Unto the Breach Walkthrough
★ Best Weapons | Best Armor | Best Artifacts
☆ All Door Code Locations and Solutions
★ How to Unlock All Endings
☆ All Main Mission and Side Mission Guides
★ Locations: All Bases | All Artifact Farms
☆ How to Get All Unique Weapons

Once More Unto the Breach is a main mission in STALKER 2: Heart of Chornobyl. Read on for a complete walkthrough of Once More Unto the Breach, as well as the rewards for completing the mission.
| ◄ Previous Mission | Next Mission ▶ |
|---|---|
| In Search of Past Glory | Visions of Truth |
List of Contents
Once More Unto the Breach Walkthrough
| This main mission is exclusive to the Ward Faction. For players who sided with the Spark Faction, they will have to do the Happiness for Everyone mission instead. | ||||||
| List of Objectives | ||||||
| 1 | Meet Up with Zotov | |||||
| 2 | Help Take the Duga Checkpoint (Optional) | |||||
| 3 | Find the Entrance to the Tunnel | |||||
| 4 | Get Inside the Duga Compound | |||||
| 5 | Get to Location D | |||||
| 6 | Go Through the Area with Lots of Traps | |||||
| 7 | Plant Explosives | |||||
| 8 | Move Away from the Center of the Blast | |||||
| 9 | Find Faust at the Comm Center | |||||
| 10 | Defeat Faust | |||||
| 11 | Climb the Ledge Up Yourself | |||||
Meet Up with Zotov
A call with Zotov will be automatically made soon after you finish In Search of Past Glory. He will ask you to meet him at a command post near the Duga, located southwest of the Chemical Plant Base.
Talk to the Captain once you get there and choose to hear the plan. After the briefing, take the explosives from Zotov and start walking westward towards the Duga.
Help Take the Duga Checkpoint (Optional)

By following the road west, you'll run into some soldiers on standby outside the checkpoint. They will start the attack if you approach them and you can join in to complete this optional objective.
We recommend seeing this through and help them clear the checkpoint to make the next objective easier to complete.
Find the Entrance to the Tunnel

You'll find the tunnel entrance inside the orange building near the south wall. Go down the stairs in the second room to find a utility tunnel with pipes and reach the other end for another ladder. Climb down this ladder to complete the objective.
Get Inside the Duga Compound

Move two rooms west and look for a room on your right with an electric anomaly. Set the anomaly off with a bolt and look over the shelves at the other end to find a hole leading to another room.
There is a switch inside that must be turned on to unlock the steel door in the previous room. Take out your weapon before you open the door to the left of the terminal, as Rodents were also behind the steel door you just opened. From here, you must make your way to the room on the other end.
Reach the Room on the Other End
| 1 | 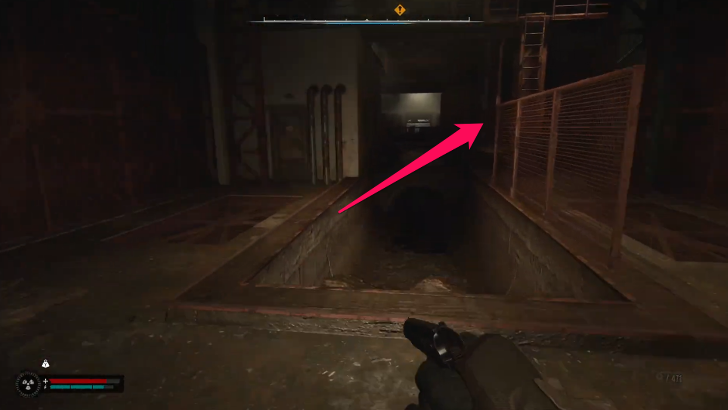 Pass through the unlocked door once it's clear and go up the ladder on your right. Slide down the ladder at the other end of the platform. |
|---|---|
| 2 | 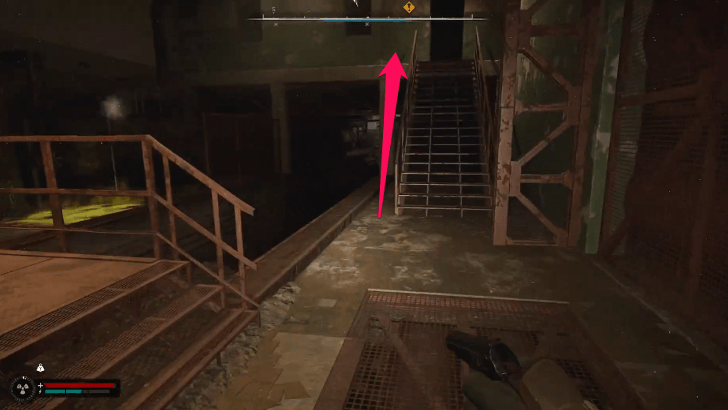 Jump over the radioactive puddle and walk over the control room ahead. Ready your weapon before going up the stairs as there's a Bloodsucker inside. |
| 3 | 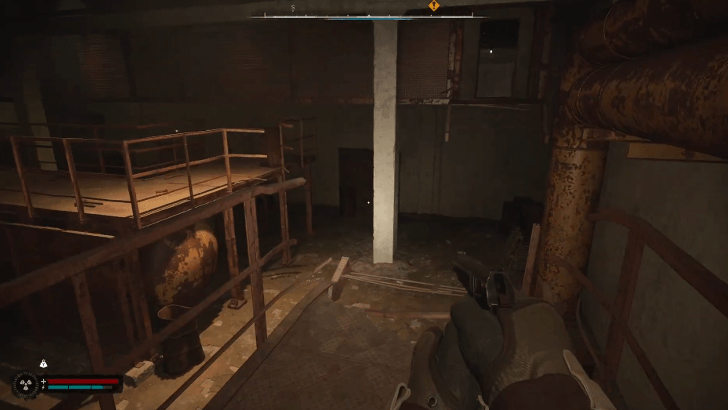 Exit on the other side and use the next platform to get to the next and last section. |
| 4 | 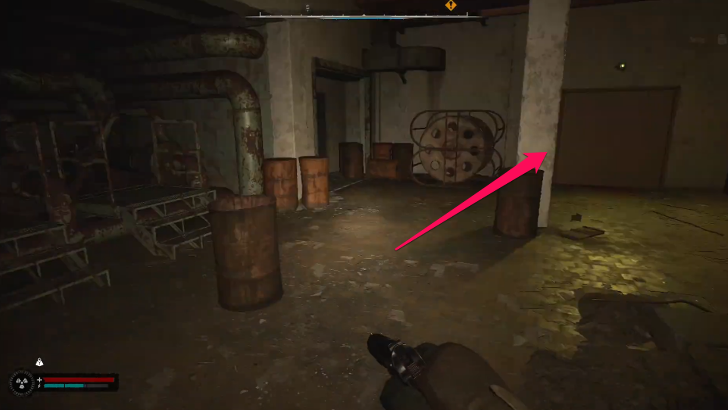 There's another Bloodsucker behind the double door so prepare for another fight. Enter the next room after defeating the Bloodsucker and climb the ladder inside. |
| 5 | 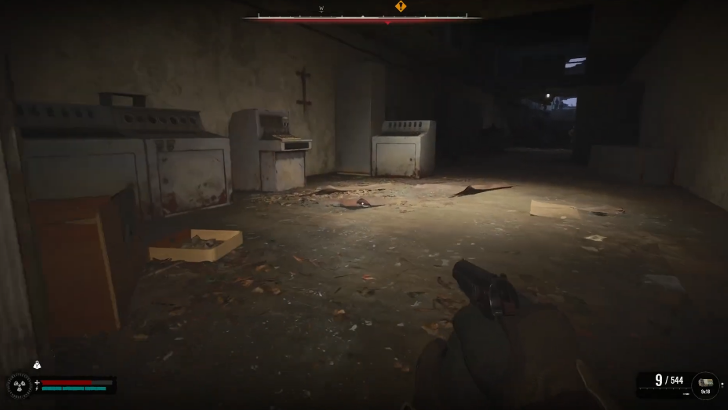 Unfortunately, the lockers in the next room are all empty, so you can just exit on the other side and cross the platform. |
| 6 | 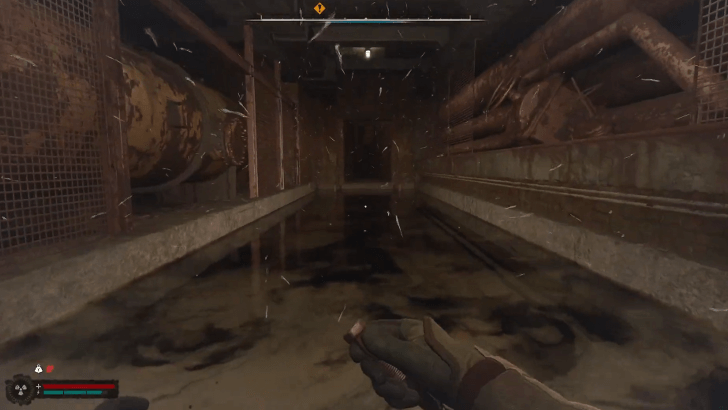 At the end of this hallway is a gravity anomaly with suspended glass shards. Pass through it by walking slowly or crouching to avoid taking damage. |
| 7 | 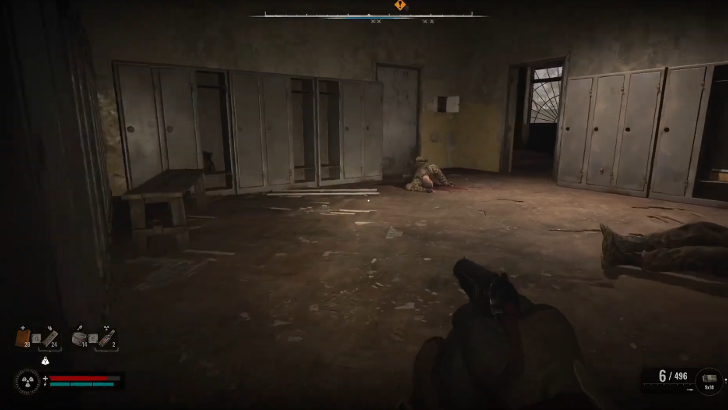 Climb the ladder and follow the objective marker (the path will be linear) until you reach another locker room. Past this room is the Duga compound. |
Get to Location D
Collect the supplies in the next room before heading out. Location D is far to the northwest and there are guards along the way. You can either reach it with a stealth approach (Gun suppressors are necessary) or with guns blazing.
Cross the Anomaly Field

You'll see a broken fence after getting past the first group of guards. This serves as an entrance to a gravity anomaly field, with your destination at the other end. Hug the right wall to avoid being spotted by the guards on the left side as you reach for the objective marker. Don't forget to set off the gravity anomalies along your way.
Reach Location D
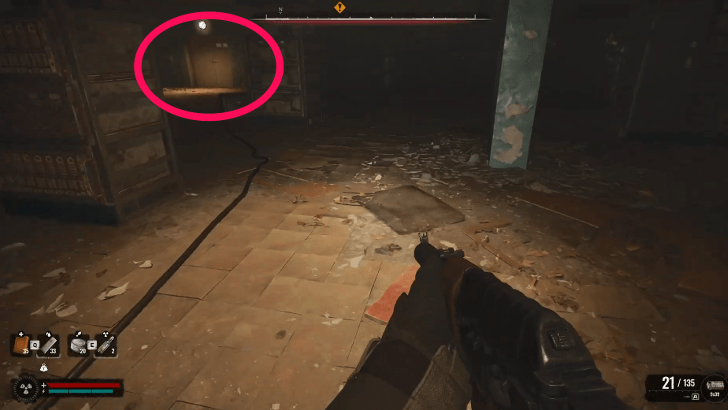
More enemies are inside the building past the anomaly field. Clear the area and open the doors on the right side to reach location D.
Go Through the Area with Lots of Traps

Go down the stairs at the end of this floor while gunning down guards along the way. This next area is riddled with tripwires with grenades attached to them. These tripwires are placed on some of the doorways.
| 1 | 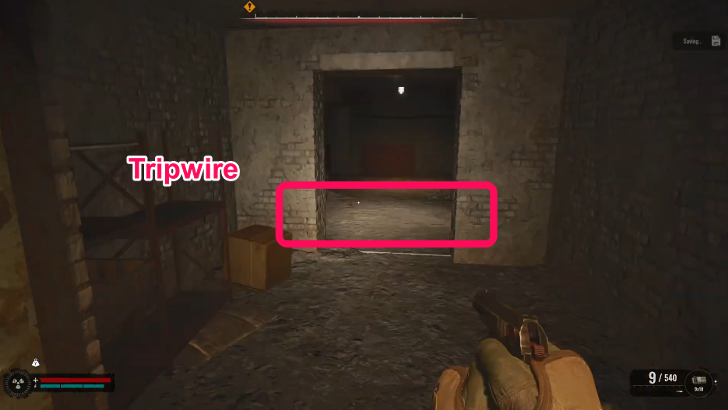 After going down the stairs, shoot the wire on the doorway that leads to the next room. |
|---|---|
| 2 | 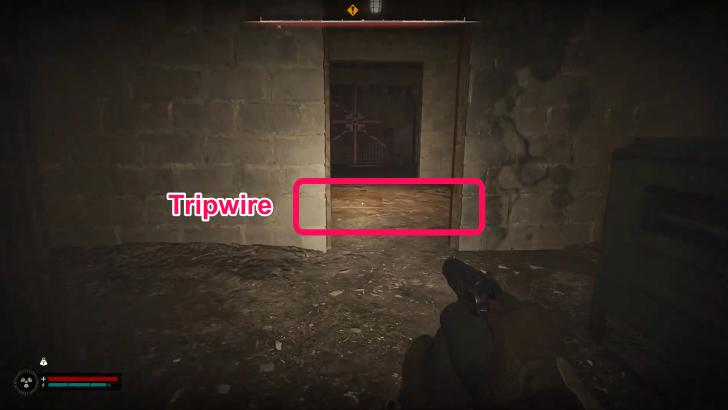 There's another tripwire on the doorway to the left. Set it off and move to the next room. |
| 3 | 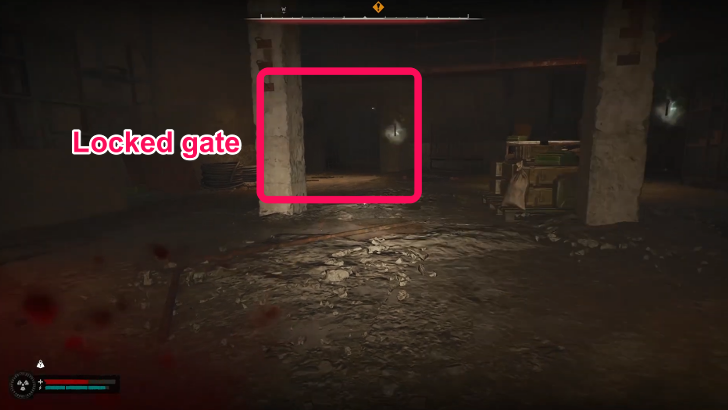 Drop down to the lower floor and quickly run to the gate in the northwest corner if you want to avoid the Burer attack. Remove the lock and follow the path to a hallway on the upper floor. |
| 4 |  Take out all the enemies here and run to the other end until you reach the mining spot. |
Plant Explosives

There are no enemies in this part of the area for now, so you can head straight to the first marked spot to plant an explosive pack. Enemies will start spawning from the east, so quickly place the second pack on the fourth pipe of the same side before you get overwhelmed.
Move Away from the Center of the Blast

Turn south immediately and run towards the second pipe from the right to exit the mining spot.
Find Faust at the Comm Center
The Comm Center is the building to your left. Needless to say, it's crawling with his followers.
| 1 | 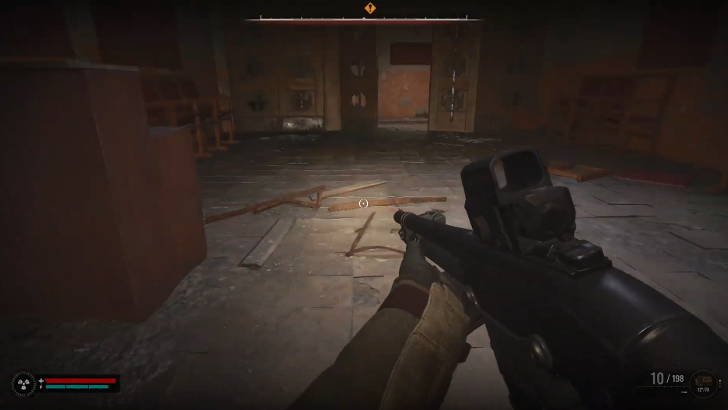 Enter the Comm Center and go to the hallway past the first room. There is a guard on each side of this doorway: one you can kill silently and another quickly after the first. |
|---|---|
| 2 | 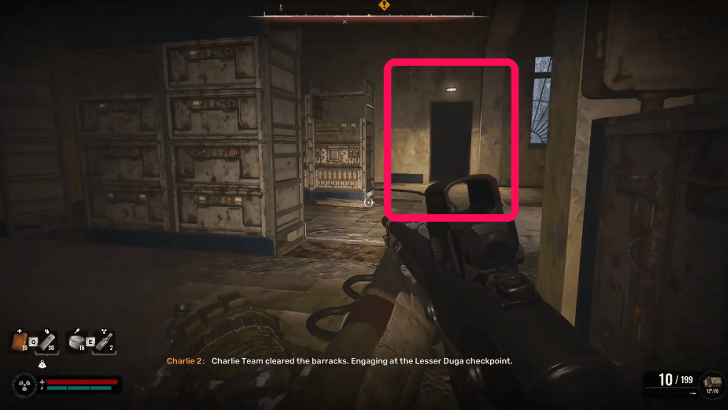 Move two rooms southeast and find the stairs on the right side. |
| 3 | 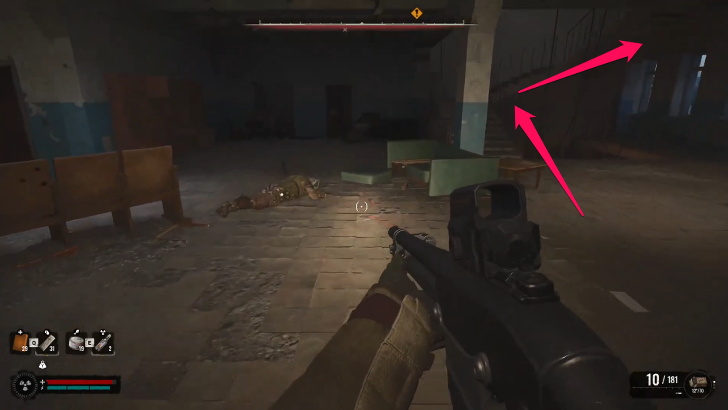 On the second floor, fight your way through two more rooms to find another set of stairs at the end. |
| 4 | 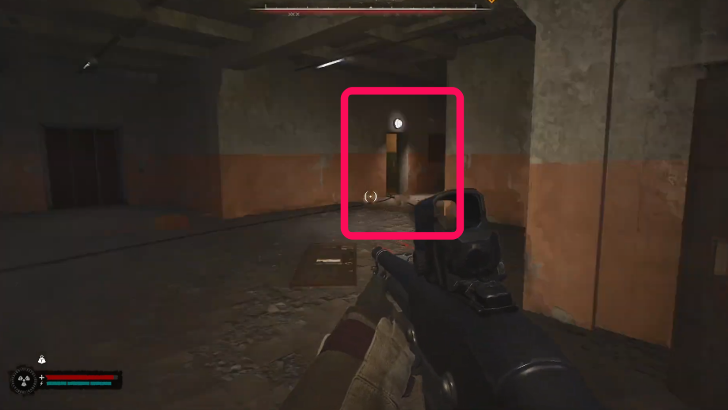 The third floor is clear. Go up the stairs on the other side of the room. |
| 5 | As soon as you open the door, you will find Faust who will immediately use this camera zoom in and out psi attack before running away. |
| 6 | Follow Faust to the rooftop to complete the objective. |
Defeat Faust

Make sure you're wearing the helmet with the Suppressor upgrade that you made during the main mission, In Search of Past Glory.
When you're ready, head out there and immediately shoot the three psi-emitters over the rooftop. These look like lanterns and should be easy to spot with their glow. The fourth psi-emitter is attached to Faust's hip.
Destroy it and he will be vulnerable to damage. Deal enough damage to end the fight and trigger the cutscene through another psi attack.
Climb the Ledge Up Yourself

| Choice | Result |
|---|---|
| Climb Up Yourself | You will climb the ledge up by yourself. This will then lead to a heartwarming conversation with Faust and will end the mission. |
| Accept Help | Faust will seemingly help you but as soon as he grabs your hand, he will let go, leading to your death. |
Once you've damaged Faust enough, a cutscene and dialogue sequence will play out where you'll find yourself hanging on a ledge. Choose the option to climb the ledge up yourself, since choosing to let Faust help you up will lead to your death.
After getting up the ledge, exhaust all remaining dialogue options with him. You will then be transported back to the roof and the mission will be completed.
Once More Unto the Breach Rewards
No Mission Rewards
| Rewards |
|---|
| This mission has no rewards upon completion. |
Once More Unto the Breach Overview
Location and Mission Info
| Once More Unto the Breach Mission Info | |
|---|---|
| Starting Location | Chemical Plant |
| Quest Giver | Starts immediately after installing the Suppressor during In Search of Past Glory (if you sided with the Ward) |
STALKER 2 Related Guides

All Main Missions
Comment
Author
Once More Unto the Breach Walkthrough
improvement survey
03/2026
improving Game8's site?

Your answers will help us to improve our website.
Note: Please be sure not to enter any kind of personal information into your response.

We hope you continue to make use of Game8.
Rankings
- We could not find the message board you were looking for.
Gaming News
Popular Games

Genshin Impact Walkthrough & Guides Wiki

Honkai: Star Rail Walkthrough & Guides Wiki

Umamusume: Pretty Derby Walkthrough & Guides Wiki

Pokemon Pokopia Walkthrough & Guides Wiki

Resident Evil Requiem (RE9) Walkthrough & Guides Wiki

Monster Hunter Wilds Walkthrough & Guides Wiki

Wuthering Waves Walkthrough & Guides Wiki

Arknights: Endfield Walkthrough & Guides Wiki

Pokemon FireRed and LeafGreen (FRLG) Walkthrough & Guides Wiki

Pokemon TCG Pocket (PTCGP) Strategies & Guides Wiki
Recommended Games

Diablo 4: Vessel of Hatred Walkthrough & Guides Wiki

Cyberpunk 2077: Ultimate Edition Walkthrough & Guides Wiki

Fire Emblem Heroes (FEH) Walkthrough & Guides Wiki

Yu-Gi-Oh! Master Duel Walkthrough & Guides Wiki

Super Smash Bros. Ultimate Walkthrough & Guides Wiki

Pokemon Brilliant Diamond and Shining Pearl (BDSP) Walkthrough & Guides Wiki

Elden Ring Shadow of the Erdtree Walkthrough & Guides Wiki

Monster Hunter World Walkthrough & Guides Wiki

The Legend of Zelda: Tears of the Kingdom Walkthrough & Guides Wiki

Persona 3 Reload Walkthrough & Guides Wiki
All rights reserved
S.T.A.L.K.E.R. 2 is a registered trademark of GSC Game World Global Ltd. © 2024 GSC Game World Global Ltd. GSC Game World and its logos are Trademarks or Registered Trademarks Of GSC Game World Global Ltd. © S.T.A.L.K.E.R. 2 HEART OF CHORNOBYL a game developed GSC Game World. All other trademarks, registered trademarks or logos belong to their respective owners.
The copyrights of videos of games used in our content and other intellectual property rights belong to the provider of the game.
The contents we provide on this site were created personally by members of the Game8 editorial department.
We refuse the right to reuse or repost content taken without our permission such as data or images to other sites.





![Monster Hunter Stories 3 Review [First Impressions] | Simply Rejuvenating](https://img.game8.co/4438641/2a31b7702bd70e78ec8efd24661dacda.jpeg/thumb)


