The Eternal Shining Walkthrough
★ Best Weapons | Best Armor | Best Artifacts
☆ All Door Code Locations and Solutions
★ How to Unlock All Endings
☆ All Main Mission and Side Mission Guides
★ Locations: All Bases | All Artifact Farms
☆ How to Get All Unique Weapons

The Eternal Shining is a main mission in STALKER 2: Heart of Chornobyl. Read on for a complete walkthrough of The Eternal Shining, as well as the rewards for completing the mission.
| ◄ Previous Mission | Next Mission ▶ |
|---|---|
| Through the Valley of the Shadow of Death | - |
List of Contents
The Eternal Shining Walkthrough
| This main mission is exclusive to the Spark ending route of STALKER 2. Only players who answered Eternal spring during Subtle Matter and chose to escape Korshunov during Dangerous Liaisons will have access to this mission. | ||||||
| List of Objectives | ||||||
| 1 | Get to the Generators' Control Center | |||||
| 2 | Destroy the Monolith Squad | |||||
| 3 | Reactivate the Generators | |||||
| 4 | Cover Spark in the Teleportation Hall | |||||
| 5 | Activate the Teleporter | |||||
| 6 | Examine the Teleporter | |||||
| 7 | Kill Strelok | |||||
| 8 | Meet Up with Scar in the Neurolaboratory | |||||
| 9 | Destroy the Monolith Squad | |||||
| 10 | Continue Looking for Scar | |||||
| 11 | Clear the Path to the Neurolab | |||||
| 12 | Follow Scar | |||||
| 13 | Restore Power | |||||
| 14 | Get Rid of the Monolith Squad on the Way to the Elevator | |||||
| 15 | Get to the Death Trucks Workshop | |||||
| 16 | Get to the Elevator Control Room | |||||
| 17 | Destroy the Granite Squad | |||||
| 18 | Restart the Elevator Control System | |||||
| 19 | Go Down to Lab X7 | |||||
Get to the Generators' Control Center
There will be guards inside and you will enter combat as soon as you pass through the hole in the wall so make sure you're at full health with no lingering status conditions before proceeding.
| 1 | 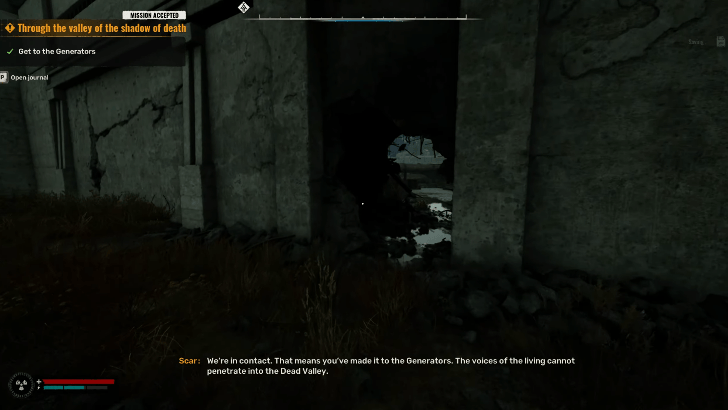 Pass through the hole and immediately take cover as there are enemies in all directions. |
|---|---|
| 2 | 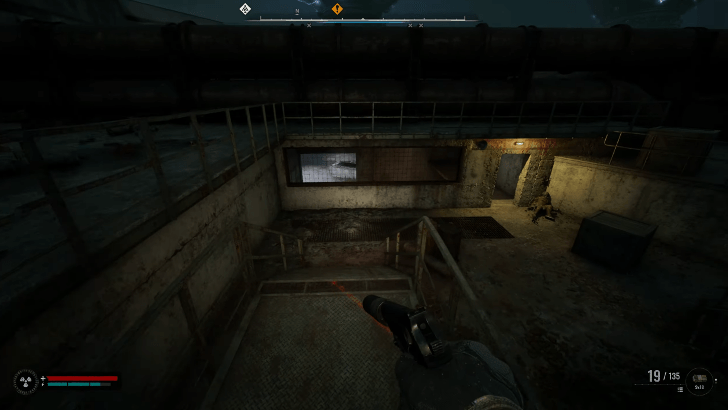 A few steps to the north is a ladder that leads deeper into the Generators. |
| 3 | 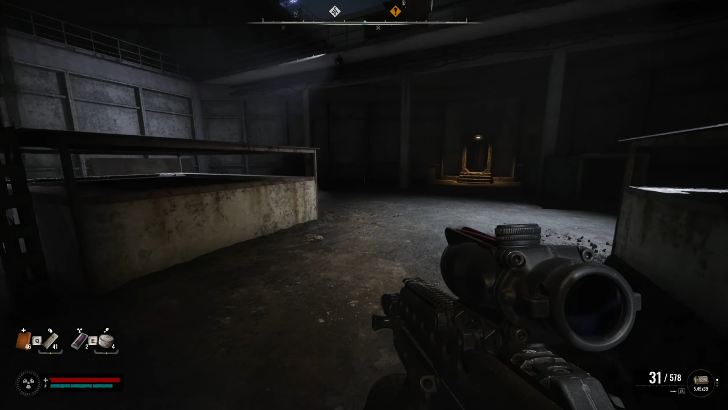 Turn left and into the lit doorway. Take out the enemies in the area so no one can follow you. |
| 4 | 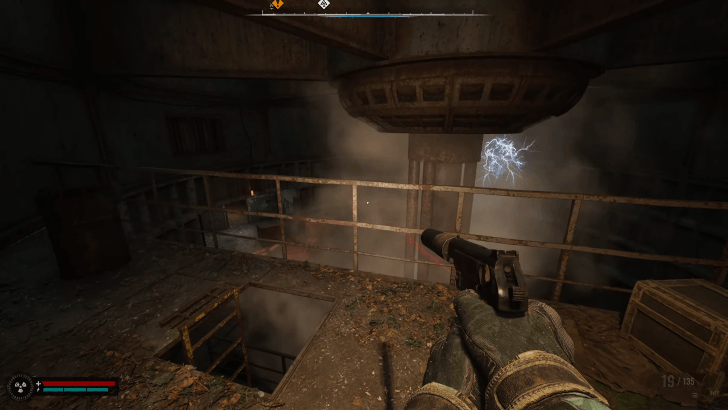 You'll soon reach the interior of one of the generators, with electric orbs roaming around. Go down the first ladder you see and run towards the room to your left. |
| 5 | 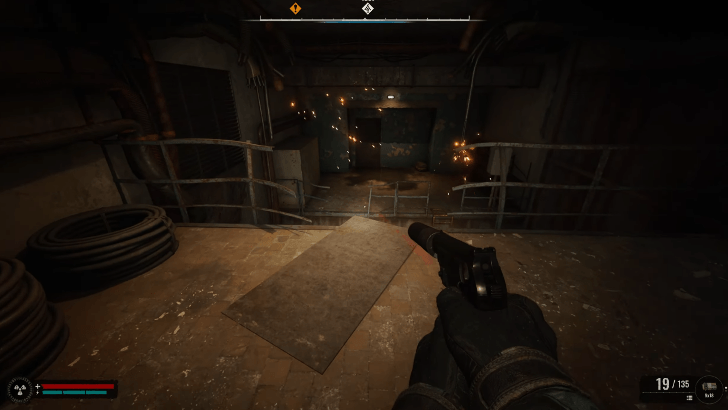 Perform a running jump and land on the platform on the other side so you can use the ladder to safely reach the bottom. |
| 6 |  Follow the rooms to the south to reach the control center. |
Destroy the Monolith Squad

Enter the control center through the doorway on your right and start clicking on Monolithians with weapons. The squad consists of twelve Monolithians.
Reactivate the Generators

Go inside the west room and push the button on the control panel to reactivate the Generators.
Cover Spark in the Teleportation Hall

Now, go to the southeast corner of the control center and enter through the opened door. The locker room at the end of this corridor has ammo and weapons that you can use to resupply if needed. Pass through the door to the right when you're ready.
Activate the Teleporter

Go up the east platform and press the button on the control panel to activate the teleporter.
Examine the Teleporter

Something's not right with the teleporter. Go ahead and check the teleporter further to the north.
Kill Strelok

Time to use up those ammo! Strelok will try to keep his distance from you as he finds cover. He can also make fire and electric anomalies and radioactive puddles within the room, making it difficult to follow him around.
Getting near Strelok forces him to run away, which also gives you opportunity to open fire. However, don't get too close as he will shove you to the ground and zoom away.
Bugs Could Occur in This Boss Fight
Strelok clips into a wall and gets stuck inside. |
Try to kill Strelok as fast as you can as this fight can get very buggy, with his swift dashes being the triggers. Strelok will often phase through the level, clip out, and never re-appear in the boss arena.
If you're having a hard time finishing the boss fight early and Strelok keeps on clipping out the room, try setting a lower difficulty to weaken and prevent him from using his dashes that can cause the bug.
Meet Up with Scar in the Neurolaboratory

With Strelok taken care of, you can now meet up with Scar. Find a lit door on the southwest and press the button next to it to open the path to the neurolab.
Enter the room and make your way two levels down. You'll find two Monolithians just chilling past the ladder, and more as you reach the lower floor. Pass through the doorway on the northeast and follow the corridor to encounter another Monolith squad.
Destroy the Monolith Squad
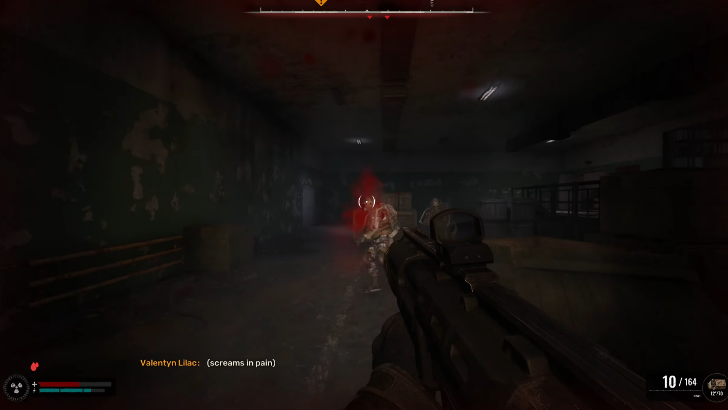
Seven of the Monolith squad is scattered in this room, with the remaining three camping on a separate room you can reach by passing through the doorway on the northeast.
Continue Looking for Scar

Proceed to the north room and immediately turn right. Unlock the door using the button and go to the other side with another blast door. Before pressing the button on your left, make sure you're health is full and guns reloaded as more Monolithians are camped on the other side.
Clear the Path to the Neurolab

This objective should be over quick as there are only five Monolithians present and they're all in or near the hallway. Afterwards, follow the marker again and open the double door to the neurolaboratory.
Follow Scar

Scar will lead you to the next blast door. Listen to his speech as he walks you through the rooms and talk to him one last time before proceeding.
Restore Power
Open the blast door and enter the next room. The first floor is riddled with gravity anomalies, so mind where you're going and set them off with bolts before passing through.
| 1 | 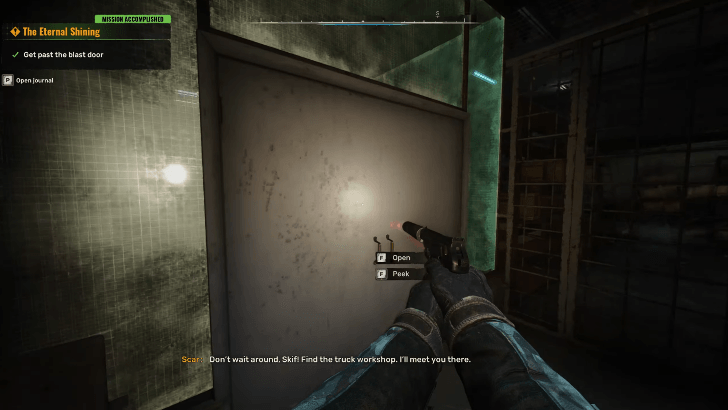 Enter the double door on your left. |
|---|---|
| 2 | 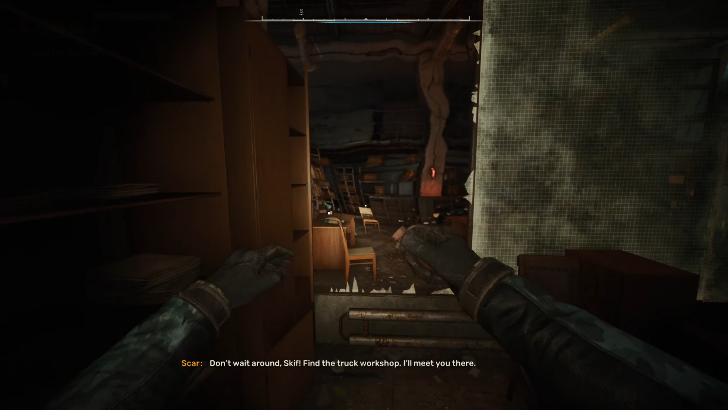 Set off the gravity anomaly on the broken window on your right before passing through. |
| 3 | 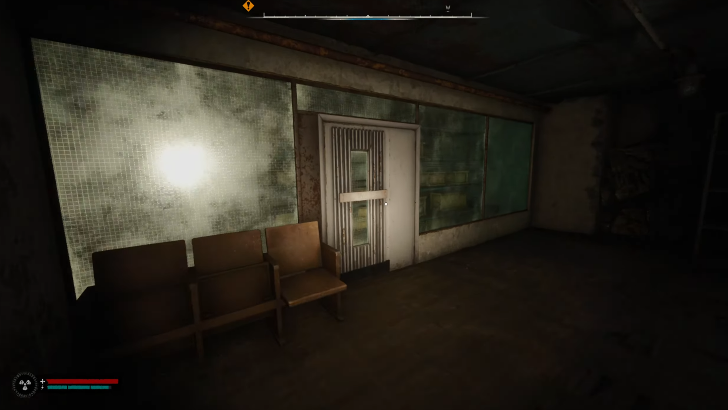 Go to the southwest corner of the room and enter the door. Inside, you'll find a staircase on your left that will take you to the upper floor. |
| 4 | 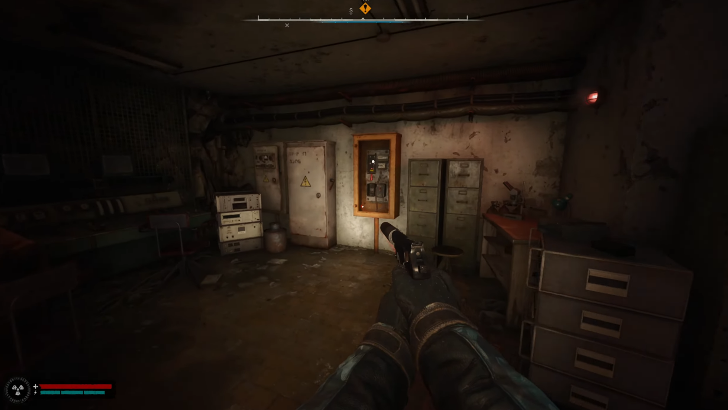 From here, go all the way to the east to reach the generator room. Push the switch up to complete the objective. |
Get Rid of the Monolith Squad on the Way to the Elevator

Exit the room and immediately turn right. Throw a bolt at the gravity anomaly and jump down to find another blast door. Open it and enter the next blast door for another wave of Monolithians. This objective will remain until the rest of the squad is eliminated on the lower level.
Get to the Death Trucks Workshop

Head to the south end of the floor as you mow through the Monolithians and you will find a lift that can take you to the lower level. You'll see a wounded Scar below, who will warn you about the Granite squad and tell you that the elevator must be restarted first.
Get to the Elevator Control Room
The elevator in question is just a few steps to the right, but since it's out of commission, it must be restarted first through the control room.
| 1 | 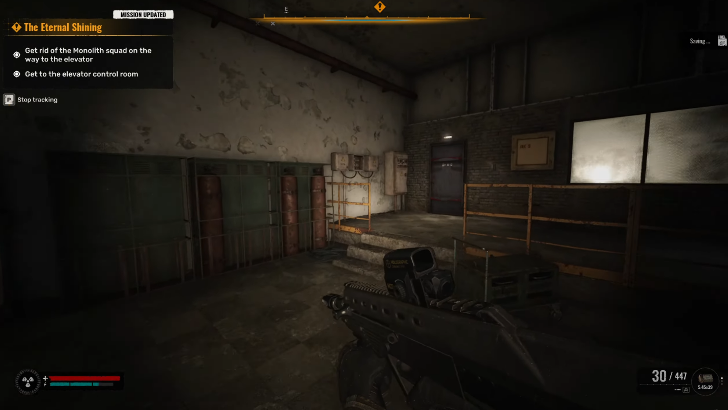 Use the key card to unlock the door to the right of the elevator and open the blast door inside. |
|---|---|
| 2 | 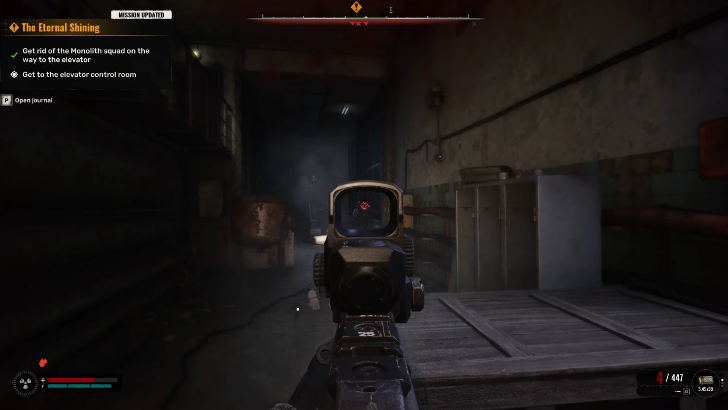 Defeat the last of the Monolithian squad (from the earlier objective) and go all the way to the east. You'll encounter more Monolithians on your way to the control room so stay alert. |
| 3 | 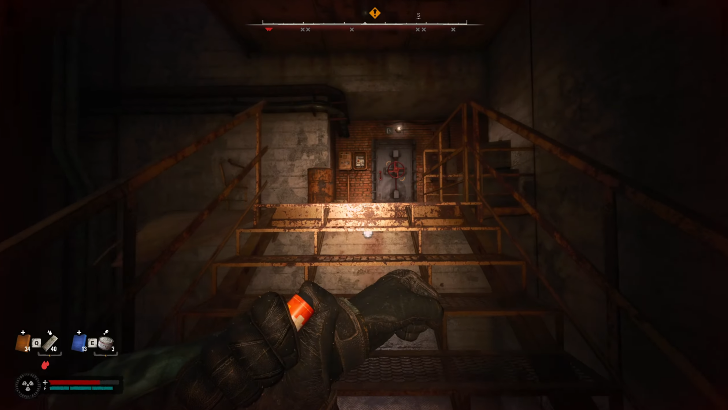 After reaching the room at the end, loop to the northwest and keep following the marker to the west end until you find another blast door. |
| 4 | 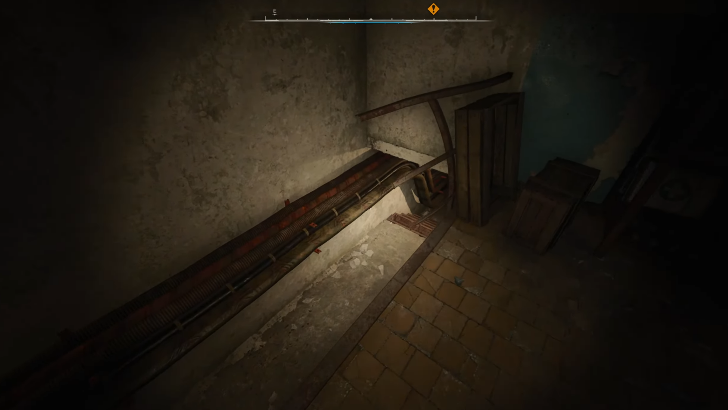 Resupply in the next room if needed and look to your left. There is a narrow tunnel on the side that will lead you to the control room. |
Destroy the Granite Squad

The Granite squad Scar was warning you about earlier is inside. Four of them is on the lower level while the rest are on the upper platform. While taking out the members below, avoid staying at the center of the room for too long to avoid the rain of bullets from the members above.
Restart the Elevator Control System

Once it's clear, enter the room on the west side and go up the stairs where the control panel is. Press the red button to restart the elevator.
Go Down to Lab X7

The door in front of the control panel leads back to the room where you found Scar. Use the staircase to your right to reach the same level as the elevator and ride it all the way down. Look for Scar at the end of the tunnel and watch the ending cutscene for the Spark ending.
The Eternal Shining Rewards
No Mission Rewards
| Rewards |
|---|
| This mission has no rewards upon completion. |
The Eternal Shining Overview
Location and Mission Info
| The Eternal Shining Mission Info | |
|---|---|
| Starting Location | |
| Quest Giver | Starts immediately after reaching the Generators during Through the Valley of the Shadow of Death (if you sided with Spark) |
STALKER 2 Related Guides

All Main Missions
Comment
Author
The Eternal Shining Walkthrough
improvement survey
03/2026
improving Game8's site?

Your answers will help us to improve our website.
Note: Please be sure not to enter any kind of personal information into your response.

We hope you continue to make use of Game8.
Rankings
- We could not find the message board you were looking for.
Gaming News
Popular Games

Genshin Impact Walkthrough & Guides Wiki

Honkai: Star Rail Walkthrough & Guides Wiki

Umamusume: Pretty Derby Walkthrough & Guides Wiki

Pokemon Pokopia Walkthrough & Guides Wiki

Resident Evil Requiem (RE9) Walkthrough & Guides Wiki

Monster Hunter Wilds Walkthrough & Guides Wiki

Wuthering Waves Walkthrough & Guides Wiki

Arknights: Endfield Walkthrough & Guides Wiki

Pokemon FireRed and LeafGreen (FRLG) Walkthrough & Guides Wiki

Pokemon TCG Pocket (PTCGP) Strategies & Guides Wiki
Recommended Games

Diablo 4: Vessel of Hatred Walkthrough & Guides Wiki

Cyberpunk 2077: Ultimate Edition Walkthrough & Guides Wiki

Fire Emblem Heroes (FEH) Walkthrough & Guides Wiki

Yu-Gi-Oh! Master Duel Walkthrough & Guides Wiki

Super Smash Bros. Ultimate Walkthrough & Guides Wiki

Pokemon Brilliant Diamond and Shining Pearl (BDSP) Walkthrough & Guides Wiki

Elden Ring Shadow of the Erdtree Walkthrough & Guides Wiki

Monster Hunter World Walkthrough & Guides Wiki

The Legend of Zelda: Tears of the Kingdom Walkthrough & Guides Wiki

Persona 3 Reload Walkthrough & Guides Wiki
All rights reserved
S.T.A.L.K.E.R. 2 is a registered trademark of GSC Game World Global Ltd. © 2024 GSC Game World Global Ltd. GSC Game World and its logos are Trademarks or Registered Trademarks Of GSC Game World Global Ltd. © S.T.A.L.K.E.R. 2 HEART OF CHORNOBYL a game developed GSC Game World. All other trademarks, registered trademarks or logos belong to their respective owners.
The copyrights of videos of games used in our content and other intellectual property rights belong to the provider of the game.
The contents we provide on this site were created personally by members of the Game8 editorial department.
We refuse the right to reuse or repost content taken without our permission such as data or images to other sites.


![Everwind Review [Early Access] | The Shaky First Step to A Very Long Journey](https://img.game8.co/4440226/ab079b1153298a042633dd1ef51e878e.png/thumb)

![Monster Hunter Stories 3 Review [First Impressions] | Simply Rejuvenating](https://img.game8.co/4438641/2a31b7702bd70e78ec8efd24661dacda.jpeg/thumb)


