In the Name of Science Walkthrough and Electronic Collar Locations
★ Best Weapons | Best Armor | Best Artifacts
☆ All Door Code Locations and Solutions
★ How to Unlock All Endings
☆ All Main Mission and Side Mission Guides
★ Locations: All Bases | All Artifact Farms
☆ How to Get All Unique Weapons
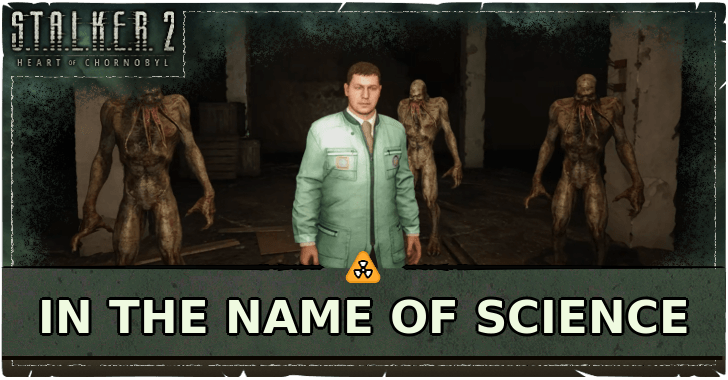
In the Name of Science is a Side Mission in STALKER 2: Heart of Chornobyl. Read on for a complete walkthrough of In the Name of Science, including a full list of all electronic collar locations, rewards, and choices for this side mission.
List of Contents
In the Name of Science Overview and Rewards
Location and Mission Info
| In the Name of Science Mission Info | |
|---|---|
 |
|
| Starting Location | Malachite or Chemical Plant |
| Quest Giver | Shcherba |
In the Name of Science will trigger after you finish Visions of Truth. However, do note that you will need to have given the Controller Project Documents to Doctorant Shcherba during In Search of Past Glory in order to get this mission.
Can Still be Accepted Even After Telling Shcherba You're Too Busy
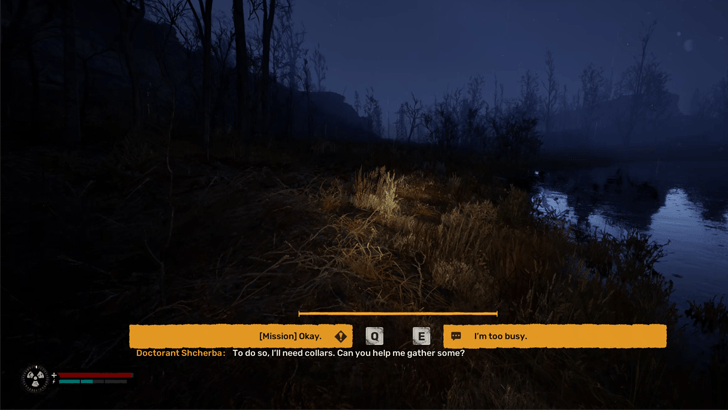
Once you leave STC Malachite during the events of Visions of Truth, Shcherba will contact you with a new mission. During the timed decision, choosing Okay triggers In the Name of Science immediately. However, if you answered I'm too busy, you can still accept the quest later on, but you'll have to visit Shcherba back at the Roofed Warehouse in Chemical Plant to get it.
Completion Rewards
| In the Name of Science Rewards |
|---|
|
If you Recalibrated the Jammer: ・8000 Coupons on Stalker Difficulty. If you Disabled the Jammer: ・9500 Coupons on Stalker Difficulty. ・Gauss Gun (50% Durability) |
Near the end of the mission, you'll be tasked to activate or disable the electronic collars. If you choose to recalibrate and deactivate the collars, Dvupalov will reward you with 8000 Coupons and the mission ends there.
If you destroy the jammer and activate the collars, Shcherba will reward you with 9500 Coupons. However, do note that this locks in a required 3-Bloodsucker fight later on. Once you deal with all of the remaining objectives, Dvupalov will reward you with a Gauss Gun.
In the Name of Science Walkthrough
| List of Objectives | ||||||
|---|---|---|---|---|---|---|
| 1 | Learn More About Shcherba's Request | |||||
| 2 | Collect Electronic Collars for Shcherba ① Boathouse in Wild Island ② Hydrodynamics Lab in Zaton ③ The Brood in Garbage ④ Brain Scorcher in Malachite ⑤ Containers in the Red Forest |
|||||
| 3 | Return to Shcherba and Deliver the Collars | |||||
| 4 | Find the Device that Jams the Collar Signals | |||||
| 5 | Disable or Recalibrate the Jammer | |||||
| Option 1 | Option 2 | |||||
| Disable Continues the quest. |
Recalibrate Ends the quest. |
|||||
| 6 | Enter the Lab and Get the Reward from Shcherba | |||||
| 7 | Escape the Room and Eliminate the Mutants | |||||
| 8 | Confront Shcherba and Deal with Him | |||||
| 9 | Speak with the Doctor to Get the Final Reward | |||||
Learn More About Shcherba's Request
If you accepted Shcherba's request when he first called you, skip to the next step. Otherwise, make your to the Roofed Warehouse in the Chemical Plant region (where you met Dvupalov during In Search of Past Glory) and talk to Shcherba to learn more about his request and the electronic collars you have to get.
This Quest Only Triggers if You Gave Shcherba the Controller Project Documents
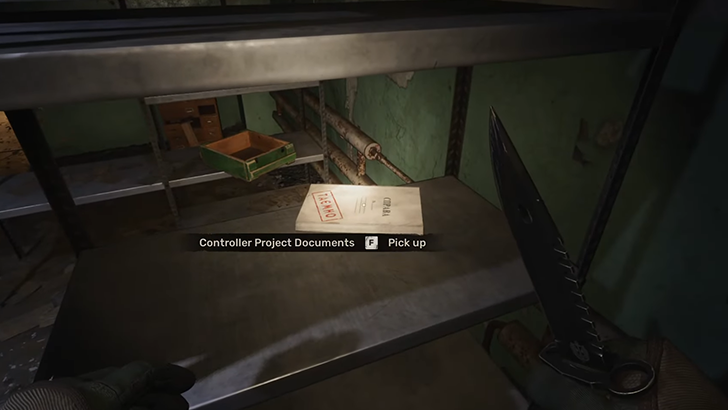
Do note that In the Name of Science will only trigger if you fulfilled the optional objective of In Search of Past Glory. If you gave the Controller Project Documents to Shcherba during that main mission, In the Name of Science should be available to you.
In Search of Past Glory Walkthrough
Collect Electronic Collars for Shcherba
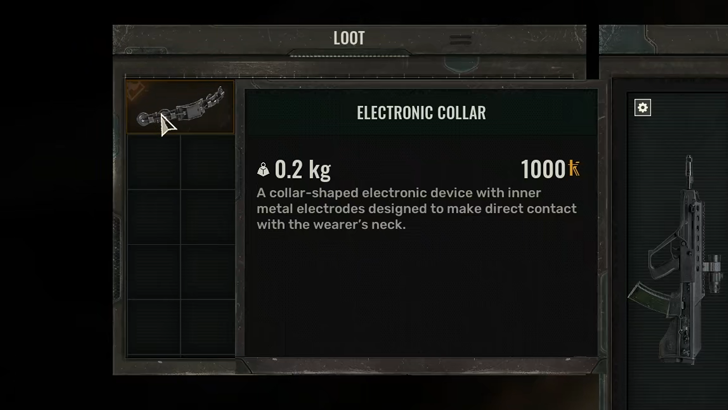
With the request accepted, you'll now have to explore the Zone in search of the electronic collars that Shcherba asked you to bring back. For this side mission, you'll have to bring back 4 electronic collars by killing the mutants that have them equipped.
| Location | Mutant |
|---|---|
| Boathouse (Wild Island) |
Psy Bayun |
| Hydrodynamics Lab (Zaton) |
Controller |
| The Brood (Garbage) |
Snork |
| Brain Scorcher (Malachite) |
No mutant; only an NPC interaction. |
| Containers (Red Forest) |
Pseudogiant |
Click on a link above to jump to a section!
Boathouse Electronic Collar in Wild Island
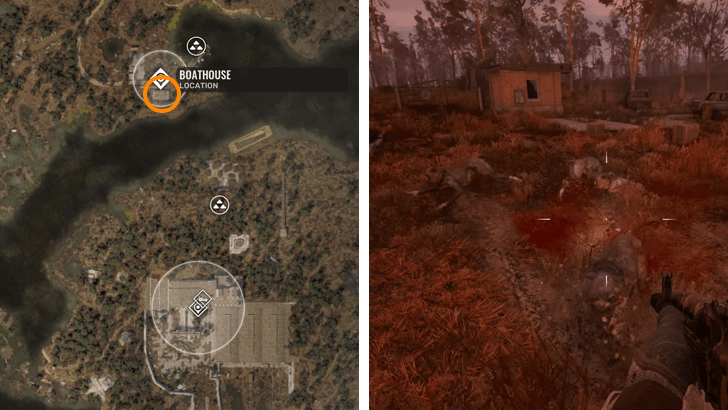
The electronic collar found at the Boathouse in Wild Island is worn by a Psy Bayun. Unlike a normal Bayun, this one can conjure illusions of itself. Run back to the two hunters outside the Boathouse to get them to help you kill the mutant. Remember, the one that bleeds is the real Bayun.
Note: Players who hunted this mutant for its electronic collar during the main mission, A Minor Incident, will be tasked to get their 4th electronic collar from a Snork near The Brood in Garbage instead.
Hydrodynamics Lab Electronic Collar in Zaton
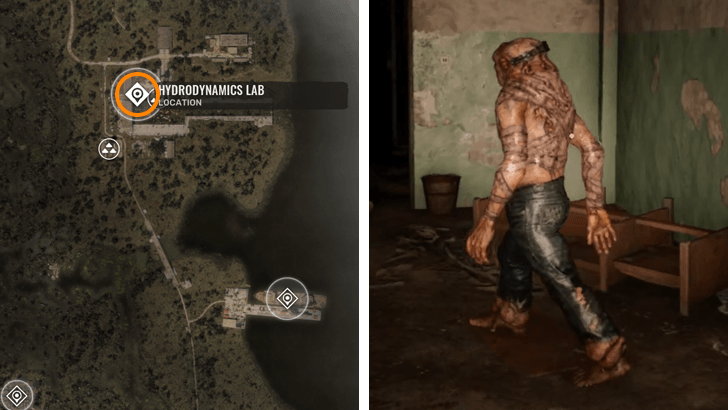
The electronic collar found in the Hydrodynamics Lab of Zaton is worn by a Controller. Make sure to bring either Psi-Blockers, a Psi-Protection Suit, or Dvupalov's Magic Vodka to counter its psi-radiation attacks.
Before going up to the second level of the lab, make sure to deal with the zombies that rise up first since you can get swarmed very quickly if you are not careful.
The Brood Electronic Collar in Garbage
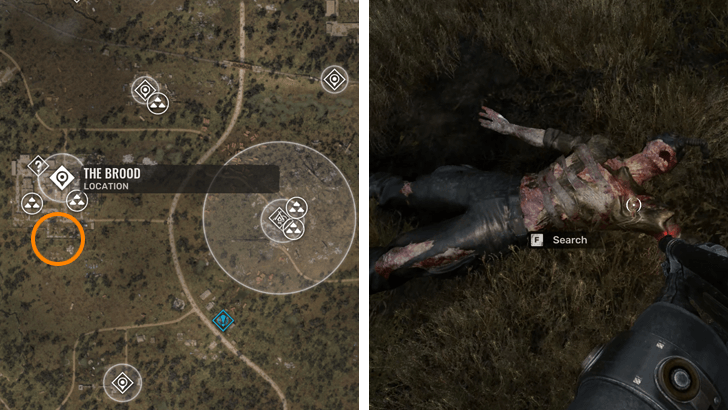
The electronic collar found in The Brood POI in Garbage is worn by a Snork. You'll find the hunched mutant near a collection of wrecked cars flanked by corpses. For reference, it will be located outside the wall of The Brood. Kill it to get its electronic collar.
Brain Scorcher Electronic Collar in Malachite
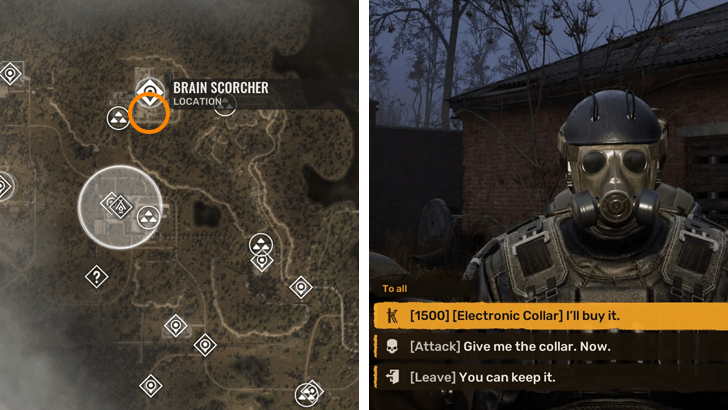
Players of the old STALKER games will be familiar with the Brain Scorcher in Malachite. As you approach the electronic collar's location, Shcherba will contact you saying the location changed. Follow the new objective marker to encounter a group of mercenaries led by one Yevhen Mamay.
Since the collar is proof of their successful job, you'll have to convince them to part with it for your quest. You can choose to pay 1,500 Coupons for the collar or attack them to get the electronic collar.
Containers Electronic Collar in Red Forest
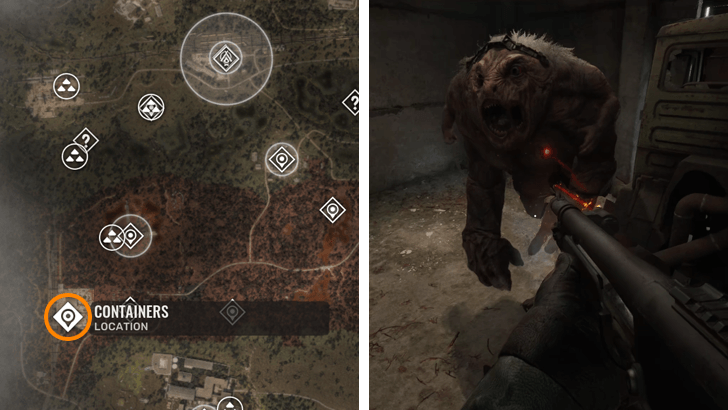
The final electronic collar will be worn by a Pseudogiant found in the Containers POI at the Red Forest. This is the same location you go to during the side mission, Just Business, that you get from the Barkeep in Rostok.
Lure the Pseudogiant away from its makeshift pen and have it attack the bandits (if they are still alive in your playthrough). Wait for the Pseudogiant to finish them off before joining the fight. The target should be easier to kill now that it's been softened by several bullet holes.
Tip: If you're having a tough time killing the Pseudogiant, climb on top of the shipping containers as well as the main building roof to mess with the Pseudogiant's AI. This allows you to shoot at it while being relatively safe from its melee attacks.
Return to Shcherba and Deliver the Collars
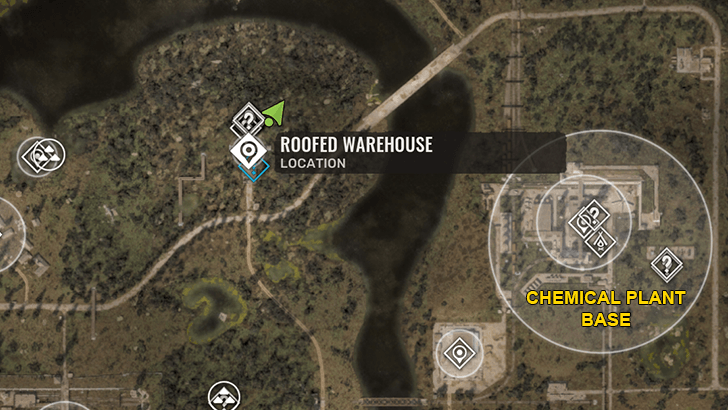
Once you have 4 electronic collars, return to Shcherba at the Roofed Warehouse in the Chemical Plant region and deliver them. Wait for him to check the collars, and he'll find out that they are being jammed.
Naturally, he will ask you to take care of it so that the collars will become usable.
Find the Device that Jams the Collar Signals
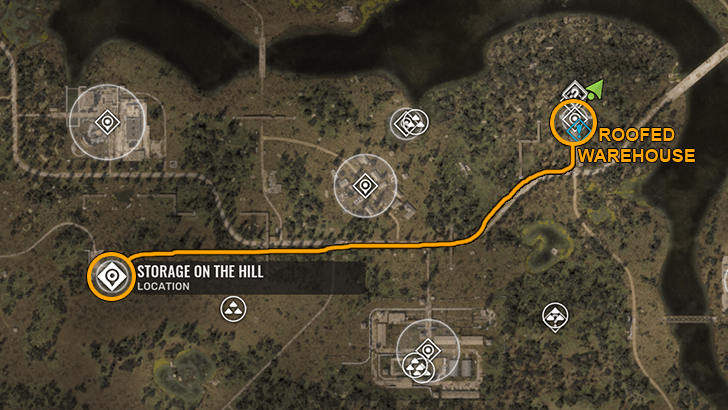
To find the Jammer, you'll need to make your way to the Storage On the Hill POI to the west of the Roofed Warehouse. Clear out the electro anomalies at the entrance before heading towards the main bunker doors.
| 1 | 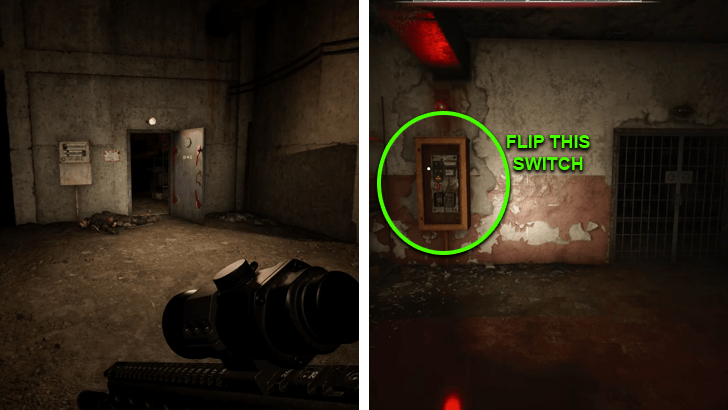 Deal with the zombies guarding the large garage area before heading inside via the open bulkhead door. You'll find a switch here that you'll need to turn on in order to unlock the way forward. |
|---|---|
| 2 | 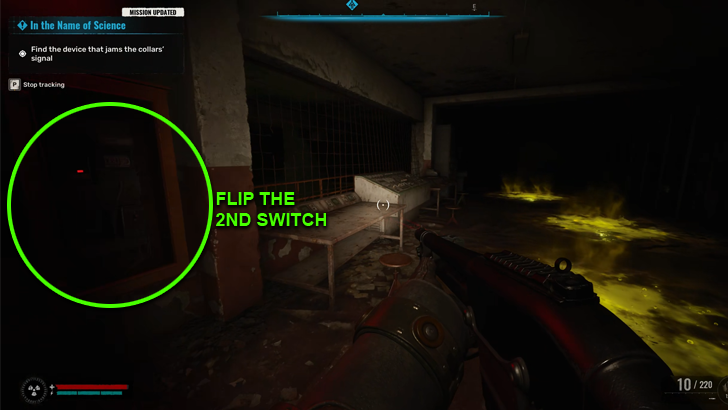 Once the switch is flipped, the barred door will unlock. Go through it and follow the hallway until you reach a control room with acid anomalies on the floor. The second switch should be in this room. |
| 3 | 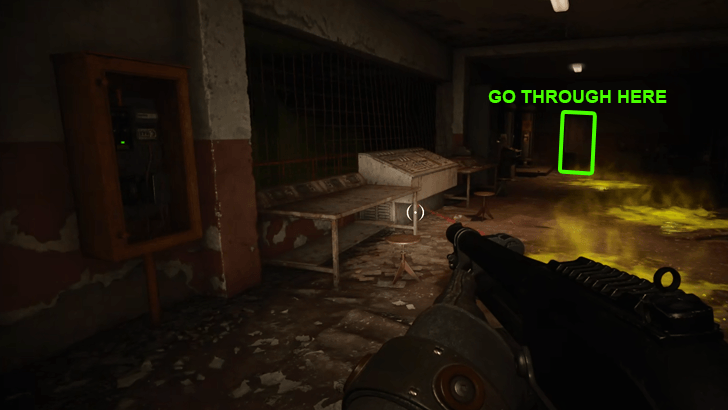 After the second switch is flipped, the sealed bulkhead door on the other side of the room should automatically open. Go through it and down the stairs to reach a new room with a broken set of stairs and a sealed bulkhead door. |
| 4 | 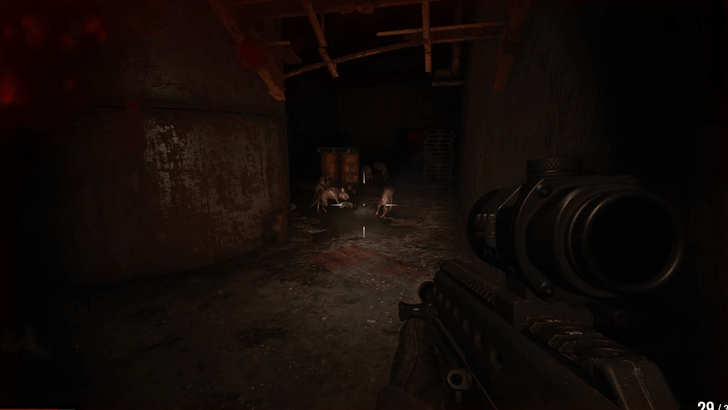 Drop down stairs and deal with the mutant rodents waiting for you. When everything is dead, head inside the room where the rodents came from and flip the switch inside to open the sealed bulkhead door. |
| 5 | 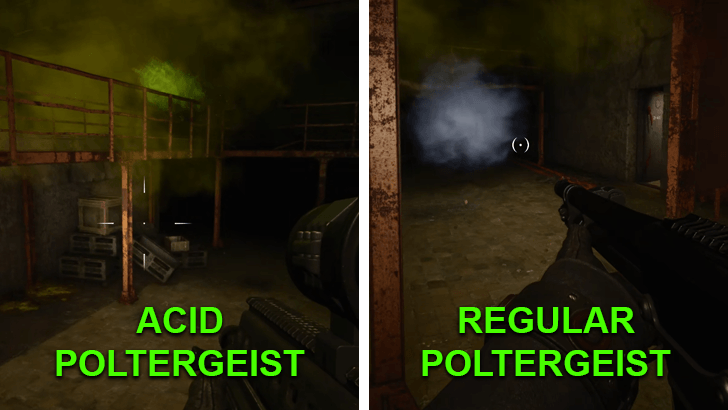 This new door leads to an area filled with acid clouds as well as 2 Poltegeists. One will be invisible, and the other will be both invisible and acidic. It will be easier to kill both since Poltegeists can lob objects at you even when you're behind a wall. |
| 6 | 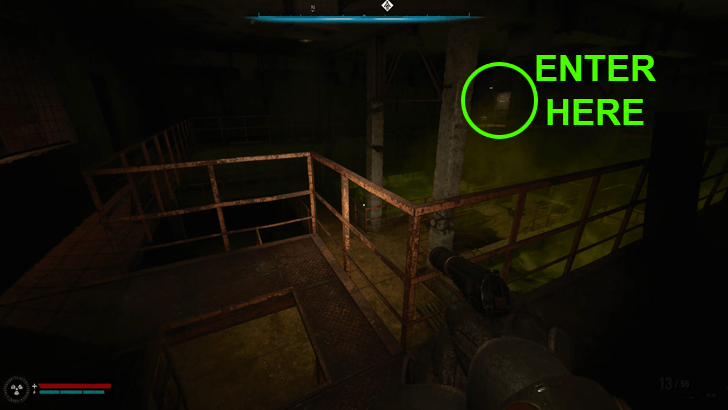 Once you've killed or juked them, use the ladder on the 2nd level of rafters to reach the 3rd floor of the room. From there, enter the open bulkhead door (it should be well-lit). Note: There is a stash on this level that contains a High-Capacity APSB Magazine that you can loot. |
| 7 | 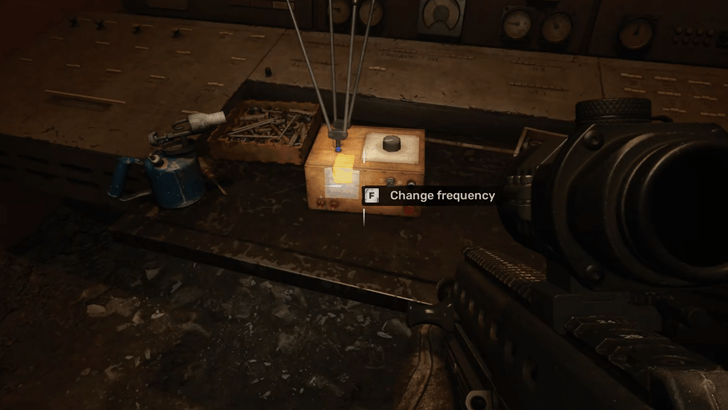 As soon as you exit the bulkhead door, go right and down the stairs to find the Jammer. Now, you'll have to choose between Disabling or Recalibrating the Jammer. |
Disable or Recalibrate the Jammer
| Choice | Effect |
|---|---|
| Disable the jammer to activate the collars. | Shcherba rewards you with 9500 Coupons (Stalker Difficulty). Mandatory fight against 3 Bloodsuckers later on. Dvupalov rewards you with a Gauss Gun after you deal with Shcherba. |
| Recalibrate the jammer to shut down the collars. | Dvupalov rewards you with 8000 Coupons. The mission ends after leaving the bunker. |
During this segment of the mission, you'll have to choose to either Disable or Recalibrate the Jammer. If you want more rewards, we recommend disabling the Jammer by shooting it. If you want to do right by the Zone, recalibrate the Jammer to shut down the collars.
Either Answer is Acceptable if You Shut Down the Collars
If you decided to shut down the collars, an enraged Shcherba will call you after Dvupalov contacts you. In the middle of his tirade, you'll be given a timed choice on what to answer regarding what happend to the Jammer. The answers will not have any effect on the outcome of In the Name of Science.
Enter the Lab and Get the Reward from Shcherba
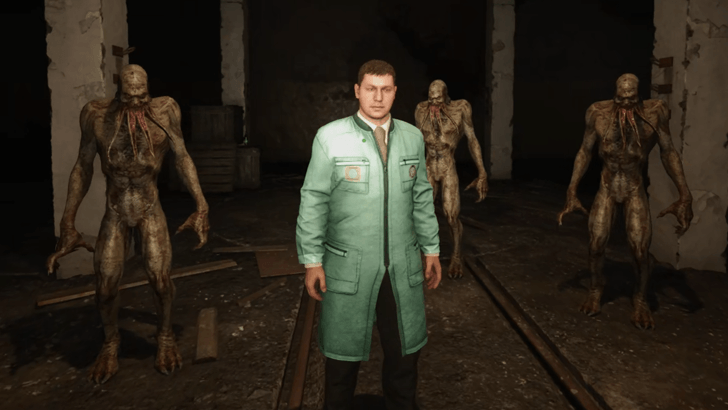
If you Disabled the Jammer in the previous step, Shcherba will later contact you to receive your reward from him. Return to the Roofed Warehouse and go through the door flanked by a seated Dvupalov.
However, before you descend, the doctor will stop and give you 2 Bottles of his Magic Vodka. Add these to your quick access bar before going down to find Shcherba.
It isn't surprising that Shcherba summoned you in order to double-cross Skif. Follow his instructions to get your "reward" from one of the rooms. As soon as you interact with the safe, the door will lock behind you.
Escape the Room and Eliminate the Mutants
Once psi-radiation starts flooding the room, reach for the doctor's Magic Vodka. Drink one to avoid being fried while waiting for the door to unlock. When the door clicks open, exit and deal with Shcherba's 3 acid Bloodsucker thralls to progress.
This fight is very tough, especially if you manage to get knocked on your back by one of the Bloodsuckers. If moving and shooting isn't your style, park yourself in one corner of the room with your back to the wall. Then, let them approach you and weather the storm of attacks by spamming Medkits.
Confront Shcherba and Deal with Him
With his lackeys dealt with, all that's left is to confront Shcherba. Follow the quest marker to his room to trigger a conversation. Choose [Attack] You're finished to kill him or You can go to spare him. Your response should depend on your current standing with STC Malachite and the Scientists Faction.
| Choice | Effect |
|---|---|
| [Attack] You're finished. | Negatively affects your relationship with the Scientists and Dvupalov. Changes Dvupalov's parting words to you. Dvupalov rewards you with a Gauss Gun. |
| You can go. | No negative relations with the Scientists and Dvupalov. Dvupalov rewards you with a Gauss Gun. |
Should You Kill or Spare Scherba?
Killing Shcherba will sour your relations with the Scientists. If this happens, Dvupalov will not speak to you, locking you out of the Gauss Gun reward until your notoriety dies down within the Scientist faction.
It is better to spare Shcherba in order to guarantee you get the Gauss Gun and a timely finish for this very long side mission.
Speak with the Doctor to Get the Final Reward
Finally, speak to Dr. Dvupalov one last time. Regardless of your choice, he will reward you with a 50% durability Gauss Gun for your efforts. All that's left after is to leave the Roofed Warehouse to complete In the Name of Science.
Note: If you get the Hostile Factions side mission after killing Shcherba, Dvupalov won't speak to you. A simple fix (especially if you want to kill Shcherba) is to simply wait it out until Hostile Factions expires. Once it does, you should be able to talke to Dvupalov again.
STALKER 2 Related Guides

All Side Missions
Comment
Author
In the Name of Science Walkthrough and Electronic Collar Locations
improvement survey
03/2026
improving Game8's site?

Your answers will help us to improve our website.
Note: Please be sure not to enter any kind of personal information into your response.

We hope you continue to make use of Game8.
Rankings
- We could not find the message board you were looking for.
Gaming News
Popular Games

Genshin Impact Walkthrough & Guides Wiki

Honkai: Star Rail Walkthrough & Guides Wiki

Umamusume: Pretty Derby Walkthrough & Guides Wiki

Pokemon Pokopia Walkthrough & Guides Wiki

Resident Evil Requiem (RE9) Walkthrough & Guides Wiki

Monster Hunter Wilds Walkthrough & Guides Wiki

Wuthering Waves Walkthrough & Guides Wiki

Arknights: Endfield Walkthrough & Guides Wiki

Pokemon FireRed and LeafGreen (FRLG) Walkthrough & Guides Wiki

Pokemon TCG Pocket (PTCGP) Strategies & Guides Wiki
Recommended Games

Diablo 4: Vessel of Hatred Walkthrough & Guides Wiki

Cyberpunk 2077: Ultimate Edition Walkthrough & Guides Wiki

Fire Emblem Heroes (FEH) Walkthrough & Guides Wiki

Yu-Gi-Oh! Master Duel Walkthrough & Guides Wiki

Super Smash Bros. Ultimate Walkthrough & Guides Wiki

Pokemon Brilliant Diamond and Shining Pearl (BDSP) Walkthrough & Guides Wiki

Elden Ring Shadow of the Erdtree Walkthrough & Guides Wiki

Monster Hunter World Walkthrough & Guides Wiki

The Legend of Zelda: Tears of the Kingdom Walkthrough & Guides Wiki

Persona 3 Reload Walkthrough & Guides Wiki
All rights reserved
S.T.A.L.K.E.R. 2 is a registered trademark of GSC Game World Global Ltd. © 2024 GSC Game World Global Ltd. GSC Game World and its logos are Trademarks or Registered Trademarks Of GSC Game World Global Ltd. © S.T.A.L.K.E.R. 2 HEART OF CHORNOBYL a game developed GSC Game World. All other trademarks, registered trademarks or logos belong to their respective owners.
The copyrights of videos of games used in our content and other intellectual property rights belong to the provider of the game.
The contents we provide on this site were created personally by members of the Game8 editorial department.
We refuse the right to reuse or repost content taken without our permission such as data or images to other sites.


![Monster Hunter Stories 3 Review [First Impressions] | Simply Rejuvenating](https://img.game8.co/4438641/2a31b7702bd70e78ec8efd24661dacda.jpeg/thumb)


