Dead Frequency Walkthrough
★ Best Weapons | Best Armor | Best Artifacts
☆ All Door Code Locations and Solutions
★ How to Unlock All Endings
☆ All Main Mission and Side Mission Guides
★ Locations: All Bases | All Artifact Farms
☆ How to Get All Unique Weapons
Dead Frequency is a main mission in STALKER 2: Heart of Chornobyl. Read on for a complete walkthrough of Dead Frequency, as well as the rewards for completing the mission.
| ◄ Previous Mission | Next Mission ▶ |
|---|---|
| Chasing Ghosts | Like a Moth to the Flame In Search of a Guide |
List of Contents
Dead Frequency Objectives
The Dead Frequency mission will have different quest objectives depending on whether you acquired the Ward Badge during Back to Slag Heap.
Players without the Ward Badge will have to coordinate with Star from the Spark Faction, while Ward Badge holders are free to enter Camp Icarus.
| List of Objectives | ||||||
|---|---|---|---|---|---|---|
| 1 | ||||||
| Ward Badge | No Ward Badge | |||||
| Get to Camp Icarus | Meet Up with Star | |||||
| 2 | ||||||
| Ward Badge | No Ward Badge | |||||
| Complete Like a Moth to a Flame | Bring the Ward Sensors to Star | |||||
| 3 | ||||||
| Ward Badge | No Ward Badge | |||||
| Get psi-pills from the medic (Senkevych Route Only) | Intercept the Wardens' Radio Calls | |||||
| 4 | ||||||
| Ward Badge | No Ward Badge | |||||
| Find Alpha and Bravo Team (Senkevych Route Only) | Find Alpha team | |||||
| 5 | ||||||
| Ward Badge | No Ward Badge | |||||
| Explore Echo Station | Find Bravo Team | |||||
| 6 | ||||||
| Ward Badge | No Ward Badge | |||||
| Find Faust's agent | Activate Backup Power | |||||
| 7 | ||||||
| Ward Badge | No Ward Badge | |||||
| Activate the device | Explore Echo Station and Find Faust's Agent | |||||
| 8 | ||||||
| Ward Badge | No Ward Badge | |||||
| Wait for the device to finish | Activate the Device | |||||
| 9 | ||||||
| Ward Badge | No Ward Badge | |||||
| Contact Faust instead of Shterev | Contact Faust instead of Shterev | |||||
Dead Frequency Walkthrough (With Ward Badge)
| Ward Badge and No Ward Badge Walkthroughs | |
|---|---|
| Ward Badge Walkthrough | No Ward Badge Walkthrough |
Click on a link above to jump between the Ward Badge and No Ward Badge walkthroughs.
Get to Camp Icarus
Camp Icarus Location

To get to Camp Icarus, you need to head southeast from the tower in Azimuth Station. It is recommended that you stick to the main road and go past the Ward checkpoint, instead of going straight through the Sand Mine.
Talk to the Guard at the Checkpoint

The guard at the checkpoint will stop you, and tell you to go back. Show him the Ward Badge you got from Korshunov from a previous mission. Once you are inside the camp you will also unlock the Like a Moth to the Flame main mission.
Complete Like a Moth to a Flame
Completing Like a Moth to a Flame is a required part of progressing this mission. Your choices in the aforementioned mission will drastically affect the objectives you must finish in this mission. We recommend going with the Kryvenko route, as it is a much more direct route that does not add extra steps to finding Sterev.
| Choices | |
|---|---|
| Kryvenko Route | Senkevych Route |
Get psi-pills from the medic (Optional)
Medic at Northwest Corner

Sgt. Batalov, the medic, can be found at the northwest corner of the camp. While this is optional, you can never have enough of free stuff in the Zone.
Find Alpha and Bravo Team

Part of the Senkevych Route of the Dead Frequency mission requires you to find two teams that have been cut off from Icarus communications. Just visit both sites and show them your Ward Badge to show that you're a friendly sent by the captain. Get information from each team commander, and rescue them if you wish.
Explore Echo Station
Echo Station is East of Icarus

Echo Station can be found to the east of the Icarus base. Keep exploring the inside of the building until reach the area where you hear Shterev's voice.
Find Faust's Agent

Open the door and you'll find Lt. Shterev who appears to be under some psychic influence. Regardless of dialogue option, he gets aggressive and tries to kill you.
Activate the Device

Go out of the room and interact with the switch near the terminal to activate the device.
Wait for the Device to Finish

As the device is still turning on, you will have to fight off some zombie stalkers. When the fight has ended, go back to the room where you found Shterev.
Contact Faust Instead of Shterev

Use the computer and copy the files to get Faust's recorded message. Afterwards the mission will end.
Dead Frequency Walkthrough (Without Ward Badge)
| Ward Badge and No Ward Badge Walkthroughs | |
|---|---|
| Ward Badge Walkthrough | No Ward Badge Walkthrough |
Click on a link above to jump between the Ward Badge and No Ward Badge walkthroughs.
Meet Up with Star

For players without the Ward badge, the first objective would be to talk to Star at a forest shack in Zaton. He will then ask you to retrieve the sensors from a warden sergeant.
Bring the Ward Sensors to Star

Go to the anomaly field nearby. Look for the dead body of Sergeant Orlowski inside a destroyed shack and retrieve the ward sensors from him. Afterward, return to Star and hand him the sensors.
Intercept the Wardens' Radio Calls

Interact with the radio on the table next to Star when the prompt to intercept the Wardens' radio pops up.
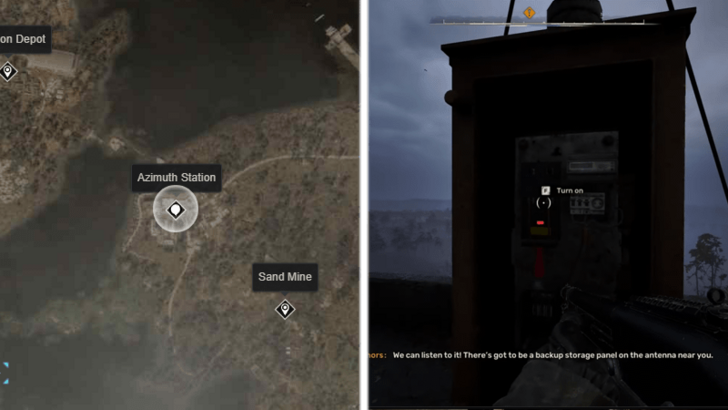
Find Alpha team
| Map View | 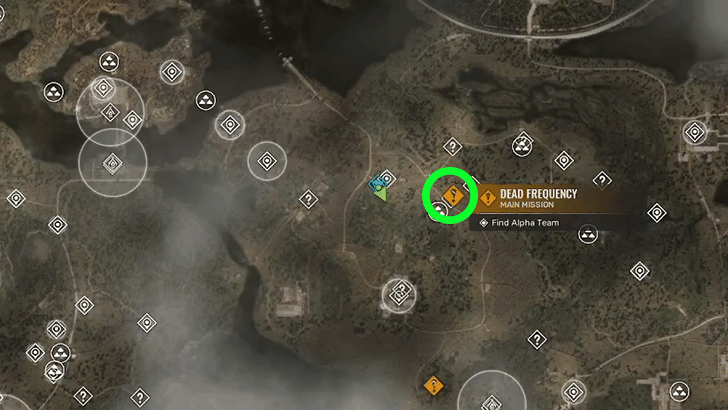 |
|---|---|
| In-Game View | 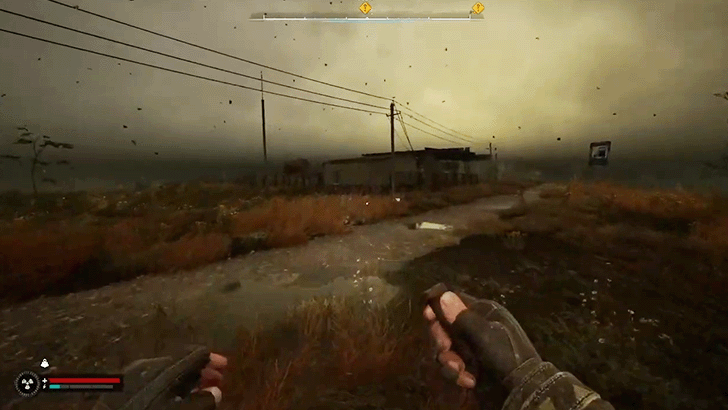 |
Head to the gas station to the east and start looking for Alpha Team. Find the soldier named Krutov at the entrance to complete this objective.
Eliminate Alpha Team (Optional)

While talking to each Alpha Team member, you can choose the dialogue option to kill them; either that or you can straight up just shoot them as soon as you meet them. Keep in mind that if one of their comrades sees you murdering them, they will also become hostile towards you.
Get Information from Alpha Team Commander

Drop down the chasm outside the gas station, then loot Lt. Koptytsky's body and get the Shterev PDA.
While making your way out of the chasm, kill one of the soldiers that will threaten you.
Find Bravo Team
| Map View | 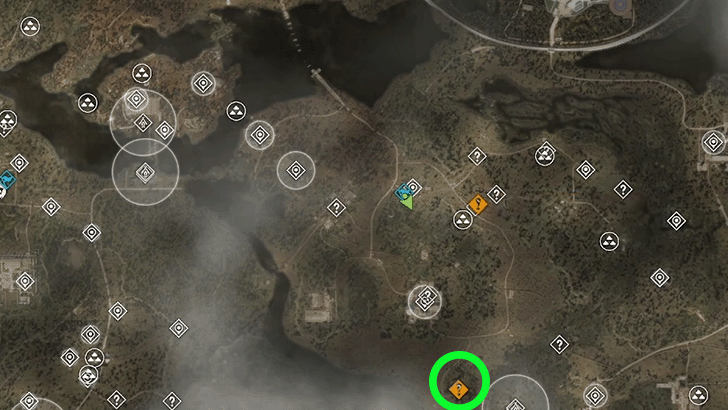 |
|---|---|
| In-Game View | 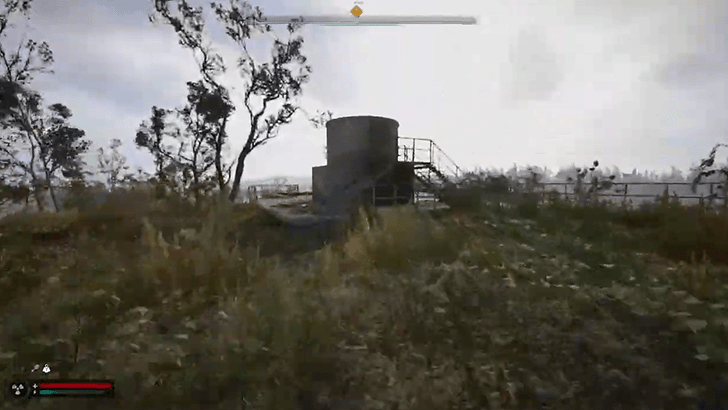 |
Head south to find Bravo Team. Enter the silo and climb down the ladder.
Eliminate Bravo Team (Optional)
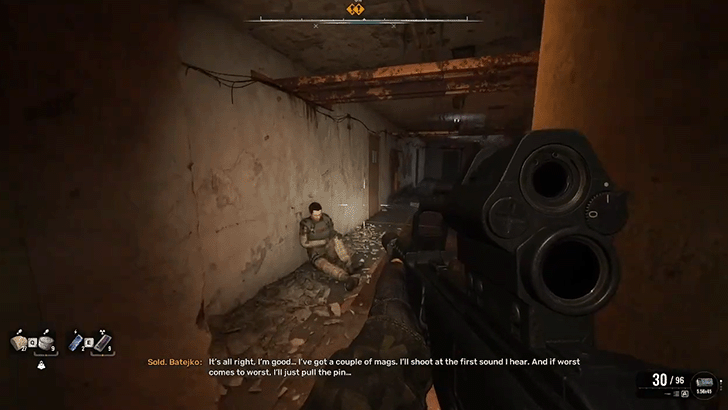
Similar to Alpha team, you can choose to murder each Bravo team member by selecting the dialogue option to Attack them.
Additionally, if you leave the injured Bravo Team member alive and gave him a Medkit, he will give you a password that you can use on the commander later on to avoid engaging with him once you meet him.
Get Information from Bravo Team Commander

Navigate through the tunnels to find the Bravo Team Commander, you'll encounter Bloodsuckers along the way. Speak to Lt. Kozymkov and tell him you're looking for Shterev.
The Commander will become hostile, but you can defuse the situation by saying “Titmouse” - the password that you got from the injured bravo team member earlier (if you didn't kill him).
Activate Backup Power

After dealing with the Bravo Team Commander, go to the circuit breaker behind him and flip the switch to activate the backup power. Leave the tunnels after that and make your way to the Echo Station.
Explore Echo Station and Find Faust's Agent

Go to the Echo Station and talk to Lt. Shterev inside, then kill him after the conversation.
Activate the Device

Leave Lt. Shterev's quarters and flip the switch on the device outside. Wait for the device to finish activating while defending yourself from waves of enemy soldiers.
Contact Faust Instead of Shterev

Access the computer to copy the files. You'll receive Faust's recorded message and the mission will end here.
Dead Frequency Rewards
Mission Rewards
| Rewards |
|---|
| ・12000 Coupons (Stalker Difficulty) |
Dead Frequency Overview
Location and Mission Info
| Dead Frequency Mission Info | |
|---|---|
 |
|
| Starting Location | Zaton |
| Quest Giver | Starts immediately after finishing Chasing Ghosts. |
| Mission Description | |
| Now I'm certain that Faust is responsible for orchestrating the attack against me. With the help of Strider, the leader of Noontide, I found out that the preacher has an ally within the Ward's Camp Icarus. If I can interrogate this man. maybe I can discover Faust's whereabouts and get my Scanner back. | |
STALKER 2 Related Guides

All Main Missions
Comment
I found out if you follow and talk to Lt. Kozymkov when he meets up with Sold. Batejko, he gives you an new GP37 and some ammo.
Author
Dead Frequency Walkthrough
improvement survey
03/2026
improving Game8's site?

Your answers will help us to improve our website.
Note: Please be sure not to enter any kind of personal information into your response.

We hope you continue to make use of Game8.
Rankings
- We could not find the message board you were looking for.
Gaming News
Popular Games

Genshin Impact Walkthrough & Guides Wiki

Honkai: Star Rail Walkthrough & Guides Wiki

Umamusume: Pretty Derby Walkthrough & Guides Wiki

Pokemon Pokopia Walkthrough & Guides Wiki

Resident Evil Requiem (RE9) Walkthrough & Guides Wiki

Monster Hunter Wilds Walkthrough & Guides Wiki

Wuthering Waves Walkthrough & Guides Wiki

Arknights: Endfield Walkthrough & Guides Wiki

Pokemon FireRed and LeafGreen (FRLG) Walkthrough & Guides Wiki

Pokemon TCG Pocket (PTCGP) Strategies & Guides Wiki
Recommended Games

Diablo 4: Vessel of Hatred Walkthrough & Guides Wiki

Cyberpunk 2077: Ultimate Edition Walkthrough & Guides Wiki

Fire Emblem Heroes (FEH) Walkthrough & Guides Wiki

Yu-Gi-Oh! Master Duel Walkthrough & Guides Wiki

Super Smash Bros. Ultimate Walkthrough & Guides Wiki

Pokemon Brilliant Diamond and Shining Pearl (BDSP) Walkthrough & Guides Wiki

Elden Ring Shadow of the Erdtree Walkthrough & Guides Wiki

Monster Hunter World Walkthrough & Guides Wiki

The Legend of Zelda: Tears of the Kingdom Walkthrough & Guides Wiki

Persona 3 Reload Walkthrough & Guides Wiki
All rights reserved
S.T.A.L.K.E.R. 2 is a registered trademark of GSC Game World Global Ltd. © 2024 GSC Game World Global Ltd. GSC Game World and its logos are Trademarks or Registered Trademarks Of GSC Game World Global Ltd. © S.T.A.L.K.E.R. 2 HEART OF CHORNOBYL a game developed GSC Game World. All other trademarks, registered trademarks or logos belong to their respective owners.
The copyrights of videos of games used in our content and other intellectual property rights belong to the provider of the game.
The contents we provide on this site were created personally by members of the Game8 editorial department.
We refuse the right to reuse or repost content taken without our permission such as data or images to other sites.





![Monster Hunter Stories 3 Review [First Impressions] | Simply Rejuvenating](https://img.game8.co/4438641/2a31b7702bd70e78ec8efd24661dacda.jpeg/thumb)


That might require you to have given Sold. Batejko a medkit first for that to happen. You'll want to go back to them anyways because the locked door near Batejko containing a safe opens up after you flip the switch.