How to Beat Bahamut

Bahamut is a boss that appears during the Fire in the Sky quest in Final Fantasy 16 (FF16). See the best strategies for how to beat Bahamut, how to counter its attacks and abilities, as well as its location, quest appearance, spoils, and drops.
| ◄ Previous Boss | Next Boss ▶ |
|---|---|
| Necrophobe | Sleipnir |
List of Contents
Bahamut Overview
Bahamut Location and Drops
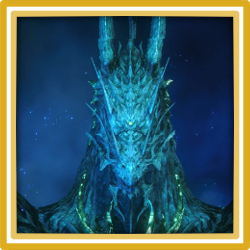 Bahamut Bahamut |
|
| Quest | |
|---|---|
| Location & Region | The Crystalline Dominion , Crystalline Dominion |
| Rewards | ・5000 EXP ・400 AP ・5500 Gil ・
|
| Abilities | ・Quintessence ・Aura Burst ・Gigaflare ・Megaflare ・Mortal Coil ・Teraflare ・Triple Coil |
How to Beat Bahamut (First Phase)
| Step-by-Step Guide |
|---|
|
|
Evade Aerial Slashes
Bahamut will usually take up to the skies and attack you with aerial manuevers and abilities. One of which is it will launch two consecutive aerial slashes at you so you'll have to Dodge (R1) twice during this.
Jump Over Energy Waves
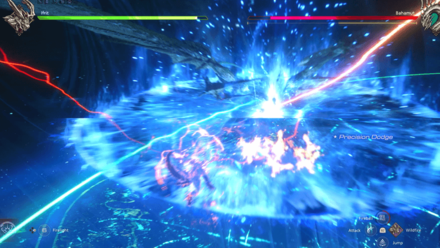
After executing its dash attack, it will slam the ground, causing a huge energy wave that will flow out of Bahamut. Jump (X Button) over the wave as it approaches you to avoid getting damaged by it.
Use Spitflare to Destroy Quintessence Orbs
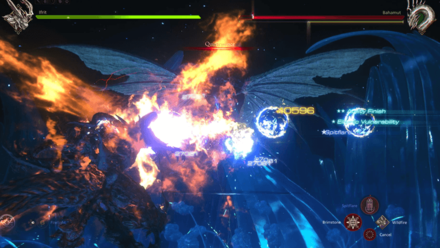
Once the boss summons Quintessence orbs, Ifrit will also gain access to the Spitflare ability. Press R2 + Triangle to unleash a fire beam to destroy the orbs, then redirect your aim to Bahamut to damage it with flames until the ability ends.
How to Beat Bahamut (Second Phase)
| Step-by-Step Guide |
|---|
|
|
Aim and Shoot Fireballs
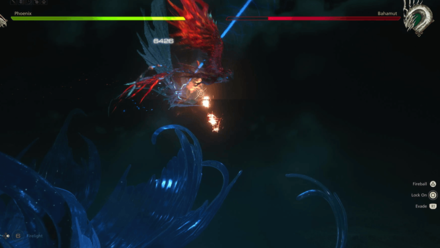
You'll be embodying the Phoenix for the second phase. Use the L-Stick to aim the reticule at Bahamut, then Triangle to shoot Fireballs once you see the aim reticule turn into a circle.
Hold Triangle to Charge Fireball For Increased Damage
You can deal more damage with the Fireball by holding triangle. Charging it up for an extended amount of time increases the damage!
Lock On to Destroy Multiple Targets
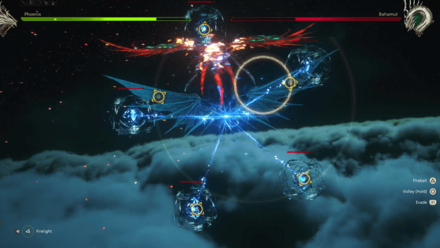
The Bahamut will charge up a powerful Gigaflare attack in which it will summon multiple orbs and unleash a powerful beam that can instantly kill you if you fail to destroy it within the given timeframe.
Hold Circle to lock on multiple targets while rotating in a counterclockwise direction, then release once you've tagged all targets. Do this until their health is halfway, then switch to Fireballs (Triangle) on each one to finish them off.
How to Beat Bahamut (Third Phase)
| Step-by-Step Guide |
|---|
|
|
Utilize Spitflare and Brimstone to Damage It
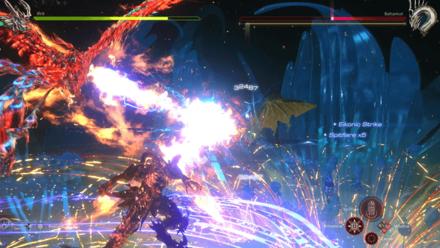
You'll find yourself controlling Ifrit again after a brief stint as the Phoenix. The fight will be quick during this segment of the boss battle as you'll only need to deplete a quarter of its health.
Use Spitflare to combine your strength with the Phoenix, then unleash a fire beam towards Bahamut to greatly reduce its health. Once staggered, go near it and charge up Brimstone to its full capacity, then release to unload a huge explosion, greatly damaging Bahamut in the process.
Go Inside the Phoenix's Barrier During Terraflare
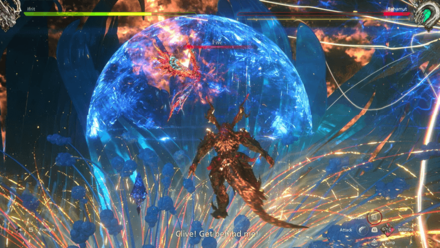
Bahamut will harness its power and begin charging up Terraflare. The Phoenix will then summon a protective barrier around it which you must go to in order to protect yourself from the massive explosion.
Execute QTEs to Deflect Terraflare
Once Terraflare is unleashed, keep spamming the Square button to prevent it from destroying the barrier.
How to Beat Bahamut (Fourth Phase)
| Step-by-Step Guide |
|---|
|
|
Use Lightspeed to Close the Gap
The final segment of the battle sees Ifrit and Phoenix merge together, which gives you new access to abilities. Use Lightspeed (X Button) to quickly dash towards Bahamut and spam your basic attacks to damage it.
Be sure to back off using Wildfire after a few combos as it will fire off laser beams at you or launch a gigantic ball of energy known as Supernova.
Evade Laser Patterns Using Wildfire

As soon as you see laser beams forming up in multiple vertical and horizontal directions, use Wildfire to quickly fly over to a safe spot, usually a gap in-between two lasers, to avoid getting damaged.
Avoid Glyphs During Celestrial Foundry
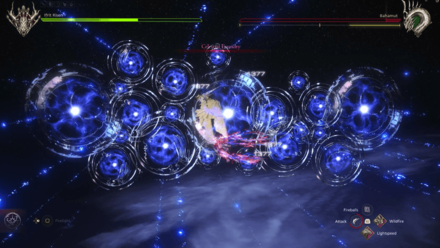
Celestial Foundry sees Bahamut spawning numerous Glyphs in-front of you. Avoid staying in the center of the purple light of these glyphs, as it will unleash a massive laser beam after charging it up.
| ◄ Previous Boss | Next Boss ▶ |
|---|---|
| Necrophobe | Sleipnir |
Final Fantasy XVI (FF16) Related Guides

List of Bosses and Formidable Foes
All Formidable Foes
Comment
Author
How to Beat Bahamut
improvement survey
03/2026
improving Game8's site?

Your answers will help us to improve our website.
Note: Please be sure not to enter any kind of personal information into your response.

We hope you continue to make use of Game8.
Rankings
- We could not find the message board you were looking for.
Gaming News
Popular Games

Genshin Impact Walkthrough & Guides Wiki

Honkai: Star Rail Walkthrough & Guides Wiki

Umamusume: Pretty Derby Walkthrough & Guides Wiki

Pokemon Pokopia Walkthrough & Guides Wiki

Resident Evil Requiem (RE9) Walkthrough & Guides Wiki

Monster Hunter Wilds Walkthrough & Guides Wiki

Wuthering Waves Walkthrough & Guides Wiki

Arknights: Endfield Walkthrough & Guides Wiki

Pokemon FireRed and LeafGreen (FRLG) Walkthrough & Guides Wiki

Pokemon TCG Pocket (PTCGP) Strategies & Guides Wiki
Recommended Games

Diablo 4: Vessel of Hatred Walkthrough & Guides Wiki

Fire Emblem Heroes (FEH) Walkthrough & Guides Wiki

Yu-Gi-Oh! Master Duel Walkthrough & Guides Wiki

Super Smash Bros. Ultimate Walkthrough & Guides Wiki

Pokemon Brilliant Diamond and Shining Pearl (BDSP) Walkthrough & Guides Wiki

Elden Ring Shadow of the Erdtree Walkthrough & Guides Wiki

Monster Hunter World Walkthrough & Guides Wiki

The Legend of Zelda: Tears of the Kingdom Walkthrough & Guides Wiki

Persona 3 Reload Walkthrough & Guides Wiki

Cyberpunk 2077: Ultimate Edition Walkthrough & Guides Wiki
All rights reserved
© 2023 SQUARE ENIX CO., LTD. All Rights Reserved.
The copyrights of videos of games used in our content and other intellectual property rights belong to the provider of the game.
The contents we provide on this site were created personally by members of the Game8 editorial department.
We refuse the right to reuse or repost content taken without our permission such as data or images to other sites.
 Gigas
Gigas Morbol
 Knight of the Blinding Dawn
 Eikon of Fire
 Shiva's Dominant
 Tiamat
 Dragon Aevis
 Fafnir
 Midnight Raven
 Chirada
 Suparna and Chirada
 Benedikta
 Garuda
 Knight of the Dying Sun
 Iron Giant
 Infernal Eikon
 Infernal Shadow
 Imperial Cannonier
 Akashic Dragon
 Typhon
 Republican War Panther
 Akashic Morbol
 Flame Lizard
 Liquid Flame
 Coeurl
 Hugo
Hugo Undertaker
 Titan
Titan White Dragon
 Necrophobe
 Sleipnir
 Barnabas (First Encounter)
 Control Node
 Aurum Giant
 Barnabas (Second Encounter)
 Behemoth
 Ultima (First Encounter)
 Ultimalius


![Everwind Review [Early Access] | The Shaky First Step to A Very Long Journey](https://img.game8.co/4440226/ab079b1153298a042633dd1ef51e878e.png/thumb)

![Monster Hunter Stories 3 Review [First Impressions] | Simply Rejuvenating](https://img.game8.co/4438641/2a31b7702bd70e78ec8efd24661dacda.jpeg/thumb)


