How to Solve the Ruins Map (2nd)
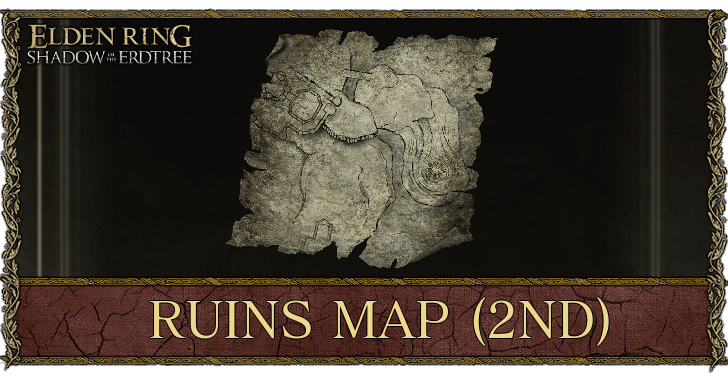
The Ruins Map (2nd) is the second of three maps obtained during Ymir's NPC Quest in the Elden Ring DLC, Shadow of the Erdtree. Read on to learn how to solve the Ruins Map (2nd), how to find the location it marks, and the rewards for blowing the hanging bell it leads to.
| Ruins Map Guides | ||
|---|---|---|
| Ruins Map | Ruins Map (2nd) | Ruins Map (3rd) |
List of Contents
How to Solve the Ruins Map (2nd)
Get the O Mother Gesture in Bonny Village
| World View | Map Location |
|---|---|
 |
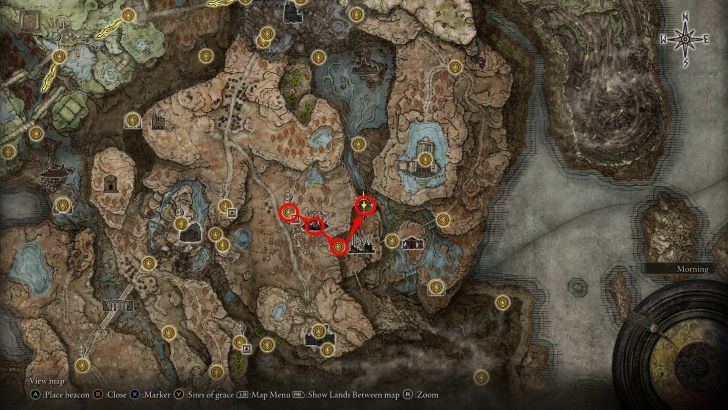 |
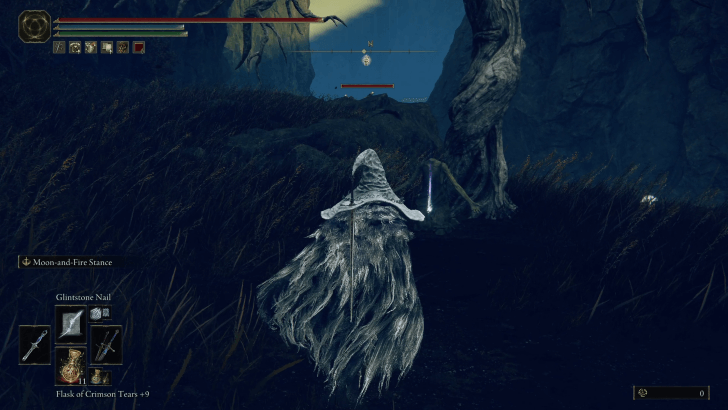
Before you start following the map, you need to get the O Mother gesture in advance from Bonny Village, as you will need to use it to unlock the way to Scaduview and the Finger Ruins of Dheo.
O Mother Gesture Location and Use
Go to the Finger Ruins of Dheo to Solve the Map Clue
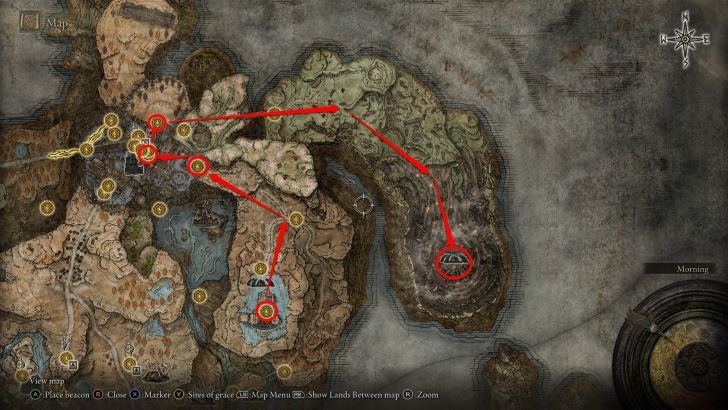
The second Ruins Map you get from Count Ymir points you in the direction of the Finger Ruins of Dheo at the northeastern end of the Realm of Shadow. You will need to pass through the Shadow Keep Church District and Scaduview in order to reach it.
| Ruins Map (2nd) Walkthrough | |
|---|---|
| 1 | 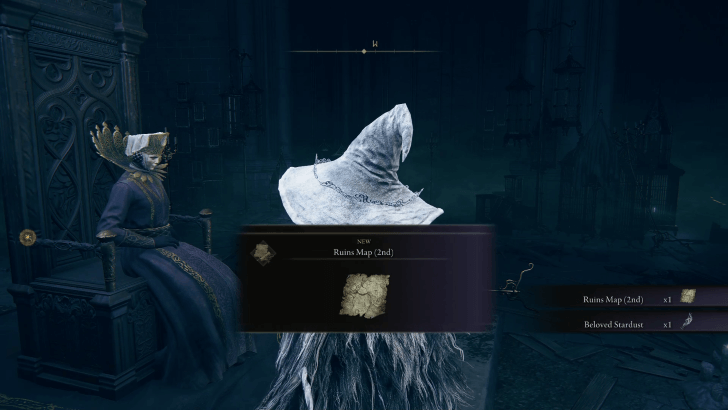 Speak to Count Ymir in the Cathedral of Manus Metyr after ringing the first hanging bell in his quest to receive the Ruins Map (2nd). |
| 2 | From the Cathedral, ride northwest to enter the Shadow Keep Church District, then navigate the dungeon to reach the upper floors of the Storehouse and find the lift to the Shadow Keep, Back Gate. |
| 3 | 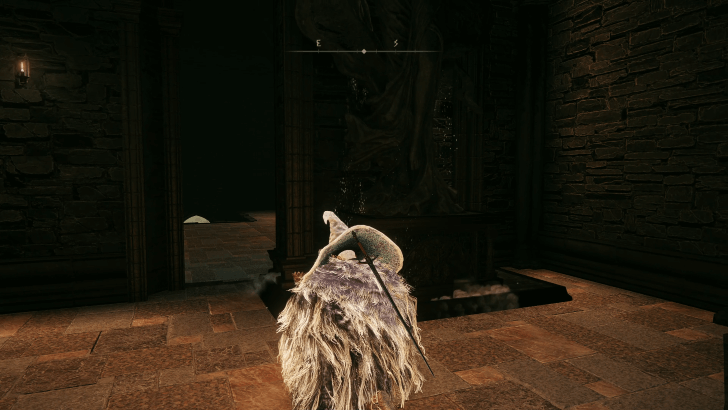 Use the O Mother gesture in front of the Statue of Marika, in the corridor connected to the Back Gate Site of Grace, to unlock the secret passageway to Scaduview. |
| 4 | 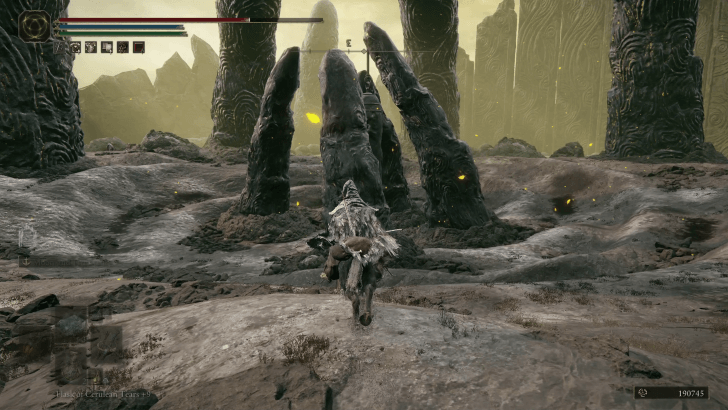 Ride to the southern end of Scaduview where the Finger Ruins of Dheo lie, and ring the hanging bell there to receive the Cerulean Seed Talisman +1. |
Return to Ymir to Get Your Rewards
Once you've rung the bell at the Finger Ruins of Dheo, teleport back to the Cathedral of Manus Metyr and speak to Ymir. After praising you for ringing the bell, he will give you the Ruins Map (3rd) for the final part of his quest.
Additionally, you will also unlock the Fleeting Microcosm sorcery from his shop.
How to Get the Ruins Map (2nd)
Continue Ymir's Questline at the Cathedral of Manus Metyr

The Ruins Map (2nd) is a key item that clues you in on the location of the hanging bells during Count Ymir's NPC quest. After ringing the hanging bell in the Finger Ruins of Rhia and speaking with Ymir again in the Cathedral of Manus Metyr, he will give the second Ruins Map to you.
Ruins Map (2nd) Overview
|
|
| Item | Ruins Map (2nd) |
|---|---|
| Item Type | Info Item |
| Description | |
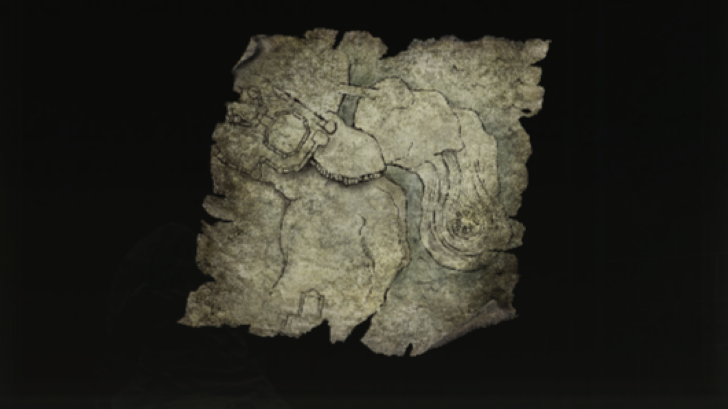
| A simple old map, faded and dirty. Acquired from Count Ymir, High Priest. Indicates another hallowed ruin, apart from the one shown on the first map. "May the gleaming stars guide you evermore." |
|
The Ruins Map (2nd) can be found and viewed from the Info tab at the end of your Inventory screen (to the right of the Talismans tab).
Elden Ring Related Guides

All Item Categories
| Items by Type | |
|---|---|
 Arrows and Bolts Arrows and Bolts |
 Bolstering Materials Bolstering Materials |
 Crafting Materials Crafting Materials |
 Key Items Key Items |
 Tools Tools |
- |
Item Guides
| Related Item Guides | |
|---|---|
 All Remembrances All Remembrances |
 All Bell Bearings All Bell Bearings |
 All Golden Seeds All Golden Seeds |
 All Sacred Tears All Sacred Tears |
 All Memory Stones All Memory Stones |
 All Larval Tears All Larval Tears |
 Stonesword Keys Stonesword Keys |
All DLC Cookbooks |
Comment
Author
How to Solve the Ruins Map (2nd)
improvement survey
03/2026
improving Game8's site?

Your answers will help us to improve our website.
Note: Please be sure not to enter any kind of personal information into your response.

We hope you continue to make use of Game8.
Rankings
- We could not find the message board you were looking for.
Gaming News
Popular Games

Genshin Impact Walkthrough & Guides Wiki

Honkai: Star Rail Walkthrough & Guides Wiki

Umamusume: Pretty Derby Walkthrough & Guides Wiki

Pokemon Pokopia Walkthrough & Guides Wiki

Resident Evil Requiem (RE9) Walkthrough & Guides Wiki

Monster Hunter Wilds Walkthrough & Guides Wiki

Wuthering Waves Walkthrough & Guides Wiki

Arknights: Endfield Walkthrough & Guides Wiki

Pokemon FireRed and LeafGreen (FRLG) Walkthrough & Guides Wiki

Pokemon TCG Pocket (PTCGP) Strategies & Guides Wiki
Recommended Games

Diablo 4: Vessel of Hatred Walkthrough & Guides Wiki

Fire Emblem Heroes (FEH) Walkthrough & Guides Wiki

Yu-Gi-Oh! Master Duel Walkthrough & Guides Wiki

Super Smash Bros. Ultimate Walkthrough & Guides Wiki

Pokemon Brilliant Diamond and Shining Pearl (BDSP) Walkthrough & Guides Wiki

Elden Ring Shadow of the Erdtree Walkthrough & Guides Wiki

Monster Hunter World Walkthrough & Guides Wiki

The Legend of Zelda: Tears of the Kingdom Walkthrough & Guides Wiki

Persona 3 Reload Walkthrough & Guides Wiki

Cyberpunk 2077: Ultimate Edition Walkthrough & Guides Wiki
All rights reserved
ELDEN RING™ & ©BANDAI NAMCO Entertainment Inc. / ©2021 FromSoftware, Inc.
The copyrights of videos of games used in our content and other intellectual property rights belong to the provider of the game.
The contents we provide on this site were created personally by members of the Game8 editorial department.
We refuse the right to reuse or repost content taken without our permission such as data or images to other sites.


![Everwind Review [Early Access] | The Shaky First Step to A Very Long Journey](https://img.game8.co/4440226/ab079b1153298a042633dd1ef51e878e.png/thumb)

![Monster Hunter Stories 3 Review [First Impressions] | Simply Rejuvenating](https://img.game8.co/4438641/2a31b7702bd70e78ec8efd24661dacda.jpeg/thumb)


