Teach Me, Great Warrior Walkthrough and Rewards
Teach Me, Great Warrior is a Side Quest that can be unlocked during Chapter 9 of Final Fantasy 7 Rebirth (FF7 Rebirth). Read on to learn more about how to unlock Teach Me, Great Warrior, how to complete it, as well as the available rewards for completing the side quest.
List of Contents
How to Unlock Teach Me, Great Warrior
Return to Gongaga at the End of Chapter 9
You will need to progress through the end of Chapter 9 to unlock the Teach Me, Great Warrior side quest. After you defeat the bosses and complete the reactor segment, you will automatically return to town where you can pick up the quest on the notice board.
How to Complete Teach Me, Great Warrior
- Help Sotetsu with his training.
- Assist with Yuffie's 1st lesson.
- Assist with Yuffie's 2nd lesson.
- Assist with Yuffie's 3rd lesson.
- Assist with Yuffie's final lesson.
- Return to Gongaga.
Help Sotetsu With His Training
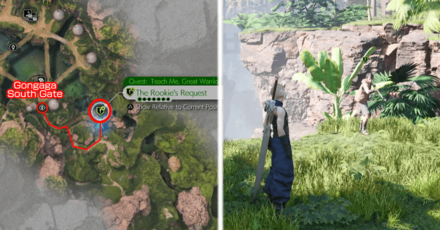
Follow these steps to find Sotetsu and help him with his training with Yuffie.
- Exit the Town from Gongaga's South Gate.
- Go to the right side past the 2nd gate.
- Turn left around the rock.
- Find Sotetsu on top of the cliff ahead.
Assist With Yuffie’s First Lesson
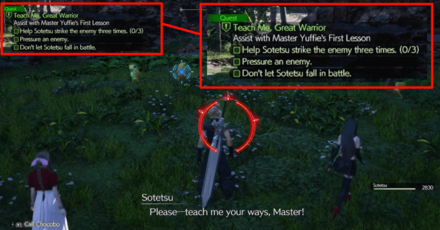
Follow Sotetsu down a path to begin Master Yuffie's first lesson. Similar to Fiend Intel, you'll need to complete the objectives on the upper left side of the screen to pass the lesson. Your first opponents will be a group of Amphidexes and a Frightflower.
| Objective | How to Complete |
|---|---|
| Help Sotetsu Strike the enemy three times | Stop Fighting until Sotetsu hits the Frightflowers 3 times |
| Pressure an enemy | Use Fire Spells on the Frightflower to Pressure it |
| Don't let Sotetsu fall in battle | Simply keep Sotetsu from dying in combat. Use Potions or Healing spells when he drops to half HP |
For this battle, it is best to prioritize the Frightflower first to stop it from transforming. Then, you can use Triple Slash on the Amphidexes since they have low health bars.
You Can Retry the Lesson If You Failed an Objective
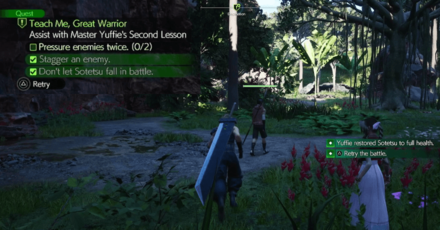
You can always retry any of the lessons if you failed an objective. To do this, just go to the area of the lesson and hold the triangle button to retry.
If you need to restore your HP and MP, you can go back to Gongaga, sleep in Cissnei's house, then fast travel to Gongaga's south gate, where you can follow the path back to Sotetsu
Change Difficulty If Enemies Die Too Quickly
Some lessons can be difficult to complete if you are over-leveled. If you are defeating the fiends too fast, you can change the game difficulty to Dynamic to scale their levels to you. To do this, just go to System > Options > Gameplay > Difficulty > Dynamic.
Assist With Yuffie’s Second Lesson
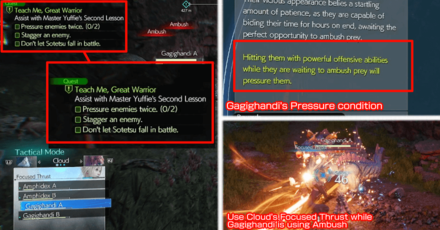
After completing the task, follow Sotetsu to the second lesson's location. In this lesson, you will be up against two Gagighandis and two Amphidexes. Gagighandis are the easiest to pressure. Simply use Triple Slash while they're in Ambush stance to Pressure them.
| Objective | How to Complete |
|---|---|
| Pressure enemies twice | Use Triple Slash when the Gagighandi is using Ambush to Pressure it. |
| Stagger an enemy | Use Focused Thrust after pressuring an enemy to build up the Stagger gauge. |
| Don't let Sotetsu fall in battle | Use Potions or Healing spells when Sotetsu drops to half HP |
For this lesson's objectives, it is also best to prioritize the Amphidexes first to avoid turning into frogs. Once they are gone, you can focus on pressuring and staggering the Gagighandis.
Assist With Yuffie’s Third Lesson
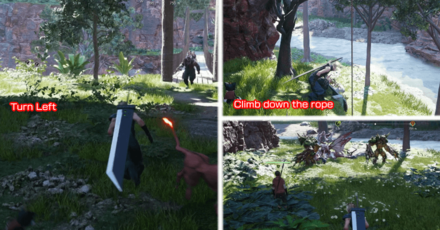
After the second lesson, follow Sotetsu to reach the third lesson's location. Here you must defeat two Chimera Mimics and two Grandhorns within a 2 minute time limit.
| Objective | How to Complete |
|---|---|
| Stagger enemies twice | Use Focused Thrust on the Chimera Mimics to instantly stagger them |
| Defeat all enemies within the time limit | Use an Ability Attack on the Grandhorns while they are blocking and follow up with Synergy Abilities to deal large damage |
| Don't let Sotetsu fall in battle | Lure the Grandhorns away from Sotetsu and use Potions or Healing spells when Sotetsu drops to half HP |
Prioritize the Chimera Mimics first since they are easy to defeat. The Grandhorns in this lesson can also deal a lot of damage, so make sure to lure them away from Sotetsu by constantly attacking it when you can.
Assist With Yuffie’s Final Lesson
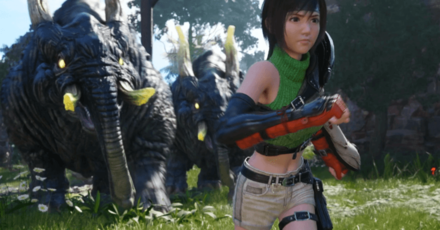
Finally, follow Sotetsu to the final lesson location where you will fight against two Mastodons. These enemies are very tanky and can deal significant damage if you do not dodge or block its attacks.
| Objective | How to Complete |
|---|---|
| Don't let Sotetsu fall in battle | Keep Enemy Aggression on you and use Potions or Healing spells when Sotetsu drops to half HP |
It is crucial to draw aggro away from Sotetsu by constantly attacking the Mastodons. You can also try to lure them into a corner by using ranged attacks to keep them away from Sotetsu.
Once you have aggro, you can begin to pressure the Mastodons by using Fire or Firebolt Blade on them. After a while they will use Breather, which makes them pressured. This is the perfect time to use powerful abilities (e.g., Cloud's Focused Thrust, Yuffie's Art of War, etc.).
Once a Mastodon is Staggered, unleash all of your Limit Breaks or Synergy Abilities on it until it dies. Rinse and repeat for the remaining Mastodon.
Return to Gongaga
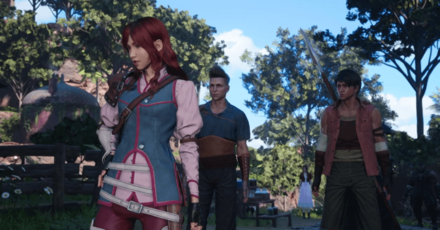
Return to Gongaga to complete the quest. During the cutscene, Cissnei will become the coalition's mentor and she will tell the would-be warriors to ready themselves for training (much to the dismay of an unpaid Yuffie).
Teach Me, Great Warrior Rewards
List of Rewards
| Rewards for Completing Teach Me, Great Warrior |
|---|
| ▸ Secrets of the Ninja Vol. IV. (10 SP for Yuffie) ▸ 10 Party EXP ▸ Player EXP (based on current level) |
Increase Favorability With Yuffie

Completing Teach Me, Great Warrior will also increase your friendship with Yuffie. This will affect the events that will occur when you visit the Gold Saucer later in the game.
Romance and Relationship Guide
Secrets of the Ninja Vol. IX Dropped by Mastodons in Hard Mode
While playing in Hard Mode, defeating the Mastodons will reward you the Secrets of the Ninja Vol. IX for Yuffie. You can access Hard Mode after completing your first playthrough of the game in any difficulty.
Teach Me, Great Warrior Information
Information and Overview
| Basic Information | |||||
|---|---|---|---|---|---|
 Recommended Level: 34 |
|||||
| Availability | Region | Side Quest Giver | |||
| Chapter 9 | Gongaga | Youth Coalition Rookie | |||
| Unlock Requirement | Check back in Gongaga after beating Crimson Mare Mk. II | ||||
FF7 Rebirth Related Guides

Side Quest Guides
| All Side Quest Guides |
|---|
| Best Side Quests to Do |
Grasslands Side Quests
| Side Quest List | Flowers from the Hill | Lifeline in Peril | A Rare Card Lost |
|---|---|---|
| Livestock's Bane | Where the Wind Blows | Hustle and Grind |
Junon Side Quests
| Side Quest List | Stuck in a Rut | When Words Won't Do | The Hardest Sell |
|---|---|---|
| Calling All Frogs | Dreaming of Blue Skies | Beneath Still Waters |
| Tides of War and Worry | ||
Corel Side Quests
Gongaga Side Quests
| Side Quest List | The Pursuit of Perfection | O Chicken, Where Art Thou | Teach Me, Great Warrior |
|---|---|---|
| The Spice of Life | Escape from Endless Writer's Block | Woodland Vigil |
Cosmo Canyon Side Quests
| Side Quest List | Bonds of Trust | Absence of a Sign | From Whence Life Flows |
|---|---|---|
| Promises to Keep | Victim of Circumstance | |
Nibel Side Quests
| Side Quest List | Esoteric Secrets of the Elders | My White-Haired Angel | Lament of the Damned |
|---|---|---|
Comment
Author
Teach Me, Great Warrior Walkthrough and Rewards
Rankings
- We could not find the message board you were looking for.
Gaming News
Popular Games

Genshin Impact Walkthrough & Guides Wiki

Umamusume: Pretty Derby Walkthrough & Guides Wiki

Crimson Desert Walkthrough & Guides Wiki

Monster Hunter Stories 3: Twisted Reflection Walkthrough & Guides Wiki

Honkai: Star Rail Walkthrough & Guides Wiki

Pokemon Pokopia Walkthrough & Guides Wiki

The Seven Deadly Sins: Origin Walkthrough & Guides Wiki

Wuthering Waves Walkthrough & Guides Wiki

Zenless Zone Zero Walkthrough & Guides Wiki

Arknights: Endfield Walkthrough & Guides Wiki
Recommended Games

Fire Emblem Heroes (FEH) Walkthrough & Guides Wiki

Diablo 4: Vessel of Hatred Walkthrough & Guides Wiki

Cyberpunk 2077: Ultimate Edition Walkthrough & Guides Wiki

Yu-Gi-Oh! Master Duel Walkthrough & Guides Wiki

Super Smash Bros. Ultimate Walkthrough & Guides Wiki

Pokemon Brilliant Diamond and Shining Pearl (BDSP) Walkthrough & Guides Wiki

Elden Ring Shadow of the Erdtree Walkthrough & Guides Wiki

Monster Hunter World Walkthrough & Guides Wiki

The Legend of Zelda: Tears of the Kingdom Walkthrough & Guides Wiki

Persona 3 Reload Walkthrough & Guides Wiki
All rights reserved
© SQUARE ENIX CO., LTD. All Rights Reserved.
CHARACTER DESIGN: TETSUYA NOMURA/ROBERTO FERRARI
LOGO ILLUSTRATION: © 1997 YOSHITAKA AMANO
The copyrights of videos of games used in our content and other intellectual property rights belong to the provider of the game.
The contents we provide on this site were created personally by members of the Game8 editorial department.
We refuse the right to reuse or repost content taken without our permission such as data or images to other sites.


