Quetzalcoatl Hard Mode Guide | Grasslands Classified Intel Boss
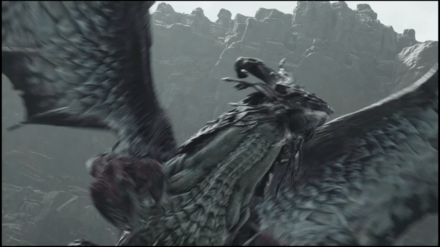
Quetzalcoatl is a secret boss in Grasslands Region of Final Fantasy 7 Rebirth (FF7 Rebirth). Learn how to beat Quetzalcoatl in Hard Mode and normal difficulties, its weaknesses and resistances, and a list of its moves and attack patterns in this guide!
List of Contents
Grasslands Classified Intel Boss Location
Location
| Full Map | 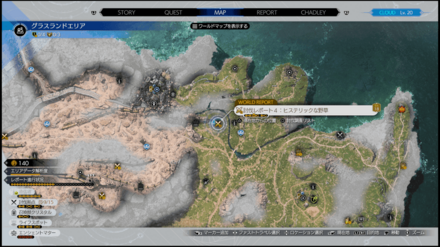 |
|---|---|
| Enlarged Map | 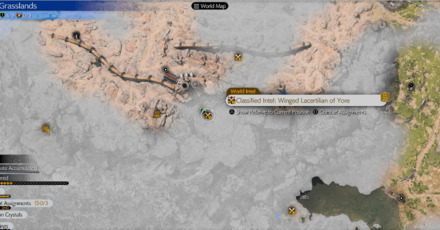 |
| In-Game Location | 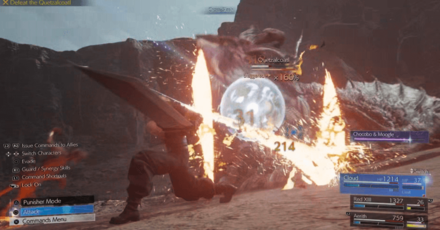 |
How to Unlock Quest
| Chapter | 2 - A New Journey Begins |
|---|---|
| How to Unlock | Complete four of the six Expedition Intels from the Grasslands Region |
| Rec. Level | Lv. 22 |
The Classified Intel Report: Winged Lacertilian of Yore can be unlocked by first going to any four of the six Expedition Intel Reports in the Grasslands Region and analyzing the Lifesprings there.
All Lifespring Locations (Expedition Intel)
Quetzalcoatl Weaknesses and Stats
Stats
 |
|||
| Easy | Normal | Hard | |
|---|---|---|---|
| HP | 14156 | 20223 | 92190 |
Weakness and Resistances
| Weaknesses | Lesser Resistances | Greater Resistances |
|---|---|---|
| None | ||
| Absorbed Elements | Immunities | |
| None | ||
Changes When Staggered
| Weakness / Effective | Resistance |
|---|---|
| None |
How to Pressure Quetzalcoatl
How to Pressure
|
|
Inflicting enough damage by exploiting its elemental weakness will pressure it. Each time it moves between the air and ground, it will unleash a powerful attack.
How to Pressure and Stagger Enemies
How to Beat Quetzalcoatl
|
|
Equip an Ice Materia on Your Main DPS
Quetzalcoatl has a weakness to Ice, and constantly applying Ice-damage will pressure it. Therefore, it's a good idea to equip an Ice Materia onto your Main DPS and have them attack with Blizzard Spells.
Ideally, you would want to use either Aerith or Yuffie, if you come back to this when she's unlocked, since they can cast spells twice with Arcane Ward and Doppelganger respectively.
Use High Stagger Moves When Pressured
After applying enough elemental damage via Ice attacks, Quetzalcoatl will be pressured, giving you an opportunity to hit it with moves like Cloud's Focused Thrust or Barret's Focused Shot to quickly build up its stagger bar.
Use Magic or Aerial Attacks When It Takes Flight
While not a problem for Aerith or Barret thanks to their ranged standard attacks, Cloud or Tifa will need to do aerial attacks to hit enemies in the air without ATB. Each character has different moves that can be used while in the air, and their method of getting up differs as well.
How to Use Aerial Attacks
| Character | How to Attack |
|---|---|
 Cloud Cloud
|
・Evade, and then hold the ▢ button to combo mid-air ・Attacks can be performed by chaining them together |
 Tifa Tifa
|
・Use Synergy Skills like Soaring Flurry or Heavenly Ascent to get into the air, then attack |
Get Away from Quetzalcoatl When It Uses Spark Snare
Quetzalcoatl will emit a large Lightning attack nearby itself after using Spark Snare. This second move's range is quite large, so when you see it preparing for the first attack, you should try and put as much distance between yourself and Quetzalcoatl as possible.
Quetzalcoatl Best Party and Builds
| This party setup is built for Hard Mode. If you don't have certain members, equipment, or Materia available, you could replace them with the closest alternative that you have available. |
Recommended Party Setup
| Recommended Party Setup | |
|---|---|
 Yuffie Yuffie
|
【Magic DPS】 ・Ninjutsu converts basic attacks to Ice. ・Double casts Ice with Doppelganger. Recommended Level: 70 |
 Tifa Tifa
|
【Physical DPS】 ・Heavily increases stagger damage. ・Also has Healing in case of emergencies. Recommended Level: 70 |
 Aerith Aerith
|
【Support】 ・Primarily used to buff the party. ・Save ATB for emergency healing. Recommended Level: 70 |
Yuffie Spams Ice Attacks
Yuffie will be your Main DPS on this team due to Ice Ninjutsu, Icy Banishment, and Blizzard Spells being able to quickly put Quetzalcoatl into pressure.
After it's been staggered, she can fire off a Blizzaga or Icy Banishment III with her Doppelganger active to double cast it and deal massive damage to Quetzalcoatl.
Tifa Increases Damage Dealt During Stagger
Once Quetzalcoatl gets staggered, Tifa can use the combination of Rise and Fall, Omnistrike, and True Strike to massively increase the amount of damage it takes while staggered.
Combine this with Yuffie's powerful Ice-type attacks and Quetzalcoatl will go down in no time.
Aerith Casts Buffs on the Party
If you're playing well and able to dodge and block Quetzalcoatl's attacks, Aerith's ATB Charges will go towards buffing Yuffie and Tifa with spells like Haste, Faith, and Brave instead of having to heal the party.
Do note though that it's still recommended to save some ATB Charges to heal the party in case someone's HP gets too low.
Quetzalcoatl Best Materia to Use
Recommended Materia for Yuffie
| Weapon: Crescent Sickle |
Armor: Valkyrian Bangle |
|---|---|
|
|
|
| Summon: |
Magic Focus linked to Ice will be your primary damage source outside of Icy Banishment III, so make sure that you have this equipped.
ATB Boost and Stagger are used to give Yuffie a boost to her ATB so that she can continue to spam commands while ATB Assist is great for charging up Tifa and Aerith's ATBs without you needing to swap to them.
For the flexibles slots, HP, MP, Magic and Luck Up are all generally good stat increases while Assess is useful to check for the boss' stats. Also, Chakra and Prayer are useful in case you need to quickly heal yourself or the party.
Finally, Gilgamesh is used to give Yuffie a balanced boost to her Attack and Magic while also giving a slight boost to her HP and MP.
Recommended Materia for Tifa
| Weapon: Kaiser Knuckles |
Armor: Enhanced Varvados Bracelet |
|---|---|
|
|
|
| Summon: |
ATB Stagger, Boost, and Skill Master are used so that Tifa can spam her abilities as much as possible as soon as Quetzalcoatl gets staggered.
Magnify linked to Healing is used in case no one else has ATB Chagres to heal the party, while Disempowerment and Enervation will debuff the boss and make the fight more manageable.
For the flexible slots, HP, Luck, and Strength Up are all generally good stat increases while Chakra will heal Tifa in a pinch without having to use MP.
Finally, Odin is used because it gives her the highest Attack boost out of all the available Summons.
Recommended Materia for Aerith
| Weapon: Ceremonial Staff |
Armor: Cetran Bracer |
|---|---|
|
|
|
| Summon: |
Barrier, Fortification, Time, and Empowerment are used so that Aerith can boost the party's defenses, ATB charge rate, and damage while HP Up and MP Up help her survive more hits and cast more spells respectively.
For the linked Materia, Magnify and Healing are used to heal the entire party in a pinch, Swiftcast and Revival to instantly revive a downed ally, and lastly Magic Efficiency and Reraise to cast Reraise on an ally at a lower MP cost.
Finally, Phoenix is used because it gives her the highest Magic boost out of all the available Summons.
Quetzalcoatl Rewards and Details
Rewards
| Quetzalcoatl Rewards | |||||||||||
|---|---|---|---|---|---|---|---|---|---|---|---|
| Easy/Normal | Hard Mode | ||||||||||
|
・150 EXP ・6 AP ・221 Gil |
・11440 EXP ・18 AP ・1633 Gil |
||||||||||
| Items Dropped | Rare Items Dropped | ||||||||||
| ・Quetzalcoatl Talon | None | ||||||||||
| Stealable Items | Morphable Items | ||||||||||
| ・Quetzalcoatl Talon | ・Quetzalcoatl Talon | ||||||||||
| Hard Mode Exclusive Drops | |||||||||||
|
・The Art of Swordplay Vol. VIII ・Sinister Quetzalcoatl Talon |
|||||||||||
Quetzalcoatl Talon is needed for the completion of a Side Quest
Completing this Classified Intel is required to finish the Where the Wind Blows Side Quest, as the Quetzalcoatl Talon dropped by beating Quetzalcoatl is a part needed for crafting the Windmill Gear.
Where the Wind Blows Side Quest and Windmill Settlement Location
Drops the Sinister Quetzalcoatl Talon on Hard
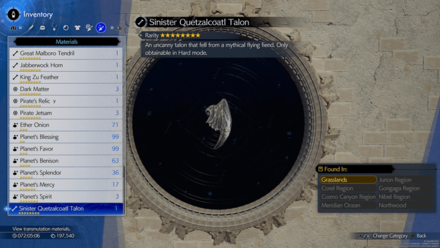
Beating Quetzalcoatl on Hard Mode will award the player with a Sinister Quetzalcoatl Talon, which is required to craft the Genji Gloves accessory.
Genji Gloves Effects and How to Get
Basic Information and Details
| Quetzalcoatl | |
|---|---|

|
|
| Location | Chapter Unlocked |
| Grasslands | Chapter 2 |
| Species | Movement |
| Biological | Grounded |
| Details | |
|
A great aerial creature that calls the grasslands home. This particular species has existed since antiquity, its genetic structure remaining largely unchanged to this day. It commands lightning, driving away any who dare enter its territory. Inflicting enough damage by exploiting its elemental weakness will pressure it. Each time it moves between the air and ground, it will unleash a powerful attack. |
|
FF7 Rebirth Related Guides

Boss Fight Guide and List of All Bosses
Story Bosses
| All Major Story Bosses | |
|---|---|
| Chapter 1 | Materia Guardian |
| Chapter 2 | Midgardsormr |
| Chapter 3 |
Rude and Elena Mythril Golem |
| Chapter 4 |
Terror of the Deep Roche |
| Chapter 5 | Jenova Emergent |
| Chapter 6 | Grasptropod |
| Chapter 7 |
Custom Valkyrie Gigatrice |
| Chapter 8 |
Dyne Anuran Suppressor |
| Chapter 9 |
Specimen H1024 Crimson Mare Mk. II |
| Chapter 10 | Gi Nattak |
| Chapter 11 |
Diabolic Variant Yin and Yang Forgotten Specimen Galian Beast Roche |
| Chapter 12 |
Abzu Rude and Elena Rufus |
| Chapter 13 |
Red Dragon Ironclad Reno and Rude Tseng and Elena Moss-Grown Adamantoise Demon Gate |
| Chapter 14 |
Jenova Lifeclinger Sephiroth Reborn |
Optional Bosses
| Grasslands | |
|---|---|
| Summon | Titan |
| Classified Intel | Quetzalcoatl |
| Side Quests |
White Terror |
| Junon | |
| Summon | Phoenix |
| Classified Intel | Mindflayer |
| Side Quests |
White Mousse Hell Rider II Sandstorm Drake |
| Corel | |
| Summon | Alexander |
| Classified Intel | Tonberry King |
| Side Quests |
Dark Claw Joker |
| Minigame | Test 0 |
| Gongaga | |
| Summon | Kujata |
| Classified Intel | Great Malboro |
| Side Quests |
Levridon Mastodon Gorgon Mane Gigantoad |
| Cosmo Canyon | |
| Summon | Bahamut Arisen |
| Classified Intel | Jabberwock |
| Side Quests | Irasceros Gigaworm |
| Nibel | |
| Summon | Odin |
| Classified Intel | King Zu |
| Side Quests |
Queen Bee Dranabarga |
| Meridian Ocean | |
| Gilgamesh's Island |
Gilgamesh Titan and Bahamut Arisen Phoenix and Kujata Alexander and Odin |
| Pirate King's Treasure |
Ogre Raider Brineborn Demon Hueyacoatl Sea Dragon |
Comment
Author
Quetzalcoatl Hard Mode Guide | Grasslands Classified Intel Boss
Rankings
- We could not find the message board you were looking for.
Gaming News
Popular Games

Genshin Impact Walkthrough & Guides Wiki

Umamusume: Pretty Derby Walkthrough & Guides Wiki

Crimson Desert Walkthrough & Guides Wiki

Monster Hunter Stories 3: Twisted Reflection Walkthrough & Guides Wiki

Honkai: Star Rail Walkthrough & Guides Wiki

Pokemon Pokopia Walkthrough & Guides Wiki

The Seven Deadly Sins: Origin Walkthrough & Guides Wiki

Wuthering Waves Walkthrough & Guides Wiki

Zenless Zone Zero Walkthrough & Guides Wiki

Arknights: Endfield Walkthrough & Guides Wiki
Recommended Games

Fire Emblem Heroes (FEH) Walkthrough & Guides Wiki

Diablo 4: Vessel of Hatred Walkthrough & Guides Wiki

Cyberpunk 2077: Ultimate Edition Walkthrough & Guides Wiki

Yu-Gi-Oh! Master Duel Walkthrough & Guides Wiki

Super Smash Bros. Ultimate Walkthrough & Guides Wiki

Pokemon Brilliant Diamond and Shining Pearl (BDSP) Walkthrough & Guides Wiki

Elden Ring Shadow of the Erdtree Walkthrough & Guides Wiki

Monster Hunter World Walkthrough & Guides Wiki

The Legend of Zelda: Tears of the Kingdom Walkthrough & Guides Wiki

Persona 3 Reload Walkthrough & Guides Wiki
All rights reserved
© SQUARE ENIX CO., LTD. All Rights Reserved.
CHARACTER DESIGN: TETSUYA NOMURA/ROBERTO FERRARI
LOGO ILLUSTRATION: © 1997 YOSHITAKA AMANO
The copyrights of videos of games used in our content and other intellectual property rights belong to the provider of the game.
The contents we provide on this site were created personally by members of the Game8 editorial department.
We refuse the right to reuse or repost content taken without our permission such as data or images to other sites.


![Death Stranding 2: On The Beach [PC] Review | A Port That Delivers](https://img.game8.co/4447392/15310a0c9aa1b6843bb713b2ea216930.jpeg/show)


