Roche (Chapter 4) Hard Mode Guide
Roche (Chapter 4) is a boss in Chapter 4: Dawn of a New Era of Final Fantasy 7 Rebirth (FF7 Rebirth). Learn how to beat Roche (Chapter 4) on Hard Mode and normal difficulties, his weaknesses and resistances, and a list of his moves and attack patterns in this guide!
List of Contents
Roche Weaknesses and Stats
Stats
 |
|||
| Easy | Normal | Hard | |
|---|---|---|---|
| HP | 5243 | 7490 | 34145 |
Weakness and Resistances
| Weaknesses | Lesser Resistances | Greater Resistances |
|---|---|---|
|
|
None | None |
| Absorbed Elements | Immunities | |
| None |
|
|
Changes When Staggered
| Weakness / Effective | Resistance |
|---|---|
|
|
None |
How to Pressure Roche
Use Fire Spells or Perfect Block His Dash Attacks
|
|
The easiest way to Pressure Roche is to cast Fire while he rides around the arena. However, be careful when casting while he's riding on the walls of the arena. If you hit him while he does this, he'll counterattack with Crash and Burn immediately.
Alternatively, you can opt to Perfect Block Roche's dash attacks to Pressure him. Equip a Precision Defense Focus Materia to help Cloud perfect block the attacks. After multiple Perfect Blocks, Roche should enter a Pressured state.
How to Pressure and Stagger Enemies
Pressure Lasts Longer if You Exploit Roche's Fire Weakness
Even though Perfect Blocks will result in Pressuring Roche, it is still better to use Fire spells when playing on Easy or Normal difficulties since the Pressured state lasts longer. This allows you to easily follow up with Stagger buildup attacks compared to Perfect Blocks.
Roche Best Party and Builds
| This section is for players who are playing on Easy and Normal difficulties. To check out the best builds and tips for Hard Mode, jump to our Hard Mode Guide section, below! |
Cloud is the Only Usable Character
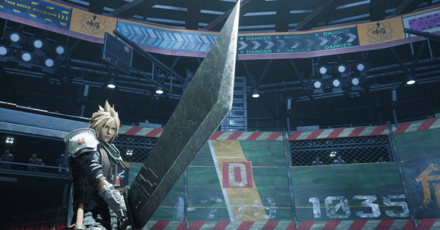
The boss fight against Roche is a one-on-one battle with Cloud. It means the only character you can use will be Cloud, so try to familiarize yourself with his movement and attack pattern to defeat Roche effectively.
Cloud Strife Best Builds and Weapons
Best Materia to Use Against Roche
| Materia | Effect / How to Use |
|---|---|
|
|
・Use to cast fire spells, which is Roche's primary weakness |
|
|
・Summon Ifrit after staggering Roche to maximize damage ・It also inflicts fire damage |
|
|
・Equipt to automatically use items without spending ATB. |
|
|
・Equip to slightly extend input timing window for Perfect Block. |
|
|
・Increase Cloud's HP, making him slightly tanky. |
How to Beat Roche
| Roche Boss Fight Tips |
|---|
|
|
Perfect Block Attacks
The main gimmick to survive against Roche is to Perfect Block most of his attacks in battle. Equip the Precision Defense Focus Materia to help you with this! As he dashes towards you, hit R1 at the right time to Perfect Block the attack.
If you time it right, he will sometimes spin out of control, leaving you with a short opening where you can do damage. Chain together Perfect Blocks and he will enter a Pressured state - perfect for a quick Focused Thrust to build Stagger.
How to Get Precision Defense Focus Materia
Use Fire to Apply Pressure
Equip the Fire Materia and use Fire to apply pressure on Roche and turn the battle in your favor. Time the cast while he's dashing or circling around the arena to pressure him with 100% success rate!
Note: Hitting Roche with Fire while he's circling the walls of the arena will have him immediately counterattack with Crash and Burn. Be ready to dodge or block when this happens since it deals a lot of damage on hit.
Summon Ifrit to Fight
You will get a chance to summon Ifrit during the second phase after staggering Roche for the first time. Ifrit will automatically attack with fire damage and cast Hellfire at the end of his summon.
You can also consume ATB to use some of his skills, but make sure to use it while Roche is staggered as they aren't guaranteed to hit, unlike Fire.
Dodge Voltage Attacks
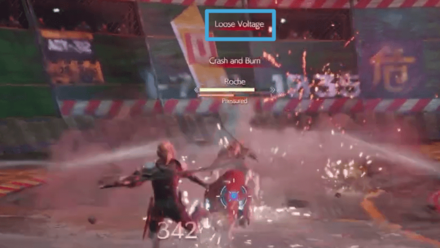
Roche's Voltage attacks are high-damaging stomps that can deplete almost half of your HP if you get hit directly. Always dodge them to preserve your HP and win the fight.
You will know if those attacks are coming once you see the Loose Voltage or High-Voltage Ride highlighted in red above his head.
Perform Ranged Sword Attacks
Cloud can do ranged attacks with his sword after dodging. Utilize this attack technique to retaliate even if Roche is already far away from you!
Roche (Chapter 4) Hard Mode Guide
| Roche (Chapter 4) Hard Mode Tips |
|---|
| ★ Best Hard Mode Build for Roche (Ch. 4) ★ |
|
|
Roche (Chapter 4) Hard Mode Build for Cloud
| The build featured in this Hard Mode section is at Weapon Level 8. If you find that you don't have enough Materia slots to complete the setup, consider getting all the possible Manuscripts on Normal, first. |
 Cloud Cloud
Damage / Stagger Buildup |
|||||
| Weapon | Armor | ||||
|---|---|---|---|---|---|
| Igneous Saber | Cetran Armlet | ||||
| Accessory | Summon Materia | ||||
| Supernatural Wristguards | Bahamut Arisen | ||||
| Weapon Materia | Armor Materia | ||||
| Weapon Skills | |||||
|
|
|
||||
|
|
|
||||
Avoid Casting Fire Spells
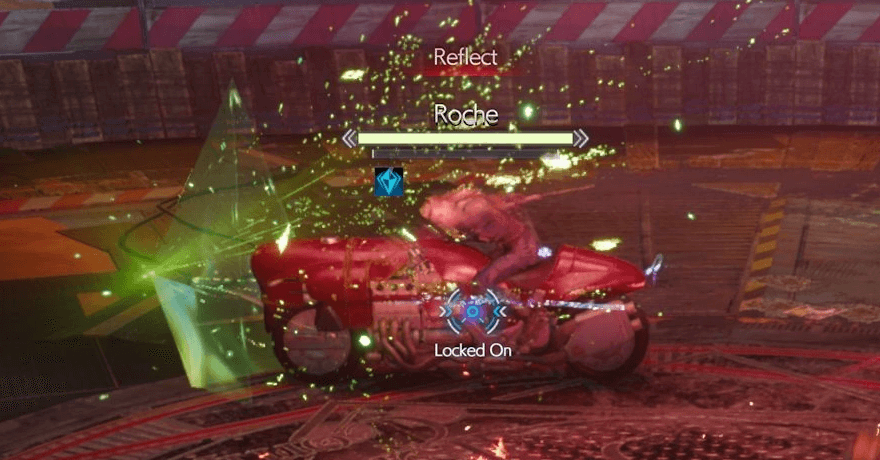
In Hard Mode, Roche casts Reflect at the start of the boss fight and re-casts it after getting Staggered. This limits the window of time you'll be able to cast Fire during the fight, making it impractical.
Instead, rely on your weapon's linked Elemental and Fire Materia to exploit Roche's weakness. While it may not proc Pressure on hit, it will buff your regular attacks and counters throughout the fight.
Use Mode Switch for Easier Blocking and Dodging
| Mode Switch Perfect Block | Hit |
|---|---|
Since Roche's attacks are much stronger in Hard Mode, it'll be better to stay mobile. For this reason, avoid staying in Punisher Mode. Instead, stay in Operator Mode and use mode switch (Triangle) to perfect block and counter his dash attacks.
After countering, immediately switch back (triangle) to Operator Mode. This should allow you dodge the triple ranged attack Roche likes to spam. Mode switch is perfect for this encounter since it blocks like a Punisher Mode parry, allowing you to counter after a block.
Use Roche's Lightning Attacks to Heal
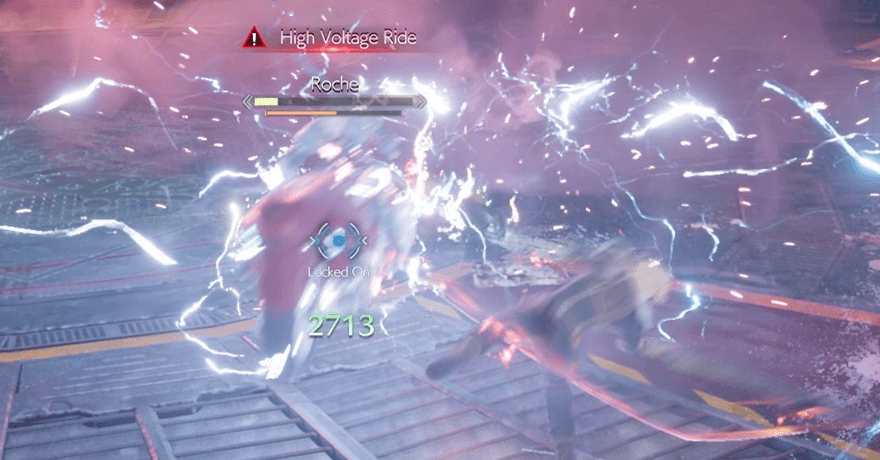
Take advantage of your armor's linked 3★ Elemental and Lightning Materia and use them to heal up by standing inside Roche's lightning attacks. Whenever he uses Loose Voltage or High Voltage Ride, simply stand in the AoE and get hit to heal from the damage.
Note: Using this setup, any unblockable attack during Phase 2 of the boss fight will heal you. Just remember that if he jumps from the wall ride with Crash and Burn, you'll have to block since this is a physical attack.
Save Up ATB for Infinity's End Casts on Stagger

With heals and Fire damage guaranteed by your linked Materia, you can save your ATB charges for when Roche gets Staggered. Once he goes down, use up your saved 2 ATB charges to hit him with Infinity's End. Repeat until he goes down in Phase 2.
Roche Rewards and Details
Rewards
| Roche Rewards | |||||||||||
|---|---|---|---|---|---|---|---|---|---|---|---|
| Easy/Normal | Hard Mode | ||||||||||
|
・1063 EXP ・50 Party EXP ・10 AP ・723 Gil |
・6500 EXP ・30 AP ・2763 Gil ・The Art of Sword Play Vol. IX・The Art of Sword Play Vol. XIII |
||||||||||
| Items Dropped | Rare Items Dropped | ||||||||||
| ・Elixir |
None
|
||||||||||
| Stealable Items | Morphable Items | ||||||||||
| ・Elixir |
None
|
||||||||||
Gives the Speed Demon Keychain if All 5 Troopers are Alive Before the Fight
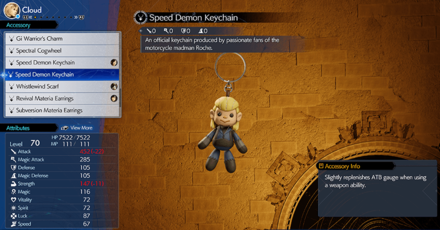
If you manage to keep all five of the 7th Infrantry Troopers alive leading up to the boss fight, Roche will reward you with an accessory called the Speed Demon Keychain after you beat him.
Basic Information and Details
| Roche | |
|---|---|
 |
|
| Location | Chapter Unlocked |
| Junon Seaport Facilities - Section H | Chapter 4 |
| Species | Movement |
| Human | Grounded |
| Details | |
|
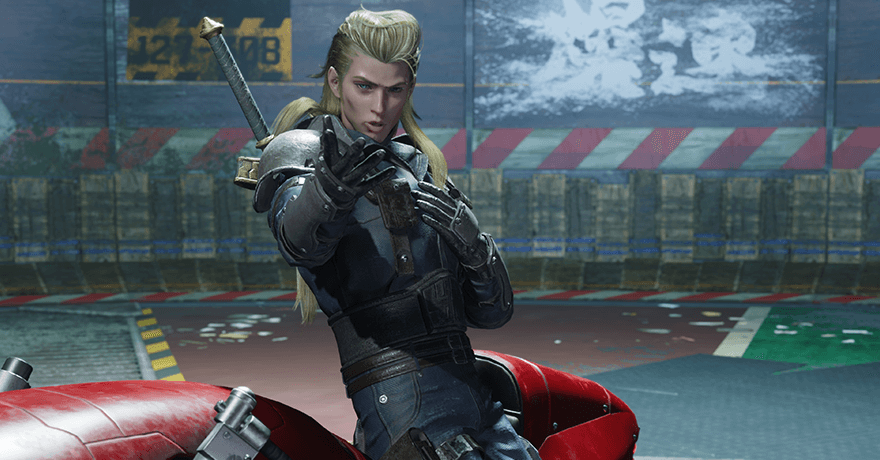
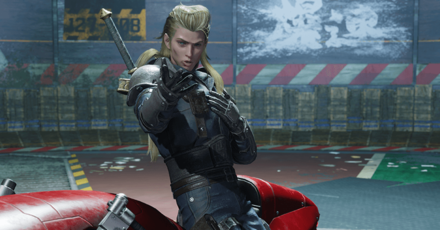
A 3-C SOLDIER maverick who left Midgar in order to reunite with his dear friend. His freewheeling, reckless, and altogether bombastic nature has earned him both envy and scorn in equal measure. Exploiting his elemental weakness can pressure him. If Rocher is pressured while riding walls, he will drop to the ground and counterattack. Inflicting enough damage while he is pressured will cause him to spin out. |
|
FF7 Rebirth Related Guides

Boss Fight Guide and List of All Bosses
Story Bosses
| All Major Story Bosses | |
|---|---|
| Chapter 1 | Materia Guardian |
| Chapter 2 | Midgardsormr |
| Chapter 3 |
Rude and Elena Mythril Golem |
| Chapter 4 |
Terror of the Deep Roche |
| Chapter 5 | Jenova Emergent |
| Chapter 6 | Grasptropod |
| Chapter 7 |
Custom Valkyrie Gigatrice |
| Chapter 8 |
Dyne Anuran Suppressor |
| Chapter 9 |
Specimen H1024 Crimson Mare Mk. II |
| Chapter 10 | Gi Nattak |
| Chapter 11 |
Diabolic Variant Yin and Yang Forgotten Specimen Galian Beast Roche |
| Chapter 12 |
Abzu Rude and Elena Rufus |
| Chapter 13 |
Red Dragon Ironclad Reno and Rude Tseng and Elena Moss-Grown Adamantoise Demon Gate |
| Chapter 14 |
Jenova Lifeclinger Sephiroth Reborn |
Optional Bosses
| Grasslands | |
|---|---|
| Summon | Titan |
| Classified Intel | Quetzalcoatl |
| Side Quests |
White Terror |
| Junon | |
| Summon | Phoenix |
| Classified Intel | Mindflayer |
| Side Quests |
White Mousse Hell Rider II Sandstorm Drake |
| Corel | |
| Summon | Alexander |
| Classified Intel | Tonberry King |
| Side Quests |
Dark Claw Joker |
| Minigame | Test 0 |
| Gongaga | |
| Summon | Kujata |
| Classified Intel | Great Malboro |
| Side Quests |
Levridon Mastodon Gorgon Mane Gigantoad |
| Cosmo Canyon | |
| Summon | Bahamut Arisen |
| Classified Intel | Jabberwock |
| Side Quests | Irasceros Gigaworm |
| Nibel | |
| Summon | Odin |
| Classified Intel | King Zu |
| Side Quests |
Queen Bee Dranabarga |
| Meridian Ocean | |
| Gilgamesh's Island |
Gilgamesh Titan and Bahamut Arisen Phoenix and Kujata Alexander and Odin |
| Pirate King's Treasure |
Ogre Raider Brineborn Demon Hueyacoatl Sea Dragon |
Comment
Author
Roche (Chapter 4) Hard Mode Guide
Rankings
- We could not find the message board you were looking for.
Gaming News
Popular Games

Genshin Impact Walkthrough & Guides Wiki

Honkai: Star Rail Walkthrough & Guides Wiki

Arknights: Endfield Walkthrough & Guides Wiki

Umamusume: Pretty Derby Walkthrough & Guides Wiki

Wuthering Waves Walkthrough & Guides Wiki

Pokemon TCG Pocket (PTCGP) Strategies & Guides Wiki

Abyss Walkthrough & Guides Wiki

Zenless Zone Zero Walkthrough & Guides Wiki

Digimon Story: Time Stranger Walkthrough & Guides Wiki

Clair Obscur: Expedition 33 Walkthrough & Guides Wiki
Recommended Games

Fire Emblem Heroes (FEH) Walkthrough & Guides Wiki

Pokemon Brilliant Diamond and Shining Pearl (BDSP) Walkthrough & Guides Wiki

Diablo 4: Vessel of Hatred Walkthrough & Guides Wiki

Super Smash Bros. Ultimate Walkthrough & Guides Wiki

Yu-Gi-Oh! Master Duel Walkthrough & Guides Wiki

Elden Ring Shadow of the Erdtree Walkthrough & Guides Wiki

Monster Hunter World Walkthrough & Guides Wiki

The Legend of Zelda: Tears of the Kingdom Walkthrough & Guides Wiki

Persona 3 Reload Walkthrough & Guides Wiki

Cyberpunk 2077: Ultimate Edition Walkthrough & Guides Wiki
All rights reserved
© SQUARE ENIX CO., LTD. All Rights Reserved.
CHARACTER DESIGN: TETSUYA NOMURA/ROBERTO FERRARI
LOGO ILLUSTRATION: © 1997 YOSHITAKA AMANO
The copyrights of videos of games used in our content and other intellectual property rights belong to the provider of the game.
The contents we provide on this site were created personally by members of the Game8 editorial department.
We refuse the right to reuse or repost content taken without our permission such as data or images to other sites.


