Forgotten Specimen Hard Mode Guide
Forgotten Specimen is a boss in Chapter 11: The Long Shadow of Shinra of Final Fantasy 7 Rebirth (FF7 Rebirth). Learn how to beat Forgotten Specimen on Hard Mode and normal difficulties, its weaknesses and resistances, and a list of its moves and attack patterns in this guide!
List of Contents
Forgotten Specimen Weaknesses and Stats
Stats
 |
|||
| Easy | Normal | Hard | |
|---|---|---|---|
| HP | 48075 | 68679 | 133164 |
Weakness and Resistances
| Weaknesses | Lesser Resistances | Greater Resistances |
|---|---|---|
| - | - | |
| Absorbed Elements | Immunities | |
| - | ||
Changes When Staggered
| Weakness / Effective | Immunity |
|---|---|
| - |
How to Pressure Forgotten Specimen
How to Pressure
|
|
You can pressure Forgotten Specimen after forcing it to switch resistances multiple times. You can do that by attacking it opposite of its resistance — using Physical attacks when it has Magic resistance and vice versa.
Crippling its Tentacles or Arm will also pressure it. Use Physical damage on the Tentacles and Magic on the Arm to destroy them.
How to Pressure and Stagger Enemies
Forgotten Specimen Best Party and Builds
| This section is for players who are playing on Easy and Normal difficulties. To check out the best builds and tips for Hard Mode, jump to our Hard Mode Guide section, below! |
Recommended Party Setup
| Recommended Party Setup | |
|---|---|
 Barret Barret
|
【Tank / Physical Damage】 ・Deal strong physical damage with Maximum Fury and Overcharge ・Build stagger with Focused Shot and Bonus Round ・Use healing items when unable to damage the boss ・Use Lifesaver to tank damage Recommended Level: 40 |
 Aerith Aerith
|
【Support / Magic Damage】 ・Main spellcaster and Magic damage dealer ・Focus on healing or buffs when unable to damage boss Recommended Level: 40 |
 Cait Sith Cait Sith
|
【All Rounder】 ・Can switch between magic and physical attacker ・Summon Moogle to fight and distract the boss Recommended Level: 40 |
Best Materia to Use
Recommended Materia
| Materia | How to Use |
|---|---|
| Fire, Ice, Poison, Lightning, or Wind Materia | ・Equip any Elemental Materia to use magic spells against the boss during Magic Resistance Transformation
・Link with Level Boost to increase level and cast a more powerful spell. ・Best equipped on Aerith, but it's also good on other party members |
|
|
・Heal a single ally in battle when their HP drops to a critical level
・Best equipped on Barret or Cait Sith |
|
|
・Equip to increase HP. ・Best equipped on Barret or Cait Sith |
|
|
・Equip to increase Luck.
・Can be equipped on all characters |
|
|
・Equip to increase MP. It can help to cast Magic or Healing spells.
・Best equipped on Aerith, but it's also good on other party members |
|
|
・Increase the efficiency of items, like Potions.
・Best equipped on Barret or Cait Sith |
How to Beat Forgotten Specimen (Normal)
| Forgotten Specimen Boss Fight Tips |
|---|
|
|
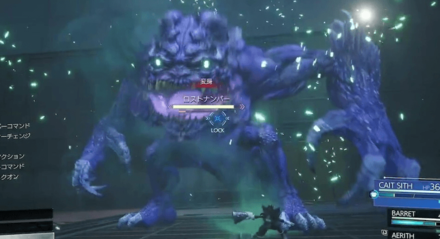
Attack with the Opposite of the Boss's Resistance
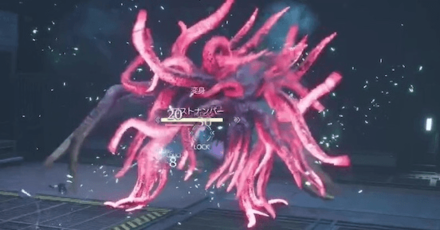
| Physical Resistance Form | Magic Resistance Form |
|---|---|
 |
 |
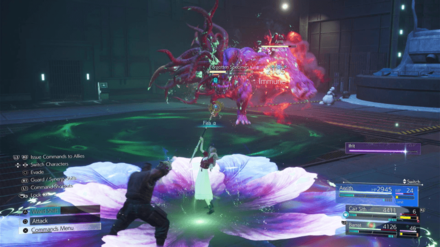
Forgotten Specimen can transform and obtain resistance to Physical or Magical attacks depending on what you hit it with. Attacking it opposite to its resistance and forcing it to transform multiple times can pressure it, bringing it closer to being staggered.
When it grows into a purple monster, it will have resistance against Physical attacks, and you must use Magic to deal more damage. When it transforms into a pink monster with tentacle-like limbs, it will gain Magic resistance, and you must use Physical attack to deal more damage.
Check Immunity Before Attacking in 2nd Phase
| Immunity to Physical attacks. Use Magic to deal damage and dispel it when you see this icon. | |
| Immunity to Magic attacks. Use Physical attacks to deal damage and dispel it when you see this icon. |
Forgotten Specimen won't transform in the second phase. Instead, it will apply Physical or Magic immunity statuses that you will see under its HP bar in battle. You can dispel the immunity by attacking the opposite of that immunity — use Physical attack on Magic immunity and vice versa.
Check the current immunity before attacking to get the most out of your ATB charges and remove the boss's current immunity!
Use Barret Against Magic Resistance or Immunity

Once Forgotten Specimen transforms into its Magic Resistance form or Magic immunity, switch to Barret to inflict damage on the boss. You can use his Focused Shot or Maximum Fury if you have ATB charges to spare to deal more damage against the boss!
You can also use Cait Sith's Moogle Knuckle ability (from the Golden Megaphone you got earlier in Chapter 11) to deal bursts of Physical damage if your Barret build is lacking in Physical DPS.
Use Aerith Against Physical Resistance or Immunity
Use Aerith once Forgotten Specimen switches to Physical Resistance form or immunity to attack using Magic spells. You can place her Arcane Ward first to double-cast any spells you use.
If you're having trouble managing ATB to cast enough Soul Drains for MP recovery, you can bring along some Ether while slotting an Item Economizer Materia to recover MP without having to use up ATB charges.
Target the Tentacles or the Arm to Pressure
| Body Part | Weakness |
|---|---|
| Tentacles |
|
| Arm |
|
Forgotten Specimen's Tentacles and Arm will become targetable in the second phase. Destroying them will put pressure on Forgotten Specimen and bring it closer to being staggered.
Using two full charges of Barret's Maximum Fury on the Tentacles will destroy them. On the other hand, casting three 2nd level spells on Aerith's Arcane Ward will be enough to cripple the Arm!
Forgotten Specimen Hard Mode Guide
| Forgotten Specimen Hard Mode Tips |
|---|
| ★ Best Hard Mode Builds for Forgotten Specimen ★ |
|
|
Forgotten Specimen Hard Mode Build
| The builds featured in this Hard Mode section are at Weapon Levels 7~8. If you find that you don't have enough Materia slots to complete the setup, consider getting all the possible Manuscripts on Normal, first. |
| Barret DPS / Tank / Healer | |||||
| Weapon | Armor | ||||
|---|---|---|---|---|---|
| Battle Cry | Cetran Bracer | ||||
| Accessory | Summon Materia | ||||
| Whistlewind Scarf | Gilgamesh | ||||
| Weapon Materia | Armor Materia | ||||
| Weapon Skills | |||||
| Cait Sith Support / Secondary Spellcaster | |||||
| Weapon | Armor | ||||
|---|---|---|---|---|---|
| Gjallarhorn | Hades Armlet | ||||
| Accessory | Summon Materia | ||||
| Gi Warrior's Charm | Kujata | ||||
| Weapon Materia | Armor Materia | ||||
| Weapon Skills | |||||
| Aerith Main Spellcaster / Magic DPS | |||||
| Weapon | Armor | ||||
|---|---|---|---|---|---|
| Plumose Rod | Hades Armlet | ||||
| Accessory | Summon Materia | ||||
| Chocoking's Cape | Phoenix | ||||
| Weapon Materia | Armor Materia | ||||
| Weapon Skills | |||||
Use Lifesaver and Steelskin at the Start
Immediately use Lifesaver and Steelskin at the start of battle as Barret to tank the damage of the entire party, keeping Aerith and Cait Sith's HP full.
Use Chakra to recover Barret's health; not only does this save MP, but it's also effective as Barret's Skill Master and ATB Assist fill the ATB gauges of the party.
Note: Lifesaver is a weapon skill from the Barrage Blaster.
Alternate Between Barret and Aerith
Alternate between Barret and Aerith to deal with each resistance form of the Forgotten Specimen.
Use Barret's Maximum Fury and Bonus Round to deal with the Magic Resistant form. Doublecast elemental spells with Aerith in her Arcane Ward to significantly deal damage when the Physical Resistant form is active.
Note: Bonus Round is a weapon skill from the Hi-Caliber Rifle, while Aerith's Arcane Ward is a weapon skill from the Guard Stick.
Stagger with Barret Once Pressured
After pressuring the boss, use Barret's Focused Shot to significantly increase stagger on the Forgotten Specimen.
Note: Focused Shot is a weapon skill from the Gatling Gun. You need to be proficient with the weapon skill to be able to use it with other weapons.
Use Moogle Knuckle to Increase Multiplier
Once staggered, use Cait Sith's Moogle Knuckle to increase the stagger damage multiplier.
This will act as a set up for you to deal damage with Aerith's spells cast from an Arcane Ward.
Note: Moogle Knuckle is the default weapon ability of the Golden Megaphone.
Save Summons for Second Phase
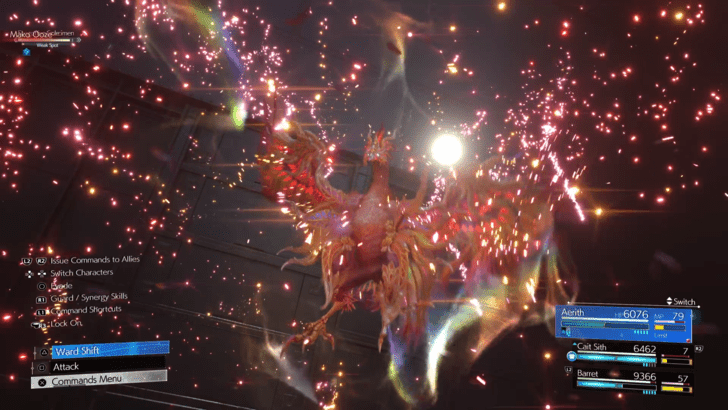
Save Summons for the second phase of the boss fight, as the Forgotten Specimen will apply Shield and Reflect on itself.
Gilgamesh's role is to dispel Reflect from the Forgotten Specimen, opening it up for another barrage of magic damage from Aerith; while Phoenix's role is to support the party with Reraise and healing.
Do Not Use Spells if Reflect is Active
All your spells will bounce back and deal damage to you instead if you use spells while Reflect is still active on the Forgotten Specimen.
Doing this may kill Barret if you used max-level spells in Aerith's Arcane Ward, putting your party at a disadvantage.
Use Cait Sith's Die, Slots, and Moogle Magic
Cait Sith's role throughout the fight is to support the entire party with various effects from Roll o' the Dice, buffs from Lucky Slots, and using Phoenix's abilities with Moogle Magic.
Note: Moogle Magic is a weapon skill from the Crystal Megaphone. You need to be proficient with the weapon skill to be able to use it with other weapons.
Forgotten Specimen Rewards and Details
Rewards
| Forgotten Specimen Rewards | |||||||||||
|---|---|---|---|---|---|---|---|---|---|---|---|
| Easy/Normal | Hard Mode | ||||||||||
|
・2775 EXP ・50 Party EXP ・10 AP ・1850 Gil |
・6500 EXP ・30 AP ・3250 Gil ・Fortunes Untold Vol. XII |
||||||||||
| Items Dropped | Rare Items Dropped | ||||||||||
|
None
|
None
|
||||||||||
| Stealable Items | Morphable Items | ||||||||||
|
None
|
None
|
||||||||||
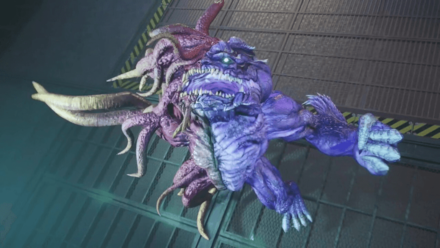
Basic Information and Details
| Forgotten Specimen | |
|---|---|
|
|
|
| Location | Chapter Unlocked |
| Mako Research Facility, Shinra Manor | Chapter 11 |
| Species | Movement |
| Artificial | Grounded |
| Details | |
|
The result of a failed experiment aimed at creating a life-form capable of shape-shifting. It alters its body composition based on enemy attacks, but doing so causes the creater to gradually break down from the inside. Inflicting enough physical damage will make it resistant to physical attacks, while magic damage will make it resistant to magic attacks. Forcing it to switch resistances multiple times will pressure it. Physical damage will dispel Reflect, while magic damage will dispel Shield. |
|
FF7 Rebirth Related Guides

Boss Fight Guide and List of All Bosses
Story Bosses
| All Major Story Bosses | |
|---|---|
| Chapter 1 | Materia Guardian |
| Chapter 2 | Midgardsormr |
| Chapter 3 |
Rude and Elena Mythril Golem |
| Chapter 4 |
Terror of the Deep Roche |
| Chapter 5 | Jenova Emergent |
| Chapter 6 | Grasptropod |
| Chapter 7 |
Custom Valkyrie Gigatrice |
| Chapter 8 |
Dyne Anuran Suppressor |
| Chapter 9 |
Specimen H1024 Crimson Mare Mk. II |
| Chapter 10 | Gi Nattak |
| Chapter 11 |
Diabolic Variant Yin and Yang Forgotten Specimen Galian Beast Roche |
| Chapter 12 |
Abzu Rude and Elena Rufus |
| Chapter 13 |
Red Dragon Ironclad Reno and Rude Tseng and Elena Moss-Grown Adamantoise Demon Gate |
| Chapter 14 |
Jenova Lifeclinger Sephiroth Reborn |
Optional Bosses
| Grasslands | |
|---|---|
| Summon | Titan |
| Classified Intel | Quetzalcoatl |
| Side Quests |
White Terror |
| Junon | |
| Summon | Phoenix |
| Classified Intel | Mindflayer |
| Side Quests |
White Mousse Hell Rider II Sandstorm Drake |
| Corel | |
| Summon | Alexander |
| Classified Intel | Tonberry King |
| Side Quests |
Dark Claw Joker |
| Minigame | Test 0 |
| Gongaga | |
| Summon | Kujata |
| Classified Intel | Great Malboro |
| Side Quests |
Levridon Mastodon Gorgon Mane Gigantoad |
| Cosmo Canyon | |
| Summon | Bahamut Arisen |
| Classified Intel | Jabberwock |
| Side Quests | Irasceros Gigaworm |
| Nibel | |
| Summon | Odin |
| Classified Intel | King Zu |
| Side Quests |
Queen Bee Dranabarga |
| Meridian Ocean | |
| Gilgamesh's Island |
Gilgamesh Titan and Bahamut Arisen Phoenix and Kujata Alexander and Odin |
| Pirate King's Treasure |
Ogre Raider Brineborn Demon Hueyacoatl Sea Dragon |
Comment
Author

Forgotten Specimen Hard Mode Guide
Rankings
- We could not find the message board you were looking for.
Gaming News
![Animal Crossing: New Horizons Review [Switch 2] | Needlessly Crossing Over to a New Generation](https://img.game8.co/4391759/47d0408b0b8a892e453a0b90f54beb8a.png/show)

Popular Games

Genshin Impact Walkthrough & Guides Wiki
Honkai: Star Rail Walkthrough & Guides Wiki
Arknights: Endfield Walkthrough & Guides Wiki
Umamusume: Pretty Derby Walkthrough & Guides Wiki
Wuthering Waves Walkthrough & Guides Wiki
Pokemon TCG Pocket (PTCGP) Strategies & Guides Wiki
Abyss Walkthrough & Guides Wiki
Zenless Zone Zero Walkthrough & Guides Wiki
Digimon Story: Time Stranger Walkthrough & Guides Wiki
Clair Obscur: Expedition 33 Walkthrough & Guides Wiki


Recommended Games
Fire Emblem Heroes (FEH) Walkthrough & Guides Wiki
Pokemon Brilliant Diamond and Shining Pearl (BDSP) Walkthrough & Guides Wiki
Diablo 4: Vessel of Hatred Walkthrough & Guides Wiki
Super Smash Bros. Ultimate Walkthrough & Guides Wiki
Yu-Gi-Oh! Master Duel Walkthrough & Guides Wiki
Elden Ring Shadow of the Erdtree Walkthrough & Guides Wiki
Monster Hunter World Walkthrough & Guides Wiki
The Legend of Zelda: Tears of the Kingdom Walkthrough & Guides Wiki
Persona 3 Reload Walkthrough & Guides Wiki
Cyberpunk 2077: Ultimate Edition Walkthrough & Guides Wiki


All rights reserved
© SQUARE ENIX CO., LTD. All Rights Reserved.
CHARACTER DESIGN: TETSUYA NOMURA/ROBERTO FERRARI
LOGO ILLUSTRATION: © 1997 YOSHITAKA AMANO
The copyrights of videos of games used in our content and other intellectual property rights belong to the provider of the game.
The contents we provide on this site were created personally by members of the Game8 editorial department.
We refuse the right to reuse or repost content taken without our permission such as data or images to other sites.