Best Characters Tier List
This is a tier list for the best characters in Final Fantasy 7 Rebirth (FF7 Rebirth). Read for a full list of characters ranked, their proficiencies, and a detailed explanation of each character's tier ranking!
| Party and Build Guides | |
|---|---|
| Best Character Builds | Best Party Compositions |
| Character Tier List | Best Abilities |
List of Contents
Best Characters Tier List
| Evaluation Criteria |
|---|
|
・Overall: Takes into account a character's overall performance during any type of combat situation. ・Physical: Takes into consideration the characters' physical damage output. ・Magic: Considers the damage or proficiency of spells and abilities. ・Support: Considers the character's support capabilities like healing, staggering, and pressuring in combat. |
Character Tier List
| Best Character Tier List | |||||||||||||
|---|---|---|---|---|---|---|---|---|---|---|---|---|---|
 Yuffie Yuffie
|
 Tifa Tifa
|
||||||||||||
 Cloud Cloud
|
 Aerith Aerith
|
 Barret Barret
|
|||||||||||
 Cait Sith Cait Sith
|
 Red XIII Red XIII
|
||||||||||||
Yuffie and Tifa are the best characters to use in FF7 Rebirth. These two can be a hypercarry for their respective parties with the other two allies acting as supports and dealing additional damage.
Character Tier List and Explanation
S-Tier: Yuffie
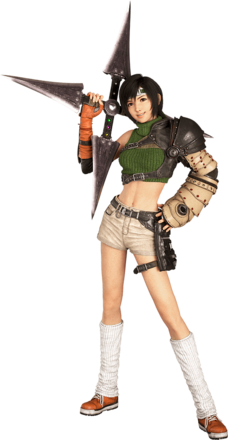 Yuffie Yuffie
|
Overall Tier Ranking | ||||
|---|---|---|---|---|---|
 |
|||||
| Physical | Magic | Support | |||
Easy Element Access for Pressuring and Staggering Enemies
Yuffie's Ninjutsu ability allows her to gain access to elemental magic attacks without using MP. Know the enemy's elemental weakness with Assess and exploit it with Yuffie's magic attacks to put them in a Pressured state and quickly fill the Stagger gauge.
You can also equip Elemental materia and link it with an elemental Magic materia that matches the target's weakness to deal additional damage with the shuriken while using Ninjutsu.
Proficient in Any Combat Style
Yuffie is an extremely versatile character that can attack enemies from range, melee, and airborne with seamless effort.
Using Yuffie's shurken with Throw will change her basic attacks to Ninjutsu—dealing non-elemental magic damage that can be imbued with any element using the Elemental Ninjutsu ability. She can then close the gap with the targeted enemy by retrieving the shuriken and switch back to physical basic attacks.
Can Easily Dodge Out of Attacks
Yuffie also has an evasive ability, Brumal Form, that lets her reliably dodge attacks and blink to a short distance. To top it off, successfully evading attacks with this ability replenishes her ATB.
She also has Blindside that allows her to break free from immobilization. Such situations include being in "Bound" state, attack ministuns (flinching from attacks), and being knocked down. However, take note that this escape ability doesn't work in some cases.
Doppelganger Copies Actions
In Chapter 9, Yuffie can obtain the Bird of Prey weapon to learn Doppelganger. This ability creates a clone that copies every action Yuffie makes, including basic attacks, Abilities, and Spells.
Although the clone only does about 20% of Yuffie's damage, it still increases her DPS especially when using Banishment III or Storm's Fury.
Burst Enemies with Banishment
Once Yuffie gains access to Banishment through Crystalline Cross, she can make use of her ability spam by charging the ability to Banishment III for a powerful burst damage. You can change this ability's element through Elemental Ninjutsu.
She will get Purification later on that shares the same gauge as Banishment. This ability deals way less damage but restores Yuffie's HP and MP.
S-Tier: Tifa
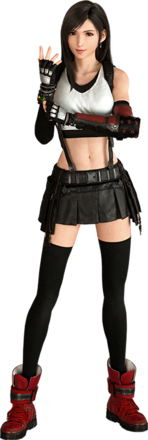 Tifa Tifa
|
Overall Tier Ranking | ||||
|---|---|---|---|---|---|
|
|||||
| Physical | Magic | Support | |||
High Single-Target DPS and Agile Fighting Style
Through Tifa's speed and ease of use, Tifa's moveset is greatly utilized against single targets. With abilities like Unbridled Strength that increase Tifa's damage and dodge frame, she can easily move around and unleash a barrage of her combos that hit fast.
Increases Stagger Damage Multiplier
Tifa's Overpower that can pressure enemies combined with Focused Strike and her attack speed that can build up the stagger gauge quickly synergizes well with the effects of Tifa's unique abilities.
Her Unbridled Strength unique abilities—Whirling Uppercut, Omnistrike, and Rise and Fall—effectively increase the damage multiplier on staggered enemies, which is beneficial to Tifa and other party members that deal high damage.
Unfettered Fury Adds Magic and Stagger Damage
In the endgame, Tifa can change her Unbridled Strength to Unfettered Fury. This ability imbues her basic attacks with magic damage and increase their stagger damage.
Her unique abilities will also change, dealing increased stagger damage but with less damage multiplier increase against staggered enemies and slower attack animations.
To make it simple, Unfettered Fury is mainly for staggering enemies fast, while Unbridled Strength is mainly for increasing damage multiplier once the target is staggered.
A-Tier: Cloud
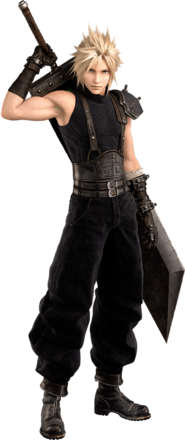 Cloud Cloud
|
Overall Tier Ranking | ||||
|---|---|---|---|---|---|
 |
|||||
| Physical | Magic | Support | |||
Fast ATB Gauge Fill Allows Constant Ability Use
While in Operator Mode, Cloud can charge his ATB gauge fast which allows him to use abilities as fast as possible. His abilities are also useful as they can be used in different situations while also dealing a lot of damage.
Examples for early game abilities include Focused Strike that deals significant stagger damage and Triple Slash that clears mobs efficiently through its multi-strike.
All-Rounder with High Damage
With access to Operator Mode and Punisher Mode, Cloud can swap between these modes that focus on a balanced playstyle and a more offensive playstyle, respectively.
Cloud can deal both high physical damage from Triple Slash and Prime Mode, and magic damage from Firebolt Blade ability and Blade Burst.
Effective Even Against Flying Enemies
Despite being a melee-focused character, Cloud can stand on his own against grounded and flying enemies alike. He has the capability to dash to an enemy from any direction through the use of Firebolt Blade or by simply holding the attack button after a dodge.
Counter Attacks with Punisher Mode and Counterstance
Cloud can also counter physical melee attacks by switching to or blocking during Punisher Mode with correct timing. Like perfect blocks, this completely negates damage and can be followed by a powerful counterattack.
The Punisher Mode counter doesn't work on ranged and magic attacks.
In the endgame, he will learn Counterstance from Slipstream Saber that can be easily chained with combos, can be used in midair, and can counter even ranged and magic attacks.
Unlike the Punisher Mode counter, Counterstance only reduces damage taken with perfect timing.
Use Prime Mode to Go Full Offensive
Cloud's Prime Mode upgrades his Punisher Mode and applies the Berserk status, increasing its potency as well.
Holding the attack button while in Prime Mode has Cloud deal heavy damage within three strikes that is best used to execute staggered enemies or to simply take out a chunk off slow enemies.
A-Tier: Aerith
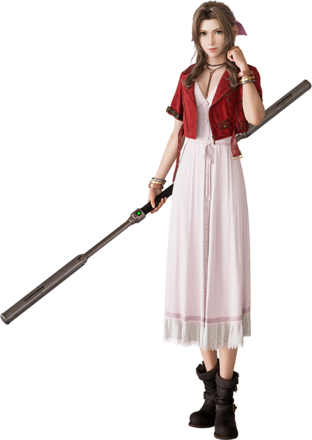 Aerith Aerith
|
Overall Tier Ranking | ||||
|---|---|---|---|---|---|
|
|||||
| Physical | Magic | Support | |||
High Magic Damage and Proficiency
Aerith is the best spell caster as she can deal high magic damage thanks to her Fleeting Familiar which boosts the damage of spells.
Use Ward Shift to Avoid Damage
With Aerith's low mobility and defense, Ward Shift allows Aerith to teleport a short distance and is a crucial ability as it is the best way to avoid damage when controlling Aerith.
Can Be Used as No-Control Support
Players can use Aerith without the need to control her by simply slotting the right materia. We recommend slotting a Pray Materia or Healing Materia linked with an Auto-Cast Materia for her to heal your party.
If you want wide-range healing you can link the Magnify Materia to the Healing Materia, but this will require you to manually use Cure spells with Aerith.
Enhance Basic Attacks with Radiant Ward
Placing a Radiant Ward and standing on it causes Aerith's basic attacks to fire light beams instead that are more powerful and can fill up the stagger and ATB gauges faster than her regular ones.
Casting spells while inside the ward also makes Aerith invulnerable. This doesn't give her "super armor", however, so she can still be interrupted or pushed out of the ward.
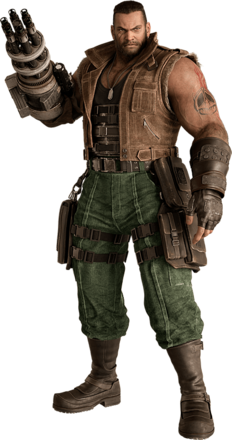
A-Tier: Barret
 Barret Barret
|
Overall Tier Ranking | ||||
|---|---|---|---|---|---|
|
|||||
| Physical | Magic | Support | |||
Tankiest Character
Barret's abilities allow him to tank damage for the team. With abilities like Steelskin which allows damage reduction for physical and magical, and Lifesaver which takes the damage intended for allies, Barret makes a perfect support for any combat situation.
Staggers Enemies Fast
Barret can build up Stagger gauges fast through his normal attacks and even faster once his unique ability, Overcharge, is ready. With his quick-staggering capacity, Barret is the best support for a party that focuses on offense.
Equipping Auto Unique Ability Materia on Barret allows him to build up stagger fast with Overcharge as a non-active member.
Can Finish Setting Up Early with Turbulent Spirit
In endgame, Barret can use Turbulent Spirit from Battle Cry for a ridiculous increase of ATB charge rate.
This can only be used once per battle, but the increase allows him to use other abilities like Steelskin, Lifesaver, and Bonus Round very early to buff him up before using other attack abilities.
B-Tier: Cait Sith
 Cait Sith Cait Sith
|
Overall Tier Ranking | ||||
|---|---|---|---|---|---|
 |
|||||
| Physical | Magic | Support | |||
Difficult All-Rounder
Cait Sith is a difficult but fun all-rounder to play due to the conditions and randomness of his abilities. Roll' o the Dice and Fortune Telling provide effects and damage at random, while the rest of his Moogle Abilities focus on damage, magic damage, and staggering enemies.
Most Abilities Require the Moogle Mount
Moogle Kaboom, Moogle Mine, Moogle Magic, and Moogle Knuckle are abilities that require Cait Sith to summon his mount first which would already cost 1 ATB.
This mechanic makes him difficult to play at first, but with the right build focusing on ATB charges and life sustain, Cait Sith is a rewarding character to play.
Great Support Abilities, But Mostly Random
Letting Cait Sith's moogle fight charges its unique ability. Reaching lv2 charge changes its Divekick technique to one that casts a random buff to the party, while reaching lv3 charge changes it to an ability that casts a random debuff to enemies.
His only ability that instantly grants a specific buff is Lady Luck, which gives critical hit rate boost to all allies. Perfect for DPS characters!
Playing Lucky Slots is Risky but Very Rewarding
His hidden ability from the Folio Skill Tree, Lucky Slots, lets Cait play slots in the middle of the battle for 2 ATB charges. You can press the corresponding button to stop the reels one by one until you get all three.
Getting three matching reels provide various effects depending on the combination, but it is guaranteed to be extremely useful. You can get effects such as Resist and Reraise on all party members or a limit level increase.
However, Cait will be vulnerable while playing the slots as the battle will continue as normal. Make sure Cait is on high HP or enemies are staggered before using this ability!
B-Tier: Red XIII
 Red XIII Red XIII
|
Overall Tier Ranking | ||||
|---|---|---|---|---|---|
|
|||||
| Physical | Magic | Support | |||
High Mobility to Deal with Ranged Enemies
Red XIII is the fastest playable character in FF7 Rebirth, through his speed and skills like Wildcharge, he can outmaneuver and close gaps against ranged or far targets.
Red's weaknesses are flying enemies as his attacks lack range and most of his abilities do not home into enemies.
Vengeance Mode is Difficult to Activate
Vengeance Mode is Red XIII's unique ability that increases the potency of his attacks and movement, and allows him to use Siphon Fang—a unique ability that recovers HP based on the damage it deals.
To activate Vengeance Mode, Red will first need to fill its gauge by getting hit, blocking attacks, or attacking after receiving damage. This unique ability makes Red XIII a difficult but powerful character to play in terms of risk and reward as filling the gauge requires drawing aggro.
Grant Party Wide Haste with Supernal Fervor
Supernal Fervor is a very useful support abillity from Red XIII that gives the Haste buff on the entire party for 2 ATB charges.
The ability requires Vengeance Mode to be active first, but is still usable even if the gauge is not full. So you can simply fill the Vengeance gauge a little, activate Vengeance Mode, then use Supernal Fervor.
Other Support Abilities Consume Vengeance Charge
The rest of his support abilities depletes the Vengeance gauge. Vengeance Mode is what makes Red a very good physical attacker, so you'll want its gauge to be filled as often as possible.
With that said, Watcher's Respite and Watcher's Spirit are not recommended and should only be used as a last resort.
Reaper Touch Works Well with Darkside
Taking damage trying to fill the Vengeance gauge can still be beneficial to Red XIII as this boosts the damage of Reaper Touch, the ability learned from Brisingamen that increases damage dealt based on lost HP.
Darkside is a late game materia that works very well with this ability. Using Darkside in battle increases the potency of abilities, but consumes a portion of the user's HP on each use. These effects are perfect for amping Reaper Touch, but keep an eye on Red's HP.
Avoid keeping Red's health dangerously low just for the sake of increasing Reaper Touch's damage and immediately heal with Siphon Fang or the Bloody Fang limit break.
FF7 Rebirth Related Guides
Other Character Guides
| Character Guides | |
|---|---|
| Characters Tier List | Best Builds |
| Best Party Compositions | Best Abilities |
Comment
Author

Best Characters Tier List
Rankings
- We could not find the message board you were looking for.
Gaming News

![Star Savior Review [First Impressions] | Engaging, Entertaining, and Expensive](https://img.game8.co/4447603/8f500e9bf666bdb8adb1af478e9dfdbd.png/show)


Popular Games

Genshin Impact Walkthrough & Guides Wiki
Umamusume: Pretty Derby Walkthrough & Guides Wiki
Crimson Desert Walkthrough & Guides Wiki
Monster Hunter Stories 3: Twisted Reflection Walkthrough & Guides Wiki
Honkai: Star Rail Walkthrough & Guides Wiki
Pokemon Pokopia Walkthrough & Guides Wiki
The Seven Deadly Sins: Origin Walkthrough & Guides Wiki
Wuthering Waves Walkthrough & Guides Wiki
Zenless Zone Zero Walkthrough & Guides Wiki
Arknights: Endfield Walkthrough & Guides Wiki


Recommended Games
Fire Emblem Heroes (FEH) Walkthrough & Guides Wiki
Diablo 4: Vessel of Hatred Walkthrough & Guides Wiki
Cyberpunk 2077: Ultimate Edition Walkthrough & Guides Wiki
Yu-Gi-Oh! Master Duel Walkthrough & Guides Wiki
Super Smash Bros. Ultimate Walkthrough & Guides Wiki
Pokemon Brilliant Diamond and Shining Pearl (BDSP) Walkthrough & Guides Wiki
Elden Ring Shadow of the Erdtree Walkthrough & Guides Wiki
Monster Hunter World Walkthrough & Guides Wiki
The Legend of Zelda: Tears of the Kingdom Walkthrough & Guides Wiki
Persona 3 Reload Walkthrough & Guides Wiki


All rights reserved
© SQUARE ENIX CO., LTD. All Rights Reserved.
CHARACTER DESIGN: TETSUYA NOMURA/ROBERTO FERRARI
LOGO ILLUSTRATION: © 1997 YOSHITAKA AMANO
The copyrights of videos of games used in our content and other intellectual property rights belong to the provider of the game.
The contents we provide on this site were created personally by members of the Game8 editorial department.
We refuse the right to reuse or repost content taken without our permission such as data or images to other sites.