Terror of the Deep Hard Mode Guide
Terror of the Deep is a boss in Chapter 4: Dawn of a New Era of Final Fantasy 7 Rebirth (FF7 Rebirth). Learn how to beat Terror of the Deep on Hard Mode and normal difficulties, its weaknesses and resistances, and a list of its moves and attack patterns in this guide!
List of Contents
Terror of the Deep Weaknesses and Stats
Stats
 |
|||
| Easy | Normal | Hard | |
|---|---|---|---|
| HP | 13838 | 19768 | 95605 |
Weakness and Resistances
| Weaknesses | Lesser Resistances | Greater Resistances |
|---|---|---|
|
|
|
|
| Absorbed Elements | Immunities | |
| None |
|
|
Changes When Staggered
| Weakness / Effective | Resistance |
|---|---|
|
|
|
How to Pressure Terror of the Deep
Cripple its Tail in Phase 1 or Deal Damage to its Head in Phase 2
|
|
During Phase 1, Terror of the Deep can be pressured by crippling its tail whenever it uses the Grasping Tail move. If successful, it will be stunned and Pressured, allowing you to build up Stagger without having to worry about a counterattack.
During Phase 2 (after it uses Oceanic Tornado), you can use Lightning Spells whenever it pops out of the water to deal enough damage to Pressure it. Similarly, it will be stunned when Pressured, allowing you to build up its Stagger meter.
How to Pressure and Stagger Enemies
Terror of the Deep Best Party and Builds
| This section is for players who are playing on Easy and Normal difficulties. To check out the best builds and tips for Hard Mode, jump to our Hard Mode Guide section, below! |
Recommended Party Setup
| Available Characters and Roles | |
|---|---|
 Cloud Cloud
|
【DPS】 ・Can track Terror of the Deep in the air using aerial attacks. ・Can generate enough ATB to use Thunder consistently during the fight. Recommended Level: 22 |
 Aerith Aerith
|
【Support】 ・Can use Heal to support the team. ・Can cast Arcane Ward for double-cast Lightning spells. Recommended Level: 22 |
 Barret Barret
|
【Support】 ・Provides consistent long range damage. ・Use Focused Shot to build up Stagger. Recommended Level: 22 |
Best Materia to Use
| Materia | How to Use |
|---|---|
|
|
・Used to exploit Terror of the Deep's weakness. Can cripple its tail fin during Grasping Tail and one-shot Water Cells. |
|
|
・One method of recovering HP during the fight. Equip one for each party member for maximum effectiveness. |
| ・Fire, Ice, or Wind Materia will do in a pinch when trying to free one of your allies from a Water Cell. |
How to Beat Terror of the Deep
| Terror of the Deep Boss Fight Tips |
|---|
|
|
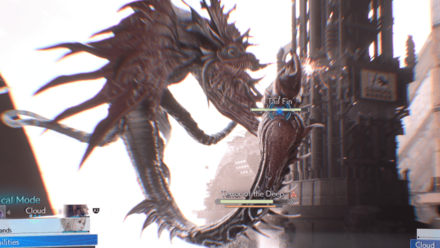
Use Thunder Spells to Exploit its Weakness
Terror of the Deep is weak to Thunder Spells. With Thunder Materia equipped, use any variant of Thunder while the boss is in the water to deal a large amount of damage. Usually, this will be enough to pressure it and inflict a momentary stun.
Use Cloud to Execute Aerial Attacks
| Character | Aerial Combo Input |
|---|---|
 Cloud Cloud |
You will keep floating as long as you continue pressing square and circle after the gap-closer button input. |
Cloud is one of the only characters that can execute aerial combos without needing a synergy skill. Use his aerial attack combo to stick to Terror of the Deep during Phase 1, dodging mid-air when needed and tracking by holding down square.
Once you're airborne, you will be able to hit Terror of the Deep by spamming basic attacks (square) and dodges (circle). Aerial attacks are a great way to avoid a lot of the moves that this boss uses.
Use Barret to Deal Ranged Damage
Alternatively, you can opt to use ranged attacks by piloting Barret during the fight. Use his Steelskin ability to resist interruption while shooting and alternate it with either Focused Shot or Overcharge to build up Stagger.
Cripple Its Tail Fin to Pressure It
Terror of the Deep gets stunned and pressured when you damage its Tail Fin. Whenever it brings its Tail Fin forward, use Cloud's Firebolt Blade, Thundara, or Barret's Overcharge to cripple and pressure the boss.
This also works when it has grabbed a member of your party. Simply execute either of the three abilities listed prior to release your party member before spamming abilities to build up stagger while it's pressured.
Use Magic to Quickly Destroy the Water Cell
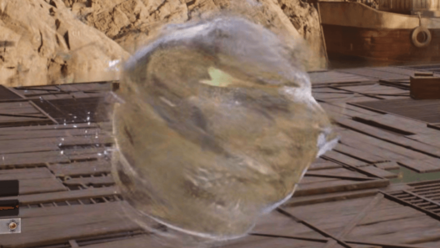
Characters hit by Terror of the Deep's Water Cell attack will be bound and rendered unusable. To free them up for use, use spells to destroy the Water Cell. Regular attacks will also work but they deal significantly lower damage compared to spells or magical attacks.
Spells will usually one-shot the Water Cell so if you have any spare ATB charges, make sure to use a spell instead of regular attacks. Magical attacks or abilities will also work in a pinch like Aerith's Sorcerous Storm.
Dodge Its Grab Attacks

Its Grasping Tail grab attack deals a lot of damage if you fail to cripple its tail after the grab. So, find the right timing and dodge either left or right to avoid it.
If you've been caught in its Grasping Tail, immediately switch to another party member and use Cloud's Firebolt Blade, Thundara, or Barret's Overcharge to free the bound party member.
Summon Ramuh to Aid in Battle
The summon gauge becomes available after you first stagger the boss. Once it appears, summon Ramuh (if you have the Summon Materia equipped) from the commands menu and he'll provide a helping hand in the battle.
Terror of the Deep Hard Mode Guide
| Terror of the Deep Hard Mode Tips |
|---|
| ★ Best Hard Mode Builds for Terror of the Deep ★ |
|
|
Terror of the Deep Hard Mode Builds
| The builds featured in this Hard Mode section are at Weapon Levels 7~8. If you find that you don't have enough Materia slots to complete the setup, consider getting all the possible Manuscripts on Normal, first. |
| Cloud Elemental DPS | |||||
| Weapon | Armor | ||||
|---|---|---|---|---|---|
| Igneous Saber | Cetran Armlet | ||||
| Accessory | Summon Materia | ||||
| Supernatural Wristguards | Kujata | ||||
| Weapon Materia | Armor Materia | ||||
| Weapon Skills | |||||
| Barret Stagger Buildup / Tank | |||||
| Weapon | Armor | ||||
|---|---|---|---|---|---|
| Battle Cry | Enhanced Varvados Bracelet | ||||
| Accessory | Summon Materia | ||||
| Fortitude Ring | Alexander | ||||
| Weapon Materia | Armor Materia | ||||
| Weapon Skills | |||||
| Aerith Support / Spellcaster | |||||
| Weapon | Armor | ||||
|---|---|---|---|---|---|
| Plumose Rod | Cetran Bracer | ||||
| Accessory | Summon Materia | ||||
| Circlet | Phoenix | ||||
| Weapon Materia | Armor Materia | ||||
| Weapon Skills | |||||
Build Note: The Elemental and Lightning links for Cloud and Barret are important since it allows them to easily cripple Terror of the Deep and destroy Water Cell with basic attacks.
Cast Magnified Haste at the Start
This fight will ultimately boil down to generating enough ATB to fuel your cycle of abilities and spells. Since Cloud will have a maxed out First Strike Materia, use your first ATB charge at the start of battle to cast a Magnified Haste for your entire party.
Later on in the fight, Aerith should be able to fuel her own moves once she has Radiant Ward and ATB Boost available. The same goes for Barret who has Turbulent Spirit to fall back on if he's having a tough time generating max ATB.
Open the Fight with Aerial and Basic Attacks Only
When attacking in Phase 1, only stick to aerial attacks when using Cloud or basic attacks using Barret. Given the fight's difficulty and the clunky ally AI, you will need to manage the ATB and Overcharge economy to weasel your way out of Terror of the Deep's restrain moves.
If your non-controlled party members end up getting grabbed by Grasping Tail or bound by Water Cell, then you can use Cloud's Firebolt Blade (or Thundara) or Barret's Overcharge to quickly free them without any additional damage needed.
Avoid Water Cell at All Costs
In Hard Mode, Terror of the Deep casts Water Cell twice before leading up to a triple Grasping Tail. If you fail to avoid any of these restrain moves, you'll end up with two trapped party members (in Water Cells) and one that is bound and slammed by Terror of the Deep.
In certain situations, this can lead to a full party wipe, especially if the character who was grabbed by Grasping Tail has no ATB for heals or spells after getting slammed down. Make sure to dodge at least one Water Cell since the second is guaranteed to hit your AI ally because they won't try to dodge it.
Use Aerith's Healing Spells and Chakra to Keep HP Up
If Aerith has spare ATB charges, use a quick Curaga to quickly bring up the HP of characters in critical condition. If using Barret, take advantage of his fast ATB recovery rate and spam Chakra to quickly heal back up when low on health.
Bait Out Grasping Tail and Get Grabbed
However, if played correctly, the Water Cell into Grasping Tail combo can be exploited so long as you manage to avoid getting hit by Water Cell. If you manage to dodge Water Cell, have Terror of the Deep grab your character with Grasping Tail.
Then, while restrained, switch over to either Cloud, Barret, or Aerith (depending on who is free) and use Firebolt Blade, Overcharge, or Thundara to quickly cripple the tail and pressure Terror of the Deep.
Cripple the Tail for Easy Pressures and Staggers
Again, once someone is grabbed by Grasping Tail, target the tail and use Firebolt Blade, Overcharge, or Thundara to quickly cripple it. Once the boss is stunned and Pressured, use Barret's 2-ATB Focused Shot to quickly push the boss into a Staggered state.
Note: This will be much easier to set-up in Phase 1 compared to hitting it with Thunder spells while it's in water. In Phase 2, Terror of the Deep uses a different grab attack, so make sure to milk this tactic before reaching the second phase.
Most of the Damage will Come from Cloud's Infinity's End
Once you do manage to stagger Terror of the Deep, switch over to Cloud and start building ATB using Punisher Mode. With Haste active, you should be able to build 2-ATB quickly, allowing you to cast Infinity's End before the stagger duration is up.
Cast Arcane and Radiant Wards for Phase 2 Thundaga Spam
You'll know it's Phase 2 once Terror of the Deep casts its AoE skill, Oceanic Tornado. When it ends, switch to Aerith and cast Arcane Ward, Radiant Ward, and ATB Boost to prepare for the Thundaga spam.
If Cloud still has a spare ATB charge, re-cast Magnified Haste at the start of Phase 2. This should allow the entire party to build up ATB charges passively while you pilot Aerith and Barret during Phase 2.
Take Control of Cloud During Oceanic Tornado
Sometimes, the AI likes putting Cloud in Punisher Mode before Oceanic Tornado. When this happens, the AI starts blocking, causing Cloud to die once he gets sucked into the vortex. To avoid this, switch over and control Cloud when Oceanic Tornado starts.
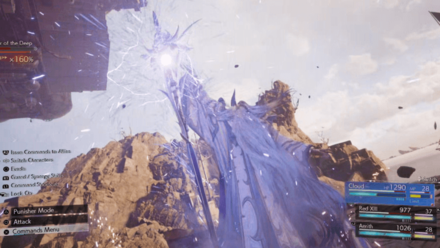
Double Cast Thundaga on Aerith and Barret in Phase 2
During Phase 2, Terror of the Deep will pop in and out of the water to hit you with Water Jet, Hydroshot, and Aquatic Twister. Make sure to play as Aerith and Barret and have them stand on top of the Arcane and Radiant Wards you set up earlier during Phase 2.
Once Terror of the Deep pops up from the water, immediately start casting Thundaga on both Aerith and Barret. 4 consecutive casts should Pressure, Stagger, and deal a tremendous amount of damage when they connect. Repeat until the boss dies.
Terror of the Deep Rewards and Details
Rewards
| Terror of the Deep Rewards | |||||||||||
|---|---|---|---|---|---|---|---|---|---|---|---|
| Easy/Normal | Hard Mode | ||||||||||
|
・1200 EXP ・50 Party EXP ・10 AP ・800 Gil |
・6500 EXP ・30 AP ・3250 Gil ・Telluric Scriptures Vol. IX |
||||||||||
| Items Dropped | Rare Items Dropped | ||||||||||
|
None
|
None
|
||||||||||
| Stealable Items | Morphable Items | ||||||||||
|
None
|
None
|
||||||||||
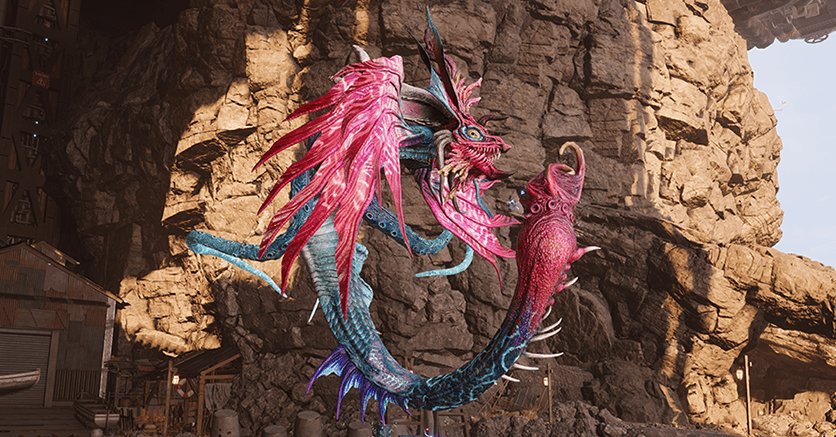
Basic Information and Details
| Terror of the Deep | |
|---|---|
 |
|
| Location | Chapter Unlocked |
| Junon Region | Chapter 4 |
| Species | Movement |
| Biological | Grounded |
| Details | |
|
A monstrous aquatic creature that lives off the coast of Junon. It possesses a buoyancy that allows it to swim at high speeds through both the water and air. It ingests seawater and then expels it with explosive force to stun prey. Inflicting enough damage on its head while it is in the water will pressure it and cause it to take to the air. Attacking the Water Cells it creates will pop them. |
|
FF7 Rebirth Related Guides

Boss Fight Guide and List of All Bosses
Story Bosses
| All Major Story Bosses | |
|---|---|
| Chapter 1 | Materia Guardian |
| Chapter 2 | Midgardsormr |
| Chapter 3 |
Rude and Elena Mythril Golem |
| Chapter 4 |
Terror of the Deep Roche |
| Chapter 5 | Jenova Emergent |
| Chapter 6 | Grasptropod |
| Chapter 7 |
Custom Valkyrie Gigatrice |
| Chapter 8 |
Dyne Anuran Suppressor |
| Chapter 9 |
Specimen H1024 Crimson Mare Mk. II |
| Chapter 10 | Gi Nattak |
| Chapter 11 |
Diabolic Variant Yin and Yang Forgotten Specimen Galian Beast Roche |
| Chapter 12 |
Abzu Rude and Elena Rufus |
| Chapter 13 |
Red Dragon Ironclad Reno and Rude Tseng and Elena Moss-Grown Adamantoise Demon Gate |
| Chapter 14 |
Jenova Lifeclinger Sephiroth Reborn |
Optional Bosses
| Grasslands | |
|---|---|
| Summon | Titan |
| Classified Intel | Quetzalcoatl |
| Side Quests |
White Terror |
| Junon | |
| Summon | Phoenix |
| Classified Intel | Mindflayer |
| Side Quests |
White Mousse Hell Rider II Sandstorm Drake |
| Corel | |
| Summon | Alexander |
| Classified Intel | Tonberry King |
| Side Quests |
Dark Claw Joker |
| Minigame | Test 0 |
| Gongaga | |
| Summon | Kujata |
| Classified Intel | Great Malboro |
| Side Quests |
Levridon Mastodon Gorgon Mane Gigantoad |
| Cosmo Canyon | |
| Summon | Bahamut Arisen |
| Classified Intel | Jabberwock |
| Side Quests | Irasceros Gigaworm |
| Nibel | |
| Summon | Odin |
| Classified Intel | King Zu |
| Side Quests |
Queen Bee Dranabarga |
| Meridian Ocean | |
| Gilgamesh's Island |
Gilgamesh Titan and Bahamut Arisen Phoenix and Kujata Alexander and Odin |
| Pirate King's Treasure |
Ogre Raider Brineborn Demon Hueyacoatl Sea Dragon |
Comment
Author

Terror of the Deep Hard Mode Guide
Rankings
- We could not find the message board you were looking for.
Gaming News
![Neverness to Everness (NTE) Review [Beta Co-Ex Test] | Rolling the Dice on Something Special](https://img.game8.co/4414628/dd3192c8f1f074ea788451a11eb862a7.jpeg/show)


Popular Games

Genshin Impact Walkthrough & Guides Wiki
Honkai: Star Rail Walkthrough & Guides Wiki
Arknights: Endfield Walkthrough & Guides Wiki
Umamusume: Pretty Derby Walkthrough & Guides Wiki
Wuthering Waves Walkthrough & Guides Wiki
Pokemon TCG Pocket (PTCGP) Strategies & Guides Wiki
Abyss Walkthrough & Guides Wiki
Zenless Zone Zero Walkthrough & Guides Wiki
Digimon Story: Time Stranger Walkthrough & Guides Wiki
Clair Obscur: Expedition 33 Walkthrough & Guides Wiki


Recommended Games
Fire Emblem Heroes (FEH) Walkthrough & Guides Wiki
Pokemon Brilliant Diamond and Shining Pearl (BDSP) Walkthrough & Guides Wiki
Diablo 4: Vessel of Hatred Walkthrough & Guides Wiki
Super Smash Bros. Ultimate Walkthrough & Guides Wiki
Yu-Gi-Oh! Master Duel Walkthrough & Guides Wiki
Elden Ring Shadow of the Erdtree Walkthrough & Guides Wiki
Monster Hunter World Walkthrough & Guides Wiki
The Legend of Zelda: Tears of the Kingdom Walkthrough & Guides Wiki
Persona 3 Reload Walkthrough & Guides Wiki
Cyberpunk 2077: Ultimate Edition Walkthrough & Guides Wiki


All rights reserved
© SQUARE ENIX CO., LTD. All Rights Reserved.
CHARACTER DESIGN: TETSUYA NOMURA/ROBERTO FERRARI
LOGO ILLUSTRATION: © 1997 YOSHITAKA AMANO
The copyrights of videos of games used in our content and other intellectual property rights belong to the provider of the game.
The contents we provide on this site were created personally by members of the Game8 editorial department.
We refuse the right to reuse or repost content taken without our permission such as data or images to other sites.