Chapter 7: Those Left Behind Walkthrough
A walkthrough for Chapter 7: Those Left Behind in Final Fantasy 7 Rebirth (FF7 Rebirth). Read on for a detailed guide of Chapter 7, including item locations, rewards, bosses, as well as useful tips for completing this chapter!
| ◄ Previous Chapter | Next Chapter ▶ |
|---|---|
|
Chapter 6 Fool's Paradise |
Chapter 8 All That Glitters |
List of Contents
Chapter 7: Those Left Behind Walkthrough
| Chapter 7 Main Objectives | |
|---|---|
| 1 | Climb Mt. Corel ┗ Boss Battle: Custom Valkyrie |
| 2 |
Go Through the Preparation Plant ┗ Boss Battle: Gigatrice |
| 3 | Continue to North Corel |
Click on any of the links above to jump to the section!
Climb Mt. Corel Walkthrough
| Objectives | |
|---|---|
| 1 |  Toward Mt. Corel In Costa del Sol, go past the red Wheelie parking lot under the bridge to find the Rent-a-Bird Stables, where you can rent a Chocobo. Tip: The Rent a Bird Membership costs 300 Gil. |
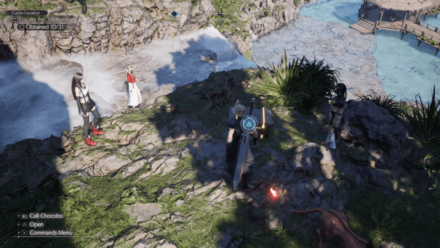
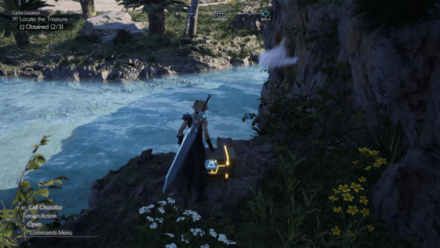
| 2 | 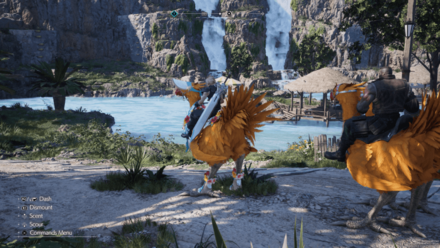 Take the Chocobo west out of town and head to the nearby waterfalls called Sunrise Plateau. Grab all the treasure chests in the area before proceeding to Mt. Corel. ┗Jump to Sunrise Plateu Chest Locations |
| 3 |  Mountain Trek After splitting up with the rest of the group, use the rest stop to recover your HP and MP. Wizard's Rod: There is a hidden chest on the left side of the rest stop where you can find a weapon for Aerith. |
| 4 |  Climb up the mountain as Cloud, Aerith, and Red XIII. In the First Trail area, go to the very top of the area to find the continuation of the path. |
| 5 | 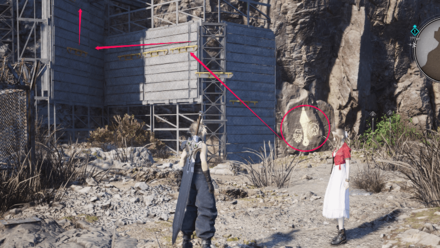 Continue following the path on the third trail until you reach a dead end. Here, you will have to look for Yuffie's drawings on the wall to learn where to go next. |
| 6 | 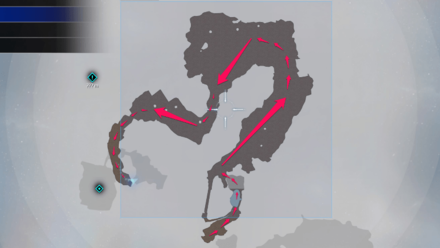 After reaching the fourth trail, continue heading straight. Pass the fifth trail, and you will arrive at the Reactor Construction Site. |
| 7 | 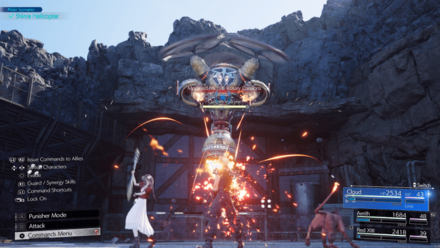 Shinra Helicopter As you enter the Reactor Construction Site, you'll notice a helicopter nearby. Continue in that direction, and at the end, you'll have a boss fight with Custom Valkyrie. ┗ Recommended Party for Custom Valkyrie ▶︎ How to Beat Custom Valkyrie |
| 8 | Complete a short Interlude with Zack. |
| 9 | To the Summit Continue heading up the mountain and regroup with the others. After that, you will follow Barret and use the elevator to reach the Coal Mines. |
Sunrise Plateu Chest Locations
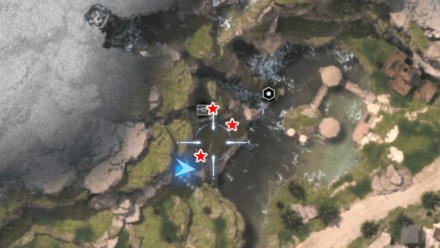
Sunrise Plateau is a cache location situated on the north side of the Corel region, beside the waterfalls connecting to the river.
| Chest Location | |
|---|---|
 2,000 Gil |
 Emerald x1 |
 Ether x1 |
- |
Go Through the Preparation Plant Walkthrough
| Objectives | |
|---|---|
| 1 | 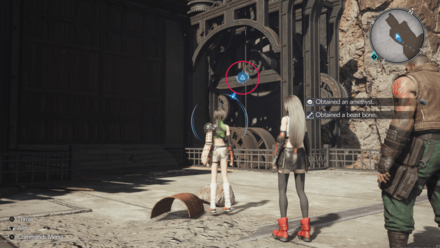 Reach the Control Panel In the next section, you'll play as Yuffie, Barret, and Tifa. Use Yuffie's shuriken to hit a wheel up and to the right, and enter the Preparation Plant. |
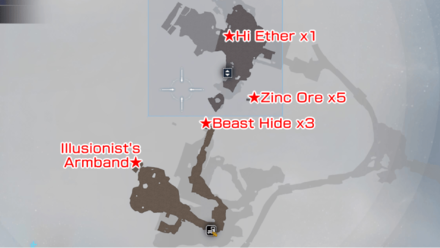
| 2 | 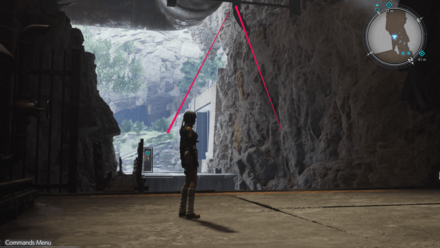 Get a Grappling Hook Obtain the Grappling Hook which you'll use to get around. When the Grappling Hook icon appears, look around for something to hang on to, then press L2 to leap to it. Then, look for a landing spot, and press the Circle button when it appears to land on it. First, go across the gap and pull the level to activate the zipline in the previous room. Twin Viper: There's a chest that contains a weapon for Yuffie on a nearby platform, right beside the lever. |
| 3 | 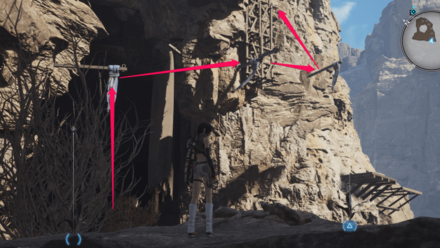 Unlock the Elevator Go up the zipline. Head outside and grapple across to the cliff, then look backwards to find a grapple point which you can hit with your Shuriken to lower. Go across and climb up. Use the teminal to activate the elevator and reunite with Barret and Tifa. Zinc Ore: There is a chest containing Zinc Ore on the platform below you while using the grappling hook. |
| 4 | 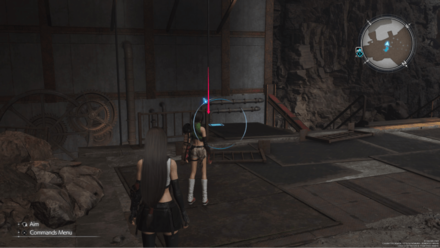 Continue Your Search Continue following the path until you reach a room with a Cockatrice. Find a staircase going down, and either go down it or slide down the pole next to it. Illusionist's Armband: There is a climbable wall on the right side of this room. Go up the wall and then throw your shuriken at the ladder to lower it down. Use this ladder and swing your way across until you reach the treasure chest at the end. |
| 5 |  At the bottom, go past the two Cockatrices and then turn left to see a grapple point that you need to hit with your Shuriken. Use your grappling hook to swing around the rocks and you will find a rotating pillar |
| 6 |  Jump onto the rotating pillar which you turn as you swing. Use the control stick when you're at the far end of your swing to advance until you reach the other side. Pull the lever at the other end to activate the ziplines. |
| 7 | After activating the ziplines, go back across the water to Barret and Tifa. Barrage Blaster: On your way back to the zipline, head east towards the cliff and pick up the a new weapon for Barret. |
| 8 | 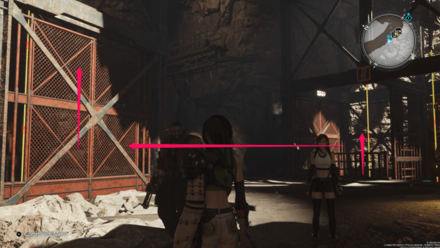 Take two sets of ziplines up to the very top. Here, you will encounter a couple of more enemies as soon as you get off the zipline. |
| 9 | 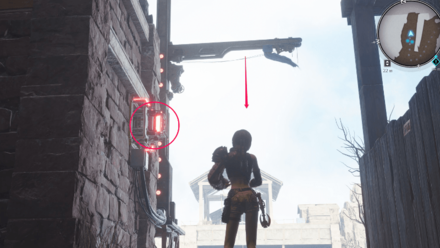 In the next room, hit the green battery with your Shuriken to cause a grapple point to lower. You'll have to wait for it to lower, but it will appear right in front of the battery. Swing across these grappling points and you will reach the second battery. |
| 10 |  Hit the second battery with your Shuriken, then use your grappling hook. While hanging on the hook, it will slowly slide and move you forward, bringing you to the third and final battery. |
| 11 | 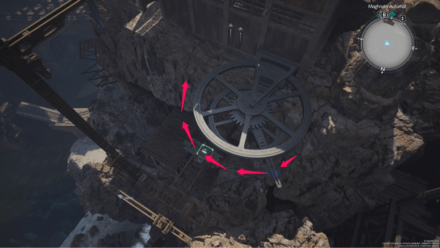 From here, you will not be able to hit the battery with your Shuriken as you are hanging from the rope. You need to rotate the mechanism by swinging, and it will automatically activate the battery, allowing you to access the Bomb room. |
| 12 | Defeat the Bomb to activate the terminal and regroup with Tifa and Barret. TIp: The Bomb can be a bit tricky with just Yuffie so watch your HP! Try to inflict as much damage as you can while they are breathing fire to pressure them. |
| 13 | 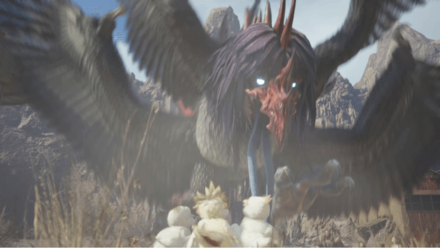 Lower the Drawbridge Activate the terminal to reunite with Barret and Tifa. In the next room, you'll fight the Gigatrice. ┗ Recommended Party for Gigatrice ▶︎ How to Beat Gigatrice |
Continue to North Corel Walkthrough
| Objectives | |
|---|---|
| 1 | 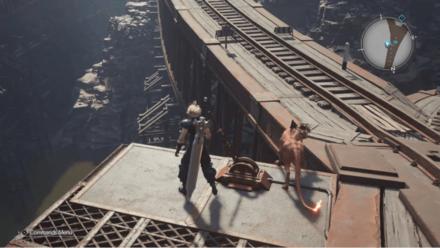 Set Their Route You'll control Cloud again. Continue ahead until you reach a lever which you can use to affect your Relationship Level with Barret or Yuffie. Set the tracks to go left if you want to deepen your relationship with Barret, and set them right for Yuffie. This will affect who Cloud goes on a date with in the Gold Saucer. ▶︎ Romance and Relationship Guide |
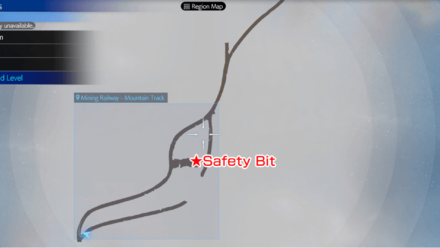
| 2 | Continue crossing the bridge and then use the terminal at the end to activate the other group's mine cart. Safety Bit: Halfway across the bridge, there is a ladder to your left that leads up to a small cabin. Enter this cabin and open the chest to obtain the Safety Bit. |
| 3 | 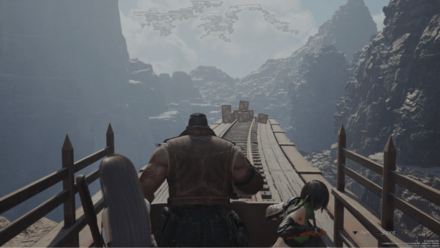 Once Cloud activates the terminal, you will start controlling Barret and Yuffie as they ride the mine cart. During this section, you can use Barret to shoot the small boxes and throw Yuffie's Shuriken at the larger boxes to obtain various items. |
| 4 | Cross the wooden bridge with the group, and you will arrive in North Corel. You can freely explore this area before heading to Ropeway Bound. |
| 5 | Ropeway Bound Proceed to the Gold Saucer when you are ready! You won't be able to Fast Travel out of the Gold Saucer for a while, so save your game beforehand and be sure you're happy with your current state of progress. |
Chapter 7 Boss Strategy Guide
| Chapter 7 Bosses Guide | |
|---|---|
| Custom Valkyrie | Gigatrice |
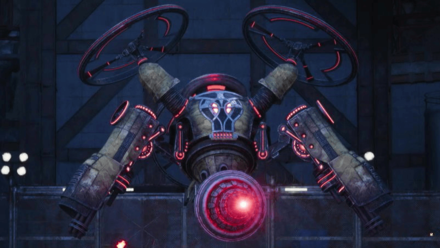
How to Beat Custom Valkyrie
| Custom Valkyrie | |
|---|---|
 |
|
| Location | Chapter Unlocked |
| Mt. Corel | Those Left Behind |
| Weaknesses | Lesser Resistances |
|
|
|
| Greater Resistances | Immunities |
|
None
|
|
| Absorbed Elements | When Triggered |
|
None
|
|
| Pressure Conditions | |
| Inflicting enough damage by exploiting its elemental weakness will pressure it. While it is using Cooling Protocol, it will become easier to pressure. | |
Found at the Mt. Corel
You will fight the Custom Valkyrie at Mt. Corel in the Corel region during chapter 7 before you can regroup with Barret and the others.
Recommended Party Setup and Roles
| Available Characters and Roles | |
|---|---|
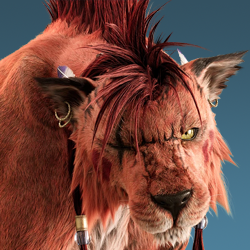 Red XIII Red XIII
|
・Best to use as the active character as he can benefit from blocking and is quite fast in dodging attacks ・Also has Vengeance Mode that can help him recover health |
 Cloud Cloud
|
・Use Cloud as the active character once the boss is in Cooling Protocol or staggered |
 Aerith Aerith
|
・Focus on supporting the team and providing lightning or wind damage ・Best not to use as the active character as she won't be quick enough to dodge attacks |
Custom Valkyrie Boss Fight Tips
- Use Lightning and Wind attacks
- Easier to pressure during its Cooling Protocol
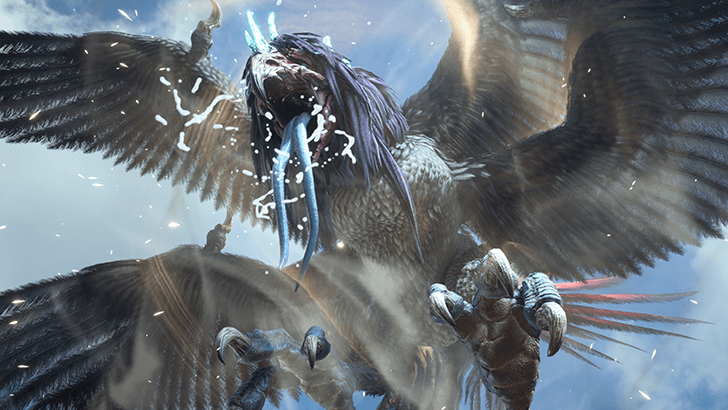
How to Beat Gigatrice
| Gigatrice | |
|---|---|
 |
|
| Location | Chapter Unlocked |
| Mt. Corel | Those Left Behind |
| Weaknesses | Lesser Resistances |
|
|
|
| Greater Resistances | Immunities |
|
None
|
|
| Absorbed Elements | When Triggered |
|
None
|
|
| Pressure Conditions | |
| Inflicting enough damage while it is in the air will pressure it and force it to descend. Using elemental magic on cyclones it conjures will imbue them with elemental energy. It will become pressured if hit by one of these. | |
Found at the Coal Mines
You will fight the Gigatrice at the Coal Mines near the end of chapter 7.
Recommended Party Setup and Roles
| Available Characters and Roles | |
|---|---|
 Yuffie Yuffie
|
【Main Damage Dealer】 ・Inflict continuous ranged damage with Ninjutsu ・Best to use as the active character because of her speed |
 Barret Barret
|
【Tank / Support】 ・Take the damage for the team with the Lifesaver from the Barrage Blaster ・Heal allies and himself with the Healing and Prayer Materia. ・Inflict ranged damage consistently. |
 Tifa Tifa
|
【Punisher】 ・Best to use once Gigatrice is grounded ・Punish Gigatrice with a flurry of attacks using her abilities once it's staggered |
Gigatrice Boss Fight Tips
- Use Fire and Poison to pressure Gigatrice
- Move away from the Dust Devil
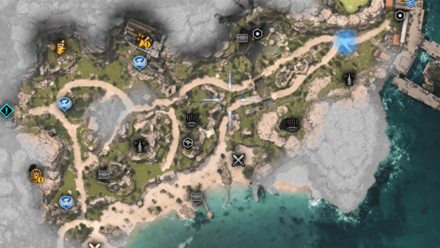
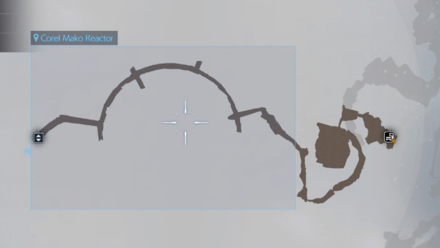
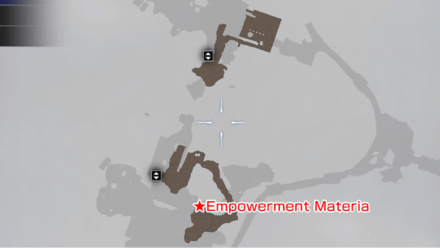
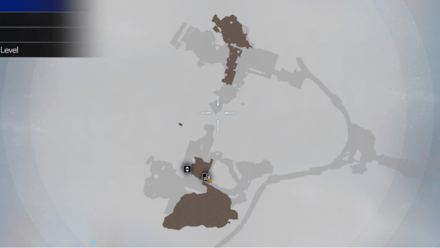
Chapter 7 Map and Obtainable Items
Maps
| List of Maps | ||
|---|---|---|
 |
 |
 |
 |
 |
 |
 |
 |
 |
 |
 |
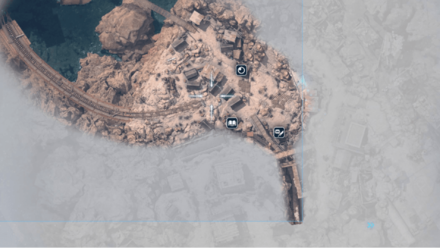 |
Obtainable Items
| Corel Region | ||
|---|---|---|
| 2,000 Gil | Emerald x1 | Ether x1 |
| Mt. Corel - Foot | ||
| Wizard's Rod | Ruby | |
| Gold Dust x3 | - | |
| Mt. Corel - 350m | ||
| Mythril Ore x1 | - | - |
| Coal Mines - Ground Level | ||
| 1,700 Gil | Twin Viper | Barrage Blaster |
| Beast Spines x3 | Safety Bit | - |
| Coal Mines - 30m | ||
| Hi Ether x1 | Zinc Ore x5 | Beast Hide x3 |
| Illusionist's Armband | - | - |
| Coal Mines - 60m | ||
| - | - | |
| Settlement - Lookout | ||
| - | - | |
This list does not include the items that you get from destroying the wooden crates.
Materia List and How to Get All Materia
FF7 Rebirth Related Guides

| All Story Chapters | |
|---|---|
| Chapter 1 | Fall of a Hero |
| Chapter 2 | A New Journey Begins |
| Chapter 3 | Deeper into Darkness |
| Chapter 4 | Dawn of a New Era |
| Chapter 5 | Blood in the Water |
| Chapter 6 | Fool's Paradise |
| Chapter 7 | Those Left Behind |
| Chapter 8 | All That Glitters |
| Chapter 9 | The Planet Stirs |
| Chapter 10 | Watcher of the Vale |
| Chapter 11 | The Long Shadow of Shinra |
| Chapter 12 | A Golden Key |
| Chapter 13 | Where Angels Fear to Tread |
| Chapter 14 | End of the World |
| How Long to Beat? Game Length | |
| Post-Game Content and How to Get 100% Clear | |
Author

Chapter 7: Those Left Behind Walkthrough
Rankings
- We could not find the message board you were looking for.
Gaming News


Popular Games

Genshin Impact Walkthrough & Guides Wiki
Umamusume: Pretty Derby Walkthrough & Guides Wiki
Crimson Desert Walkthrough & Guides Wiki
Monster Hunter Stories 3: Twisted Reflection Walkthrough & Guides Wiki
Honkai: Star Rail Walkthrough & Guides Wiki
Pokemon Pokopia Walkthrough & Guides Wiki
The Seven Deadly Sins: Origin Walkthrough & Guides Wiki
Wuthering Waves Walkthrough & Guides Wiki
Zenless Zone Zero Walkthrough & Guides Wiki
Arknights: Endfield Walkthrough & Guides Wiki


Recommended Games
Fire Emblem Heroes (FEH) Walkthrough & Guides Wiki
Diablo 4: Vessel of Hatred Walkthrough & Guides Wiki
Cyberpunk 2077: Ultimate Edition Walkthrough & Guides Wiki
Yu-Gi-Oh! Master Duel Walkthrough & Guides Wiki
Super Smash Bros. Ultimate Walkthrough & Guides Wiki
Pokemon Brilliant Diamond and Shining Pearl (BDSP) Walkthrough & Guides Wiki
Elden Ring Shadow of the Erdtree Walkthrough & Guides Wiki
Monster Hunter World Walkthrough & Guides Wiki
The Legend of Zelda: Tears of the Kingdom Walkthrough & Guides Wiki
Persona 3 Reload Walkthrough & Guides Wiki


All rights reserved
© SQUARE ENIX CO., LTD. All Rights Reserved.
CHARACTER DESIGN: TETSUYA NOMURA/ROBERTO FERRARI
LOGO ILLUSTRATION: © 1997 YOSHITAKA AMANO
The copyrights of videos of games used in our content and other intellectual property rights belong to the provider of the game.
The contents we provide on this site were created personally by members of the Game8 editorial department.
We refuse the right to reuse or repost content taken without our permission such as data or images to other sites.
if you take the sidequest in north corel from the clinic doctor, you will arrive soon in Old South Corel Mine and there is a new purple chest with a brand new weapon for RED.