Jenova Lifeclinger Hard Mode Guide
Jenova Lifeclinger is a boss in Chapter 14: End of the World of Final Fantasy 7 Rebirth (FF7 Rebirth). Learn how to beat Jenova Lifeclinger on Hard Mode and normal difficulties, its weaknesses and resistances, and a list of its moves and attack patterns in this guide!
List of Contents
Jenova Lifeclinger Weaknesses and Stats
Stats
 |
|||
| Easy | Normal | Hard | |
|---|---|---|---|
| HP | 66340 | 94772 | ? |
Weakness and Resistances
| Weaknesses | Lesser Resistances | Greater Resistances |
|---|---|---|
| None | ||
| Absorbed Elements | Immunities | |
| None | ||
Changes When Staggered
| Weakness / Effective | Resistance |
|---|---|
| None | None |
How to Pressure Jenova Lifeclinger
|
|
Destroy the Barrier with Magic
During the 1st Phase of the fight, Jenova Lifeclinger will swap sides and put up a barrier that blocks all Physical attacks. Quickly destroy it with Magic attacks like Cloud's Blade Burst or elemental spells to destroy it and pressure Jenova.
Auto-Pressured During Sanguinary Flame
During Phase 3, Jenova Lifeclinger will use Sanguinary Flame and will automatically be pressured while it's using this move. Similar to the barrier, it's immune to Physical attacks so you'll need to use Magic attacks to stagger it.
Deal Enough Damage
If you keep hitting Jenova Lifeclinger with high damage abilities, like a Limit Break for example, it can get pressured just from your attacks. Make sure that you're always using each character's strongest moves to pressure it without relying on its other pressure conditions.
How to Pressure and Stagger Enemies
Jenova Lifeclinger Best Party and Builds
Normal Mode Builds
| Builds by Difficulty | |
|---|---|
| Normal Mode | Hard Mode |
Party Members For Each Phase
| Phase | Party Members | ||
|---|---|---|---|
| 1st Phase |
 Cloud Cloud
|
Random | Random |
| 2nd Phase (Right Wing) |
 Tifa Tifa
|
 Cait Sith Cait Sith
|
- |
| 2nd Phase (Left Wing) |
 Barret Barret
|
 Red XIII Red XIII
|
- |
| 2nd Phase (Head) |
Cloud
|
 Yuffie Yuffie
|
- |
| Final Phase |
Cloud
|
Random | Random |
For the 1st and Final Phases, you will have two random party members alongside Cloud. However, the party members for the 2nd Phase will be fixed, and you'll control the same two characters every time.
Do note that this also applies for Hard Mode, so make sure to plan your builds accordingly.
Best Materia to Use
| Materia | How to Use |
|---|---|
|
|
・Gives the ability to cast Fire and Ice spells
・Can save an extra slot for stat-increasing Materia |
|
|
・Gives the ability to cast Lightning and Wind spells
・Can save an extra slot for stat-increasing Materia |
|
|
・Gives the ability to cast healing spells to heal your party |
|
|
・Equip to increase HP |
|
|
・Apply Haste on your party to increase their overall speed |
|
|
・Increase the effect of items like Potions |
Hard Mode Builds
| Builds by Difficulty | |
|---|---|
| Normal Mode | Hard Mode |
| These Hard Mode builds use equipment at Weapon Level 9, except for Cloud and Barret. If you don't have enough Materia slots or the right Weapon Skills to complete a setup, consider using a different weapon or collect all of the character's Manuscripts first. |
As a note, most of these builds, besides Cloud's, use the Enhanced Varvados Bracelet due to its high Magic Defense. If you wish, you may swap it out for another Armor piece with more Materia Slots instead if you need it.
Best Build for Cloud
| Jump to Build | ||
|---|---|---|
| Cloud | Barret | Tifa |
| Red XIII | Yuffie | Cait Sith |
|
Cloud
Physical DPS |
|||||
| Weapon | Armor | ||||
|---|---|---|---|---|---|
| Sleek Saber | Cetran Bracer | ||||
| Accessory | Summon Materia | ||||
| Enhanced Expeditionary Medal | Gilgamesh | ||||
| Weapon Materia | Armor Materia | ||||
| Weapon Skills | |||||
|
|
|
||||
|
|
|
||||
Cloud will be your main damage dealer for this fight since he's guaranteed to show up in all three boss Phases. This means that he should equip the Magnify-Healing, Skill Master, and ATB Assist Materias to better support the party.
Besides that, he has the usual Revival, Stat Up and Blocking Materias, as well as First Strike to start proccing ATB Assist as soon as possible and Chakra to heal himself without using MP.
One thing to note is that there's a unique quirk with this fight where all other party members besides Cloud will have their Limit Gauges full when they first appear in battle. This makes Limit Siphon an amazing Materia to have because, when combined with the Enhanced Expeditionary Medal accessory, Cloud can easily spam his Finishing Touch Limit Break on Jenova.
Best Build for Barret
| Jump to Build | ||
|---|---|---|
| Cloud | Barret | Tifa |
| Red XIII | Yuffie | Cait Sith |
|
Barret
ATB Support |
|||||
| Weapon | Armor | ||||
|---|---|---|---|---|---|
| Battle Cry | Enhanced Varvados Bracelet | ||||
| Accessory | Summon Materia | ||||
| Transference Module | Kujata | ||||
| Weapon Materia | Armor Materia | ||||
|
|
|
||||
| Weapon Skills | |||||
|
|
|
||||
|
|
|
||||
Since there are open Materia Slots on this build, you can choose to add any useful Materia like Dark Side, First Strike, or Time in the open slots.
Barret will act as a Support for Cloud by generating and using up ATB Charges to build up his Limit Gauge with the Transference Module accessory. Once Barret's Limit Gauge is full, Cloud can use Limit Siphon on him, allowing him to use his Limit Breaks instead.
Also, Barret can use Lifesaver to redirect damage away from the rest of the party, allowing you to focus your healing on one character rather than having to use multiple Curagas or Cloud's Magnify-Curaga.
Aside from that, the Materias used are the same as every other party member besides Cloud. These include the usual Stat Boost, Blocking, and Restorative Materias, as well as Barrier to cast Manaward and reduce the damage of Jenova Lifeclinger's predominantly Magic-based attacks.
This Build is Stronger at Weapon Level 9
As a note, this build is much better with the ATB Limit Weapon Skill. Unfortunately, you will need to beat this boss first on Hard Mode to get the required Manuscripts to reach Weapon Level 9 and unlock ATB Limit.
Best Build for Tifa
| Jump to Build | ||
|---|---|---|
| Cloud | Barret | Tifa |
| Red XIII | Yuffie | Cait Sith |
|
Tifa
Physical DPS |
|||||
| Weapon | Armor | ||||
|---|---|---|---|---|---|
| Dragon Claws | Enhanced Varvados Bracelet | ||||
| Accessory | Summon Materia | ||||
| Hermes Shoes | Odin | ||||
| Weapon Materia | Armor Materia | ||||
|
|
|
||||
| Weapon Skills | |||||
|
|
|
||||
|
|
|
||||
Since there are open Materia Slots on this build, you can choose to add any useful Materia like Dark Side, First Strike, or Time in the open slots.
Tifa will primarily be a Physical DPS in this fight thanks to the raw single-target power of her abilities. The damage of her Unique Abilities in to True Strike combo can easily shave off massive chunks of Jenova Lifeclinger's HP once it's staggered.
However, a key difference with this build compared to other party members is that Tifa doesn't want to have her Limit Gauge taken away by Cloud. This is because she can do more damage than him as long as she gets up to Limit Level 3, so you'll want to make sure you're using Synergy Abilities to get her to that breakpoint.
Aside from that, the Materias used are the same as every other party member besides Cloud. These include the usual Stat Boost, Blocking, and Restorative Materias, as well as Barrier to cast Manaward and reduce the damage of Jenova Lifeclinger's predominantly Magic-based attacks.
Best Build for Red XIII
| Jump to Build | ||
|---|---|---|
| Cloud | Barret | Tifa |
| Red XIII | Yuffie | Cait Sith |
|
Red XIII
Physical DPS |
|||||
| Weapon | Armor | ||||
|---|---|---|---|---|---|
| Brisingamen | Enhanced Varvados Bracelet | ||||
| Accessory | Summon Materia | ||||
| Enhanced Draconic Ring | Alexander | ||||
| Weapon Materia | Armor Materia | ||||
|
|
|
||||
| Weapon Skills | |||||
|
|
|
||||
|
|
|
||||
Since there are open Materia Slots on this build, you can choose to add any useful Materia like Dark Side, First Strike, or Time in the open slots.
Red XIII will also be a Physical DPS character for this fight due to the amount of damage he can do with Retaliation. Thankfully, Brisingamen comes with two Vengeance Gauge Charge Rate Up Weapon Skills, letting him use Retaliation more often than normal.
Another thing to note is that Red can also help feed Cloud's Limit Siphoning thanks to the Enhanced Draconic Ring accessory. Since Red will constantly block attacks to charge up his Vengeance Gauge, he will also generate Limit Gauge charges at the same time.
Aside from that, the Materias used are the same as every other party member besides Cloud. These include the usual Stat Boost, Blocking, and Restorative Materias, as well as Barrier to cast Manaward and reduce the damage of Jenova Lifeclinger's predominantly Magic-based attacks.
Best Build for Yuffie
| Jump to Build | ||
|---|---|---|
| Cloud | Barret | Tifa |
| Red XIII | Yuffie | Cait Sith |
|
Yuffie
Magic DPS |
|||||
| Weapon | Armor | ||||
|---|---|---|---|---|---|
| Twin Viper | Enhanced Varvados Bracelet | ||||
| Accessory | Summon Materia | ||||
| Spectral Cogwheel | Bahamut Arisen | ||||
| Weapon Materia | Armor Materia | ||||
|
|
|||||
| Weapon Skills | |||||
|
|
|
||||
|
|
|
||||
Since there's an open Materia Slot on this build, you can choose to add any useful Materia like Dark Side, First Strike, or Time in the open slot.
Yuffie dishes out a lot of magic damage thanks to her Ninjutsu basic attacks, her Weapon Abilities like Banishment and Purification, as well as her Fire spells. This makes her a great candidate for destroying Jenova's barrier during Phase 1 and as a DPS for Phase 3 when it uses Sanguinary Flame.
Also, similar to Barret, she can constantly fill up her Limit Gauge for Cloud to Siphon away thanks to ATB Limit, MP Limit, and the Spectral Cogwheel accessory. Make sure that you're constantly casting Fire spells to spend MP and ATB Charges to quickly build up her Limit Gauge.
Aside from that, the Materias used are the same as every other party member besides Cloud. These include the usual Stat Boost, Blocking, and Restorative Materias, as well as Barrier to cast Manaward and reduce the damage of Jenova Lifeclinger's predominantly Magic-based attacks.
Best Build for Cait Sith
| Jump to Build | ||
|---|---|---|
| Cloud | Barret | Tifa |
| Red XIII | Yuffie | Cait Sith |
|
Cait Sith
Magic DPS |
|||||
| Weapon | Armor | ||||
|---|---|---|---|---|---|
| Iron Megaphone | Enhanced Varvados Bracelet | ||||
| Accessory | Summon Materia | ||||
| Gi Warrior's Charm | Phoenix | ||||
| Weapon Materia | Armor Materia | ||||
|
|
|||||
| Weapon Skills | |||||
|
|
|
||||
|
|
|
||||
Since there's an open Materia Slot on this build, you can choose to add any useful Materia like Dark Side, First Strike, or Time in the open slot.
Cait Sith will be the other Magic DPS since he will want to spam Lightning spells to build up his Limit Gauge with MP Limit. This way, he's both doing damage and feeding into Cloud's Limit Siphon strategy.
Alternatively, you could use a Physical build that uses the Gjallarhorn for its ATB Limit Weapon Skill, but it's recommended to keep Cait Sith as a spellcaster so he can destroy the barrier in Phase 1 and to damage Jenova when it uses Sanguinary Flame in Phase 3.
Aside from that, the Materias used are the same as every other party member besides Cloud. These include the usual Stat Boost, Blocking, and Restorative Materias, as well as Barrier to cast Manaward and reduce the damage of Jenova Lifeclinger's predominantly Magic-based attacks.
How to Beat Jenova Lifeclinger (1st Phase)
| Jump to Boss Phase | ||
|---|---|---|
| 1st | 2nd | 3rd |
| Jenova Lifeclinger First Phase Tips | ||
|
|
||
Have Tons of Recovery Items on Normal Mode
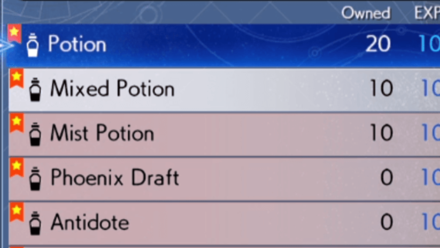
Prepare a lot of recovery items before fighting Jenova Lifeclinger on Normal Mode. It is hard not to get hit against Jenova Lifeclinger as it will launch a variety of attacks with different timings and ranges, and they can be fatal if you get hit a few times so don't hesitate to recover using your items when a character falls below 50% HP.
Items Cannot be Used on Hard Mode
Do note that this tip only applies for non-Hard Mode difficulties, since you cannot use items on Hard Mode. If you're on Hard Mode, you'll need to rely on Cure spells, Chakra, and Prayer healing instead.
Use a Limit Break Instantly
During this fight, every party member besides Cloud will have their Limit Gauge maxed out the first time they appear during the boss fight. Use Limit Siphon with Cloud so that you can unleash a powerful Limit Break right as the fight begins.
Don't Use a Limit Break While It's Invincible
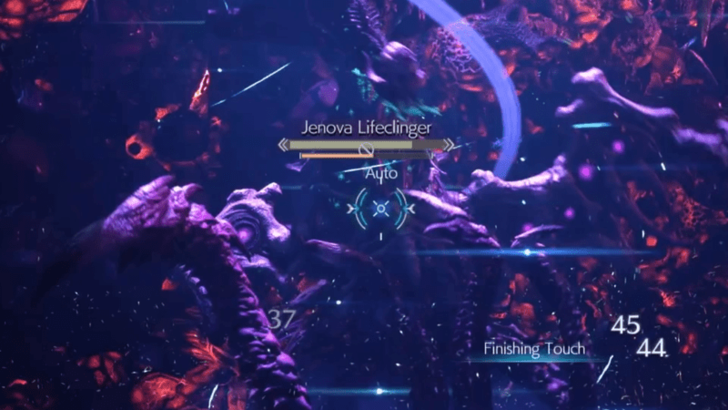
Make sure that you only use 1 Limit Break first since Jenova Lifeclinger will stop taking damage at around 80% HP. Check first if its HP bar is greyed out with a stop symbol over it before using another Limit Break, otherwise, it'll do no damage and be wasted.
Destroy the Barrier with Magic
Jenova Lifeclinger will eventually swap sides and put up a barrier that is immune to Physical damage. Use Magic attacks such as spells or Cloud's Blade Burst to destroy the barrier and instantly pressure Jenova.
Cloud Will Fight Alone Once It's at 80% HP
At around 80% HP, Jenova will pick up both of Cloud's companions and eject them from the arena. Be prepared to have Cloud fight alone until you bring it down to around 75% HP, where the fight transitions to the second part of Phase 1.
Raise Stagger Meter While Jenova's Invincible
Another thing to note when Jenova's at 80% HP is that it stops taking damage. However, it will still be susceptible to having its Stagger Meter raised. Take this opportunity to raise it right before the bar maxes out so that you can instantly stagger it when it's no longer immune to damage.
Don't worry about raising the gauge too high since Jenova can't get Staggered while it's immune to damage.
Use a Second Limit Break Once Party Returns
Once you get to the second part of Phase 1, use Limit Siphon again on the other party member that still has a full Limit Gauge so that you can deal massive damage and push Jenova closer to Phase 2. If Cloud's Attack is high enough, a Finishing Touch can be enough to end Phase 1.
Stand In Front of the Body During Desecration
When Jenova teleports, it will immediately use Desecration and fire multiple high-damage lasers from its wings. Make sure to stand in front of the body so that you're not standing in front of the wings and the lasers.
Reduce HP to Around 40% to End the 1st Phase
Keep damaging Jenova Lifeclinger until it drops to around 40% HP to finish Phase 1. Remember to use Cloud's Limit Breaks to deal massive damage and quickly bring down its health.
How to Beat Jenova Lifeclinger (2nd Phase)
| Jump to Boss Phase | ||
|---|---|---|
| 1st | 2nd | 3rd |
| Jenova Lifeclinger Second Phase Tips | ||
|
|
||
Party Changes Depending on the Body Part
| Party Setup In Order | ||
|---|---|---|
| Right Wing |
Tifa
|
Cait Sith
|
| Left Wing |
Red XIII
|
Barret
|
| Head |
Cloud
|
Yuffie
|
The characters that you'll use in this Phase are dependent on which body part you're fighting, and unlike Phases 1 and 3, the party members will always be the same. You'll start with the Right Wing characters, followed by the Left Wing, and lastly the Head in that order.
Instantly Block After a Cutscene
Once the in-battle cutscene ends and you can control your character again, Jenova will immediately use an attack with little warning. Make sure that you're ready to block this attack as soon as the cutscene ends so that you won't take any unnecessary damage.
Do note that this applies to every cutscene where you swap to a different body part and not just the cutscene between Phases 1 and 2.
Prioritize Blocking Over Dodging
You'll want to block attacks rather than dodge them because the size of the platform you fight on is tiny. This leaves a wider margin of error when dodging an attack, especially against homing attacks and moves that take up a large amount of space.
Use a Limit Break to Destroy a Body Part
Depending on the party members that you had during the 1st Phase, you may have a Limit Break available to use on each body part during Phase 2. Use them right away so that you can quickly destroy one body part and move on to the next one.
Alternatively, you could always save a character's Limit Break for Cloud to Siphon away in Phase 3, but it's better to use them this Phase since you're not sure which two party members will show up for Phase 3.
May Not Destroy a Body Part at Full HP
A Limit Break might not instantly destroy a body part depending on your stats or difficulty. If your offensive stats are low or you're playing on Dynamic or Hard Mode, be prepared to use follow-up attacks to destroy a body part.
Avoid the Red Light to Dodge Desecration
Similar to Phase 1, Jenova Lifeclinger will blast your characters with laser beams when it uses Desecration. You can easily dodge this attack by moving away from the red light that's used to indicate where the laser will fire.
Do note that the attack pattern of this move changes depending on the body part you're fighting, so make sure that you're paying attention to the red light and you're not reflexively dodging the same way you did against a different body part.
Destroy the Head to End the 2nd Phase
To move on to Phase 3, you'll need to destroy Jenova's head during Cloud and Yuffie's section. Remember to Siphon Yuffie's Limit so that you can quickly destroy the head with Finishing Touch and move on to the next Phase.
How to Beat Jenova Lifeclinger (Final Phase)
| Jump to Boss Phase | ||
|---|---|---|
| 1st | 2nd | 3rd |
| Jenova Lifeclinger Final Phase Tips | ||
|
|
||
Attack Pattern Combines Phase 1 and 2
Jenova Lifeclinger's Phase 3 attack pattern uses a combination of attacks from its prior Phases, meaning you can use the same methods to dodge its attacks. However, some attacks can overlap, so be patient and wait for an opening before counterattacking.
Save ATB Charges for Emergency Recovery
Considering that Jenova is sending a barrage of attacks your way, it's recommended to always have one ATB Charge saved at all times in case you need to heal or revive a party member.
Use Magic Attacks During Sanguinary Flames
Jenova Lifeclinger will automatically be pressured when it uses Sanguinary Flames and becomes immune to physical attacks. Move away from Jenova Lifeclinger and use any Magic attacks to deal damage until it gets staggered.
Build Limit Gauge on Other Characters
Remember to also use your other party members and fill their Limit Gauges so that Cloud can Siphon it and use Finishing Touch.
Doing this means you don't have to worry about increasing a party member's Limit Level with Synergy Abilities and you can immediately use Cloud's Level 3 Limit Break, as long as you have the Enhanced Expeditionary Medal equipped.
Save Limit Break for When Jenova's Staggered
If you use a Limit Break, Jenova may use Sanguinary Flames and make itself immune to the attack. To avoid this from happening, it's best to save your Limit Breaks for when it gets Staggered to ensure that the attack hits.
Jenova Lifeclinger Rewards and Details
Rewards
| Jenova Lifeclinger Rewards | |||||||||||
|---|---|---|---|---|---|---|---|---|---|---|---|
| Easy/Normal | Hard Mode | ||||||||||
|
・3300 EXP ・50 Party EXP ・10 AP ・2200 Gil |
TBD
|
||||||||||
| Items Dropped | Rare Items Dropped | ||||||||||
|
None
|
None
|
||||||||||
| Stealable Items | Morphable Items | ||||||||||
|
None
|
None
|
||||||||||
Drops the Sharpshooter's Companion Vol. XV on Hard Mode
Defeating Jenova Lifeclinger on Hard Mode will award you with the Sharpshooter's Companion Manuscript for Barret. This is important because you will need to collect all of a character's Manuscripts to reach Weapon Level 9.
Basic Information and Details
| Jenova Lifeclinger | |
|---|---|
|
|
|
| Location | Chapter Unlocked |
| Forgotten Capital | Chapter 14 |
| Species | Movement |
| Unreadable | Grounded |
| Details | |
|
The calamity from the stars that fell into a deep slumber after its conflict with the Cetra. Newly awakened through the grace of black-robed sacrifice, it seeks to seep its way into the lifestream and bring about the end. Unable to read |
|
FF7 Rebirth Related Guides

Boss Fight Guide and List of All Bosses
Story Bosses
| All Major Story Bosses | |
|---|---|
| Chapter 1 | Materia Guardian |
| Chapter 2 | Midgardsormr |
| Chapter 3 |
Rude and Elena Mythril Golem |
| Chapter 4 |
Terror of the Deep Roche |
| Chapter 5 | Jenova Emergent |
| Chapter 6 | Grasptropod |
| Chapter 7 |
Custom Valkyrie Gigatrice |
| Chapter 8 |
Dyne Anuran Suppressor |
| Chapter 9 |
Specimen H1024 Crimson Mare Mk. II |
| Chapter 10 | Gi Nattak |
| Chapter 11 |
Diabolic Variant Yin and Yang Forgotten Specimen Galian Beast Roche |
| Chapter 12 |
Abzu Rude and Elena Rufus |
| Chapter 13 |
Red Dragon Ironclad Reno and Rude Tseng and Elena Moss-Grown Adamantoise Demon Gate |
| Chapter 14 |
Jenova Lifeclinger Sephiroth Reborn |
Optional Bosses
| Grasslands | |
|---|---|
| Summon | Titan |
| Classified Intel | Quetzalcoatl |
| Side Quests |
White Terror |
| Junon | |
| Summon | Phoenix |
| Classified Intel | Mindflayer |
| Side Quests |
White Mousse Hell Rider II Sandstorm Drake |
| Corel | |
| Summon | Alexander |
| Classified Intel | Tonberry King |
| Side Quests |
Dark Claw Joker |
| Minigame | Test 0 |
| Gongaga | |
| Summon | Kujata |
| Classified Intel | Great Malboro |
| Side Quests |
Levridon Mastodon Gorgon Mane Gigantoad |
| Cosmo Canyon | |
| Summon | Bahamut Arisen |
| Classified Intel | Jabberwock |
| Side Quests | Irasceros Gigaworm |
| Nibel | |
| Summon | Odin |
| Classified Intel | King Zu |
| Side Quests |
Queen Bee Dranabarga |
| Meridian Ocean | |
| Gilgamesh's Island |
Gilgamesh Titan and Bahamut Arisen Phoenix and Kujata Alexander and Odin |
| Pirate King's Treasure |
Ogre Raider Brineborn Demon Hueyacoatl Sea Dragon |
Comment
Author

Jenova Lifeclinger Hard Mode Guide
Rankings
- We could not find the message board you were looking for.
Gaming News
![Animal Crossing: New Horizons Review [Switch 2] | Needlessly Crossing Over to a New Generation](https://img.game8.co/4391759/47d0408b0b8a892e453a0b90f54beb8a.png/show)


Popular Games

Genshin Impact Walkthrough & Guides Wiki
Honkai: Star Rail Walkthrough & Guides Wiki
Arknights: Endfield Walkthrough & Guides Wiki
Umamusume: Pretty Derby Walkthrough & Guides Wiki
Wuthering Waves Walkthrough & Guides Wiki
Pokemon TCG Pocket (PTCGP) Strategies & Guides Wiki
Abyss Walkthrough & Guides Wiki
Zenless Zone Zero Walkthrough & Guides Wiki
Digimon Story: Time Stranger Walkthrough & Guides Wiki
Clair Obscur: Expedition 33 Walkthrough & Guides Wiki


Recommended Games
Fire Emblem Heroes (FEH) Walkthrough & Guides Wiki
Pokemon Brilliant Diamond and Shining Pearl (BDSP) Walkthrough & Guides Wiki
Diablo 4: Vessel of Hatred Walkthrough & Guides Wiki
Super Smash Bros. Ultimate Walkthrough & Guides Wiki
Yu-Gi-Oh! Master Duel Walkthrough & Guides Wiki
Elden Ring Shadow of the Erdtree Walkthrough & Guides Wiki
Monster Hunter World Walkthrough & Guides Wiki
The Legend of Zelda: Tears of the Kingdom Walkthrough & Guides Wiki
Persona 3 Reload Walkthrough & Guides Wiki
Cyberpunk 2077: Ultimate Edition Walkthrough & Guides Wiki


All rights reserved
© SQUARE ENIX CO., LTD. All Rights Reserved.
CHARACTER DESIGN: TETSUYA NOMURA/ROBERTO FERRARI
LOGO ILLUSTRATION: © 1997 YOSHITAKA AMANO
The copyrights of videos of games used in our content and other intellectual property rights belong to the provider of the game.
The contents we provide on this site were created personally by members of the Game8 editorial department.
We refuse the right to reuse or repost content taken without our permission such as data or images to other sites.