Gi Nattak Hard Mode Guide

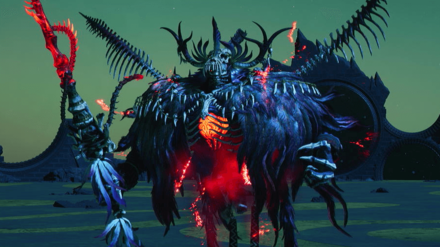
Gi Nattak is a boss in Chapter 10: Watcher of the Vale of Final Fantasy 7 Rebirth (FF7 Rebirth). Learn how to beat Gi Nattak on Hard Mode and normal difficulties, its weaknesses and resistances, and a list of its moves and attack patterns in this guide!
List of Contents
Gi Nattak Weaknesses and Stats
Stats
 |
|||
| Easy | Normal | Hard | |
|---|---|---|---|
| HP | ? | 52602 | 112677 |
Weakness and Resistances
| Weaknesses | Lesser Resistances | Greater Resistances |
|---|---|---|
| - | - | |
| Absorbed Elements | Immunities | |
| - | ||
Changes When Staggered
| Weakness / Effective | Resistance |
|---|---|
| - |
How to Pressure Gi Nattak
How to Pressure
|
|
You only need to deal enough damage on Gi Nattak to pressure it. It should get pressured once the stagger meter is around 40%.
How to Pressure and Stagger Enemies
How to Beat Gi Nattak (Normal)
| Gi Nattak Boss Fight Tips |
|---|
|
|
Basic Attacks can be Blocked or Dodged Easily

Gi Nattak's basic attacks can be blocked or dodged easily, even if they don't have an attack prompt like its other moves. If you're using Red XIII, take advantage of that and build up Vengeance by blocking them!
You can use Vengeance later to recover Red XIII's HP or Barret's HP with Watcher's Respite! Watcher's Respite is the weapon skill of Golden Claw.
Activate Barret's Lifesaver at the Start
Use Lifesaver to increase Barret's HP and take the damage that Red XIII will receive in combat. You will be able to save ATB as you only need to heal Barret since he will be taking all the damage!
Lifesaver is a weapon skill of the Barrage Blaster that you can get in Chapter 7 in Coal Mines.
Beat All Soul Flames Quickly

Gi Nattak will summon several Soul Flames and move out of the arena afterward. Defeat all the summoned units quickly to put back Gi Nattak in the arena.
You can beat all of them fast using Red XIII's spinning move (charged attack) and Crescent Claw.
Avoid its Withering Grip

Gi Nattack will try to grab one of your characters with its Withering Grip. If successful, it will damage your character and steal its HP to heal itself.
You can dodge it by simply moving back once you see the attack prompt!
Get Behind Boss During its Drain Move
Move behind Gi Nattak once it starts using its Drain to avoid getting hit. Use that opportunity to attack him once you get behind its back!
Getting hit by its Drain will damage your characters and heal itself for each hit.
Stagger Boss After its Execration of the Gi
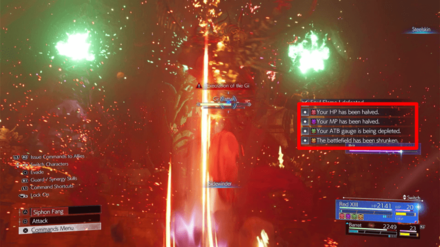
| Execration of the Gi Effects | Reduces HP to half Reduces MP to half Depletes ATB gauge Shrinks the arena |
|---|
Gi Nattak will use its Execration of the Gi move after all the Soul Flames are defeated in the second phase. It applies four debuffs on Red XIII and Barret once it activates.
It is an unavoidable attack and can only be removed once you stagger Gi Nattak!
How to Pressure and Stagger Enemies
Defeat Boss Within the Doom Time Limit

Gi Nattak will activate its instant death move named Doom in the last phase. Defeat it within the time limit to avoid this instant death move!
The time limit won't show as an actual "Time" but a huge number - 90,000 that depletes for approximately two and a half minutes.
Gi Nattak Hard Mode Guide
| Gi Nattak Hard Mode Tips |
|---|
| ★ Best Hard Mode Builds for Gi Nattak ★ |
|
|
Gi Nattak Hard Mode Builds
| The builds featured in this Hard Mode section are at Weapon Levels 7~8. If you find that you don't have enough Materia slots to complete the setup, consider getting all the possible Manuscripts on Normal, first. |
 Red XIII Red XIII Physical DPS | |||||
| Weapon | Armor | ||||
|---|---|---|---|---|---|
| Golden Collar | Celestial Bangle | ||||
| Accessory | Summon Materia | ||||
| Gi Warrior's Charm | Alexander | ||||
| Weapon Materia | Armor Materia | ||||
| Weapon Skills | |||||
 Barret Barret Healer | |||||
| Weapon | Armor | ||||
|---|---|---|---|---|---|
| Battle Cry | Cetran Bracer | ||||
| Accessory | Summon Materia | ||||
| Chocoking's Cape | Phoenix | ||||
| Weapon Materia | Armor Materia | ||||
| Weapon Skills | |||||
| TBD | |||||
Keep Manawall Up for Red
In the hard mode fight against Gi Nattak, we recommend actively controlling Red XIII as he will act as your main DPS. This will make him more likely to draw aggro, so it's important that you increase his defenses as much as you can.
Try to keep Manawall up using the Barrier Materia to reduce the damage from Gi Nattak's physical and magic attacks. With the Magic Focus materia, the buff will last longer than usual.
Perfect Block Its Attacks
Memorize Gi Nattak's attack patterns and perfect block them to fill the Vengeance gauge faster. Take note that this boss can attack in quick succession, so you might have to press the button multiple times to perfect block each hit.
Having the Precision Defense Focus materia makes this easier, even at base level.
Always Save an ATB for Sentinel Stance
If you're having a hard time blocking all Gi Nattak's rapid attacks, try using Sentinel Stance instead as it makes Red invulnerable for a few seconds and allows him to follow up with a counterattack.
Counters launched from Sentinel Stance deals heavy damage and gives a huge boost to the Vengeance gauge.
Remember that Sentinel Stance won't protect you from unblockable attacks, so keep an eye on the attack names to know when to dodge away instead!
Have Barret Prioritize Healing
Fortunately, Barret is here to support you and carry the recovery materia that you need. You'll want Barret to always have ATB charges ready just in case your team, especially Red, needs healing.
It is highly recommended to have the Auto-Unique Ability (for Overcharge), Skill Master combined with Auto-Weapon Ability, and Steadfast Block materias to help fill his ATB gauge.
Save MP with Pray
You cannot replenish MP using items in Hard Mode, so use Cure sparingly so you still have enough MP for Arise just in case. If you have enough SP, get the MP Recovery Rate Up skill core from the Folio Skill Tree.
If you need healing, try filling 2 ATB charges and cast Pray instead to heal both characters without spending MP. Check the table below for the recommended times to use each healing ability!
| Recommended Times to Use Recovery Abilities | |
|---|---|
| Conditions | Ability to Use |
| ・Barret MP >80% ・Red HP <60% |
Regen on Red |
| ・Barret and Red HP <60% | Pray |
| ・Red HP <60% ・Red Limit Gauge full |
Bloody Fang |
| ・Ally HP <40% | Cure on ally, followed by Pray if needed |
| ・Phase 2 of boss fight ・Ally HP keeps dropping <50% |
Summon Phoenix |
| ・Phoenix summoned ・Ally HP <30% |
Phoenix's Reraise on ally |
This table is ordered by priority, with the top row being the highest priority.
Do Not Use Lifesaver
This is what happens to Barret if Lifesaver is active.
Do not use Lifesaver against Gi Nattak even if you're used to using it to set Barret up at the start of every fight. This will make him take almost all of the damage and force you to use Cure spells a lot, draining his MP.
The Prayer materia will also lose its value if only one party member is taking damage.
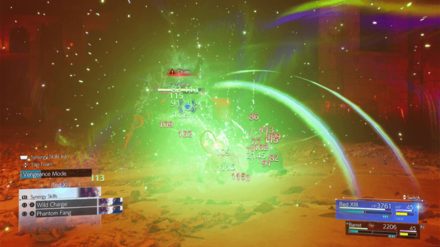
Run Around to Avoid Phantasmal Scourge
Gi Nattak also has a few unblockable attacks that you shouldn't use Sentinel Stance against. Once such attacks is Phantasmal Scourge, where Gi Nattak rains down red orbs in the room and summons Soul Flames after.
When it starts casting this attack, keep moving around and quickly take out the Soul Flames before they cause you more trouble.
Use Stardust Ray on the Soul Flames
Gi Nattak will summon a swarm of Soul Flames as the fight transitions to phase 2. If you don't have 2 ATB charges ready, fill 2 ATB charges by attacking them then use Stardust Ray immediately to wipe most of them out.
These mobs can cast tier-2 elemental spells and make the fight a lot more difficult if you keep them around.
Prepare for the Doom Countdown
In the last phase, Gi Nattak will place Doom on both characters that results in an instant death if the counter reaches 0. The counter is also smaller in Hard Mode and will start at 60,000, which is around 1 minute and 40 seconds.
Make sure you're prepared before this phase and go all out to defeat Gi Nattak before the timer runs out.
| How to Prepare for Gi Nattak's Doom | |
|---|---|
| 1 | Before starting the boss fight, unlock both characters' Level 3 Limit Breaks: Wrath of the Land and Satellite Beam. |
| 2 | As early as phase 1, accumulate Synergies and use the Overfang Synergy Ability twice to reach Limit Level 3. |
| 3 | Save enough Synergies for United Refocus. |
| 4 | Save full Limit gauges for both characters to be used in the last phase. |
| 5 | Once the doom countdown starts, pressure Gi Nattak by inflicting enough damage. |
| 6 | After putting Gi Nattak in a pressured state, use both characters' Level 3 Limit Breaks to quickly fill the Stagger gauge. Both Limit Breaks deal increased stagger. |
| 7 | Before completely filling the Stagger gauge, use United Refocus. |
| 8 | Stagger Gi Nattak. |
| 9.1 | Activate Red's Vengeance Mode (if not yet active) and spam Sidewinder. Use Crescent Claw if Vengeance Mode is about to run out. |
| 9.2 | Use Barret's Maximum Fury. |
Gi Nattak Best Party and Builds
Fixed Party Setup
| Recommended Party Setup | |
|---|---|
|
Red XIII
|
・Charge Vengeance for more healing options ・Punish the boss with Sidewinder, Crescent Claw, or Stardust Ray once staggered. |
|
Barret
|
・Mostly focus on taking damage and healing ・Activate Lifesaver to tank damage and increase HP ・Can use Maximum Fury or Focused Shot once the boss is staggered for maximum damage |
Gi Nattak Best Materia to Use
Recommended Materia for Red XIII
| Weapon: Golden Collar |
Armor: Road Warrior Bangle |
|---|---|
|
|
|
| Summon: |
This build for Red XIII focuses on increasing some stats, improving blocking, and adds healing options. It doesn't have any elemental Materia, as Gi Nattak doesn't have any elemental weaknesses.
For the Healing Materia, it's best to use the 3-Star Healing Materia in Chapter 10 where you look for the artifact to open the gate. It will allow Red XIII to cast Regen and heal him or Barret over time.
Recommended Materia for Barret
| Weapon: Calamitous Bazooka |
Armor: Road Warrior Bangle |
|---|---|
|
|
|
| Summon: |
This build mostly gives additional stats and healing capabilities for Barret. It doesn't have any elemental Materia, as Gi Nattak doesn't have any elemental weaknesses.
To get many Materia slots and equip more passive Materia, use the Calamitous Bazooka that can be retrieved from a chest in Chapter 10 during the trials.
Gi Nattak Rewards and Details
Rewards
| Gi Nattak Rewards | |||||||||||
|---|---|---|---|---|---|---|---|---|---|---|---|
| Easy/Normal | Hard Mode | ||||||||||
|
・2888 EXP ・50 Party EXP ・10 AP ・1650 Gil |
・9750 EXP ・30 AP ・3250 Gil ・Tale of the Red Warrior Vol. XIV |
||||||||||
| Items Dropped | Rare Items Dropped | ||||||||||
|
None
|
None
|
||||||||||
| Stealable Items | Morphable Items | ||||||||||
|
None
|
None
|
||||||||||
Basic Information and Details
| Gi Nattak | |
|---|---|
|
|
|
| Location | Chapter Unlocked |
| Cosmo Canyon | Chapter 10 |
| Species | Movement |
| Unreadable | Flying |
| Details | |
|
The leader of the Gi, a people who were driven to extinction and cursed to roam as spirits, rejected by the lifestream. He and his clan have been sealed in an underground cave, left to fan the flames of their hatred and the red miasma that envelops them. Inflicting damage will pressure him. A curse will activate when the soul flames possess a statue. Staggering Gi Nattack will undo the curse. Doom will inflict instant death after a certain amount of time. |
|
FF7 Rebirth Related Guides

Boss Fight Guide and List of All Bosses
Story Bosses
| All Major Story Bosses | |
|---|---|
| Chapter 1 | Materia Guardian |
| Chapter 2 | Midgardsormr |
| Chapter 3 |
Rude and Elena Mythril Golem |
| Chapter 4 |
Terror of the Deep Roche |
| Chapter 5 | Jenova Emergent |
| Chapter 6 | Grasptropod |
| Chapter 7 |
Custom Valkyrie Gigatrice |
| Chapter 8 |
Dyne Anuran Suppressor |
| Chapter 9 |
Specimen H1024 Crimson Mare Mk. II |
| Chapter 10 | Gi Nattak |
| Chapter 11 |
Diabolic Variant Yin and Yang Forgotten Specimen Galian Beast Roche |
| Chapter 12 |
Abzu Rude and Elena Rufus |
| Chapter 13 |
Red Dragon Ironclad Reno and Rude Tseng and Elena Moss-Grown Adamantoise Demon Gate |
| Chapter 14 |
Jenova Lifeclinger Sephiroth Reborn |
Optional Bosses
| Grasslands | |
|---|---|
| Summon | Titan |
| Classified Intel | Quetzalcoatl |
| Side Quests |
White Terror |
| Junon | |
| Summon | Phoenix |
| Classified Intel | Mindflayer |
| Side Quests |
White Mousse Hell Rider II Sandstorm Drake |
| Corel | |
| Summon | Alexander |
| Classified Intel | Tonberry King |
| Side Quests |
Dark Claw Joker |
| Minigame | Test 0 |
| Gongaga | |
| Summon | Kujata |
| Classified Intel | Great Malboro |
| Side Quests |
Levridon Mastodon Gorgon Mane Gigantoad |
| Cosmo Canyon | |
| Summon | Bahamut Arisen |
| Classified Intel | Jabberwock |
| Side Quests | Irasceros Gigaworm |
| Nibel | |
| Summon | Odin |
| Classified Intel | King Zu |
| Side Quests |
Queen Bee Dranabarga |
| Meridian Ocean | |
| Gilgamesh's Island |
Gilgamesh Titan and Bahamut Arisen Phoenix and Kujata Alexander and Odin |
| Pirate King's Treasure |
Ogre Raider Brineborn Demon Hueyacoatl Sea Dragon |
Comment
Seriously, all your guides have been so good! I try other cheese strats on YouTube but they are so specific, it just feels like trying to follow a script. Every boss I've struggled on I've defeated quickly with these strats. Much love!
Author

Gi Nattak Hard Mode Guide
Rankings
- We could not find the message board you were looking for.
Gaming News

![Death Stranding 2: On The Beach [PC] Review | A Port That Delivers](https://img.game8.co/4447392/15310a0c9aa1b6843bb713b2ea216930.jpeg/show)


Popular Games

Genshin Impact Walkthrough & Guides Wiki
Umamusume: Pretty Derby Walkthrough & Guides Wiki
Crimson Desert Walkthrough & Guides Wiki
Monster Hunter Stories 3: Twisted Reflection Walkthrough & Guides Wiki
Honkai: Star Rail Walkthrough & Guides Wiki
Pokemon Pokopia Walkthrough & Guides Wiki
The Seven Deadly Sins: Origin Walkthrough & Guides Wiki
Wuthering Waves Walkthrough & Guides Wiki
Zenless Zone Zero Walkthrough & Guides Wiki
Arknights: Endfield Walkthrough & Guides Wiki


Recommended Games
Fire Emblem Heroes (FEH) Walkthrough & Guides Wiki
Diablo 4: Vessel of Hatred Walkthrough & Guides Wiki
Cyberpunk 2077: Ultimate Edition Walkthrough & Guides Wiki
Yu-Gi-Oh! Master Duel Walkthrough & Guides Wiki
Super Smash Bros. Ultimate Walkthrough & Guides Wiki
Pokemon Brilliant Diamond and Shining Pearl (BDSP) Walkthrough & Guides Wiki
Elden Ring Shadow of the Erdtree Walkthrough & Guides Wiki
Monster Hunter World Walkthrough & Guides Wiki
The Legend of Zelda: Tears of the Kingdom Walkthrough & Guides Wiki
Persona 3 Reload Walkthrough & Guides Wiki


All rights reserved
© SQUARE ENIX CO., LTD. All Rights Reserved.
CHARACTER DESIGN: TETSUYA NOMURA/ROBERTO FERRARI
LOGO ILLUSTRATION: © 1997 YOSHITAKA AMANO
The copyrights of videos of games used in our content and other intellectual property rights belong to the provider of the game.
The contents we provide on this site were created personally by members of the Game8 editorial department.
We refuse the right to reuse or repost content taken without our permission such as data or images to other sites.
am I missing something with the mp absorption in Barret's build? doesn't do anything?