Red Dragon Hard Mode Guide

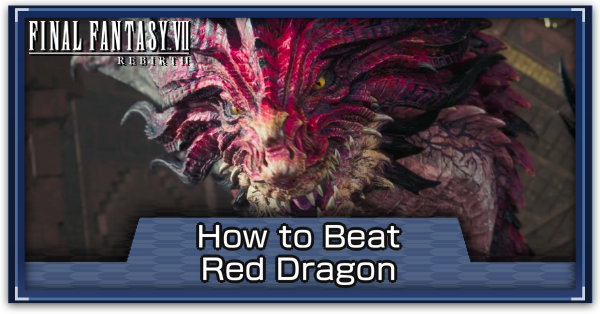
Red Dragon is a boss in Chapter 13: Where Angels Fear to Tread of Final Fantasy 7 Rebirth (FF7 Rebirth). Learn how to beat Red Dragon on Hard Mode and normal difficulties, its weaknesses and resistances, and a list of its moves and attack patterns in this guide!
List of Contents
Red Dragon Weaknesses and Stats
Stats
 |
|||
| Easy | Normal | Hard | |
|---|---|---|---|
| HP | 68075 | 97250 | 170723 |
Weakness and Resistances
| Weaknesses | Lesser Resistances | Greater Resistances |
|---|---|---|
| - | - | |
| Absorbed Elements | Immunities | |
| - | ||
Changes When Staggered
| Weakness / Effective | Immunity |
|---|---|
How to Pressure Red Dragon
|
|
Destroy One of Its Body Parts
Throughout the fight, the Red Dragon will have multiple body parts that you can destroy to pressure it. For the first part of the fight, you can destroy its head, while in the second half, you can destroy both of its wings as well as its chest.
Hit Its Head With a Scorched Pillar
During the first part of the fight, you can hide behind one of the four pillars when the Red Dragon uses its breath attacks to transform it into a Scorched Pillar. Destroying these pillars and dropping them on the Dragon's head will instantly destroy it and pressure the boss.
How to Pressure and Stagger Enemies
Red Dragon Best Party and Builds
Normal Mode Build
| Builds by Difficulty | |
|---|---|
| Normal Mode | Hard Mode |
Recommended Party Setup
| Recommended Party Setup | |
|---|---|
 Cloud Cloud
|
【Punisher】 ・Unleash powerful abilities, like Infinity's End and Braver, when the boss is staggered ・Use ranged sword attacks once the boss starts flying Recommended Level: 47 |
 Yuffie Yuffie
|
【Ranged Attacker】 ・Attack the boss from a distance using Ice Ninjutsu ・Can easily target the wings of the boss once it starts flying Recommended Level: 47 |
 Aerith Aerith
|
【Spellcaster】 ・Attack the boss with Ice magic ・Place Arcane Ward to double-cast spells Recommended Level: 47 |
Best Materia to Use
| Materia | How to Use |
|---|---|
|
|
・Gives the ability to cast Ice spells |
|
|
・Gives the ability to cast healing spells |
|
|
・Manaward halves the damage of the Red Dragon's Magic attacks. |
|
|
・Used to cast heals and buffs on the entire party. |
|
|
・Equip to increase HP |
|
|
・Fill up ATB with each successful block |
|
|
・Increase the overall efficiency of blocking |
|
|
・Increase the effect of items like Potions |
|
|
・Help inflict additional Ice damage while on the field |
Hard Mode Build
| Builds by Difficulty | |
|---|---|
| Normal Mode | Hard Mode |
| These Hard Mode builds use equipment that are at least Weapon Level 8. If you don't have enough Materia slots or the right Weapon Skills to complete a character setup, consider using a different weapon or collect all of the character's Manuscripts first. |
Best Build for Yuffie
| Jump to Character Build | ||
|---|---|---|
| Yuffie | Tifa | Aerith |
 Yuffie Yuffie
Magic DPS |
|||||
| Weapon | Armor | ||||
|---|---|---|---|---|---|
| Fuma Shuriken | Cetran Bracer | ||||
| Accessory | Summon Materia | ||||
| Genji Gloves | Gilgamesh | ||||
| Weapon Materia | Armor Materia | ||||
| Weapon Skills | |||||
|
|
|
||||
|
|
|
||||
Yuffie is the best character for this fight since she has multiple ways to target the Red Dragon's Ice weakness. She can easily deal tons of damage with her Ice Ninjutsu basic attacks, Darkness-boosted Icy Banishments, and Blizzard spells.
Since she's the character you're controlling, make sure that she has the Skill Master and ATB Assist Materias equipped so that you can generate ATB Charges on your other party members without you having to directly control them.
Yuffie's ranged attacks are also necessary to destroy the Red Dragon's wings without you having to go up in the air.
Best Build for Tifa
| Jump to Character Build | ||
|---|---|---|
| Yuffie | Tifa | Aerith |
 Tifa Tifa
Physical DPS |
|||||
| Weapon | Armor | ||||
|---|---|---|---|---|---|
| Dragon Claws | Valkyrian Bangle | ||||
| Accessory | Summon Materia | ||||
| Enhanced Expeditionary Medal | Odin | ||||
| Weapon Materia | Armor Materia | ||||
| Weapon Skills | |||||
|
|
|
||||
|
|
|
||||
Tifa does a lot of Physical damage with her Unique Ability and True Strike combo when the Dragon's staggered. She can also help build up its Stagger Meter with Focused Strike once Yuffie pressures the boss.
Aside from that, Tifa will mainly be using Limit Siphon so that she can spam Meteor Strikes to provide crowd control and good damage when the boss isn't staggered.
Best Build for Aerith
| Jump to Character Build | ||
|---|---|---|
| Yuffie | Tifa | Aerith |
 Aerith Aerith
Support |
|||||
| Weapon | Armor | ||||
|---|---|---|---|---|---|
| Ceremonial Staff | Cetran Armlet | ||||
| Accessory | Summon Materia | ||||
| Enhanced Karmic Cowl | Phoenix | ||||
| Weapon Materia | Armor Materia | ||||
| Weapon Skills | |||||
|
|
|
||||
|
|
|
||||
Aerith will be your main support in this fight with her Magnified Curagas and Manawalls to reduce the damage of the Red Dragon's attacks. She can even use Prayer when she has 2 ATB Charges to heal the party without using MP.
Aerith also has her Healing Wind Limit Break and Noble Sacrifice Weapon Ability in case your party gets low on HP or multiple party members go down, especially from Crimson Breath III.
For her accessory, you can replace the Enhanced Karmic Cowl with a Gotterdammerung so that Aerith can use her Limit Break more often or you can Siphon it away with Tifa.
How to Beat Red Dragon
| Red Dragon Boss Fight Tips |
|---|
|
|
Exploit the Red Dragon's Ice Weakness
The Red Dragon has a notable weakness to Ice attacks, so use someone like Yuffie who can use multiple Ice moves, like Ice Ninjutsu attacks, Icy Banishment, and Blizzard spells, to quickly take it down.
Have Manaward Active at All Times
Since the majority of the Red Dragon's attacks deal Magic damage, you should have the Manaward buff active on all party members to reduce the damage that they take.
Use the Pillars as Cover
Whenever the Red Dragon uses one of its Fire attacks, hide behind one of the pillars to block the attack and turn the pillar into a Scorched Pillar. You can then destroy it by dropping it on the Dragon's head to destroy and pressure it.
Pillars are Destroyed During the Second Phase
Note that all four pillars will be destroyed once the second phase starts, so don't hesitate to use them to speed up the boss fight.
Destroy the Wings Before the Chest
Use Yuffie to destroy the Red Dragon's wings with her Ice attacks so that it will fall to the ground. Once it's downed, you'll have an easier time destroying its chest since your melee party members can now hit it.
Focus the Chest to Weaken Crimson Breath
| Level | Chest HP and Attack Range |
|---|---|
| Crimson Breath III | Chest: Above 50% HP Range: Entire Arena |
| Crimson Breath II | Chest: Below 50% HP Range: Most of the Arena |
| Crimson Breath I | Chest: Destroyed Range: Half of the Arena |
Crimson Breath's attack range is directly tied to the Red Dragon's chest HP. Once you destroy its wings and drop the Dragon to the ground, focus all your damage on destroying the chest to lower the attack's range.
In case you're not sure where to run to for safety, you can follow the AI controlled characters since they will automatically run to a safe area.
Always Uses Crimson Breath III on Hard
If you're playing on Hard Mode, the Red Dragon will always use Crimson Breath III regardless of the chest's HP. Make sure that you have an extra ATB Charge to cast Manaward before destroying the chest since it'll use Crimson Breath III right after and you'll need the buff to survive.
Alernatively, you could ignore the Assess text and stagger the boss without destroying the chest so that you don't have to worry about about dealing with Crimson Breath III's damage. Do note however that it will use Crimson Breath III if you take too long to stagger it.
Red Dragon Rewards and Details
Rewards
| Red Dragon Rewards | |||||||||||
|---|---|---|---|---|---|---|---|---|---|---|---|
| Easy/Normal | Hard Mode | ||||||||||
|
・4100 EXP ・50 Party EXP ・10 AP ・2050 Gil |
・6500 EXP ・30 AP ・3250 Gil ・Tale of the Red Warrior Vol. XV |
||||||||||
| Items Dropped | Rare Items Dropped | ||||||||||
|
None
|
None
|
||||||||||
| Stealable Items | Morphable Items | ||||||||||
|
None
|
None
|
||||||||||
Basic Information and Details
| Red Dragon | |
|---|---|
 |
|
| Location | Chapter Unlocked |
| Labyrinth | Chapter 13 |
| Species | Movement |
| Biological | Flying |
| Details | |
|
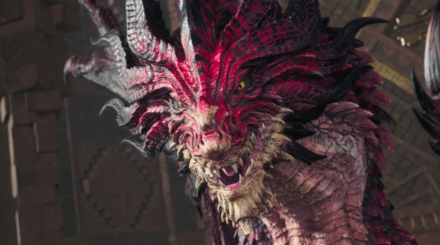
An enormous wyrm who has sworn allegiance to the Cetra, and now serves as guardian of their temple and its labyrinthine halls. It possesses a unique organ that allows it to spew incinerating flames. Striking the scorched pillars and bringing them down on the dragon will pressure it. Destroying one of its wings while it is flying will cause it to plummet, pressuring it. Attacking its chest will reduce the range of Crimson Breath. |
|
FF7 Rebirth Related Guides

Boss Fight Guide and List of All Bosses
Story Bosses
| All Major Story Bosses | |
|---|---|
| Chapter 1 | Materia Guardian |
| Chapter 2 | Midgardsormr |
| Chapter 3 |
Rude and Elena Mythril Golem |
| Chapter 4 |
Terror of the Deep Roche |
| Chapter 5 | Jenova Emergent |
| Chapter 6 | Grasptropod |
| Chapter 7 |
Custom Valkyrie Gigatrice |
| Chapter 8 |
Dyne Anuran Suppressor |
| Chapter 9 |
Specimen H1024 Crimson Mare Mk. II |
| Chapter 10 | Gi Nattak |
| Chapter 11 |
Diabolic Variant Yin and Yang Forgotten Specimen Galian Beast Roche |
| Chapter 12 |
Abzu Rude and Elena Rufus |
| Chapter 13 |
Red Dragon Ironclad Reno and Rude Tseng and Elena Moss-Grown Adamantoise Demon Gate |
| Chapter 14 |
Jenova Lifeclinger Sephiroth Reborn |
Optional Bosses
| Grasslands | |
|---|---|
| Summon | Titan |
| Classified Intel | Quetzalcoatl |
| Side Quests |
White Terror |
| Junon | |
| Summon | Phoenix |
| Classified Intel | Mindflayer |
| Side Quests |
White Mousse Hell Rider II Sandstorm Drake |
| Corel | |
| Summon | Alexander |
| Classified Intel | Tonberry King |
| Side Quests |
Dark Claw Joker |
| Minigame | Test 0 |
| Gongaga | |
| Summon | Kujata |
| Classified Intel | Great Malboro |
| Side Quests |
Levridon Mastodon Gorgon Mane Gigantoad |
| Cosmo Canyon | |
| Summon | Bahamut Arisen |
| Classified Intel | Jabberwock |
| Side Quests | Irasceros Gigaworm |
| Nibel | |
| Summon | Odin |
| Classified Intel | King Zu |
| Side Quests |
Queen Bee Dranabarga |
| Meridian Ocean | |
| Gilgamesh's Island |
Gilgamesh Titan and Bahamut Arisen Phoenix and Kujata Alexander and Odin |
| Pirate King's Treasure |
Ogre Raider Brineborn Demon Hueyacoatl Sea Dragon |
Comment
Barrets avalanche Credo is insane helpful in this fight
Author
Red Dragon Hard Mode Guide
Rankings
- We could not find the message board you were looking for.
Gaming News
Popular Games

Genshin Impact Walkthrough & Guides Wiki

Umamusume: Pretty Derby Walkthrough & Guides Wiki

Crimson Desert Walkthrough & Guides Wiki

Monster Hunter Stories 3: Twisted Reflection Walkthrough & Guides Wiki

Honkai: Star Rail Walkthrough & Guides Wiki

Pokemon Pokopia Walkthrough & Guides Wiki

The Seven Deadly Sins: Origin Walkthrough & Guides Wiki

Wuthering Waves Walkthrough & Guides Wiki

Zenless Zone Zero Walkthrough & Guides Wiki

Arknights: Endfield Walkthrough & Guides Wiki
Recommended Games

Fire Emblem Heroes (FEH) Walkthrough & Guides Wiki

Diablo 4: Vessel of Hatred Walkthrough & Guides Wiki

Cyberpunk 2077: Ultimate Edition Walkthrough & Guides Wiki

Yu-Gi-Oh! Master Duel Walkthrough & Guides Wiki

Super Smash Bros. Ultimate Walkthrough & Guides Wiki

Pokemon Brilliant Diamond and Shining Pearl (BDSP) Walkthrough & Guides Wiki

Elden Ring Shadow of the Erdtree Walkthrough & Guides Wiki

Monster Hunter World Walkthrough & Guides Wiki

The Legend of Zelda: Tears of the Kingdom Walkthrough & Guides Wiki

Persona 3 Reload Walkthrough & Guides Wiki
All rights reserved
© SQUARE ENIX CO., LTD. All Rights Reserved.
CHARACTER DESIGN: TETSUYA NOMURA/ROBERTO FERRARI
LOGO ILLUSTRATION: © 1997 YOSHITAKA AMANO
The copyrights of videos of games used in our content and other intellectual property rights belong to the provider of the game.
The contents we provide on this site were created personally by members of the Game8 editorial department.
We refuse the right to reuse or repost content taken without our permission such as data or images to other sites.


![Star Savior Review [First Impressions] | Engaging, Entertaining, and Expensive](https://img.game8.co/4447603/8f500e9bf666bdb8adb1af478e9dfdbd.png/show)


avalanche Credo = lifesaver in the english Version i think