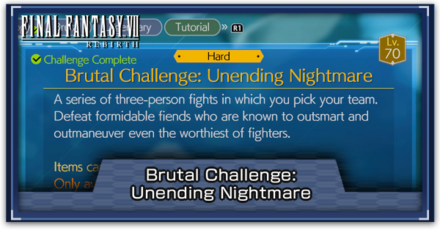
How to Beat Brutal Challenge: Unending Nightmare
This is a guide on how to beat Brutal Challenge: Unending Nightmare in the Combat Simulator of Final Fantasy 7 Rebirth (FF7 Rebirth). Check out the unlock requirements and rewards, a list of enemies and bosses in each round, and the best party, equipment, and Materia to beat this challenge.
List of Contents
Best Party and Builds
| Best Party for Brutal Challenge: Unending Nightmare | ||
|---|---|---|
 Yuffie Yuffie |
 Tifa Tifa |
 Aerith Aerith |
Yuffie Equipment and Materia
 Yuffie Yuffie
Main DPS |
|||||
| Weapon | Armor | ||||
|---|---|---|---|---|---|
| Crescent Sickle | Cetran Bracer | ||||
| Accessory | Summon Materia | ||||
| Sorcerer's Earrings | Gilgamesh | ||||
| Weapon Materia | Armor Materia | ||||
|
|
|
||||
| Weapon Skills | |||||
|
|
|
||||
|
|
|
||||
Yuffie will be the Main DPS for this team thanks to her ability to target multiple different weaknesses with her Elemental Ninjutsus and the Fire and Ice plus Lightning and Wind Materias.
She also has other great abilities like Shooting Star for crowd control and Doppelganger to double cast spells and abilities. When combined with her elemental prowess, Yuffie can easily take down the hordes of enemies in this Combat Simulator challenge.
Since Yuffie will be your main character, she will also hold the ATB Assist Materia to fill the other party member's ATB Gauges and Prayer since she will have her ATB full most of the time compared to the other two who would rather use Curaga's one ATB charge to heal.
Tifa Equipment and Materia
 Tifa Tifa
Secondary DPS |
|||||
| Weapon | Armor | ||||
|---|---|---|---|---|---|
| Kaiser Knuckles | Valkyrian Bangle | ||||
| Accessory | Summon Materia | ||||
| Full Throttle Wristguards | Odin | ||||
| Weapon Materia | Armor Materia | ||||
|
|
|
||||
| Weapon Skills | |||||
|
|
|
||||
|
|
|
||||
Tifa will be your Secondary DPS on this team because she can heavily increase stagger's damage bonus, helping you finish off an enemy before they can get back up again.
Healing and Revival are useful in case Aerith is preoccupied or doesn't have ATB charges while ATB Stagger and Skill Master let her spam her skills when an enemy gets staggered as long as you switch to her before they get knocked down.
You also have the option of running Warding linked to Petrify over ATB Stagger and Skill Master to prevent Tifa from getting Petrified, but her stagger burst damage will be worse.
Aerith Equipment and Materia
 Aerith Aerith
Support |
|||||
| Weapon | Armor | ||||
|---|---|---|---|---|---|
| Ceremonial Staff | Cetran Armlet | ||||
| Accessory | Summon Materia | ||||
| Enhanced Psychic's Charm | Phoenix | ||||
| Weapon Materia | Armor Materia | ||||
|
|
|
||||
| Weapon Skills | |||||
|
|
|
||||
|
|
|
||||
If you don't have a Ceremonial Staff with 6 Materia Slots, you can use Gambanteinn with Spiritual Harvest, Max MP +3, Reprieve, and ATB Charge Rate Up instead.
Aerith will be a traditional healer support with Curaga and Arise along with Resist and Esuna to deal with negative status. This means that she should equip Warding linked to Poison and Petrify so that she doesn't get Poisoned or Petrified herself.
Aside from that, she has Synergy linked to Comet to provide crowd control whenever your leader uses an attack command and Time for generally useful Haste buffs.
Take Advantage of Strong Magic Spells at the Start
Strong 3 star magic spells such as Firaga and Blizzaga is capable of immediately taking down enemies, and this can make battles easier if you can use it at the start. You can try equipping materia and accessories that increase your ATB at the beginning so that you can use these spells as soon as possible.
Recommended Equipment to Increase ATB at the Start
| Item | Effect |
|---|---|
|
|
Increases how full the ATB gauge is at the start of the battle. |
|
|
Doubles ATB when activated. Cannot be used continuously. Press L1 + R1 to activate. |
 Whistlewind Scarf Whistlewind Scarf
|
Slightly fills the ATB gauge at the start of the battle. |
 Chocoking's Cape Chocoking's Cape
|
Fills ATB charge at the start of battle. |
How to Beat All Rounds
Round 1
| Jump to Round | |||||||||
|---|---|---|---|---|---|---|---|---|---|
| 1 | 2 | 3 | 4 | 5 | 6 | 7 | 8 | 9 | 10 |
| Enemies |
・Elphadunk
・Queen Bee ・Guard Bee x2 |
||||||||
Prioritize killing Queen Bee first with Yuffie's Fire attacks, then you can switch to killing the Guard Bees before dealing with the Elphadunk.
Remember to switch to Tifa whenever an enemy is about to get staggered so you can swiftly finish them off and immediately move on to the next foe.
Round 2
| Jump to Round | |||||||||
|---|---|---|---|---|---|---|---|---|---|
| 1 | 2 | 3 | 4 | 5 | 6 | 7 | 8 | 9 | 10 |
| Enemies |
・Gi Lancer ・Gi Archer ・Gi Sorcerer ・Kelzmelzer |
||||||||
Kill the Gi Sorcerer first before doing anything else this round because they can revive downed enemies. Max out Yuffie's ATB Charge on other enemies first then cast two Firas on the Gi Sorcerer as soon as they start casting a spell.
Once the Gi Sorcerer is down, you can continue to use Fire attacks to deal with the Gi Archer and Lancer. Finally, spam Tifa's unique ability on the Kelzmelzer to quickly stagger and kill it.
Round 3
| Jump to Round | |||||||||
|---|---|---|---|---|---|---|---|---|---|
| 1 | 2 | 3 | 4 | 5 | 6 | 7 | 8 | 9 | 10 |
| Enemies |
・Zemzelett
・Griffon |
||||||||
Focus down the Zemzelett first with Ice attacks to pressure and stagger it as soon as possible. Once it's down, you can swap to the Griffon and employ the same strategy but with Lightning attacks instead.
The reason why you don't go after the Griffon first is because it will automatically put itself under pressure while the Zemzelett needs to be actively pressured.
Round 4
| Jump to Round | |||||||||
|---|---|---|---|---|---|---|---|---|---|
| 1 | 2 | 3 | 4 | 5 | 6 | 7 | 8 | 9 | 10 |
| Enemies |
・Threadspinner Chimera
・Pyretail x2 |
||||||||
Use Fire attacks to deal with the Pyretails first since they can be fast and annoying. Once they've been dealt with, swap to Ice to take down the Threadspinner Chimera.
Round 5
| Jump to Round | |||||||||
|---|---|---|---|---|---|---|---|---|---|
| 1 | 2 | 3 | 4 | 5 | 6 | 7 | 8 | 9 | 10 |
| Enemies |
・Devil Rider
・2-C SOLDIER Operator |
||||||||
Take down the Devil Rider first with Lightning attacks since he's more annoying to deal with because of his speed and movement. Once the biker is down, swap to Fire to swiftly dispatch the 2-C SOLDIER Operator.
Round 6
| Jump to Round | |||||||||
|---|---|---|---|---|---|---|---|---|---|
| 1 | 2 | 3 | 4 | 5 | 6 | 7 | 8 | 9 | 10 |
| Enemies |
・Whymzelett
・Shirdal |
||||||||
Focus down the Whymzelett first with Ice attacks to pressure and stagger it as soon as possible. Once it's down, you can swap to the Shirdal and employ the same strategy but with Lightning attacks instead.
The reason why you don't go after the Shirdal first is because it will automatically put itself under pressure while the Whymzelett needs to be actively pressured.
Round 7
| Jump to Round | |||||||||
|---|---|---|---|---|---|---|---|---|---|
| 1 | 2 | 3 | 4 | 5 | 6 | 7 | 8 | 9 | 10 |
| Enemies |
・Valron
・Cavestalker ・Desert Sahagin ・Chimera |
||||||||
Prioritize killing the Valron first with Ice attacks, especially when it uses Graviton Charge, since Graviga will bring you down to single-digit HP.
Once it's been dealt with, focus on the Cavestalker and Desert Sahagin next since they're also weak to Ice. Finally, switch to Fire attacks to kill the Chimera and end the fight.
Round 8
| Jump to Round | |||||||||
|---|---|---|---|---|---|---|---|---|---|
| 1 | 2 | 3 | 4 | 5 | 6 | 7 | 8 | 9 | 10 |
| Enemies |
・Enmidunk
・Cockatrice ・Death Claw |
||||||||
If you don't want to deal with Yuffie potentially getting Petrified, deal with the Cockatrice first; otherwise, kill the Enmidunk since it can be annoying to deal with when it's Rampaging and your camera's locked onto a different target.
Once those two have been dealt with, you can easily kill the Death Claw by dodging its Reaper Claws and countering it with Tifa's powerful attacks.
Round 9
| Jump to Round | |||||||||
|---|---|---|---|---|---|---|---|---|---|
| 1 | 2 | 3 | 4 | 5 | 6 | 7 | 8 | 9 | 10 |
| Enemies |
・Ancient Dragon
・Panthera Protector ・Bomb |
||||||||
Kill the Panthera Protector first since getting trapped in its Ring of Fire can leave you vulnerable to attacks. Once it goes down, switch to Wind to quickly deal with the Ancient Dragon before moving on to the Bomb that you can easily kill by pressuring it when it breathes fire.
Round 10
| Jump to Round | |||||||||
|---|---|---|---|---|---|---|---|---|---|
| 1 | 2 | 3 | 4 | 5 | 6 | 7 | 8 | 9 | 10 |
| Enemies |
・Marquis Valron
・Sahagin Warrior ・Silver Chimera |
||||||||
Prioritize killing the Marquis Valron first with Ice attacks, especially when it uses Graviton Charge, since Graviga will bring you down to single-digit HP.
Once it's been dealt with, focus on the Sahagin Warrior next since it's also weak to Ice. Finally, switch to Fire attacks to kill the Silver Chimera and end the fight.
Brutal Challenge: Unending Nightmare Unlock and Rewards
| Basic Information | |||||
|---|---|---|---|---|---|
|
Brutal Challenge: Unending Nightmare A series of three-person fights in which you pick your team. Defeat formidable fiends who are known to outsmart and outmaneuver even the worthiest of fighters. ・Items cannot be used
・Only available on Hard difficulty |
|||||
| Level | 70 | Rounds | 10 | Team | 1-3 |
| Rewards | ・Prayer Materia Earrings | ||||
| Unlock Requirements | |||||
| ・Complete Brutal Challenge: Requiem for the Scorned | |||||
To unlock Brutal Challenge: Unending Nightmare in the Combat Simulator, you will first need to beat Brutal Challenge: Requiem for the Scorned. Once you've done that, you may now attempt this Combat Simulator challenge.
Brutal Challenge: Requiem for the Scorned Guide
Final Fantasy 7 Rebirth Related Guides
All Combat Simulator Battles and Rewards
All Combat Simulator Articles
| Combat Simulator Guides |
|---|
| Brutal and Legendary Combat Simulator Guide |
Biological Intel
| List of Biological Intel Missions | |
|---|---|
| Know Thine Enemy | Blinded by Light |
| Breath of Life | At Any Cost |
| Head Case | That's the Smell |
| Stony Stare | - |
Brutal Challenges
| List of Brutal Challenges | |
|---|---|
| Army of the Damned | Requiem for the Scorned |
| Unending Nightmare | Hellions' Intonement |
| The Seventh Seal | Rulers of the Outer Worlds |
Legendary Bouts
Author

How to Beat Brutal Challenge: Unending Nightmare
Rankings
- We could not find the message board you were looking for.
Gaming News


Popular Games

Genshin Impact Walkthrough & Guides Wiki
Honkai: Star Rail Walkthrough & Guides Wiki
Arknights: Endfield Walkthrough & Guides Wiki
Umamusume: Pretty Derby Walkthrough & Guides Wiki
Wuthering Waves Walkthrough & Guides Wiki
Pokemon TCG Pocket (PTCGP) Strategies & Guides Wiki
Abyss Walkthrough & Guides Wiki
Zenless Zone Zero Walkthrough & Guides Wiki
Digimon Story: Time Stranger Walkthrough & Guides Wiki
Clair Obscur: Expedition 33 Walkthrough & Guides Wiki


Recommended Games
Fire Emblem Heroes (FEH) Walkthrough & Guides Wiki
Pokemon Brilliant Diamond and Shining Pearl (BDSP) Walkthrough & Guides Wiki
Diablo 4: Vessel of Hatred Walkthrough & Guides Wiki
Super Smash Bros. Ultimate Walkthrough & Guides Wiki
Yu-Gi-Oh! Master Duel Walkthrough & Guides Wiki
Elden Ring Shadow of the Erdtree Walkthrough & Guides Wiki
Monster Hunter World Walkthrough & Guides Wiki
The Legend of Zelda: Tears of the Kingdom Walkthrough & Guides Wiki
Persona 3 Reload Walkthrough & Guides Wiki
Cyberpunk 2077: Ultimate Edition Walkthrough & Guides Wiki


All rights reserved
© SQUARE ENIX CO., LTD. All Rights Reserved.
CHARACTER DESIGN: TETSUYA NOMURA/ROBERTO FERRARI
LOGO ILLUSTRATION: © 1997 YOSHITAKA AMANO
The copyrights of videos of games used in our content and other intellectual property rights belong to the provider of the game.
The contents we provide on this site were created personally by members of the Game8 editorial department.
We refuse the right to reuse or repost content taken without our permission such as data or images to other sites.
Round 2 here against the Gi sorcerer, just use your magnify > curaga on them. Insta pressure and can remove them from fight very quickly.