Tseng and Elena Hard Mode Guide
Tseng and Elena are bosses in Chapter 13: Where Angels Fear to Tread of Final Fantasy 7 Rebirth (FF7 Rebirth). Learn how to beat Tseng and Elena on Hard Mode and normal difficulties, their weaknesses and resistances, and a list of their moves and attack patterns in this guide!
List of Contents
Tseng and Elena's Weaknesses and Stats
Tseng Weaknesses and Stats
Stats
 |
|||
| Easy | Normal | Hard | |
|---|---|---|---|
| HP | 35616 | 50880 | 81947 |
Weakness and Resistances
| Weaknesses | Lesser Resistances | Greater Resistances |
|---|---|---|
| - | ||
| Absorbed Elements | Immunities | |
| - | ||
Changes When Staggered
| Weakness / Effective | Resistance |
|---|---|
| - | - |
Elena Weaknesses and Stats
Stats
 |
|||
| Easy | Normal | Hard | |
|---|---|---|---|
| HP | 29680 | 42400 | 68289 |
Weakness and Resistances
| Weaknesses | Lesser Resistances | Greater Resistances |
|---|---|---|
| - | ||
| Absorbed Elements | Immunities | |
| - | ||
Changes When Staggered
| Weakness / Effective | Resistance |
|---|---|
| - | - |
How to Pressure Tseng and Elena
| How to Pressure Tseng |
|---|
|
|
| How to Pressure Elena |
|
|
Block or Evade Tseng's Combo Finishers
Tseng will attack you with a series of moves, and blocking or evading the final attack of his combo will pressure him. Make sure that you're constantly guarding or dodging his attacks so that you can quickly stagger Tseng.
Attack Tseng When He Charges an Ability
Whenever Tseng charges an ability, like Asuran Shockwave or a Chi Blast, strike him with powerful abilities or Blizzard spells to stop the attack and pressure him.
Strike Elena Twice With Powerful Abilities
Unlike her previous boss fights, you'll need to strike Elena twice with powerful abilities to pressure her. Save up 2 ATB Charges so that you can hit her with back-to-back attacks.
Interrupt Their Synergy Attacks
Once Tseng and Elena pair up to use their Synergy Attacks, attack them with powerful abilities or spells that they're weak to stop the attack and pressure them both.
How to Pressure and Stagger Enemies
Tseng and Elena Best Party and Builds
Normal Mode Build
| Builds by Difficulty | |
|---|---|
| Normal Mode | Hard Mode |
Recommended Party Setup
| Recommended Party Setup | |
|---|---|
 Yuffie Yuffie
|
【Main Attacker】 ・Can quickly get ATB charges ・Can switch between Ice or Lightning ranged attacks with her Elemental Ninjutsu ・Best used as the active character because of her speed Recommended Level: 48 |
 Red XIII Red XIII
|
【Substitute】 ・Switch to Red XIII if you want to take the aggro away from Yuffie ・Build up Vengeance to increase power and speed or use it to heal the team with Watcher's Respite Recommended Level: 48 |
 Aerith Aerith
|
【Spellcaster】 ・Cast Lightning and Ice spells to damage the bosses ・Limit switching to Aerith as she doesn't have enough speed to evade attacks Recommended Level: 48 |
Best Materia to Use
| Materia | How to Use |
|---|---|
|
|
・Gives the ability to cast Ice spells against Tseng |
|
|
・Gives the ability to cast Lightning spells against Elena |
|
|
・Gives the ability to cast healing spells to heal your party |
|
|
・Equip to increase HP |
|
|
・Apply Haste on your party to increase their overall speed |
|
|
・Increase the effect of items like Potions |
Hard Mode Build
| Builds by Difficulty | |
|---|---|
| Normal Mode | Hard Mode |
| These Hard Mode builds use equipment that are at least Weapon Level 8. If you don't have enough Materia slots or the right Weapon Skills to complete a character setup, consider using a different weapon or collect all of the character's Manuscripts first. |
Best Build for Yuffie
| Jump to Character Build | ||
|---|---|---|
| Yuffie | Aerith | Red XIII |
|
Yuffie
Main DPS |
|||||
| Weapon | Armor | ||||
|---|---|---|---|---|---|
| Crescent Sickle | Cetran Bracer | ||||
| Accessory | Summon Materia | ||||
| Genji Gloves | Gilgamesh | ||||
| Weapon Materia | Armor Materia | ||||
| Weapon Skills | |||||
|
|
|
||||
|
|
|
||||
Yuffie will be the main character that you control since she can easily swap between different elements to target Tseng and Elena's weaknesses. Outside of elemental spells, she also has her Elemental Ninjutsu and Banishment abilities to exploit their weaknesses without using MP.
Since she's the character you'll control, you want to have the Skill Master and ATB Assist Materia equipped so that you can generate ATB Charges on the other party members without having to directly control them.
Best Build for Aerith
| Jump to Character Build | ||
|---|---|---|
| Yuffie | Aerith | Red XIII |
|
Aerith
Support |
|||||
| Weapon | Armor | ||||
|---|---|---|---|---|---|
| Ceremonial Staff | Cetran Armlet | ||||
| Accessory | Summon Materia | ||||
| Ribbon | Phoenix | ||||
| Weapon Materia | Armor Materia | ||||
| Weapon Skills | |||||
|
|
|
||||
|
|
|
||||
You can replace Aerith's accessory with the Gotterdammerung if you have it unlocked.
Aerith is the main support for this fight since she can equip two Altruistic Buff Ups to increase the duration of the Barrier buff she casts. Also, she can use Radiant Ward to make her invincible while she's casting a spell.
Outside of that, Aerith also has amazing supportive Limit Breaks in case she doesn't have MP or ATB Charges to cast a spell. Her Level 3 Limit Break also fills up Yuffie and Red's Limit Gauges, allowing Red to use back-to-back Limit Breaks by using Limi Siphon.
Best Build for Red XIII
| Jump to Character Build | ||
|---|---|---|
| Yuffie | Aerith | Red XIII |
|
Red XIII
Limit DPS |
|||||
| Weapon | Armor | ||||
|---|---|---|---|---|---|
| Mystic Collar | Valkyrian Bangle | ||||
| Accessory | Summon Materia | ||||
| Enhanced Expeditionary Medal | Odin | ||||
| Weapon Materia | Armor Materia | ||||
| Weapon Skills | |||||
|
|
|
||||
|
|
|
||||
Red XIII will mainly be used to spam Limit Breaks so that you can interrupt Tseng and Elena and crowd-control them for the duration of the attack. This way you can also attack them with Yuffie and use her elemental attacks while they can't fight back.
Besides spamming Limit Breaks, Red will also be your pseudo-tank since he'll want to be blocking anyway to build up his Vengeance Gauge. Make sure that you occasionally swap to him so that the bosses automatically attack him instead of Yuffie.
How to Beat Tseng and Elena
| Tseng and Elena Boss Fight Tips |
|---|
|
|
Exploit Their Elemental Weaknesses
You'll want to take control of Yuffie this fight so that you can easily exploit both Tseng and Elena's elemental weaknesses. Remember to swap Yuffie's Ninjutsu to Ice against Tseng and Lightning against Elena to maximize your damage output.
Cast Barrier to Halve Physical Damage
Considering that all of Tseng and Elena's attacks deal Physical damage, you'll want to have Barrier active at all times to halve the damage that they deal. You'll also want to have a Magnify Materia linked to it so that you can buff the whole party with a single cast.
Focus on Taking Down Tseng First
Unlike Rude, Tseng is more aggressive and will constantly go after you with his combo attacks. Focus on taking down Tseng first to give you some breathing room and make the fight easier.
Taking down Tseng will also instantly stagger Elena, allowing you to follow up with a Thundaga to kill off both bosses in one go.
Tseng Revives Elena With a Phoenix Down
If you take down Elena first, Tseng will revive her with a Phoenix Down. This is another reason why you should avoid Elena and prioritize taking down Tseng first.
Swap Characters to Divert Attacks
In between Tseng's combo attacks, you'll want to swap to a different character so that he focuses on them instead of the character you want to control. This way you can safely build up ATB Charges and spam Ice attacks without worrying about getting hit.
You also want to do this when Tseng and Elena use their Synergy Attacks so that the character you want to control can safely attack them without taking any unnecessary damage.
Save Limit Breaks to Interrupt Attacks
Save your Limit Breaks to interrupt Tseng and Elena's attacks so that you can instantly pressure them without having to use ATB Charges or MP. Also, try to save them for the second phase so that you can hit both of them when they're using their Synergy Attacks.
Remember to use Limit Siphon on Red XIII so that you can use his Limit Breaks and you can freely use Yuffie while they're crowd-controlled.
Tseng and Elena Rewards and Details
Tseng Rewards
| Tseng Rewards | |||||||||||
|---|---|---|---|---|---|---|---|---|---|---|---|
| Easy/Normal | Hard Mode | ||||||||||
|
・2742 EXP ・50 Party EXP ・10 AP ・2580 Gil |
・5526 EXP ・30 AP ・3900 Gil ・The Way of the Fist Vol. XV |
||||||||||
| Items Dropped | Rare Items Dropped | ||||||||||
|
None
|
None
|
||||||||||
| Stealable Items | Morphable Items | ||||||||||
|
None
|
None
|
||||||||||
Basic Information and Details
| Tseng | |
|---|---|
|
|
|
| Location | Chapter Unlocked |
| Star Life Room (2nd Floor) | Chapter 13 |
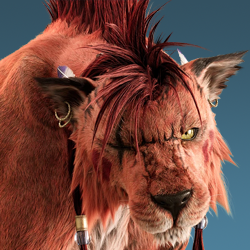
| Species | Movement |
| Human | Grounded |
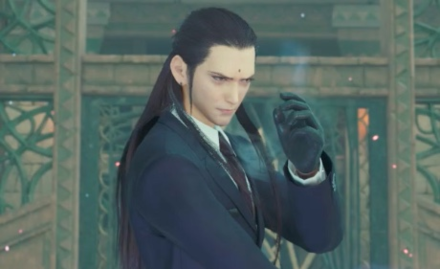
| Details | |
|
The coolheaded leader of the Turks, and Rufus's right-hand man. He has a knack for managing his eccentric subordinates. He takes the lead in battle, using a style of martial art that is, by turns, defensive and offensive. Blocking or evading his combo finishers will pressure him for a short time. Once he has recovered, he will begin to charge up for a powerful technique. Inflicting enough damage while he is charing will pressure him. Interrupting his synergy strikes will also pressure him. |
|
Elena Rewards
| Elena (Chapter 13) Rewards | |||||||||||
|---|---|---|---|---|---|---|---|---|---|---|---|
| Easy/Normal | Hard Mode | ||||||||||
|
・2150 EXP ・50 Party EXP ・10 AP ・2150 Gil |
・6500 EXP ・30 AP ・3250 Gil |
||||||||||
| Items Dropped | Rare Items Dropped | ||||||||||
|
None
|
None
|
||||||||||
| Stealable Items | Morphable Items | ||||||||||
|
None
|
None
|
||||||||||
Basic Information and Details
| Elena (Chapter 13) | |
|---|---|
|
|
|
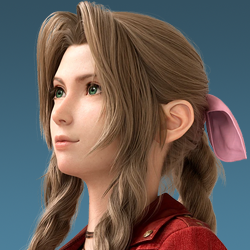
| Location | Chapter Unlocked |
| Star Life Room (2nd Floor) | Chapter 13 |
| Species | Movement |
| Human | Grounded |
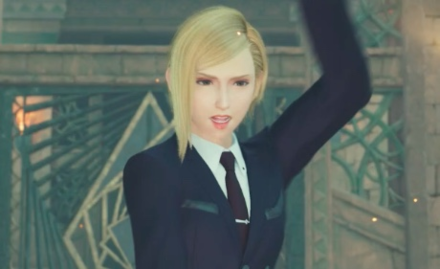
| Details | |
|
A new operative with the Turks unit of Shinra's General Affairs Division. She is searching the temple on the president's orders. Being partnered with Tseng has made her even more eager to prover herself. Hitting her with two powerful offensive abilities or interrupting her synergy strikes will pressure her. |
|
FF7 Rebirth Related Guides

Boss Fight Guide and List of All Bosses
Story Bosses
| All Major Story Bosses | |
|---|---|
| Chapter 1 | Materia Guardian |
| Chapter 2 | Midgardsormr |
| Chapter 3 |
Rude and Elena Mythril Golem |
| Chapter 4 |
Terror of the Deep Roche |
| Chapter 5 | Jenova Emergent |
| Chapter 6 | Grasptropod |
| Chapter 7 |
Custom Valkyrie Gigatrice |
| Chapter 8 |
Dyne Anuran Suppressor |
| Chapter 9 |
Specimen H1024 Crimson Mare Mk. II |
| Chapter 10 | Gi Nattak |
| Chapter 11 |
Diabolic Variant Yin and Yang Forgotten Specimen Galian Beast Roche |
| Chapter 12 |
Abzu Rude and Elena Rufus |
| Chapter 13 |
Red Dragon Ironclad Reno and Rude Tseng and Elena Moss-Grown Adamantoise Demon Gate |
| Chapter 14 |
Jenova Lifeclinger Sephiroth Reborn |
Optional Bosses
| Grasslands | |
|---|---|
| Summon | Titan |
| Classified Intel | Quetzalcoatl |
| Side Quests |
White Terror |
| Junon | |
| Summon | Phoenix |
| Classified Intel | Mindflayer |
| Side Quests |
White Mousse Hell Rider II Sandstorm Drake |
| Corel | |
| Summon | Alexander |
| Classified Intel | Tonberry King |
| Side Quests |
Dark Claw Joker |
| Minigame | Test 0 |
| Gongaga | |
| Summon | Kujata |
| Classified Intel | Great Malboro |
| Side Quests |
Levridon Mastodon Gorgon Mane Gigantoad |
| Cosmo Canyon | |
| Summon | Bahamut Arisen |
| Classified Intel | Jabberwock |
| Side Quests | Irasceros Gigaworm |
| Nibel | |
| Summon | Odin |
| Classified Intel | King Zu |
| Side Quests |
Queen Bee Dranabarga |
| Meridian Ocean | |
| Gilgamesh's Island |
Gilgamesh Titan and Bahamut Arisen Phoenix and Kujata Alexander and Odin |
| Pirate King's Treasure |
Ogre Raider Brineborn Demon Hueyacoatl Sea Dragon |
Comment
Author

Tseng and Elena Hard Mode Guide
Rankings
- We could not find the message board you were looking for.
Gaming News


Popular Games

Genshin Impact Walkthrough & Guides Wiki
Honkai: Star Rail Walkthrough & Guides Wiki
Arknights: Endfield Walkthrough & Guides Wiki
Umamusume: Pretty Derby Walkthrough & Guides Wiki
Wuthering Waves Walkthrough & Guides Wiki
Pokemon TCG Pocket (PTCGP) Strategies & Guides Wiki
Abyss Walkthrough & Guides Wiki
Zenless Zone Zero Walkthrough & Guides Wiki
Digimon Story: Time Stranger Walkthrough & Guides Wiki
Clair Obscur: Expedition 33 Walkthrough & Guides Wiki


Recommended Games
Fire Emblem Heroes (FEH) Walkthrough & Guides Wiki
Pokemon Brilliant Diamond and Shining Pearl (BDSP) Walkthrough & Guides Wiki
Diablo 4: Vessel of Hatred Walkthrough & Guides Wiki
Super Smash Bros. Ultimate Walkthrough & Guides Wiki
Yu-Gi-Oh! Master Duel Walkthrough & Guides Wiki
Elden Ring Shadow of the Erdtree Walkthrough & Guides Wiki
Monster Hunter World Walkthrough & Guides Wiki
The Legend of Zelda: Tears of the Kingdom Walkthrough & Guides Wiki
Persona 3 Reload Walkthrough & Guides Wiki
Cyberpunk 2077: Ultimate Edition Walkthrough & Guides Wiki


All rights reserved
© SQUARE ENIX CO., LTD. All Rights Reserved.
CHARACTER DESIGN: TETSUYA NOMURA/ROBERTO FERRARI
LOGO ILLUSTRATION: © 1997 YOSHITAKA AMANO
The copyrights of videos of games used in our content and other intellectual property rights belong to the provider of the game.
The contents we provide on this site were created personally by members of the Game8 editorial department.
We refuse the right to reuse or repost content taken without our permission such as data or images to other sites.