Barret Best Builds and Weapons
Barret Wallace is a playable character in Final Fantasy 7 Rebirth (FF7 Rebirth). See the best builds for Barret, list of weapons, their voice actors, and more about this character's background in this guide!
| Barret Character Guides | |
|---|---|
| Best Builds and Weapons | Romance Guide |
List of Contents
Barret Best Builds
| Stage and Chapter | List of Barret Builds |
|---|---|
| Endgame (Hard Mode) |
Barret Endgame Build |
| Late Game (Chapter 11-14) |
Barret Late Game Build |
| Mid Game (Chapter 7) |
Barret Mid Game Build |
| Early Game (Chapter 2-4) |
Barret Early Game Build |
Barret Endgame Build
| Equipment | Materia |
|---|---|
 Battle Cry Battle Cry
Weapon Lv. 8 |
|
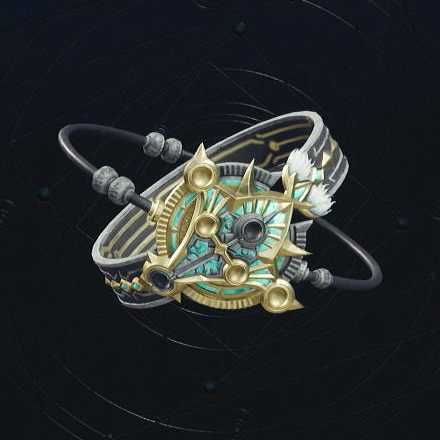
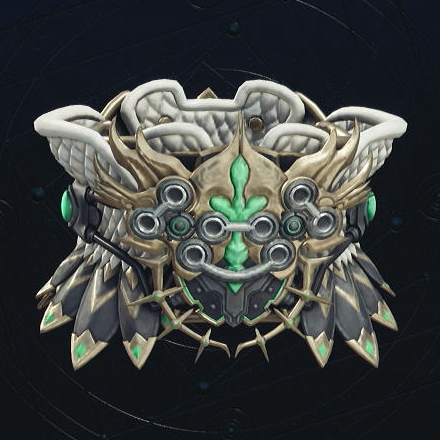 Cetran Bracer Cetran Bracer
|
|
| Alternative Armor | |
| Weapon Skills | |
| Accessory | Effect |
|---|---|
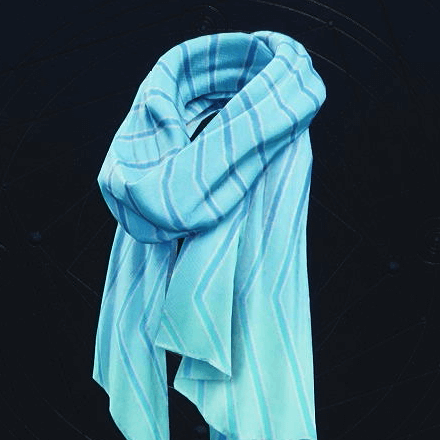 Whistlewind Scarf Whistlewind Scarf
|
Slightly fills the ATB gauge at the start of the battle. |
This is the best build for Barret in Hard Mode. The build revolves around spamming abilities and acting as a tank support for the team.
The Whistlewind Scarf and the First Strike materia will allow Barret to instantly use Turbulent Spirit to hasten his ATB charge rate, while ATB Assist and ATB Stagger will allow him and the rest of his team to build up materia faster.
HP Up, Vitality Up, and Spirit Up are slotted in for increased health and defense, paired with the Lifesaver and Steelskin abilities, this allows Barret to tank damage for his entire team.
Prayer, Reraise, and Healing are used for Barret to support his team, with a fast ATB charge rate, it's optimal to slot these Materia on him.
Best Team Synergies
| Synergy Skills | |
|---|---|
| Iron Defense Puts Barret and his partner in a defensive stance, reducing the damage taken. |
|
| Synergy Abilities | |
| United Refocus Temporarily partitions Barret's and his partner's ATB gauges into three segments, allowing for faster ability use. |
|
Additional Build Notes
- Depending on the enemy, players can swap Vitality Up and Spirit Up with Warding Materia paired with Poison and Petrify Materia.
Barret Late Game Build
| Equipment | Materia |
|---|---|
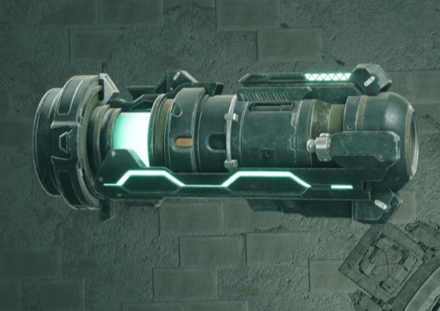
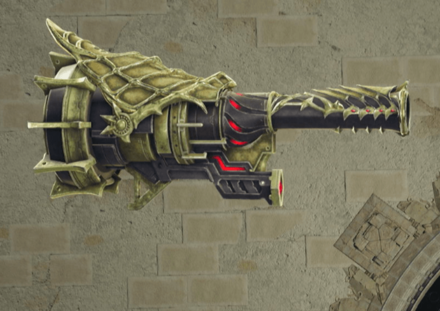 Calamitous Bazooka Calamitous Bazooka
Weapon Lv. 5 |
|
 Celestial Bangle Celestial Bangle
|
|
| Alternative Armor | |
| Weapon Skills | ・Massive Recharge
・Overcharge Stagger Siphon |
| Accessory | Effect |
|---|---|
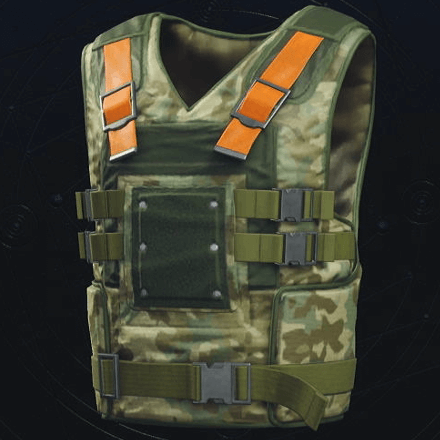 Survival Vest Survival Vest
|
Increases Vitality by +10% |
This build for Barret can be used in Chapter 11: The Long Shadow of Shinra onwards.
Barret excels at being a support tank in the late game, having Prayer and other defensive materia to enhance the party's defenses. He can build up his ATB relatively quickly through ATB Stagger, ATB Boost, and fast recharge of his Overcharge weapon ability.
Since Barret can take a lot of punishment, he can combo his ability Steelskin and Lifesaver with Provoke to redirect large amounts of damage for the party.
Best Team Synergies
| Synergy Skills | |
|---|---|
| Iron Defense Puts Barret and his partner in a defensive stance, reducing the damage taken. |
|
| Synergy Abilities | |
| United Refocus Temporarily partitions Barret's and his partner's ATB gauges into three segments, making saving up on command usage easier. |
|
| Avalanche Two-Step Will increase damage done to a staggered enemy and extend their stagger time. |
|
| Mayhem-Go-Round Fires two rotating lasers in all directions on the field. Best used when fighting groups and raises Limit Levels. |
|
Additional Build Notes
- Vitality Up is rewarded from completing Corel Battle Intel: Oh, Skewer It.
- Provoke is rewarded from completing Grasslands Battle Intel: Natural Order.
- Synergy Support is developed at Chadley's Research in the Gongaga Region.
Barret Mid Game Build
| Equipment | Materia |
|---|---|
 Gatling Gun Gatling Gun
|
|
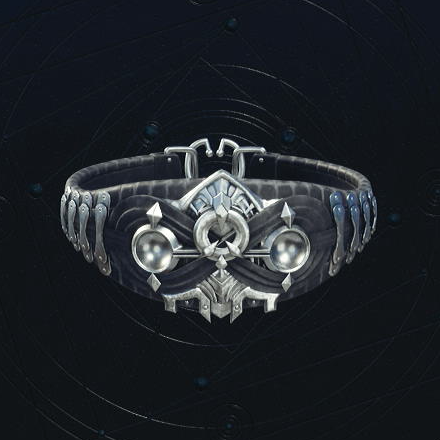 Abyssal Bangle Abyssal Bangle
|
|
| Weapon Skills |
| Accessory | Effect |
|---|---|
|
Survival Vest
|
Increases Vitality by +10% |
This build for Barret can be used in Chapter 7: Those Left Behind onwards.
The Gatling Gun is the choice weapon for Barret since this gives him access to the weapon skill ATB Charge Rate Up. Paired with his rapid-firing attacks, he will be able to fill his ATB gauges quickly for more ability uses (especially Prayer which costs 2 ATB).
Elemental materia is useful for giving Barret's ranged attacks elemental properties. Exploiting elemental weakness increases damage dealt and stagger buildup!
Best Team Synergies
| Synergy Skills | |
|---|---|
| Iron Defense Puts Barret and his partner in a defensive stance, reducing the damage taken. |
|
| Synergy Abilities | |
| United Refocus Temporarily partitions Barret's and his partner's ATB gauges into three segments, making saving up on command usage easier. |
|
| Avalanche Two-Step Will increase damage done to a staggered enemy and extend their stagger time. |
|
Additional Build Notes
- Elemental materia can be obtained by completing Junon Battle Intel: Conqueror of the Skies at Chadley's Research. Getting access to the Stormwing Fiend Sighting location requires completing the When Words Won't Do sidequest.
- ATB Stagger materia can be developed at Chadley's Research in Junon.
- Barret's other weapons such as the Hi-Caliber Rifle will have higher attack power. However, they will not have the ATB Charge Up skill.
Barret Early Game Build
| Equipment | Materia |
|---|---|
 Hi-Caliber Rifle Hi-Caliber Rifle
|
|
 Hunter's Bangle Hunter's Bangle
|
|
| Weapon Skills |
| Accessory | Effect |
|---|---|
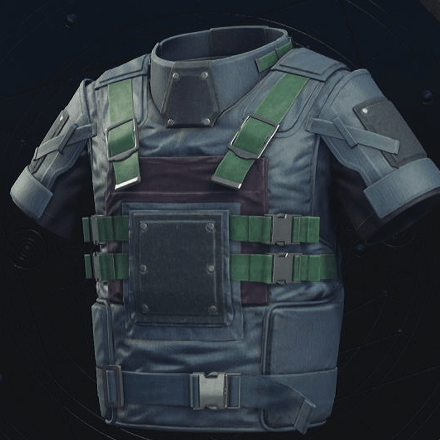 Bulletproof Vest Mk. II Bulletproof Vest Mk. II
|
Increases Vitality by +5%. Increases max HP by 250. |
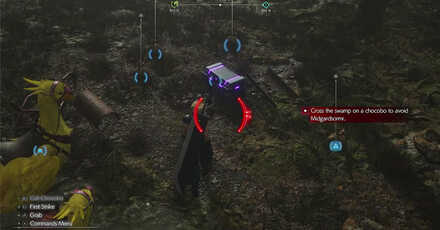
This is a simple early game build for Barret available before fighting Midgardsomr, the game's first open world boss in Chapter 2: A New Journey Begins. This build should hold up to Junon in Chapter 4: Dawn of a New Era.
A good and reliable early build for Barret is building him like a support tank with healing abilities. With his Steelskin ability, he can serve as good crowd control by redirecting aggression from enemies and tanking hits.
Prayer is a good party heal that costs 2 ATB instead of MP. Thanks to Barret's ranged weapon, he can reliably build ATB from a distance. Should you wish to invest further into Prayer, you can increase AP gain by leveling it up through an AP Up materia.
Best Team Synergies
| Synergy Skills | |
|---|---|
| Iron Defense Puts Barret and a partner in a defensive stance, reducing the damage taken. |
|
| Synergy Abilities | |
| United Refocus Temporarily partitions both Red XIII's and Barret's ATB gauges into three segments, making it easier to save up on command usage. |
|
| Overfang Barret sends Red XIII flying at the enemy, doing big damage and raising their Limit Levels. |
|
Additional Build Notes
- The materia in Barret's early game kit can be bought at a Vending Machine at Oliver's Farm. Similarly, a Hunter's Bangle can also be bought there.
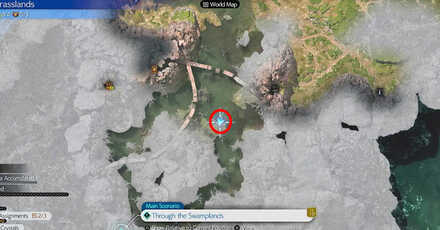
- Barret's Hi-Caliber Rifle can be obtained for free in a purple chest on the island where Cloud spots Sephiroth past the Abandoned Dock as part of the main quest (requires swimming via Chocobo).
- Bulletproof Vest Mk. II can be unlocked for transmutation by completing Excavation Intel 2: Pipeline Depository (can be discovered by completing Expedition Intel) in the Grasslands.
How to Use Barret and Combat Guide
Barret Controls
| Button / Action | Description |
|---|---|
| Fires off a single shot. | |
| Hold |
Fires off a barrage of bullets until it needs to be reloaded. |
| Overcharge: Fires off a barrage of attacks that greatly increase the ATB Gauge. Goes on cooldown after used. Charge: Speeds up Overcharges cooldown. More effective if used after an attack or ability. |
|
| Roll out of the way of an attack. | |
| Access the Command Menu for Abilities, Spells, Items, and Synergy | |
| Blocks incoming attacks to reduce damage. Perfect blocks completely negate damage. | |
| Hold |
Opens the menu for available Synergy Skills |
Barret Battle Tips
| How to Use Barret |
|---|
|
|
Quickly Build up your ATB Gauge with Overcharge
Barret's unique ability Overcharge lets him quickly build up his ATB Gauge in a single attack. This is very important because this lets him access his commands faster than most other party members.
Make sure to use Charge after attacking or using an ability to maximize Barret's damage output.
Buff Your Allies' Damage and Defense
Since Barret can use Overcharge to quickly build up his ATB Gauge, this makes him the perfect candidate for holding Materia with spells like Brave or Protect that apply buffs on his teammates.
These types of spells are especially crucial against bosses where you want to get your party set up with multiple buffs as soon as possible.
Use Steelskin and Guard to Safely Tank Hits
Steelskin reduces the damage that Barret takes from attacks. It also makes it less likely for his attacks and spells to be interrupted.
This is very useful for players who aren't good at dodging or perfectly blocking attacks, or if you need to cast spells or build up the ATB Gauge with attacks and Overcharge.
Build up Stagger with Focused Shot and Bonus Round
With the combination of Focused Shot, Bonus Round, and Overcharge, you can quickly build up the enemy's Stagger meter and deal massive damage once it's been Staggered.
Remember to use spells and abilities that apply Pressured to the enemy to further increase the rate at which the enemy gets Staggered.
Barret Best Combos
| Attack | Function |
|---|---|
| Charge Combo
Charge |
Using Overcharge is the best way to quickly build up Barret's ATB Gauge so that he can use his commands. After using an attack or ability, make sure to weave in Charge afterward to efficiently recharge Overcharge. |
Names given to the above combos are for descriptive purposes. The list above is subject to updates.
Barret Best Folio Skill Cores
| Skill Core / Priority | Type and Effect |
|---|---|
| United Refocus ★★★ |
Synergy Ability ・ Useful utility synergy ability for Barret and his partner temporary 3-gauge ATB. ・Will allow you to use more commands in battle. |
| Arcane Blast ★★★ |
Synergy Ability ・A great offensive magic ability that grants Barret and Aerith unlimited MP temporarily. |
| Bodyguard ★★★ |
Synergy Skill ・An essential defensive synergy skill that adds another survivability option for Barret. |
| Physical Safeguard ★★★ |
Stat Boost ・Applies the Protect status on Barret upon entering battle, doubling down on his tank capabilities. |
| Overload Overcharge ★★★ |
Stat Boost ・Reduces the charge time for Overcharge, allowing Barret to use the unique ability faster. |
| Selfish Recovery Boost ★★★ |
Stat Boost ・Increases the healing Barret takes by 10% which grants him more survivability. |
| Selfish Buff Up ★★☆ |
Stat Boost ・Increases the duration of beneficial status effects on Barret by 15%, synergizes well with Protect. |
| Avalanche Two-Step ★★☆ |
Synergy Ability ・Extends stagger time and increases damage dealt to the staggered target. |
| Icy Impulse ★☆☆ |
Ability ・Useful for exploiting enemy ice weaknesses. Can be used at a range. ・Does not cost MP. |
| Fiery Impulse ★☆☆ |
Ability ・Useful for exploiting enemy fire weaknesses. Can be used at a range. ・Does not cost MP. |
Barret Weapon Locations and Stats
Gatling Gun
|
Gatling Gun
|
|||
| Stats and Ability | Weapon Skills | ||
|---|---|---|---|
| ・ATK + 19 ・MATK + 19 ・DEF + 0 ・MDEF + 0 Slots: ◯◯ Ability: Focused Shot |
|||
| Location | |||
| Barret starts with the Gatling Gun as his default weapon. You'll gain access to this weapon as soon as he joins you in Chapter 2. | |||
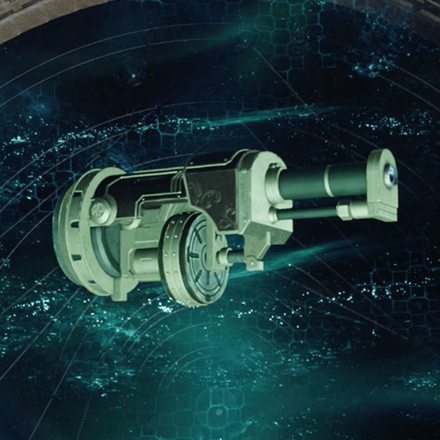
Hi-Caliber Rifle
|
Hi-Caliber Rifle
|
|||
| Stats and Ability | Weapon Skills | ||
|---|---|---|---|
| ・ATK + 36 ・MATK + 12 ・DEF + 0 ・MDEF + 0 Slots: ◯-◯◯ Ability: Bonus Round |
|||
| Location | |||
 |
 |
||
| After Passing Through the Swamp Area | |||
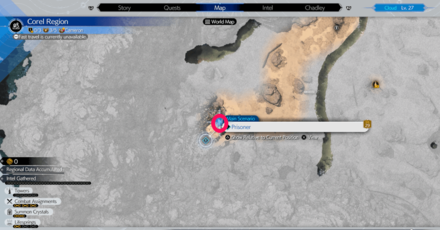
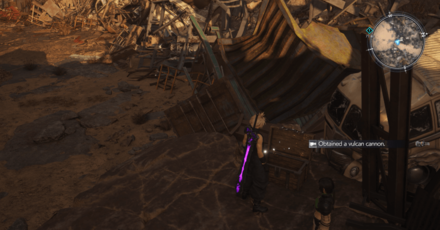
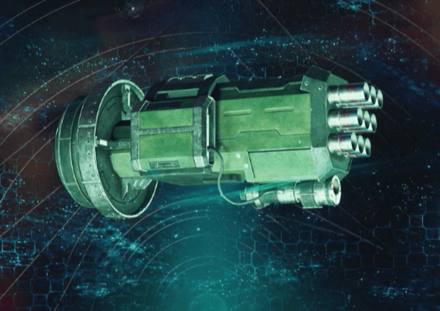
Vulcan Cannon
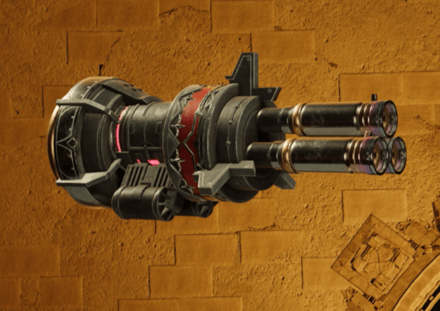 Vulcan Cannon Vulcan Cannon
|
|||
| Stats and Ability | Weapon Skills | ||
|---|---|---|---|
| ・ATK + 33 ・MATK + 44 ・DEF + 0 ・MDEF + 0 Slots: ◯-◯◯-◯ Ability: Charging Uppercut |
|||
| Location | |||
 |
 |
||
| In a Chest After Leaving Dust Bowl | |||
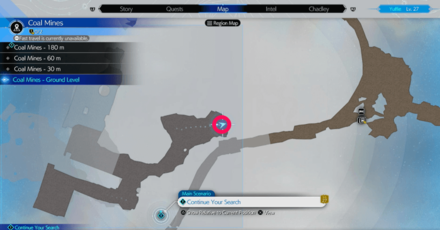
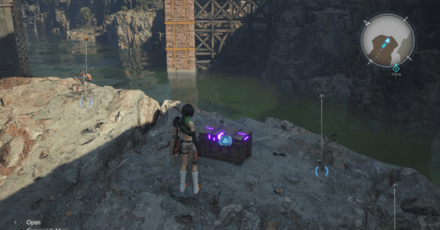
Barrage Blaster
 Barrage Blaster Barrage Blaster
|
|||
| Stats and Ability | Weapon Skills | ||
|---|---|---|---|
| ・ATK + 33 ・MATK + 30 ・DEF + 0 ・MDEF + 0 Slots: ◯◯◯◯ Ability: Lifesaver |
|||
| Location | |||
 |
 |
||
| On the Edge of a Cliff in Coal Mines | |||
Fafnir Rifle
 Fafnir Rifle Fafnir Rifle
|
|||
| Stats and Ability | Weapon Skills | ||
|---|---|---|---|
| ・ATK + 38 ・MATK + 73 ・DEF + 0 ・MDEF + 0 Slots: ◯◯◯◯◯ Ability: Point Blank |
|||
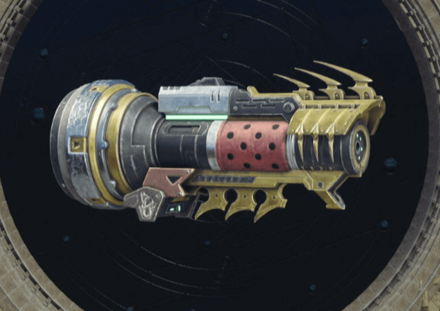
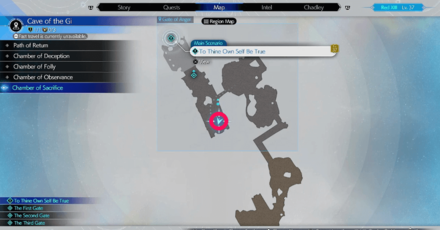
Calamitous Bazooka
|
Calamitous Bazooka
|
|||
| Stats and Ability | Weapon Skills | ||
|---|---|---|---|
| ・ATK + 72 ・MATK + 59 ・DEF + 0 ・MDEF + 0 Slots: ◯◯◯◯◯◯ Ability: Smackdown |
|||
| Location | |||
 |
 |
||
| In the Gate With Four Altars in Cave of Gi | |||
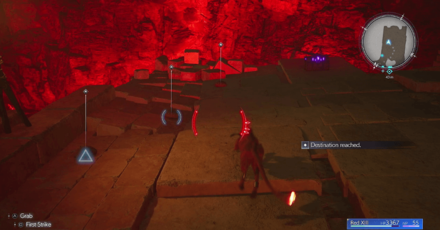
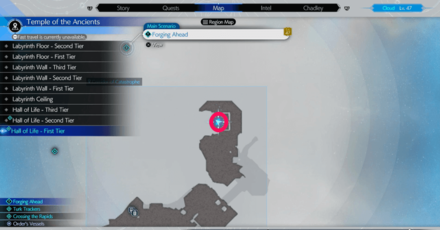
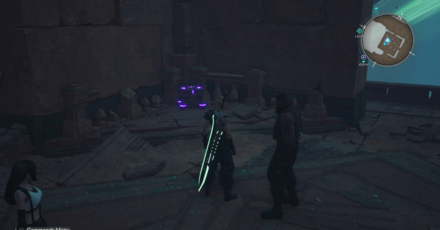
Battle Cry
|
Battle Cry
|
|||
| Stats and Ability | Weapon Skills | ||
|---|---|---|---|
| ・ATK + 88 ・MATK + 65 ・DEF + 0 ・MDEF + 0 Slots: ◯-◯◯-◯◯◯ Ability: Turbulent Spirit |
|||
| Location | |||
 |
 |
||
| In a Tower in Hall of Life | |||
All Weapons and How to Get Them
Barret Manuscript Locations
Sharpshooter's Companion Locations
| Volume | Difficulty Req. | How to Get |
|---|---|---|
| Vol. 1 | Easy / Normal |
Side Quest: When Words Won't Do
Reward for completing the When Words Won't Do Side Quest in the Junon region. |
| Vol. 2 | Easy / Normal |
Moogle Shop
Can be purchased at Merchant Rank 3 for 6 Moogle Medals. |
| Vol. 3 | Easy / Normal |
GP Exchange
Purchase at the GP Exchange for 100 GP. |
| Vol. 4 | Easy / Normal |
Moogle Shop
Can be purchased at Merchant Rank 4 for 6 Moogle Medals. |
| Vol. 5 | Easy / Normal |
Musclehead Colosseum
Reward for clearing Six-Person Bout: War of the Mascots. |
| Vol. 6 | Easy / Normal |
Side Quest: Hustle and Grind
Reward for completing the Hustle and Grind Side Quest in the Grasslands region. |
| Vol. 7 | Hard |
Side Quest: Lifeline in Peril
Reward for defeating the Noxicap during the Lifeline in Peril Side Quest, in the Grasslands region while playing in Hard Mode. |
| Vol. 8 | Hard |
Side Quest: When Words Won't Do
Reward for defeating the Sandstorm Drakes during the When Words Won't Do Side Quest, in the Junon region while playing in Hard Mode. |
| Vol. 9 | Hard |
Classified Intel: Mindflayer
Reward for defeating Mindflayer Classified Intel boss in Hard Mode. |
| Vol. 10 | Hard |
Side Quest: Missing Mr. Birdie
Reward for completing the Missing Mr. Birdie Side Quest, in the Grasslands region while playing in Hard Mode. |
| Vol. 11 | Hard |
Boss: Dyne
Reward for defeating Dyne in Chapter 8 Hard Mode. |
| Vol. 12 | Hard |
Side Quest: The Pursuit of Perfection
Reward for defeating the Daggerwings during the The Pursuit of Perfection Side Quest, in the Gongaga region while playing in Hard Mode. |
| Vol. 13 | Hard |
Side Quest: Hustle and Grind
Reward for completing the Hustle and Grind Side Quest, in the Grasslands region while playing in Hard Mode. |
| Vol. 14 | Hard |
Side Quest: Lament of the Damned
Reward for defeating the Dranabarga during the Lament of the Damned Side Quest, in the Nibel region while playing in Hard Mode. |
| Vol. 15 | Hard |
Boss: Jenova Lifeclinger
Reward for defeating Jenova Lifeclinger in Chapter 14 Hard Mode. |
| Vol. 16 | Hard |
Combat Simulator: Barret vs. The Colossi
Reward for completing the Legendary Bout: Barret vs. The Colossi in Combat Simulator. |
Barret Character Profile and Background
Profile and Voice Actor
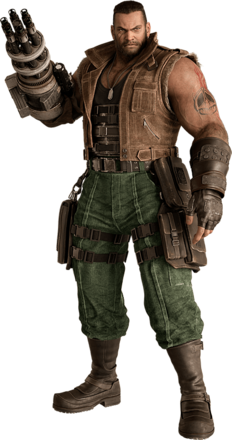 Barret |
Voice Actors | |
|---|---|---|
| EN: John Eric Bentley
JP: Mahito Funaki |
||
| Weapon | ||
| Gunarm | ||
| Chapter Unlocked | ||
|
Chapter 2 A New Journey Begins |
||
| Official Introduction | ||
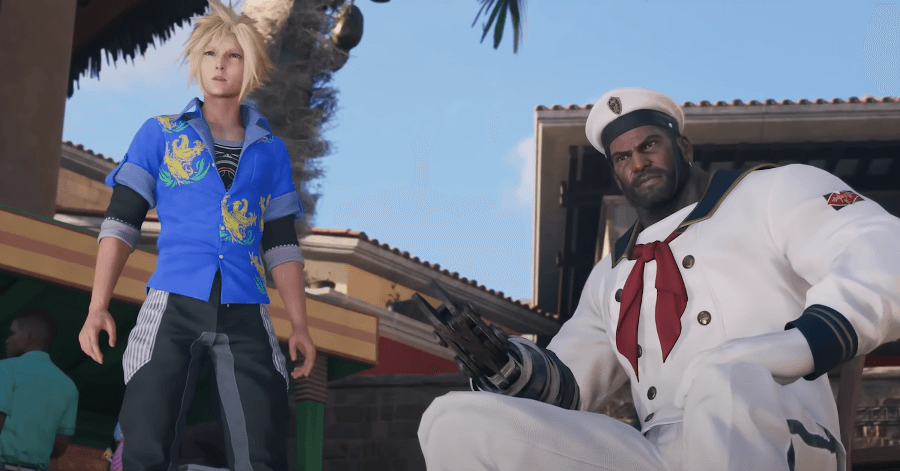
| The leader of an independent Avalanche cell, Barret spearheads an operation to take down Shinra's mako reactors. He pays a hefty price for this, however, when the company retaliates, and his comrades die in the crossfire. Armed with the memories of his lost friends and the newfound knowledge of Sephiroth's plans, he departs Midgar in hope of saving the planet and safeguarding a future for his daughter Marlene. | ||
Leader of Avalanche
Barret is the leader of Avalanche, an eco-terrorist group that tried to stop Shinra from using Mako as an energy source. He leads his allies in destroying Shinra's Mako Reactors to take down Shinra and secure a better future for all, and his daughter Marlene.
Uses Gun-Arm
Barret uses a gun arm, an actual gun grafted to his right arm. This allows him to fire at enemies from a distance and also reach enemies that can't be hit by melee weapons. He can also use other melee weapons to inflict damage up close.
Led Mako Reactor 1 Operation
As the leader of Avalanche, Barret led the Mako Reactor 1 Operation with his team. He brought ranged firepower from his gun arm to support Cloud and the others. He and Cloud also fought the Scorpion Sentinel and obtained victory with the explosion of Reactor 1.
Led Mako Reactor 5 Operation
After some planning, Barret also led the Mako Reactor 5 Operation. Since Jessie was injured from her last operation in Sector 7, Cloud ended up replacing her for the operation. They boarded the train and after the ID scan, Barret evacuated the passengers.
Barret meets up with Cloud and Tifa, goes through the tunnels, and successfully plants a bomb on the reactor. They fought Airbuster and Barret fled with Tifa while Cloud hung on the rail after its explosion.
Defended Sector 7 Pillar
Sometime later, the Turks started to attack the Sector 7 Pillar. Barret led the mission to protect the pillar and made it to the top, despite the casualties suffered. With Tifa and Cloud, he fought Rude and Reno to prevent them from dropping the plate but they failed.
Barret grieved for the possible loss of the other Avalanche members, but Cloud and Tifa urged him on. They started searching the Sector 7 ruins and found Wedge.
Rescued Aerith
Since Aerith was captured, Barret, Cloud, and Tifa set out to rescue her. They snuck into the Shinra Building with Mayor Domino's help and made their way through it until they met Professor Hojo. Hojo then released one of his specimens to deal with them.
After defeating the specimen, Barret released Aerith and Red XIII. Rufus shoots down the Avalanche helicopter, so they have to escape another way. Barret left with Aerith and Red XIII while Cloud and Tifa remained behind.
Helped Cloud Fight Sephiroth
With Shinra vehicles, Cloud and his friends escaped on the Midgar Expressway. When Sephiroth opened the portal, Barret fought off Whispers and helped Cloud fight against him.
After this, Barret promised all of them that he'd help fight against Sephiroth since he was an enemy of the planet.
Barret Abilities
| Ability | Effect / Source |
|---|---|
| Steelskin | Temporarily reduce damage taken and how easily you are interrupted. Unlocked from the start |
| Maximum Fury | Consume all ATB charges to fire a long stream of bullets at an enemy. Unlocked from the start |
| Focused Shot | Consume all ATB charges to unleash a concentrated burst of energy. Significantly increases stagger. Weapon: Gatling Gun |
| Bonus Round | Load your weapon with unique bullets that increase stagger and power up your attacks. Weapon: Hi-Caliber Rifle |
| Lifesaver | Temporarily increase your HP and take damage intended for other party members. Weapon: Barrage Blaster |
| Charging Uppercut | Rush toward an enemy and launch them into the air with a furious blow. Increases Charge. Weapon: Vulcan Cannon |
| Smackdown | Strike the ground and send nearby enemies flying. Weapon: Calamitous Bazooka |
| Turbulent Spirit | Significantly increase your ATB charge rate for a limited time. Can only be used once per battle. Weapon: Battle Cry |
Barret Limit Breaks
| Limit Break | Effect / How to Get |
|---|---|
| Fire in the Hole | Limit Level 1 Shoot an orb of energy that creates a large explosion. Unlocked from the start |
| Catastrophe | Limit Level 2 Marshal all your strength and channel it into a concentrated beam of energy. Significantly increases stagger. Unlocked from the start |
| Satellite Beam | Limit Level 3 Decimate the enemy with beams of light from beyond the stratosphere. Unlocked through the Folio Skill Tree at party level 8. |
Barret Synergy Skills
| Synergy Skill | Synergy Skill | Folio Level |
|---|---|---|
| Mad Dash | Partner(s): Cloud, Red XIII Team up with your partner to charge forward while guarding against incoming attacks. Activate in sequence to trigger a three-hit combo. |
2 |
| Iron Defense | Partner(s): Cloud, Tifa, Aerith, Red XIII Team up with your partner to take a strong defensive stance. |
1 |
| Friendly Fire | Partner(s): Tifa, Aerith, Cait Sith Team up with your partner to perform a ranged scattershot attack. |
3 |
Barret Synergy Abilities
| Synergy Ability | Description | Buff |
|---|---|---|
| Partners in Pain | Cloud slashes an enemy and Barret fires a follow-up shot. Raises their limit levels. | Limit Level Increase |
| Overfang | Barret sends Red XIII flying toward an enemy at high velocity. Raises their limit levels. | Limit Level Increase |
Barret's Role in FF7 Rebirth
In Pursuit of Sephiroth
Barret, along with Cloud and the others are in pursuit of Sephiroth after the events of the FF7 Remake. He plays an important role in FF7 Rebirth, acting as a reliable sub-leader of the party when Cloud is having his episodes of degradation.
FF7 Rebirth Related Guides
Other Character Guides
| Character Guides | |
|---|---|
| Characters Tier List | Best Builds |
| Best Party Compositions | Best Abilities |
List of Playable Characters
| All Characters | |||
|---|---|---|---|
 Aerith Aerith
|
 Barret Barret
|
 Cait Sith Cait Sith
|
 Cloud Cloud
|
 Red XIII Red XIII
|
 Sephiroth Sephiroth
|
 Tifa Tifa
|
 Yuffie Yuffie
|
 Zack Zack
|
|||
Comment
Author

Barret Best Builds and Weapons
Rankings
- We could not find the message board you were looking for.
Gaming News


Popular Games

Genshin Impact Walkthrough & Guides Wiki
Honkai: Star Rail Walkthrough & Guides Wiki
Arknights: Endfield Walkthrough & Guides Wiki
Umamusume: Pretty Derby Walkthrough & Guides Wiki
Wuthering Waves Walkthrough & Guides Wiki
Pokemon TCG Pocket (PTCGP) Strategies & Guides Wiki
Abyss Walkthrough & Guides Wiki
Zenless Zone Zero Walkthrough & Guides Wiki
Digimon Story: Time Stranger Walkthrough & Guides Wiki
Clair Obscur: Expedition 33 Walkthrough & Guides Wiki


Recommended Games
Fire Emblem Heroes (FEH) Walkthrough & Guides Wiki
Pokemon Brilliant Diamond and Shining Pearl (BDSP) Walkthrough & Guides Wiki
Diablo 4: Vessel of Hatred Walkthrough & Guides Wiki
Super Smash Bros. Ultimate Walkthrough & Guides Wiki
Yu-Gi-Oh! Master Duel Walkthrough & Guides Wiki
Elden Ring Shadow of the Erdtree Walkthrough & Guides Wiki
Monster Hunter World Walkthrough & Guides Wiki
The Legend of Zelda: Tears of the Kingdom Walkthrough & Guides Wiki
Persona 3 Reload Walkthrough & Guides Wiki
Cyberpunk 2077: Ultimate Edition Walkthrough & Guides Wiki


All rights reserved
© SQUARE ENIX CO., LTD. All Rights Reserved.
CHARACTER DESIGN: TETSUYA NOMURA/ROBERTO FERRARI
LOGO ILLUSTRATION: © 1997 YOSHITAKA AMANO
The copyrights of videos of games used in our content and other intellectual property rights belong to the provider of the game.
The contents we provide on this site were created personally by members of the Game8 editorial department.
We refuse the right to reuse or repost content taken without our permission such as data or images to other sites.