Queen's Blood Best Decks
A list showing the best decks for Queen's Blood in Final Fantasy 7 Rebirth (FF7 Rebirth). Read on to see a list of all the best Queen's Blood Decks and the best early to mid-game Queen's Blood Decks to use!
List of Contents
Queen's Blood Best Decks
| Queen's Blood Best Decks | |
|---|---|
| Chapter 2-5 |
|
| Chapter 6-10 |
|
| Chapter 11-14 |
|
Chapter 2-5 Chocobo & Moogle Buff Deck
Decklist
| Chapter 2-5 Chocobo & Moogle Buff Decklist | ||
|---|---|---|
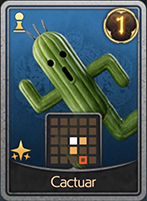 Cactuar Cactuar
2x |
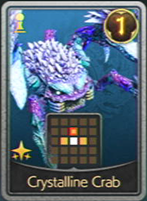 Crystalline Crab Crystalline Crab
2x |
 Ignilisk Ignilisk
2x |
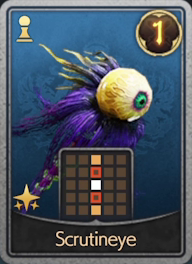 Scrutineye Scrutineye
2x |
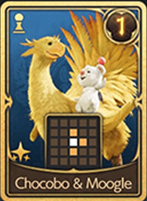 Chocobo & Moogle Chocobo & Moogle
1x |
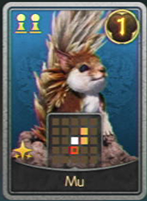 Mu Mu
2x |
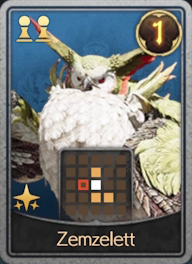 Zemzelett Zemzelett
2x |
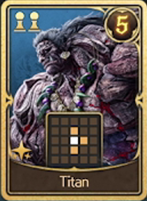 Titan Titan
1x |
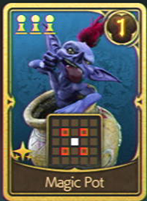 Magic Pot Magic Pot
1x |
Gameplan and Mulligan
This early-ish iteration of a buff deck uses C&M's (Chocobo & Moogle) ability and buff-stacking as its win condition! The game plan is to push lanes early to set up buffing cards and then finish strong. Hard-mulligan for C&M or Cactuar for your starting hand.
Combos
| Step | Description |
|---|---|
| 1 | Play Cactuar at the top-left spot |
| 2 | Play Ignilisk next to Cactuar |
| 3 | Play Titan in the middle for two-pawn setup |
A premium starting combo here is to use Cactuar and Ignilisk at the top lane to stack double buffs on the bottom lane! This lets you take an early top advantage and gives you a Titan follow-up into a Zemzelett middle!
Alternatives
| Card | Explanation |
|---|---|
 Quetzalcoatl Quetzalcoatl
|
・ Provides Diagonal pawns for pushing lanes ・ Has significant power for a 2-cost |
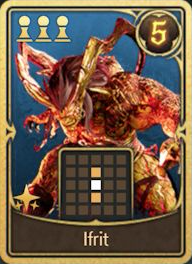 Ifrit Ifrit
|
・ Scales along Chocobo & Moogle ・ Better finisher than Magic Pot |
To replace your missing cards, use the One for All pre-built deck! It follows the same game plan but is a little weaker on pawn generation. To counteract that, you could also slot a Quetzalcoatl card for diagonal pawns!
If you have Ifrit, replace Magic Pot for a better pairing for Titan's pawn generation!
Chapter 2-5 Midgardsormr Blight Deck
Decklist
| Chapter 2-5 Midgardsormr Blight Decklist | ||
|---|---|---|
 Crawler Crawler
2x |
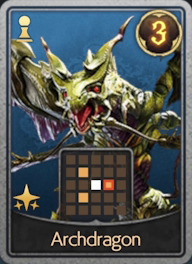 Archdragon Archdragon
2x |
 Deathwheel Deathwheel
1x |
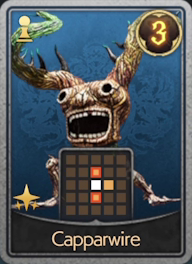 Capparwire Capparwire
2x |
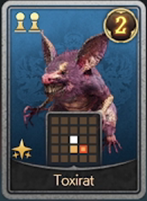 Toxirat Toxirat
2x |
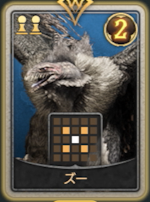 Zu Zu
2x |
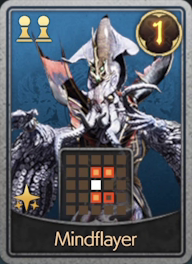 Mindflayer Mindflayer
2x |
Titan
1x |
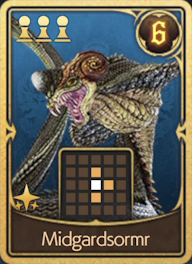 Midgardsormr Midgardsormr
1x |
Gameplan and Mulligan
This is an early iteration of a blight deck that focuses on Midgardsormr's scaling effects on destroying cards. Hard-mulligan for Capparwire, Crawler, and Midgardsormr for early three-pawn setup. The game plan here is to set up an early backlane advantage then build up 1-2 pawns for Toxirat and Archdragon!
This is more of a patient deck where it requires you to give the opponent initiative while you set up diagonal cards to steal pawn spots!
Combos
| Step | Description |
|---|---|
| 1 | Play Capparwire on the bottom-left slot. |
| 2 | Play Crawler next to the Capparwire. |
| 3 | Play Midgardsormr in the middle slot with three pawns. |
For a Midgardsormr setup, you can put Capparwire and Crawler on the bottom lane, then slot in Midgardsormr in the middle. Follow-up with Titan or Zu in the middle for pawn placement.
Alternatives
| Card | Explanation |
|---|---|
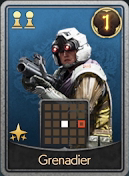 Grenadier Grenadier
|
・ Consistently removes opponent cards ・ The downside is that this card does not provide pawns |
 Elphadunk Elphadunk
|
・ Sets up back row with pawns ・ High power for its cost |
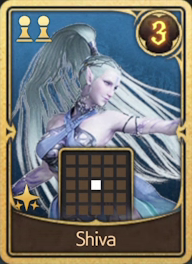 Shiva Shiva
|
・ Uses slots with pawns to spawn units ・Can be used as fodder for Midgardsormr |
Mindflayer holds the flexible spot here, where it can be replaced with Grenadiers or other power-house cards that set up back lane pawns such as Emnidunk. Since you will sometimes have open slots with pawns, Shiva can also be slotted in here!
Chapter 6-10 Ifrit Buff Deck
Decklist
| Chapter 6-10 Buff Decklist | ||
|---|---|---|
|
Crystalline Crab
2x |
Ignilisk
2x |
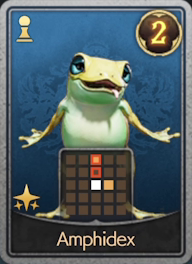 Amphidex Amphidex
2x |
|
Chocobo & Moogle
1x |
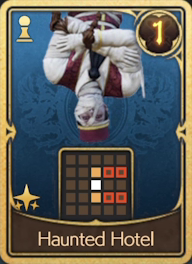 Haunted Hotel Haunted Hotel
1x |
Zemzelett
1x |
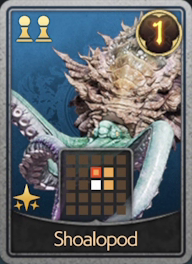 Shoalopod Shoalopod
2x |
Titan
1x |
Ifrit
1x |
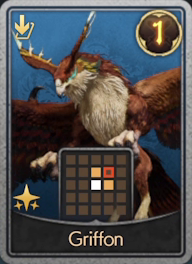 Griffon Griffon
2x |
||
Gameplan and Mulligan
Moving towards the mid-game, buff decks receive support to emphasize its game plan of flooding boards with buffs. Like the earlier iteration, the game plan is to push lanes early to get your buffs rolling and lock opponents out.
Hard-mulligan for Haunted Hotel or Chocobo & Moogle for early setups!
Combos
| Step | Description |
|---|---|
| 1 | Play Haunted Hotel in the middle lane |
| 2 | Play Titan in the bottom lane |
| 3 | Play Shoalopod in the bottom lane |
This combo sets up a total of four buffs and gets a surplus of pawns on the middle and bottom lane for your 1-pawn cards with buffs!
Alternatives
| Card | Explanation |
|---|---|
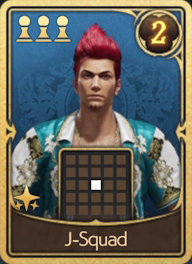 J-Squad J-Squad
|
・ Fills the board with buffs ・ RNG-based clones |
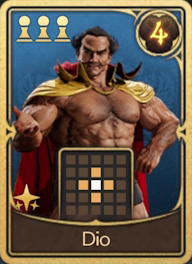 Dio Dio
|
・ Scales with buffs ・ Cross distribution of pawns ・ Counters enemy buff decks |
If you want a more high-risk high-reward card, you can opt to replace Zemzelett with the J-Squad. If you need more power in a lane while having a forward pawn to counter enemy buff decks, Dio is a suitable replacement for Ifrit.
Chapter 6-10 Chocobo Jockey Deck
Decklist
| Chapter 6-10 Chocobo Jockey Decklist | ||
|---|---|---|
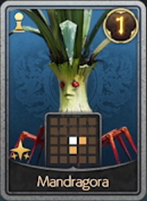 Mandragora Mandragora
2x |
Crystalline Crab
2x |
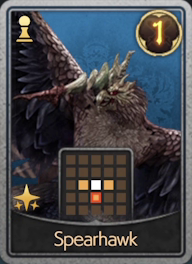 Spearhawk Spearhawk
2x |
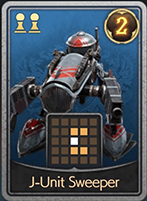 J-Unit Sweeper J-Unit Sweeper
1x |
Quetzalcoatl
2x |
Titan
1x |
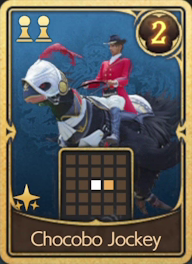 Chocobo Jockey Chocobo Jockey
1x |
 Maloceros Maloceros
1x |
 Mythril Golem Mythril Golem
1x |
|
Griffon
2x |
||
Gameplan and Mulligan
Easily the most basic yet effective deck you can pilot! The game plan of this deck is to stack huge amounts of power into one lane with Chocobo Jockey or Maloceros for their effects to activate. You only need one lane to succeed, and that should likely win you the duel.
Hard-mulligan for Mandragora, Chocobo Jockey, and Titan to bring out cards that require 2 or more pawns. One Griffon for buffing Maloceros or Chocobo Jockey should be optimal as well.
Combos
| Step | Description |
|---|---|
| 1 | Play Mandragora on the top lane |
| 2 | Play Titan in the mid lane |
| 3 | Play J-Unit Sweeper in the second slot mid-lane |
This combo sets up board space for Chocobo Jockey and Maloceros at either the top or bottom lane. You can follow this up by pushing either lane!
Alternatives
| Card | Explanation |
|---|---|
 Thug Thug
|
・ Pushes the bottom lane ・ Provides a backlane pawn |
 Ogre Ogre
|
・ High Power ・ Puts pawns to the farthest lane |
If you need more power in a lane for the game plan, two-cost units such as Thug and Ogre can win you the lane easily with Chocobo Jockey.
Chapter 6-10 Replace Buff Deck
Decklist
| Chapter 6-10 Replace Buff Decklist | ||
|---|---|---|
 Sandhog Pie Sandhog Pie
2x |
 Heatseeker Heatseeker
2x |
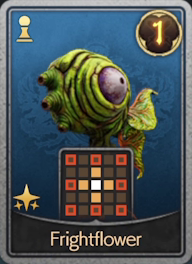 Frightflower Frightflower
2x |
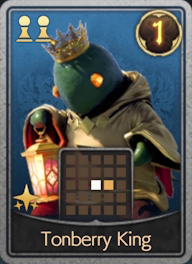 Tonberry King Tonberry King
2x |
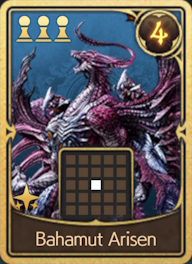 Bahamut Arisen Bahamut Arisen
1x |
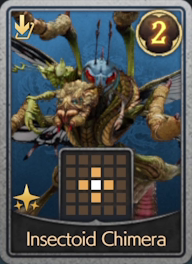 Insectoid Chimera Insectoid Chimera
2x |
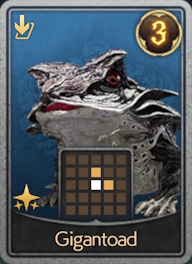 Gigantoad Gigantoad
2x |
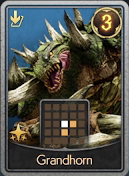 Grandhorn Grandhorn
2x |
|
Gameplan and Mulligan
Introduced in Chapter 7 and Chapter 8, this archetype focuses on destroying your cards to activate their effects. The game plan is to use your destroy fodders to secure lane space and pawns, and then replace them with higher-power units to activate their effects.
Hard-mulligan for Heat Seeker and Grandhorn for consistent lane push. Tonberry King along with Sandhog Pie are also good cards to mulligan for!
Combos
| Step | Description |
|---|---|
| 1 | Play Heatseeker in the middle lane |
| 2 | Replace Heatseker with Grandhorn |
This combo sets up a 2 pawns in the middle and 3 pawns on the bottom, which you can get back to after you set up your sacrifices further in the other lanes!
Alternatives
| Card | Explanation |
|---|---|
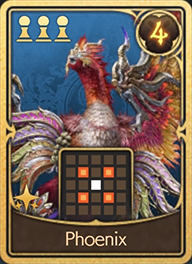 Phoenix Phoenix
|
・ Diagonal pawns ・ Massive buffs for 2-4 lanes on replacement |
 Bomb Bomb
|
・ Massive Board Wipe ・ Cross pawns |
If you want to focus and lean more on the buff angle of this deck, you can replace Bahamut Arisen with Phoenix instead. If you want more destroy fodder, Bomb can help remove both your cards and enemies from the field.
Chapter 11-14 Self-Enfeeble Deck
Decklist
| Chapter 11-14 Self-Enfeeble Decklist | ||
|---|---|---|
|
Capparwire
1x |
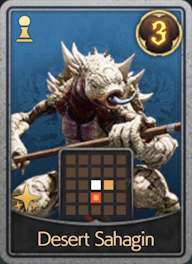 Desert Sahagin Desert Sahagin
2x |
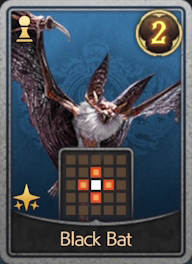 Black Bat Black Bat
2x |
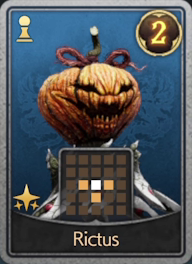 Rictus Rictus
2x |
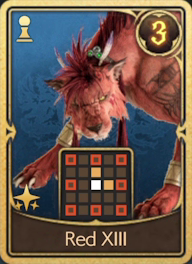 Red XIII Red XIII
1x |
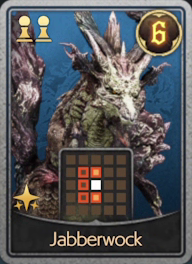 Jabberwock Jabberwock
2x |
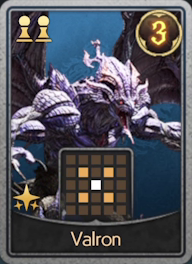 Valron Valron
1x |
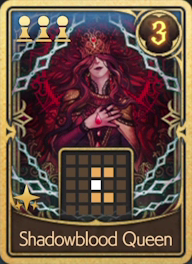 Shadowblood Queen Shadowblood Queen
1x |
 Yin & Yang Yin & Yang
1x |
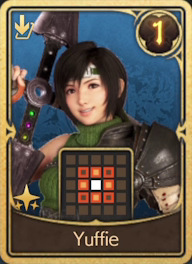 Yuffie Yuffie
1x |
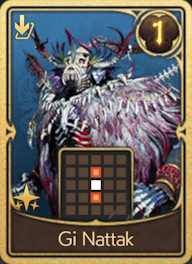 Gi Nattak Gi Nattak
1x |
|
Gameplan and Mulligan
Starting at Chapter 11, support cards have made self-enfeeble quite competitive. The game plan is to activate your enfeeble effects by purposely weakening your cards but not destroying them!
Hard-mulligan for Desert Sahagin and Red XIII for a three-pawn set up in the middle. Rictus and Black Bat are also good in the starting hand!
Combos
| Step | Description |
|---|---|
| 1 | Play Desert Sahagin on the top-left corner |
| 2 | Play Red XIII on the bottom-left corner |
This combo sets up possible enfeeble angles and sets up Shadowblood Queen for placement while you push pawns!
Alternatives
| Card | Explanation |
|---|---|
 Alexander Alexander
|
・ Scales with the amount of enfeebled allies ・ Cross pawn placement |
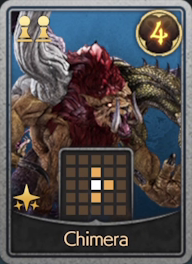 Chimera Chimera
|
・ Scales with the amount of enfeebled enemies ・ Forward push |
If you do not have Shadowblood Queen yet, opt to use Alexander instead for a scaling card. If you are trying to counter specific opponents that use self-enfeebles such as Shadowblood Queen, bring Chimera to scale off their enfeebled units.
Chapter 11-14 Tifa Jockey Deck
Decklist
| Chapter 11-14 Tifa Jockey Decklist | ||
|---|---|---|
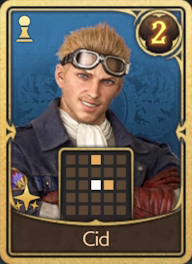 Cid Cid
1x |
Crystalline Crab
2x |
Spearhawk
2x |
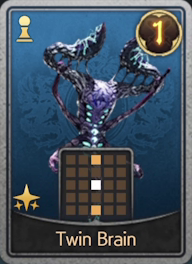 Twin Brain Twin Brain
1x |
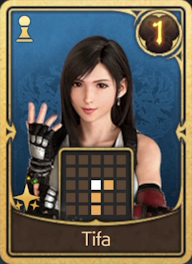 Tifa Tifa
1x |
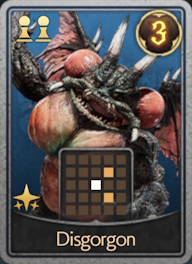 Disgorgon Disgorgon
2x |
|
Titan
1x |
Chocobo Jockey
1x |
Maloceros
1x |
|
Griffon
1x |
Gi Nattak
1x |
Red XIII
1x |
Gameplan and Mulligan
While Chocobo Jockey is absurdly strong, it receives further support through Tifa and Cid with their abilities to set up two-pawn lanes. The game plan of this deck remains the same of dominating a lane to get 5-10 additional total points but is made better with newer cards.
Hard-mulligan for Tifa and Disgorgon for early two-pawn setups. Titan and Cid are also good starters, but having either Maloceros or Chocobo Jockey is key to the game plan!
Combos
| Step | Description |
|---|---|
| 1 | Play Tifa on the top-left corner |
| 2 | Play Red XIII on the bottom-left corner |
This combo settles your two cost cards such as Titan and Chocobo Jockey ahead to pressure two lanes with bonuses at once.
Alternatives
| Card | Explanation |
|---|---|
|
Insectoid Chimera
|
・ Retakes stolen pawns on push ・ Safety measure |
|
Mythril Golem
|
・ Commonly wins lanes due to power output ・ Walls opponent's push attempt |
Since some of your key cards can lack push power or if you do not have Gi Nattak, having Insectoid Chimera to replace cards for pawn placement is handy. If you desire to guarantee a lane, slamming down Mythril Golem is sure to do that.
Chapter 11-14 Bahamut Destroy Deck
Decklist
| Chapter 11-14 Bahamut Destroy Decklist | ||
|---|---|---|
|
Archdragon
1x |
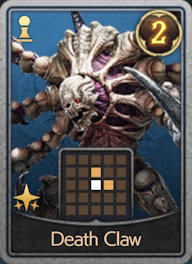 Death Claw Death Claw
2x |
Cid
1x |
|
Toxirat
2x |
Disgorgon
2x |
Titan
1x |
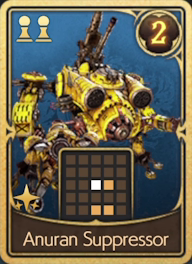 Anuran Suppressor Anuran Suppressor
1x |
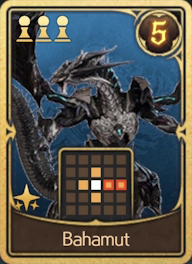 Bahamut Bahamut
1x |
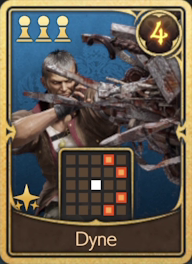 Dyne Dyne
1x |
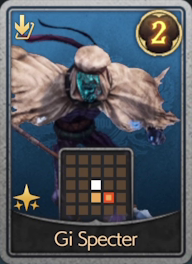 Gi Specter Gi Specter
2x |
Yuffie
1x |
|
Gameplan and Mulligan
Destroy decks make an impactful return with late-game cards such as Bahamut and Dyne supporting its game plan of removing enemy cards from the board and threatening to take all of the opponent's board space.
Hard-mulligan for Cid and Disgorgon for early 2-pawn setup into the bottom and top lane. Having Deathclaw, Anuran Suppressor, or Titan gives you options after this combo.
Combos
| Step | Description |
|---|---|
| 1 | Play Cid on the bottom-left corner |
| 2 | Play The Tiny Bronco at the top left corner |
| 3 | Play Disgorgon next to The Tiny Bronco |
This combo sets up mid with two pawns along with three pawns in the bottom for Dyne or Bahamut. The middle set-up is safe from steals if you have Gi Specter and replace Disgorgon.
Alternatives
| Card | Explanation |
|---|---|
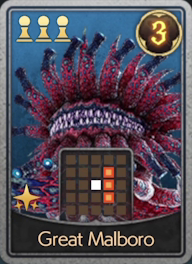 Great Malboro Great Malboro
|
・ Can wipe a column full of enemies ・ Gives pawns to the column in front of it |
 Sephiroth Sephiroth
|
・ Guarantee kills opponents above and below it ・ Cross pawn placement |
If you do not have Bahamut or Dyne, Great Malboro and Sephiroth are options that lack range but guarantee their affected zones with the amount of damage they inflict.
Chapter 11-14 Yuffie Bomb Deck
Decklist
| Chapter 11-14 Yuffie Bomb Decklist | ||
|---|---|---|
|
Sandhog Pie
2x |
Heatseeker
1x |
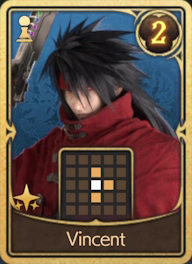 Vincent Vincent
1x |
|
Bomb
2x |
Bahamut Arisen
1x |
Insectoid Chimera
2x |
|
Gigantoad
2x |
Grandhorn
2x |
Yuffie
1x |
|
Gi Nattak
1x |
||
Gameplan and Mulligan
The game plan of this deck is to take advantage of a replace deck's ability to power push mid-lane using fodder cards. This strategy is to set up a Bomb deep in the board and then use Yuffie to board-wipe and clear space for Bahamut Arisen's Elementals!
Hard-mulligan for Vincent and Heatseeker for early mid-push while getting pawns for the top and bottom lane. Having Yuffie and a Bomb will also ensure the combo, but consider getting replace cards for contesting mid!
Combos
| Step | Description |
|---|---|
| 1 | Play Vincent in the middle |
| 2 | Play Heatseeker next to Vincent |
| 3 | Replace Heatseeker with any card |
This combo sets up mid with two pawns middle and an additional one-cost card in your hand. The middle setup is meant for the Bomb and Yuffie combo, so keep contesting with your replace cards.
The moment the board space is free, replace Vincent in the middle then play Bahamut Arisen to get Elementals.
Alternatives
| Card | Explanation |
|---|---|
 Bahba Velamyu Bahba Velamyu
|
・ Strong discard fodder ・ Enfeebles a column of enemies |
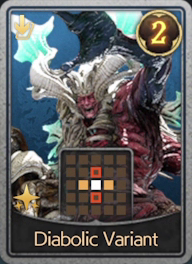 Diabolic Variant Diabolic Variant
|
・ Can destroy Elementals without taking space ・ A suitable replace card |
If you want to add a different replace fodder, you can replace Sandhog Pig with Bahba Velamyu for a more aggressive approach. If you would prefer a high-risk/high-reward card, opt to change one of the replaced cards with Diabolic Variant.
FF7 Rebirth Related Guides
Queen's Blood Card Locations and Guide
All Queen's Blood Guides
Comment
Your Tifa Jockey deck mentions Red but he isn't in the deck list, you might wanna fix that one way or the other
Author

Queen's Blood Best Decks
Rankings
- We could not find the message board you were looking for.
Gaming News

![Death Stranding 2: On The Beach [PC] Review | A Port That Delivers](https://img.game8.co/4447392/15310a0c9aa1b6843bb713b2ea216930.jpeg/show)


Popular Games

Genshin Impact Walkthrough & Guides Wiki
Umamusume: Pretty Derby Walkthrough & Guides Wiki
Crimson Desert Walkthrough & Guides Wiki
Monster Hunter Stories 3: Twisted Reflection Walkthrough & Guides Wiki
Honkai: Star Rail Walkthrough & Guides Wiki
Pokemon Pokopia Walkthrough & Guides Wiki
The Seven Deadly Sins: Origin Walkthrough & Guides Wiki
Wuthering Waves Walkthrough & Guides Wiki
Zenless Zone Zero Walkthrough & Guides Wiki
Arknights: Endfield Walkthrough & Guides Wiki


Recommended Games
Fire Emblem Heroes (FEH) Walkthrough & Guides Wiki
Diablo 4: Vessel of Hatred Walkthrough & Guides Wiki
Cyberpunk 2077: Ultimate Edition Walkthrough & Guides Wiki
Yu-Gi-Oh! Master Duel Walkthrough & Guides Wiki
Super Smash Bros. Ultimate Walkthrough & Guides Wiki
Pokemon Brilliant Diamond and Shining Pearl (BDSP) Walkthrough & Guides Wiki
Elden Ring Shadow of the Erdtree Walkthrough & Guides Wiki
Monster Hunter World Walkthrough & Guides Wiki
The Legend of Zelda: Tears of the Kingdom Walkthrough & Guides Wiki
Persona 3 Reload Walkthrough & Guides Wiki


All rights reserved
© SQUARE ENIX CO., LTD. All Rights Reserved.
CHARACTER DESIGN: TETSUYA NOMURA/ROBERTO FERRARI
LOGO ILLUSTRATION: © 1997 YOSHITAKA AMANO
The copyrights of videos of games used in our content and other intellectual property rights belong to the provider of the game.
The contents we provide on this site were created personally by members of the Game8 editorial department.
We refuse the right to reuse or repost content taken without our permission such as data or images to other sites.
The beginning deck are luck....say that dont act like its a fool proof place them and win....after chapter 6 you use tonberry but jesus did you even use what you said?