Corel Region: Map and All Locations
Corel is an explorable region in Gaia in Final Fantasy 7 Rebirth (FF7 Rebirth). Check out the map of Corel and learn the locations of Remnawave Towers, Chocobo Stops, Protorelics, and Hidden Treasures within the region.
List of Contents
Corel Interactive Map
Select icons to toggle them on/off
Map Icons
| Others | |||||||||||
|---|---|---|---|---|---|---|---|---|---|---|---|
Corel Landmarks and Locations
| Jump to a Location Type | |||
|---|---|---|---|
| - | - | ||
Corel Chocobo Hidden Treasures
| Item | Map Location | In Game Location |
|---|---|---|
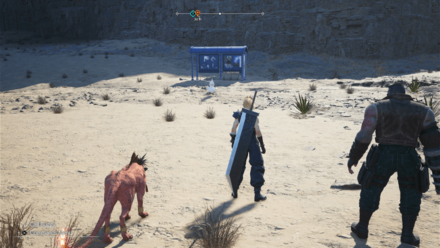
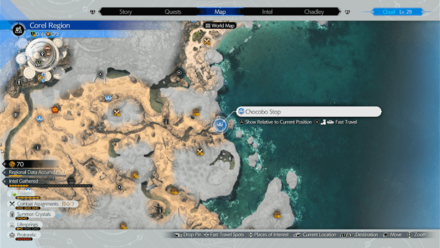
| Luck Up Materia Earrings |  |
 |
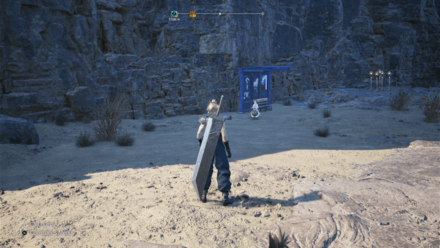
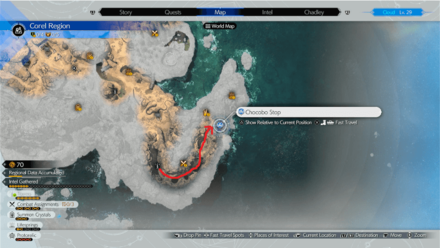
| 4,500 Gil | 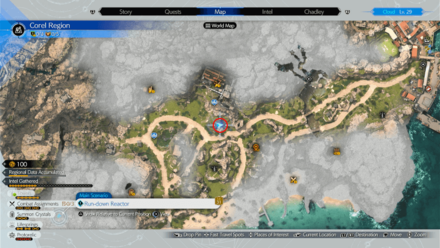 |
 |
All Chocobo Hidden Treasure Locations
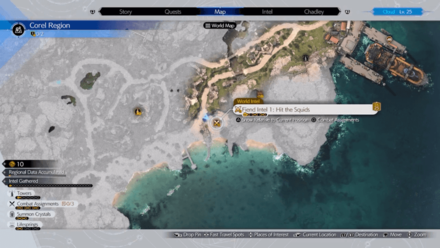
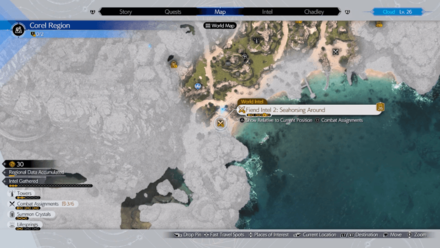
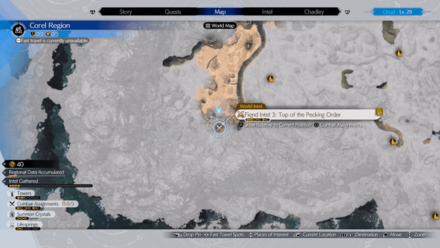
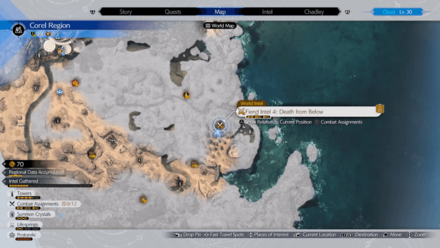
Corel Fiend Intel
| Combat Assignment | Map Location |
|---|---|
| Hit the Squids |
 |
| Seahorsing Around |
 |
| Top of the Pecking Order |
 |
| Death from Below |
 |
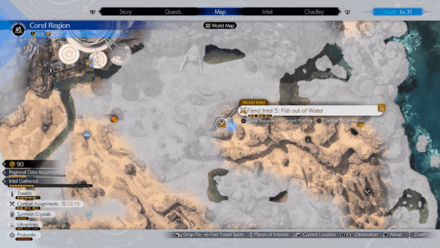
| Fish out of Water |
 |
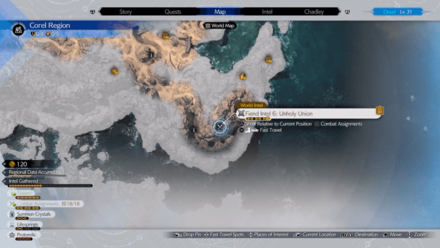
| Unholy Union |
 |
Corel Towers
Activation Intel 1: Costa Port Tower
| Map Location | Intel Revealed |
|---|---|
 Activation Intel 1: Costa Port Tower |
・Expedition Intel 1 ・Field Intel 1 |
| How to Reach and Activate Climb the ladders to the top floor and activate the terminal. |
|
Activation Intel 2: Seashell Coast Tower
| Map Location | Intel Revealed |
|---|---|
 Activation Intel 2: Seashell Coast Tower |
・Moogle Intel 1 ・Expedition Intel 2 ・Divine Intel 1 ・Fiend Intel 2 |
| How to Reach and Activate Cllimb up all the ladders and the yellow ledge wall to the top floor, then take a ladder down to activate the terminal. |
|
Activation Intel 3: Wasteland Tower
| Map Location | Intel Revealed |
|---|---|
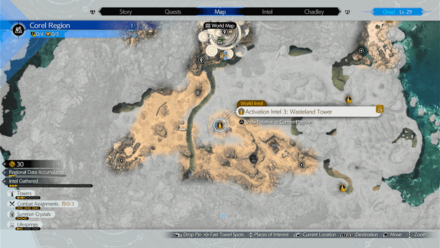 Activation Intel 3: Wasteland Tower |
・Expedition Intel 3 ・Fiend Intel 3 |
| How to Reach and Activate Climb up two ladders and activate the terminal |
|
Activation Intel 4: Riverside Tower
| Map Location | Intel Revealed |
|---|---|
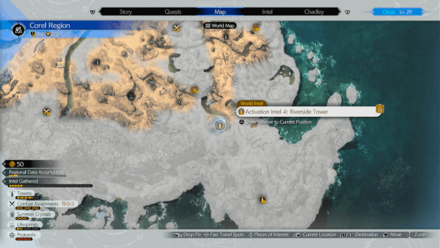 Activation Intel 4: Riverside Tower |
・Expedition Intel 4 ・Divine Intel 2 ・Fiend Intel 4 |
| How to Reach and Activate Across from the tower, you'll find a yellow ledge wall which you can climb. At the top, look for a grappling point, and press L2 to swing on it. Swing across to the tower and climb a ladder to activate the terminal. |
|
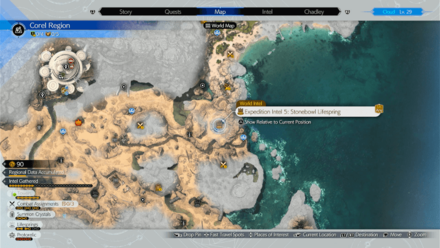
Activation Intel 5: Stonearch Tower
| Map Location | Intel Revealed |
|---|---|
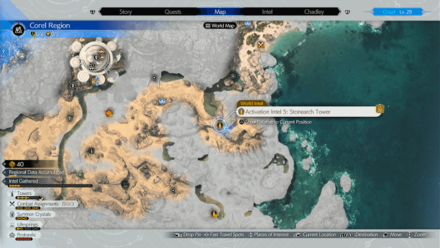 Activation Intel 5: Stonearch Tower |
・Expedition Intel 5 ・Divine Intel 3 ・Fiend Intel 5 |
| How to Reach and Activate Climb up a ladder and a yellow ledge wall and activate a terminal. |
|
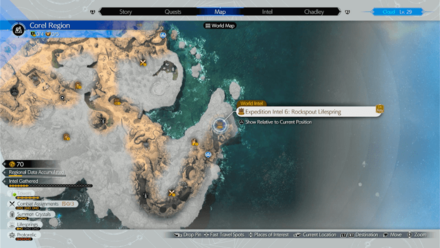
Activation Intel 6: Ravine Tower
| Map Location | Intel Revealed |
|---|---|
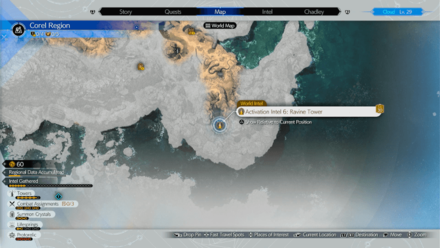 Activation Intel 6: Ravine Tower |
・Moogle Intel 2 ・Expedition Intel 6 ・Fiend Intel 6 |
| How to Reach and Activate From the north, go through a tunnel until you see the tower on a cliff overhead. Use the grappling hook on grappling point, then grapple up to another grappling point higher up. Jump off and at the tower, climb up three ladders. Grapple to a grappling point above, and jump back onto the tower onto a yellow ledge wall. Climb down to the floor and activate the terminal. |
|
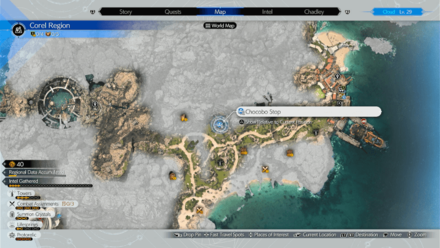
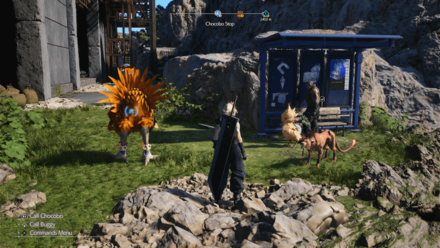
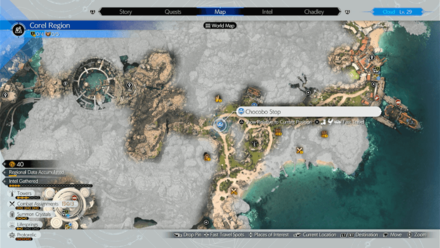
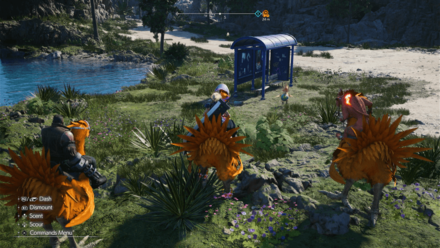
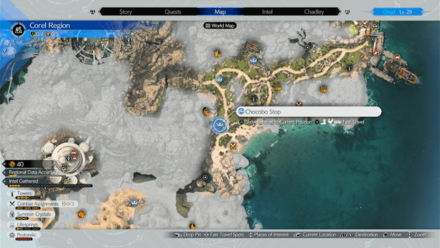
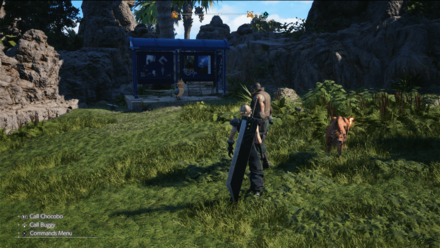
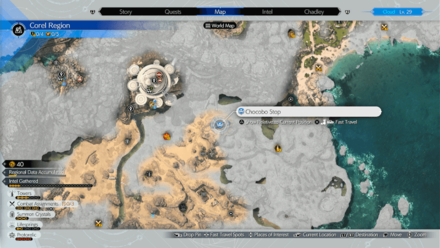
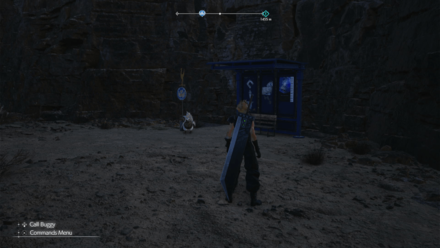
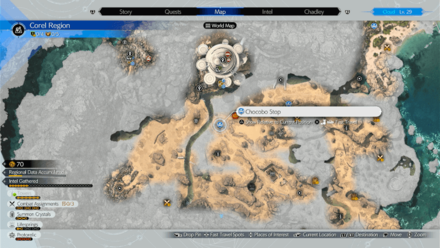
Corel Chocobo Stops
| Map Location | In-Game Location |
|---|---|
 |
 |
 |
 |
 |
 |
 |
 |
 |
 |
 |
 |
 |
 |
 |
 |
Corel Lifesprings
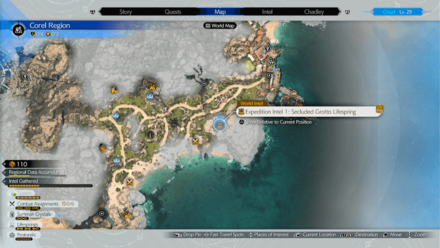
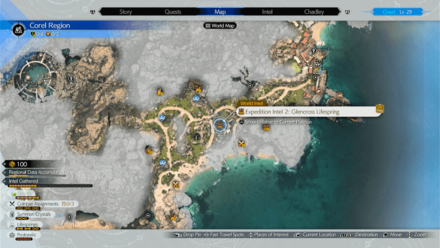

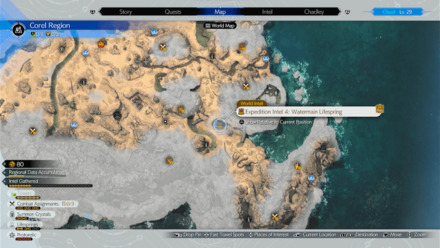
Corel Lifespring Unlocks
- Region Intel: Corel: A Tale of Decline
- Excavation Intel 1: Valve Factory Ruins
- Region Intel: Costa del Sol: A Recent History
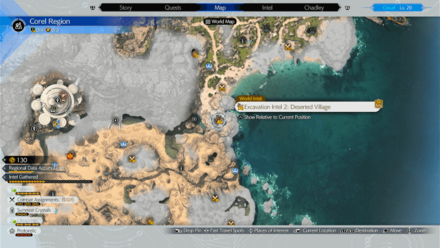
- Excavation Intel 2: Deserted Village
- Region Intel: The Rise of the Gold Saucer
- Classified Intel: Heavy Lies the Crown
Completing a Lifespring or Expedition Intel will unlock additional intel. Unlocked intel is not tied to locations but are rather unlocked in a specific order.
Corel Cache Locations
| Map Location | Rewards |
|---|---|
 Seabreeze Storehouse |
・Molotov Cocktail ・Circlet ・Vial of Celeris |
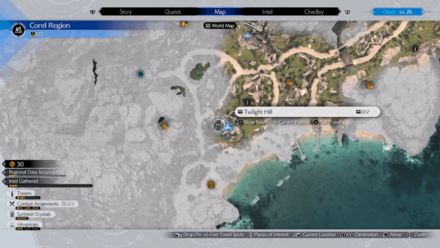 Twilight Hill |
・Phoenix Down x2 ・Hi-Potion x1 |
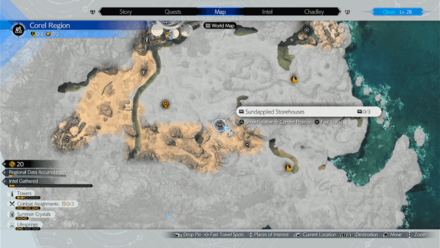 Sundappled Storehouses |
・Ice Materia Earrings ・3000 Gil ・Mythril Ore |
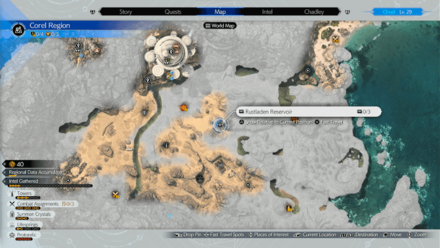 Rustladen Reservoir |
・Moogle Medal x3 ・Mist Hi-Potion ・Swallowsong Bracer |
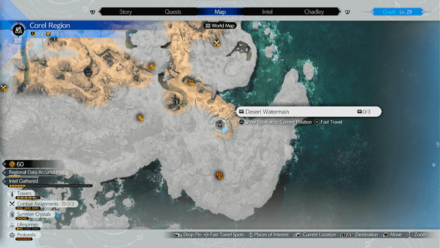 Desert Watermain |
・Mega Potion ・Ether Onion ・Ether |
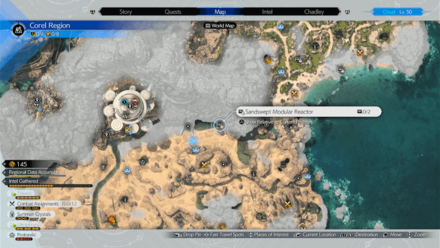 Sandswept Modular Reactor |
・Ruby x1 ・Armor-Piercing Grenades x3 |
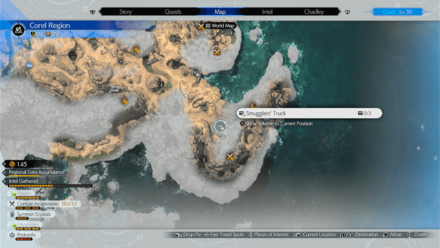 Smuggler's Truck |
・Celeris x1 ・Phoenix Down x1 ・Mythril Ore x1 |
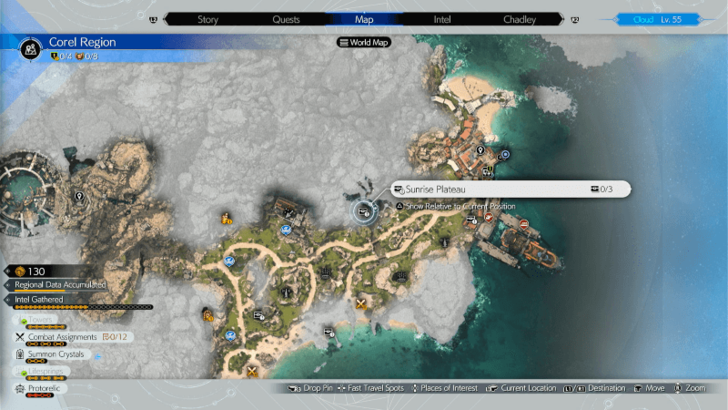 Sunrise Plateau |
・Ether ・2000 Gil ・Emerald |
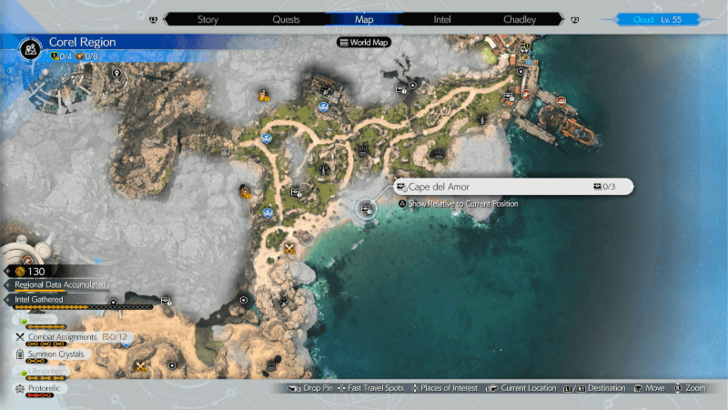 Cape del Amor |
・Gold Dust ・Ruby ・Healing Carcanet |
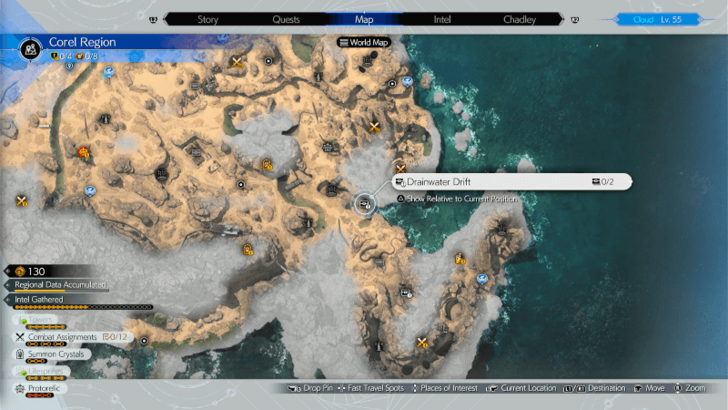 Drainwater Drift |
・Gold Dust ・Emerald |
Corel Protorelics
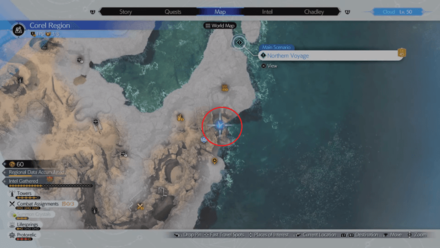
| Intel | Map Location | Cactuar Rock Location |
|---|---|---|
| Phenomenon Intel 1: Modular Reactor 1 | 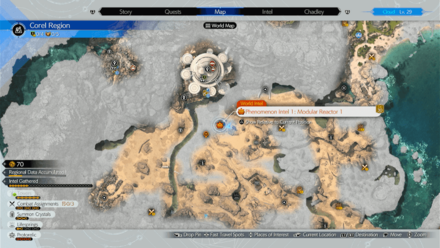 |
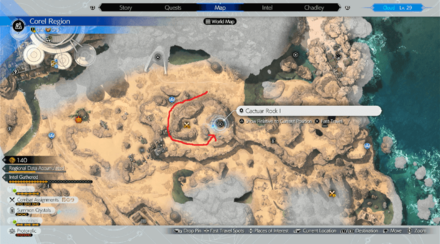 |
| Phenomenon Intel 2: Modular Reactor 2 |  |
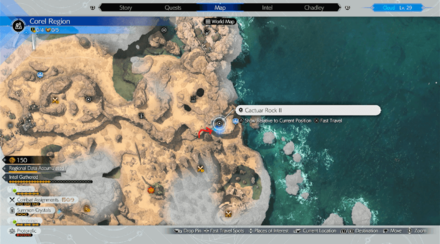 |
| Phenomenon Intel 3: Modular Reactor 3 | 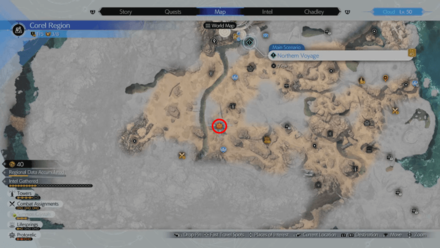 |
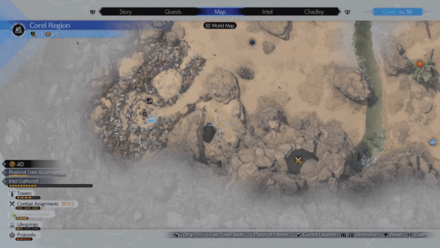 |
| Phenomenon Intel 4: Modular Reactor 4 | 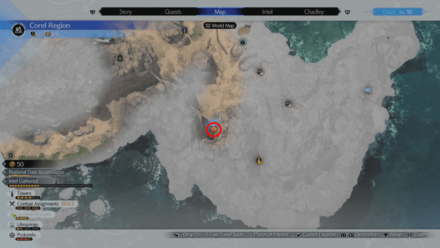 |
 |
Find Cactuar Rock and Succeed in Cactuar Crush to Complete
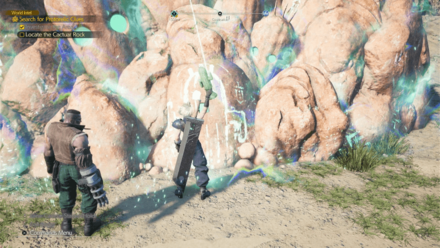 Cactuar Rock |
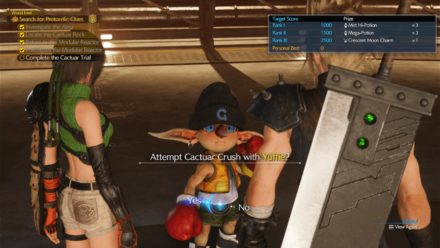 Cactuar Crush |
The Protorelics or Phenomenon Intel in the Corel Region is divided into two parts. The first part requires the players to use a Cactuar Statue to find the Cactuar Rock.
The second part involves the Cactuar Crush minigame where you will use different characters to defeat Cactuars to reach a point threshold. In addition to progressing the Phenomenon Intel questline, the minigame also provides item rewards depending on the points you achieved.
3rd and 4th Protorelic Unlocked After Chapter 12

On your first visit to the Corel Region, you can only accomplish the first 2 Phenomenon Intel. After completing the second, Kid G will ask to pause the quest line, saying that they will contact you about the rest soon.
You can complete the Corel Protorelics after completing Chapter 12 when you return to the region.
Walkthrough and List of Chapters
Corel Sanctuaries
| Sanctuary | Map Location |
|---|---|
| Divine Intel 1: Alexander Sanctuary α | 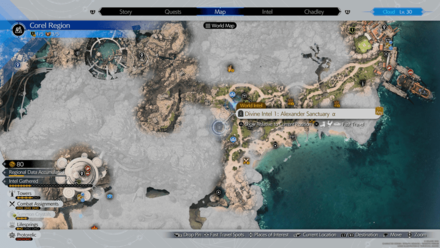 |
| Divine Intel 2: Alexander Sanctuary β | 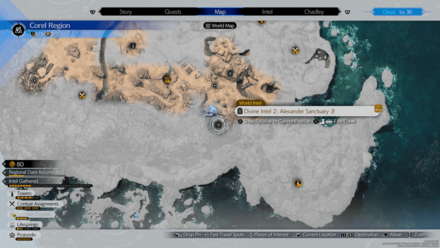 |
| Divine Intel 3: Alexander Sanctuary γ | 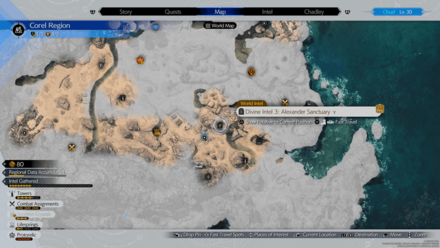 |
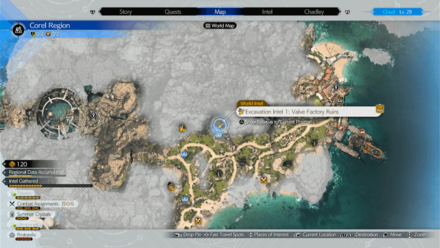
Corel Excavation Intel
Excavation Intel 1: Valve Factory Ruins
| Map Location | Transmuter Chip Locations | ||||
|---|---|---|---|---|---|
 |
 |
||||
| How to Unlock | Complete 2 Corel Expedition Intel | ||||
| Rewards | ・Transmuter Chip: Armor Upgrades 5 ・Transmuter Chip: Advanced Accessories ・Transmuter Chip: Boiler Valve |
||||
Excavation Intel 2: Deserted Village
| Map Location | Transmuter Chip Locations | ||||
|---|---|---|---|---|---|
 |
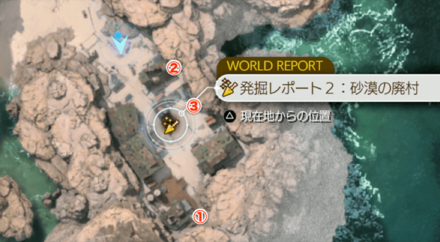 |
||||
| How to Unlock | Complete 4 Corel Expedition Intel | ||||
| Rewards | ・Transmuter Chip: Karmic Cowl ・Transmuter Chip: Bird Trap ・Transmuter Chip: Armor Upgrades 6 |
||||
All Excavation Intel Locations
Corel Classified Intel
| Map Location | Details |
|---|---|
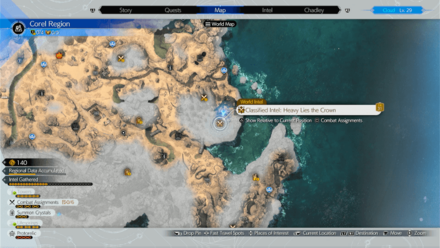 Classified Intel: Heavy Lies the Crown |
How to Unlock: Complete 4 Corel Expedition Intel Quest: Defeat the Tonberry King |
All Classified Intel Locations
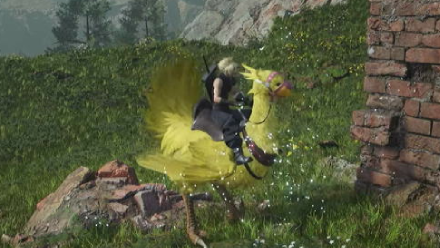
Corel Chocobo Location
Rent-a-Bird Stables in Chapter 7
| Chocobo Type | How to Unlock |
|---|---|
 Normal Chocobo Normal Chocobo |
・Purchase a pass at the Costa del Sol entrance. ・First available in Chapter 7 |
To get the Corel Chocobo, you need to find the Rent-a-Bird Stables in Costa del Sol. You can use it to rent a Chocobo to explore the Corel region.
All Chocobo Locations and Types
Corel Enemy Locations: How to Assess 25 Enemies
List of Corel Enemies
| No. | Enemy | Where and How to Encounter |
|---|---|---|
| 38 | Cyclone Drake | 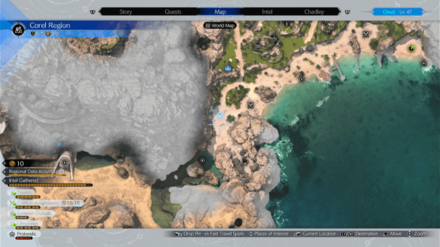 The Cyclone Drake can be found on the west side of the Clamshell Beach |
| 40 | Citripinefish |  The Citripinefish can be located on top of a mountain after climbing the wall with a chocobo |
| 42 | Bloatfloat |  The Bloatfloat can be located in the area in front of Corel Ropeway sign of Mt Corel |
| 43 | Sea Terpsicolt |  The Sea Tersicolt can be located on a field on the west side of the Clamshell Beach |
| 44 | Heliopora Terpsicolt | Can be encountered near the shore during the Seahorsing Around Fiend Intel. |
| 45 | Sandhog Pie | 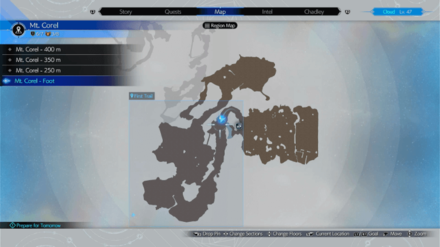 The Sandhog Pie can be located pass the entrance of Mt. Corel near the stairs |
| 47 | Barnaclaw |  Can be encountered during the Rendezvous in Costa del Sol side quest at the southwest shore of Costa Del Sol. |
| 52 | Tonberry King | 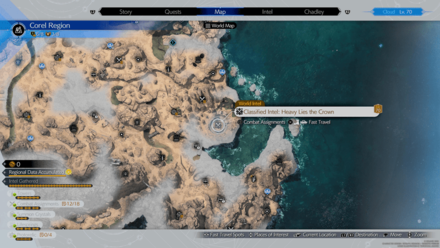 Can be encountered during The Classified Intel Report: Heavy Lies the Crown which can be unlocked by first going to any four of the six Expedition Intel Reports in the Corel Region and analyzing the Lifesprings there. |
| 57 | Bomb | 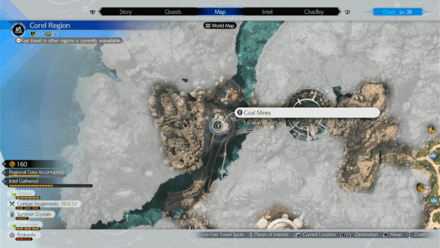 Can be encountered in the Coal Mines. |
| 102 | Saberhawk | Can be encountered during the Top of the Pecking Order Fiend Intel once you progress through the story of Chapter 8 until you exit Dustbowl. After getting out of Dustbowl, just go towards the south until you see a cavern where the Fiend Intel is. |
| 104 | Shoalopod |  The Shoalopod can be located near a bridge on the south side of the Corel Falls |
| 105 | Shankhalopod | Can be encountered during the Hit the Squids Field Intel that will appear on the southeast and follow the path from the tower until you reach the shore where the fiends are. |
| 106 | Crown Lance | 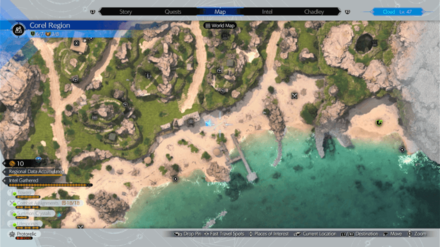 The Crown Lance can be located near the Clamshell Beach |
| 108 | Spearhawk | 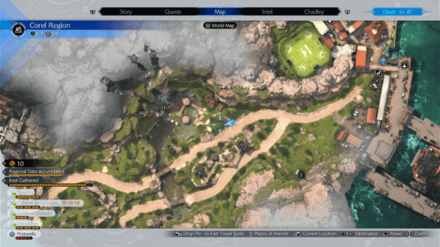 The Spearhawk can be located on the path near the Corel Falls |
| 111 | Heatseeker | 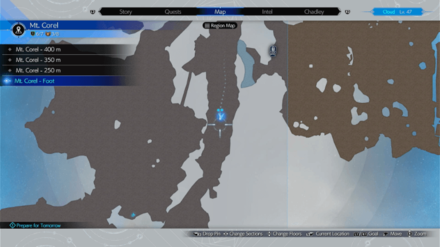 The Heatseeker can be located in Mt. Corel pass the stairs in a narrow path |
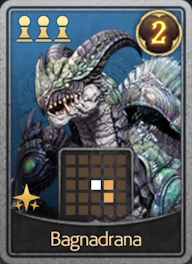
| 114 | Bagnadrana |  Can be encountered in Mt. Corel. |
| 116 | Cockatrice | Can be encountered in the Coal Mines. |
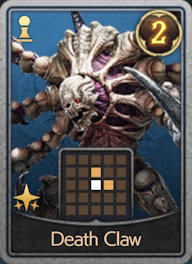
| 117 | Death Claw | 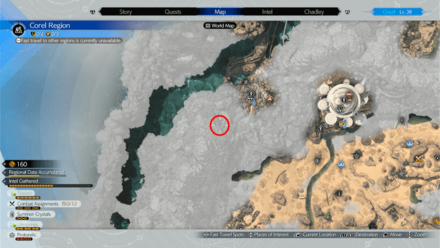 Can be encountered during the Of Robed Men and Ransoms side quest in South Corel Mine. |
| 120 | Landworm |  The Landworm can be located in the South side of Golden Saucer near a Remnawave Tower |
| 121 | Duneworm | Can be encountered during Death From Below Fiend Intel. Ride your buggy that you will get on Chapter 9 and go through the huge tube passage to get to the side where the Fiend Intel is. |
| 123 | Sandspitter | 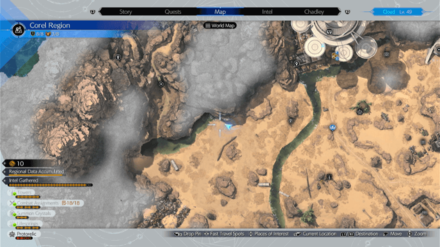 The Sandspitter can be located on the far west side of the Desert near a lake |
| 124 | Bladefin | Can be encountered during Fish out of Water Fiend Intel which will appear at the west of Stonearch Tower after activating this Remnawave Tower. Just pin it on your map and ride the Buggy that you obtained at the start of Chapter 9 to go there quickly. |
| 125 | Chimera | The Chimera can be located on the far west side of the Desert near a lake |
| 126 | Silver Chimera | Can be encountered during the Unholy Union Fiend Intel which will appear on the east of Ravine Tower after activating it. Note that you will need to use the grappling hook to get to where the Fiend Intel is. |
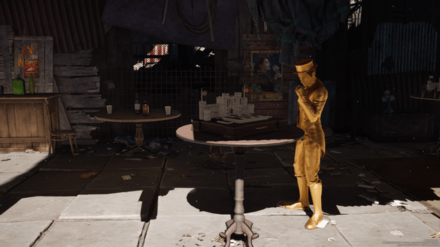
| 172 | Cactuar | 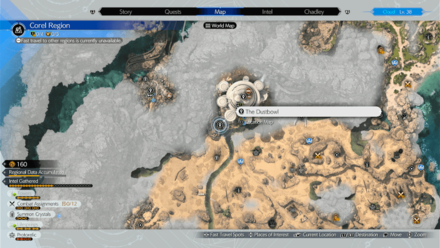 Can be encountered during The Bartender's Untended Garden main quest in Chapter 8 at The Dustbowl. |
| 174 | Cactrot | 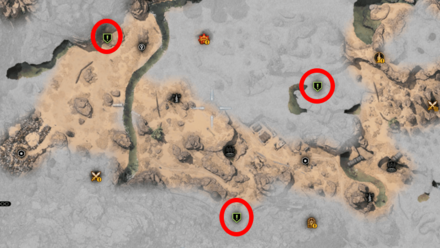 Can be encountered during the Missing Mr. Birdie side quest at 1 of the 3 locations you will be required to place a birdcage. |
Use Assess Materia on Region Enemies
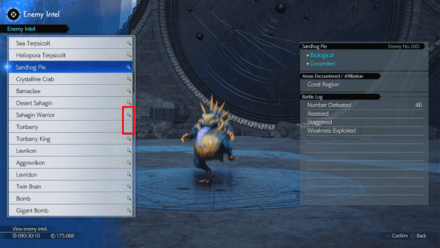
Players will need to assess 25 different enemies in Corel using the Assess Materia to complete Biological Intel: At Any Cost. However, it is not specified which of the enemies present in the region are included in the list.
To determine if you have already assessed a specific enemy, you can check the Enemy Intel screen and check for a magnifying glass icon next to their name.
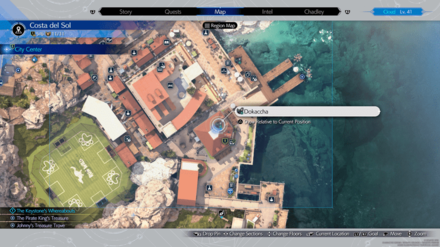
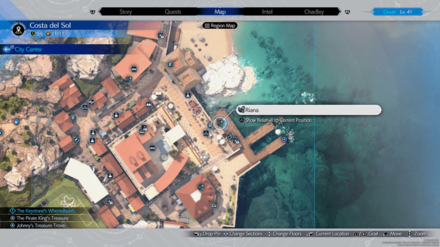
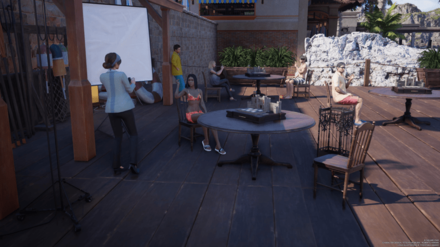
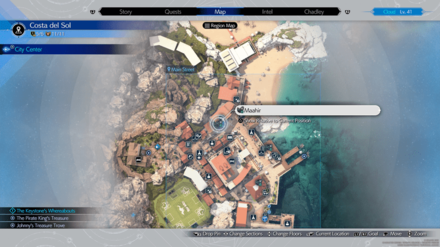
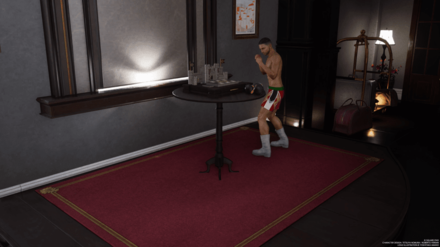
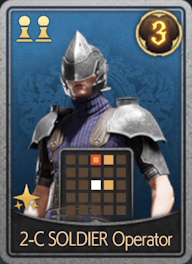
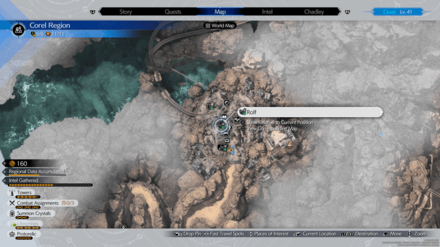
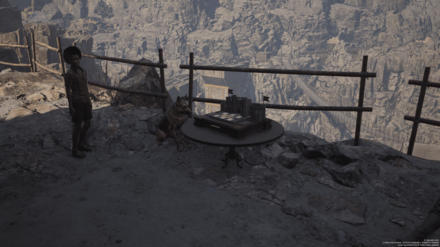
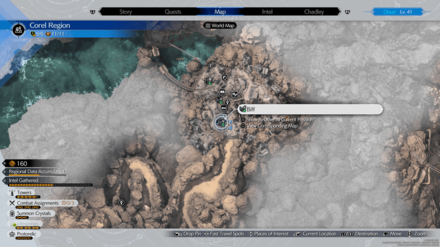
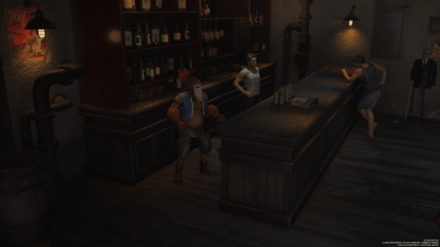
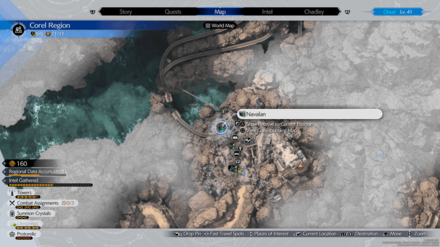
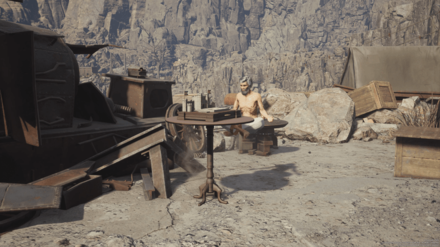
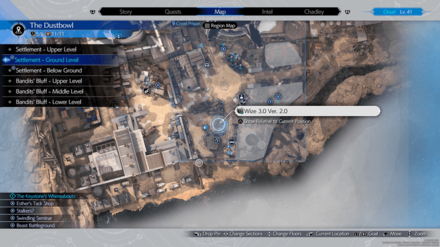
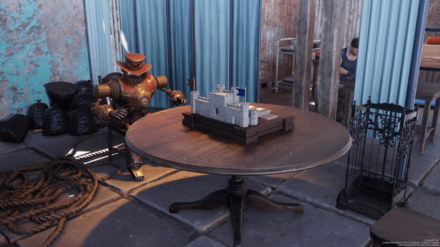
Corel Queen's Blood Players
| Player | Map & World Location | Reward |
|---|---|---|
| Dokaccha |
  |
 |
| Riana |
  |
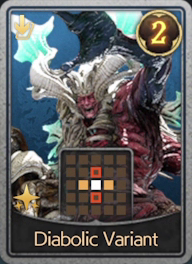 |
| Maahir |
  |
 |
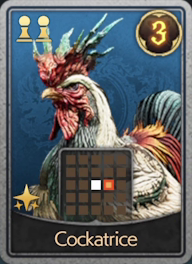
| Rolf |
  |
 |
| Biff |
  |
 |
| Navalan |
  |
 |
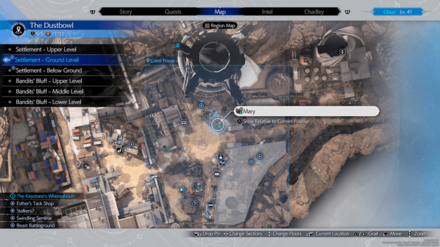
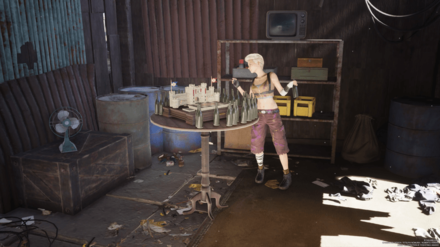
| Mary |
  |
 |
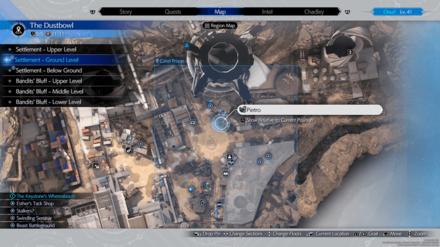
| Pietro |
  |
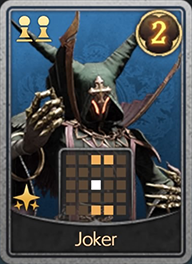 |
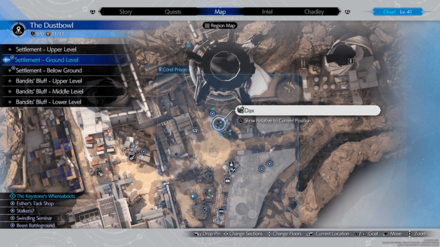
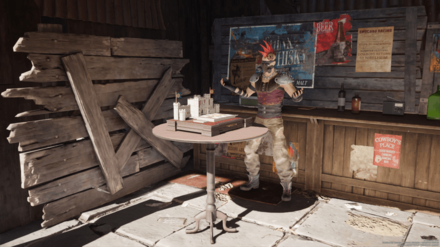
| Dax |
  |
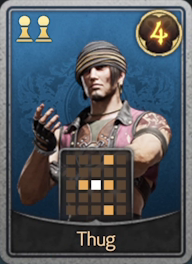 |
| Wize 3.0 Ver. 2 |
  |
 |
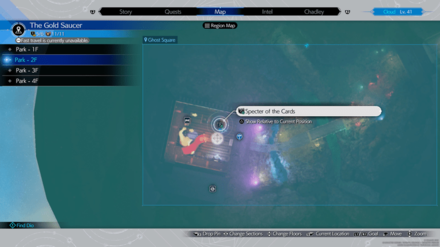
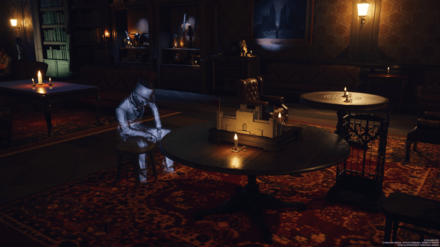
| Specter of the Cards |
  |
 |
FF7 Rebirth Related Guides
All Regions
| List of All Regions | |
|---|---|
| Grasslands | Junon |
| Corel | Gongaga |
| Cosmo Canyon | Nibel |
| Meridian Ocean | Northwood |
All Map Locations
| List of All Landmarks | |||
|---|---|---|---|
Comment
Author

Corel Region: Map and All Locations
Rankings
- We could not find the message board you were looking for.
Gaming News


Popular Games

Genshin Impact Walkthrough & Guides Wiki
Honkai: Star Rail Walkthrough & Guides Wiki
Arknights: Endfield Walkthrough & Guides Wiki
Umamusume: Pretty Derby Walkthrough & Guides Wiki
Wuthering Waves Walkthrough & Guides Wiki
Pokemon TCG Pocket (PTCGP) Strategies & Guides Wiki
Abyss Walkthrough & Guides Wiki
Zenless Zone Zero Walkthrough & Guides Wiki
Digimon Story: Time Stranger Walkthrough & Guides Wiki
Clair Obscur: Expedition 33 Walkthrough & Guides Wiki


Recommended Games
Fire Emblem Heroes (FEH) Walkthrough & Guides Wiki
Pokemon Brilliant Diamond and Shining Pearl (BDSP) Walkthrough & Guides Wiki
Diablo 4: Vessel of Hatred Walkthrough & Guides Wiki
Super Smash Bros. Ultimate Walkthrough & Guides Wiki
Yu-Gi-Oh! Master Duel Walkthrough & Guides Wiki
Elden Ring Shadow of the Erdtree Walkthrough & Guides Wiki
Monster Hunter World Walkthrough & Guides Wiki
The Legend of Zelda: Tears of the Kingdom Walkthrough & Guides Wiki
Persona 3 Reload Walkthrough & Guides Wiki
Cyberpunk 2077: Ultimate Edition Walkthrough & Guides Wiki


All rights reserved
© SQUARE ENIX CO., LTD. All Rights Reserved.
CHARACTER DESIGN: TETSUYA NOMURA/ROBERTO FERRARI
LOGO ILLUSTRATION: © 1997 YOSHITAKA AMANO
The copyrights of videos of games used in our content and other intellectual property rights belong to the provider of the game.
The contents we provide on this site were created personally by members of the Game8 editorial department.
We refuse the right to reuse or repost content taken without our permission such as data or images to other sites.