Musclehead Colosseum Advanced Mode Guide and Rewards
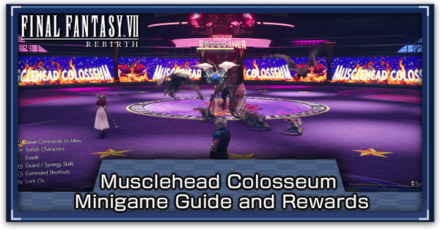
The Musclehead Colosseum Minigame can be unlocked by reaching Chapter 8 and accessing the Gold Saucer in Final Fantasy 7 Rebirth (FF7 Rebirth). Read on to learn more about how to unlock Musclehead Colosseum Minigame and its advanced combat challenges, how to play it, and rewards available in the minigame.
How to Unlock Musclehead Colosseum Minigame
Reach Chapter 8 and Head Towards Gold Saucer

The minigame can be unlocked after you've reached Chapter 8 of the main storyline and accessed the Gold Saucer.
Chapter 8: All That Glitters Walkthrough
Unlock Additional Combat Challenges in Chapter 12
Once you reach Chapter 12 of the main story, you unlock additional combat challenges for the Musclehead Colosseum minigame. These challenges are more difficult than the previous ones and offer better rewards.
Chapter 12: A Golden Key Walkthrough
How to Play Musclehead Colosseum Minigame
| How to Play Minigame |
|---|
|
|
Complete Combat Challenges in Musclehead Colosseum
The Musclehead Colosseum Minigame involves completing multiple combat challenges that are unlocked by special conditions. Some challenges vary in difficulty, while others may only allow specific characters to compete.
Unlocking and completing the combat challenges will earn you some rewards that may be worth your while, so be sure to participate now and then in the minigame.
Equip Your Best Equipment and Abilities
It is recommended that you equip your team with the best gear and abilities they currently have if you're planning to undergo these combat challenges. Having a fully optimized team will give you a better chance of winning.
Use Aerith for Crowd Control
It is recommended that you use Aerith when dealing with a large number of standard enemies. Use Chrono Aegis to optimize your defense against surrounding enemies, then cast spells that target the weakness of foes nearby.
Equip Your Participating Members with Healing Materia
It is important that you equip your party members with Healing Materia, given that the minigame doesn't allow for any participating members to use items during rounds.
Musclehead Colosseum Minigame Combat Challenges and Rewards
| All Musclehead Colosseum Categories | |
|---|---|
| 2-Person: Easy | 2-Person: Advanced |
| 6-Person: Easy | 6-Person: Advanced |
Two-Person Bouts: Easy
| Two-Person Bout: Easy Challenges |
|---|
|
|
The first 3 challenges in this category are also going to be taken up by you and your date.
Two-Person Bout: The Zoomies
| Level | 28 | Rounds | 2 |
|---|---|---|---|
| Enemies | Round 1: • Lavalisk x 4 (Weakness:
• Velociwing x4 (Weakness: Round 2: • J-Unit Sweeper x2 (Weakness: |
||
| Unlock Conditions | Unlocked by default. | ||
| Rewards | • Mega Potion x5 • Gold Saucer Points x50 |
||
| Best Party |
 Aerith Aerith
|
 Cloud Cloud
|
|
For this challenge, it is recommended to use Aerith as one of the participating members from your party. Use Chrono Aegis to block off attacks from surrounding enemies, and cast the spells that exploit enemy weaknesses.
For the second round, the fight will be much easier. Use Cloud's Firebolt Blade or Yuffie's Elemental Ninjutsu to pressure the enemies with lightning attacks.
Two-Person Bout: Devil-May-Care Desperados
| Level | 28 | Rounds | 2 |
|---|---|---|---|
| Enemies | Round 1: • Bandit x8 (Weakness: Round 2: • White Mousse x1 (Weakness: None) |
||
| Unlock Conditions | Complete Two-Person Bout: The Zoomies | ||
| Rewards | • Secrets of the Ninja Vol. III • Gold Saucer Points x60 |
||
| Best Party |
 Aerith Aerith
|
 Cloud Cloud
|
|
Choose Aerith as a participant, and equip her with both the Magnify and Fire Materia. This will help dispose the enemies surrounding you during the first round.
Pressure the White Mousse with elemental spells during the second round. Switch between other elemental attacks or spells if the White Mousse begins to build a resistance towards your attacks.
Two-Person Bout: Exemplary Exterminators
| Level | 39 | Rounds | 2 |
|---|---|---|---|
| Enemies | Round 1: • Daemonic Entity x4 (Weakness:
• Junon Flametrooper x4 (Weakness: Round 2: • Quetzalcoatl x1 (Weakness: |
||
| Unlock Conditions | • Complete Two-Person Bout: Devil-May-Care Desperados • Complete the Classified Intel Report: Winged Lacertilian of Yore |
||
| Rewards | • Hi-Ether x2 • Gold Saucer Points x70 |
||
| Best Party |
 Aerith Aerith
|
 Cloud Cloud
|
|
As usual, Aerith will be the recommended choice to take out the enemies during the first round of this challenge. Equip her with Magnify and Ice Materia, and cast the blizzards spells to eliminate the enemies in one fell swoop.
For the second round, cast Blizzard spells using Aerith to build up the enemy's stagger gauge. Have Cloud follow up with strong physical attacks to finish the enemy off.
Two-Person Bout: Ghoulish Delights
| Level | 40 | Rounds | 2 |
|---|---|---|---|
| Enemies | Round 1: • Crawler x4 (Weakness:
• Grasslands Wolf x4 (Weakness: Round 2: • Mindflayer x1 (Weakness: None) |
||
| Unlock Conditions | • Complete Two-Person Bout: Exemplary Exterminators • Complete the Classified Intel Report: The Whisperer in the Darkness |
||
| Rewards | • Tale of the Red Warrior Vol. IV • Gold Saucer Points x70 |
||
| Best Party |
 Aerith Aerith
|
 Cloud Cloud
|
|
Aerith is once again the top choice for this challenge, as you only need to equip her with the Magnify and Fire Materia and use her to cast fire spells to defeat the surrounding enemies easily.
You will need Cloud to be in the front lines during the second round of this challenge, given that physical attacks are more effective against Mindflayer rather than magical attacks.
Synergy Abilities will also help build up the Mindflayer's stagger gauge, giving you an opportunity to unleash high damage towards it.
Two-Person Bouts: Advanced
| Two-Person Bouts: Advanced Challenges |
|---|
|
|
The first 2 challenges in this category will have you fight as toads.
Two-Person Bout: Frogjutsu
| Level | 44 | Rounds | 5 |
|---|---|---|---|
| Enemies | Round 1: • Amphidex x3 Round 2: • Sandhog Pie x1
• Citripine Fish x4 Round 3: • Grangalan x2 Round 4: • Junon Flametrooper x2 Round 5: • Levrikon x1 |
||
| Unlock Conditions | Clear Chapter 12. | ||
| Rewards | • Elixir x1 • Gold Saucer Points x140 |
||
| Best Party |
 Aerith Aerith
|
 Cloud Cloud
|
|
This one is a little odd. You and your partner will fight through the entire 5 rounds as toads, effectively disabling any abilities and spells except for two: Bubble Shot and Leapfrog. Thankfully, the enemies in this challenge are weaker than usual.
Keep attacking opponents until you stagger them and go all-out with Leapfrog. Should you need to heal, use Bubble Shot to do so. Simply keep spewing bubbles until a large one appears. Once it hits an opponent, it will deal damage and restore your HP.
Two-Person Bout: Ribbit Me This
| Level | 44 | Rounds | 5 |
|---|---|---|---|
| Enemies | Round 1: • Junon Riot Trooper x3 Round 2: • Grasslands Wolf x2 Round 3: • Sea Terpiscolt x2 Round 4: • Cactrot x2 Round 5: • Bomb x1 |
||
| Unlock Conditions | Complete Two-Person Bout: Frogjutsu | ||
| Rewards | • Enfeeblement Ring x1 • Gold Saucer Points x160 |
||
| Best Party |
 Aerith Aerith
|
 Cloud Cloud
|
|
This will be the last bout you go through as toads, so make sure to follow the same strategy as the previous bout and you should be good.
Some enemies like the Grasslands Wolf might move a bit too fast, but the first normal attack you do as a frog is to pull enemies to melee range, so it shouldn't be too much of a problem.
Two-Person Bout: Birds of a Feather
| Level | 44 | Rounds | 2 |
|---|---|---|---|
| Enemies | Round 1: • Insectoid Chimera x4 (Weakness:
• Chimera Mimic x4 (Weakness: Round 2: • Maloceros x1 (Weakness:
• Skeeskee x2 (Weakness: |
||
| Unlock Conditions | Unlocked upon reaching Chapter 12 | ||
| Rewards | • X-Potion x1 • Gold Saucer Points x120 |
||
| Best Party |
 Aerith Aerith
|
 Yuffie Yuffie
|
|
For the first round of this combat challenge, choose Yuffie as a participant and use her Whirlwind ability to gather around enemies and deal AoE damage.
You could pressure all the enemies during this round with the Whirlwind ability, eliminating them instantly in the process.
The Maloceros has a high amount of HP, which will need some surmountable amount of damage from you to eliminate it.
The Skeeskee that comes along with it will be much easier to handle if you've used an ability that also deals high damage.
Two-Person Bout: Disorderly Peacekeepers
| Level | 45 | Rounds | 2 |
|---|---|---|---|
| Enemies | Round 1: • Scrutineye x4 (Weakness:
• Slug-Ray x4 (Weakness: Round 2: • Landworm x1 (Weakness:
• Amphidex x2 (Weakness: |
||
| Unlock Conditions | Complete Two-Person Bout: Birds of a Feather | ||
| Rewards | • Teluric Scriptures Vol. V • Gold Saucer Points x140 |
||
| Best Party |
 Aerith Aerith
|
 Yuffie Yuffie
|
|
For the first round, you will be using Aerith to cast powerful Thunder spells against nearby enemies by equipping her with the Magnify and Lightning Materia. This will help build up the stagger gauge of all surrounding foes.
During the second round, it is recommended that you prioritize defeating the Landworms. Ice will be the elemental weakness of all your foes, so be sure to have a party member equipped with Ice Materia.
If they happen to swallow one of your party members, simply cast Blizzard spells against them to release your swallowed ally and raise its stagger gauge.
Two-Person Bout: Into the Woods
| Level | 54 | Rounds | 2 |
|---|---|---|---|
| Enemies | Round 1: • Orc x4 (Weakness:
• Terpsicolt x4 (Weakness: Round 2: • Reapertail x1 (Weakness: |
||
| Unlock Conditions | • Complete Two-Person Bout: Disorderly Peacekeepers • Complete Two-Person Bout: Ghoulish Delights • Complete the main scenario |
||
| Rewards | • Turbo Ether • Gold Saucer Points x160 |
||
| Best Party |
 Aerith Aerith
|
 Yuffie Yuffie
|
|
For the first round, it is recommended to have Aerith equip both the Magnify and Fire Materia so that you could unleash powerful fire spells on all surrounding enemies.
You could also use Yuffie as an alternative and have her attack with Whirlwind so that you could gather all nearby foes and defeat them in one devastating attack.
During the second round, you will have to cast Ice spells or use Yuffie's Elemental Ninjutsu to pressure the Reapertail. Once it's pressured, you should use Fire spells against the Reapertail to stagger it.
Simply repeat the process of pressuring it with Ice spells and staggering with Fire spells to eliminate the Reapertail.
Two-Person Bout: Popularity Contest
| Level | 56 | Rounds | 2 |
|---|---|---|---|
| Enemies | Round 1: • Cactrot x4 (Weakness: None)
Round 2: • Great Malboro x1 (Weakness: |
||
| Unlock Conditions | • Complete Two-Person Bout: Into the Woods • Complete the Classified Intel Report: The Sultan of Stench • Complete the main scenario |
||
| Rewards | • Fortunes Untold Vol. V x1 • Gold Saucer Points x180 |
||
| Best Party |
 Aerith Aerith
|
 Yuffie Yuffie
|
|
It is recommended that you equip both the Magnify and Healing Materia to one of your participants in preparation for the second round of the combat challenge.
For your second participant, it would be best to both equip the Magnify and Cleansing Materia so that you could be able to cast Resist and Esuna to help you during the second round.
For the first round, you will be battling opponents that can be pressured by attacking with physical attacks or casting magical spells.
It is recommended to fill up the pressure gauges of your opponents and attack them when they use their abilities.
During the second round, you will be facing against Great Malboro. Exploit its weakness and use Ice spells against it to make it vulnerable.
Another way to effectively deal against a Great Malboro is destroy its mouth to prevent it from casting any Breath attacks.
Two-Person Bout: Silent or Silenced
| Level | 58 | Rounds | 2 |
|---|---|---|---|
| Enemies | Round 1: • Frightflowers x4 (Weakness: • Riot Troopers x4 (Weakness: None)
Round 2: • Jabberwock x1 (Weakness: |
||
| Unlock Conditions | • Complete Two-Person Bout: Popularity Contest • Complete the Classified Intel Report: The Wyvern Awoken • Complete the main scenario |
||
| Rewards | • Elixir x1 • Gold Saucer Points x200 |
||
| Best Party |
 Aerith Aerith
|
 Cloud Cloud
|
|
It is recommended that you equip both the Fire and Healing Materia to all your participants so that they would be able to exploit the fire weakness of all opponents and rid any status effects that might be directed against you.
For the first round, use Aerith to cast Firaga against your opponents. Prioritize eliminating the Frightflowers first, given that they are a bit immobile during the start of battle.
During the second round, it is important to have a countermeasure against the Jabberwock's attacks since every ability it has increases the likelihood of you being petrified.
Cast Esuna to prevent your members from getting petrified, and use Fire spells to weaken the Jabberwock until its eliminated.
Two-Person Bout: Sedition
| Level | 60 | Rounds | 2 |
|---|---|---|---|
| Enemies | Round 1: • Necrotic Entities x4 (Weakness: None) • Elite Grenadiers x4 (Weakness:
Round 2: • King Zu x1 (Weakness: |
||
| Unlock Conditions | • Complete Two-Person Bout: Silent or Silenced • Complete the Classified Intel Report: Avian Tyrant • Complete the main scenario |
||
| Rewards | • Enervation Materia Earrings x1 • Gold Saucer Points x230 |
||
| Best Party |
 Aerith Aerith
|
 Yuffie Yuffie
|
|
It is recommended that you equip both the Lightning and Magnify Materia in preparation for the second round of the combat challenge.
For the first round, prioritize eliminating the Elite Grenadiers and exploit their Fire weakness by using Fire spells or attacking with Cloud's Firebolt ability. After you've defeated them, you can focus on the Necrotic Entities.
During the second round, exploit King Zu's weakness and cast Thunder spells against it to make the foe more vulnerable. It is highly recommended that you attack King Zu's wings while it's using the Swan Song ability.
Attacking its wing will pressure King Zu and prevent it from using Swan Song, which is a powerful ability that can wipe all your party members if used successfully.
Six-Person Bouts: Easy
| Six-Person Bouts: Easy Challenges |
|---|
|
|
Six-Person Bout: The Uncouth
| Level | 33 | Rounds | 2 |
|---|---|---|---|
| Enemies | Round 1: • Kyuvildun x10 (Weakness: Round 2: • Bandit x10 (Weakness: |
||
| Unlock Conditions | Clear Chapter 12. | ||
| Rewards | • Mist Mega Potion x3 • Gold Saucer Points x50 |
||
| Best Party (1st Round) |
 Cloud Cloud
|
 Barret Barret
|
 Tifa Tifa
|
| Best Party (2nd Round) |
 Aerith Aerith
|
 Yuffie Yuffie
|
 Red XIII Red XIII
|
It is recommended that you use Aerith equipped with Magnify Materia and cast strong spells that exploit the enemies' elemental weaknesses in battle.
You could also use Yuffie's Whirlwind ability to gather all foes in one are and deal a devastating attack that eliminates them all.
Six-Person Bout: The Befouled
| Level | 33 | Rounds | 2 |
|---|---|---|---|
| Enemies | Round 1: • Sandhog Pie x10 (Weakness: Round 2: • Flan x10 (Weakness: |
||
| Unlock Conditions | Complete Six-Person Bout: The Uncouth | ||
| Rewards | • White Cape x1 • Gold Saucer Points x55 |
||
| Best Party (1st Round) |
 Cloud Cloud
|
 Barret Barret
|
 Tifa Tifa
|
| Best Party (2nd Round) |
 Aerith Aerith
|
 Yuffie Yuffie
|
 Red XIII Red XIII
|
It is recommended that you use Aerith equipped with Magnify Materia and cast strong spells that exploit the enemies' elemental weaknesses in battle.
You could also choose to take on this combat challenge with a level much higher than the recommended level to eliminate foes much more easier.
Six-Person Bout: Peas in a Pod
| Level | 37 | Rounds | 2 |
|---|---|---|---|
| Enemies | Round 1: • Saberhawk x1 (Weakness:
• Fleetwing x3 (Weakness: Round 2: • Shrieker x2 (Weakness: None)
• Elite Security Officer x2 (Weakness: |
||
| Unlock Conditions | Complete Six-Person Bout: The Befouled | ||
| Rewards | • Ruby x3 • Gold Saucer Points x60 |
||
| Best Party (1st Round) |
 Cloud Cloud
|
 Yuffie Yuffie
|
 Tifa Tifa
|
| Best Party (2nd Round) |
 Aerith Aerith
|
 Barret Barret
|
 Red XIII Red XIII
|
For the first round, it is recommended that you use both Yuffie and Cloud. Use Yuffie's Whirlwind ability to easily deal with the Fleetwings, while have Cloud unleash his Firebolt ability against the Saberhawks in the area.
During the second round, use Aerith and equip her with the Magnify and Fire Materia so that she could deal powerful Fire spells against the surrounding enemies.
Six-Person Bout: Scratch That
| Level | 37 | Rounds | 2 |
|---|---|---|---|
| Enemies | Round 1: Round 2: • Shaolopod x1 (Weakness:
• Crown Lance x2 (Weakness: |
||
| Unlock Conditions | Complete Six-Person Bout: Peas in a Pod | ||
| Rewards | • Steadfast Block Materia Earrings x1 • Gold Saucer Points x70 |
||
| Best Party (1st Round) |
 Cloud Cloud
|
 Barret Barret
|
 Tifa Tifa
|
| Best Party (2nd Round) |
 Aerith Aerith
|
 Yuffie Yuffie
|
 Red XIII Red XIII
|
For the first round, it is recommended that you try eliminating all enemies in an instant by using Cloud's physical attacks.
If the Experimental Varghidpolis uses Defeaning Screech in battle, they will receive immunity from being pressured. It would be best to handle them quickly to prevent them from attacking as a group.
During the second round, use Aerith and equip her with both the Fire and Magnify Materia so that you could cast powerful Fire spells against all your opponents.
Six-Person Bout: Match Made in Pain
| Level | 39 | Rounds | 2 |
|---|---|---|---|
| Enemies | Round 1: • Zu x1 (Weakness:
• Cockatrice x1 (Weakness: Round 2: • Bagnadrana x1 (Weakness:
• Death Claw x2 (Weakness: None) |
||
| Unlock Conditions | Complete Six-Person Bout: Scratch That | ||
| Rewards | • Emerald x3 • Gold Saucer Points x80 |
||
| Best Party (1st Round) |
 Cloud Cloud
|
 Red XIII Red XIII
|
 Tifa Tifa
|
| Best Party (2nd Round) |
 Aerith Aerith
|
 Yuffie Yuffie
|
 Barret Barret
|
For the first round, use Aero spells by equipping Wind Materia to one of your participants and cast them against Zu to take them out. From there, evade and guard against the attacks of the Cockatrices to fill up their stagger gauge.
During the second round, the Death Claw will attack you during the start of battle. Be sure to avoid this so you could prevent your party member from getting immobilized and fill up its stagger gauge.
Six-Person Bout: League of Reprobates
| Level | 39 | Rounds | 2 |
|---|---|---|---|
| Enemies | Round 1: • Burt x1 (Weakness: Round 2: • Tonadu x1 (Weakness:
• Barnaclaw x1 (Weakness: None) |
||
| Unlock Conditions | Complete Six-Person Bout: Match Made in Pain | ||
| Rewards | • Thunder Materia Earings x1 • Gold Saucer Points x90 |
||
| Best Party (1st Round) |
 Cloud Cloud
|
 Red XIII Red XIII
|
 Tifa Tifa
|
| Best Party (2nd Round) |
 Aerith Aerith
|
 Yuffie Yuffie
|
 Barret Barret
|
For the first round, it is recommended that you prioritize defeating Burt in battle so that you could save up some ATB for the Deathwheel.
From there, cast spells against the Deathwheel and continue to exploit its elemental weaknesses until its eliminated.
During the second round, Tonadu will unleash a powerful diving attack after you've inflicted enough damage on it. Avoiding this dive attack will increase its pressure gauge.
Cast Fire spells against Barnaclaw with someone equipped with Fire Materia to expose its guard ability on its front.
Six-Person Bout: Pecking Order
| Level | 40 | Rounds | 2 |
|---|---|---|---|
| Enemies | Round 1: Round 2: • Tonadu x2 (Weakness: |
||
| Unlock Conditions | Complete Six-Person Bout: League of Reprobates | ||
| Rewards | • Sapphire x3 • Gold Saucer Points x100 |
||
| Best Party (1st Round) |
 Cloud Cloud
|
 Red XIII Red XIII
|
 Tifa Tifa
|
| Best Party (2nd Round) |
 Aerith Aerith
|
 Yuffie Yuffie
|
 Barret Barret
|
For the first round, exploit the enemies' elemental weaknesses to pressure it. Forcing it to drop the rock its holding with powerful abilities will also pressure the enemy.
During the second round, Tonadu will unleash a powerful diving attack after you've inflicted enough damage on it. Avoid the dive attack and pressure it to deal high damage on the enemy.
Six-Person Bout: Access Denied
| Level | 40 | Rounds | 2 |
|---|---|---|---|
| Enemies | Round 1: • Mystic Dragon x3 (Weakness: Round 2: • Modded Sweeper x2 (Weakness: |
||
| Unlock Conditions | Complete Six-Person Bout: Pecking Order | ||
| Rewards | • Spectral Cogwheel x1 • Gold Saucer Points x110 |
||
| Best Party (1st Round) |
 Aerith Aerith
|
 Yuffie Yuffie
|
 Barret Barret
|
| Best Party (2nd Round) |
 Cloud Cloud
|
 Red XIII Red XIII
|
 Tifa Tifa
|
For the first round, you will be able to pressure the Mystic Dragon by inflicting a certain amount of damage on it. Use Barret or Yuffie to deal long range attacks against the enemies, and employ Aerith to cast Aero spells against them.
During the second round, unleash lightning spells or abilities against the Modded Sweeper to pressure it during combat. Continue pressuring it multiples times unitl it gets beaten in battle.
Six-Person Bouts: Advanced
| Six-Person Bouts: Advanced Challenges |
|---|
|
|
Six-Person Bout: Harmony of Discord
| Level | 45 | Rounds | 2 |
|---|---|---|---|
| Enemies | Round 1: • Yin and Yang x2 (Weakness: Round 2: • Adjudicator (Weakness: |
||
| Unlock Conditions | Unlocked during Chapter 12. | ||
| Rewards | • Transmuter Chip: Ultimate Accessories (Enhanced Camaraderie Earrings, Enhanced Psychic’s Charm, Enhanced Karmic Cowl, Enhanced Malboro Orb, Enhanced Draconic Ring, Enhanced Expeditionary Medal) • Gold Saucer Points x120 |
||
| Best Party (1st Round) |
 Cloud Cloud
|
 Yuffie Yuffie
|
 Barret Barret
|
| Best Party (2nd Round) |
 Aerith Aerith
|
 Red XIII Red XIII
|
 Tifa Tifa
|
Round 1's Yin and Yang switch between Yin, who primarily deals physical attacks, and Yang, who primarily casts Blizzard to deal magic damage. Elemental affinities do not change, however, so hit it with Fire to stagger it.
Round 2's Adjudicators are weak to Lightning and, when pressured with either physical or magic attacks, will nullify physical or magic damage, respectively. Pressure them with one type of attack, then switch to a teammate who deals with another type to fully stagger them.
Six-Person Bout: Gourmands Are We
| Level | 45 | Rounds | 2 |
|---|---|---|---|
| Enemies | Round 1: • Gigaworm x1 (Weakness:
Round 2: • White Mousse x1 (Weakness: None)
• White Terror x1 (Weakness: None) |
||
| Unlock Conditions | Complete Six-Person Bouts: Harmony of Discord | ||
| Rewards | • The Art of Swordplay Vol. V • Gold Saucer Points x130 |
||
| Best Party (1st Round) |
 Cloud Cloud
|
 Tifa Tifa
|
 Barret Barret
|
| Best Party (2nd Round) |
 Aerith Aerith
|
 Red XIII Red XIII
|
 Yuffie Yuffie
|
In Round 1, pay attention to the Gigaworm's behavior. If it burrows into the ground, it will likely swallow a teammate. Should this happen, stagger it or cripple its stomach to have it regurgitate your teammate. Otherwise, simply dodge it.
Focus on the White Mousse in Round 2. Deal enough elemental damage to it, and it will develop resistance towards that element, so keep it on its toes by switching elements.
Six-Person Bout: Primordial Protectors
| Level | 45 | Rounds | 2 |
|---|---|---|---|
| Enemies | Round 1: • Sahagin Warrior x2 (Weakness:
• Ogre x1 (Weakness: Round 2: • Gigant Bomb x1 (Weakness:
• Elder Golem x1 (Weakness: |
||
| Unlock Conditions | Complete Six-Person Bouts: Gourmand Are We | ||
| Rewards | • Mist Giga Potion x5 • Gold Saucer Points x140 |
||
| Best Party (1st Round) |
 Red XIII Red XIII
|
 Aerith Aerith
|
 Barret Barret
|
| Best Party (2nd Round) |
 Cloud Cloud
|
 Yuffie Yuffie
|
 Tifa Tifa
|
The first round of this battle is as straightforward as they come, so take them down by whatever means are available, then proceed with Round 2.
Prioritize the Gigant Bomb in Round 2 and hit it with ice spells as much as possible to stagger it and finish it off quickly. Afterward, focus on the Elder Golem and evade its attacks as much as you can. Yuffie is the most recommended character against this opponent.
Six-Person Bout: Out of the Shadows
| Level | 46 | Rounds | 2 |
|---|---|---|---|
| Enemies | Round 1: • Dark Claw x1 (Weakness:
• Marquis Valron x1 (Weakness: None) Round 2: • Irasceros x1 (Weakness:
• Thunderclaw x2 (Weakness: None) |
||
| Unlock Conditions | Complete Six-Person Bouts: Gourmand Are We | ||
| Rewards | • X-Potion x1 • Gold Saucer Points x150 |
||
| Best Party (1st Round) |
 Aerith Aerith
|
 Yuffie Yuffie
|
 Barret Barret
|
| Best Party (2nd Round) |
 Cloud Cloud
|
 Red XIII Red XIII
|
 Tifa Tifa
|
The first round is fairly easy. Prioritize the Marquis Valron end exploit its weakness to ice to pressure it, and then finish it off. Beware of Dark Claw's Reaper Claws as it can potentially one-shot you if you don't evade in time.
Round 2's Irasceros is weak to lightning, but the two Thunderclaws absorb it. Take the two Thunderclaws down by any means, then go for the Irasceros. Strike it with Thundara or two powerful blows to interrupt its Concentrate skill and fully stagger it.
Six-Person Bout: War of the Mascots
| Level | 53 | Rounds | 2 |
|---|---|---|---|
| Enemies | Round 1: • Citripinefish x2 (Weakness:
• Gargantuar x1 (Weakness: None) Round 2: • Toxirats x2 (Weakness:
• Gargantuar x1 (Weakness: None) |
||
| Unlock Conditions | • Complete Six-Person Bouts: Access Denied • Complete Six-Person Bouts: Out of the Shadows • Complete the main scenario |
||
| Rewards | • Sharpshooter's Companion Vol. V x1 • Gold Saucer Points x160 |
||
| Best Party (1st Round) |
 Cloud Cloud
|
 Yuffie Yuffie
|
 Tifa Tifa
|
| Best Party (2nd Round) |
 Aerith Aerith
|
 Red XIII Red XIII
|
 Barret Barret
|
It is recommended that you attack the Gargantuars when they're using Needle Rain to pressure them. Needle Rain unleashes a lot of damage, so it is best to use Barret or Yuffie to attack from a distance.
Six-Person Bout: The Archfiends
| Level | 54 | Rounds | 2 |
|---|---|---|---|
| Enemies | Round 1: • Mindflayer x1 (Weakness: None)
• Quetzacoatl x1 (Weakness: Round 2: • Jabberwock x1 (Weakness:
• King Zu x2 (Weakness: |
||
| Unlock Conditions | • Complete Six-Person Bouts: War of the Mascots • Defeat all classified foes in every region • Complete the main scenario |
||
| Rewards | • Fury Ring x1 • Gold Saucer Points x170 |
||
| Best Party (1st Round) |
 Tifa Tifa
|
 Yuffie Yuffie
|
 Red XIII Red XIII
|
| Best Party (2nd Round) |
 Aerith Aerith
|
 Barret Barret
|
 Cloud Cloud
|
For the first round, be sure to equip your participants with Elemental and Lightning
Materia to prevent or absorb the lightning-based attacks dealt by the Mindflayer and Quetzacoatl.
During the second round, have your participants be equipped with Elemental and Fire Materia to nullify the fire-based attacks dealt by King Zu and focus solely on attacking Jabberwock.
Six-Person Bout: Legendary Showdown
| Level | 55 | Rounds | 2 |
|---|---|---|---|
| Enemies | Round 1: • Great Malboro x1 (Weakness:
• Quetzacoatl x1 (Weakness: Round 2: • Mindflayer x1 (Weakness: None)
• King Zu x1 (Weakness: |
||
| Unlock Conditions | • Complete Six-Person Bouts: The Archfiends • Complete the main scenario |
||
| Rewards | • Turbo Ether x1 • Gold Saucer Points x180 |
||
| Best Party (1st Round) |
 Tifa Tifa
|
 Barret Barret
|
 Red XIII Red XIII
|
| Best Party (2nd Round) |
 Aerith Aerith
|
 Yuffie Yuffie
|
 Cloud Cloud
|
The Great Malboro will constantly be inflicting status ailments during the first round, so be sure to have all your participants equipped with Cleansing Materia so you could cast Esuna and Resist to afflicted party members.
It is recommended that you prioritize taking out Quetzacoatl first, given that Great Malboro will unleash a mist ability after you've inflicted enough damage on it.
This mist ability will continuously damage you until it fades away so dealing with two enemies during the activation of this ability will prove difficult.
During the second round, it is recommended that you equip your characters with the Fire and Elemental Materia to nullify or absorb any fire-based attacks dealt by King Zu.
When King Zu begins to cast its Swan Song ability, concentrate your attack to its wings to prevent it from using this ability.
Six-Person Bout: Ululating Quartet
| Level | 56 | Rounds | 2 |
|---|---|---|---|
| Enemies | Round 1: • Jabberwock x1 (Weakness:
• Quetzacoatl x1 (Weakness: Round 2: • Great Malboro x1 (Weakness:
• Mindflayer x1 (Weakness: None) |
||
| Unlock Conditions | • Complete Six-Person Bouts: Legendary Showdown • Complete the main scenario |
||
| Rewards | • AP UP Materia x1 • Gold Saucer Points x190 |
||
| Best Party (1st Round) |
 Aerith Aerith
|
 Barret Barret
|
 Red XIII Red XIII
|
| Best Party (2nd Round) |
 Tifa Tifa
|
 Yuffie Yuffie
|
 Cloud Cloud
|
It is recommended that the participants from your party be equipped with Cleansing Materia so they could use Resist and Esuna to act as countermeasures against the Great Malboro's mist attacks and the Jabberwock's petrifying abilities.
You could also equip the Safety Bit to prevent the Jabberwock's abilities from petrifying your equipped party member.
Six-Person Bout: The Boss and the Hound
| Level | 57 | Rounds | 2 |
|---|---|---|---|
| Enemies | Round 1: • Test 0 x3 (Weakness: Round 2: • Jabberwock x1 (Weakness:
• Tonberry King x1 (Weakness: None) |
||
| Unlock Conditions | • Complete Six-Person Bouts: Ululating Quartet • Complete the main scenario |
||
| Rewards | • Astral Remnant x2 • Gold Saucer Points x200 |
||
| Best Party (1st Round) |
 Yuffie Yuffie
|
 Barret Barret
|
 Red XIII Red XIII
|
| Best Party (2nd Round) |
 Tifa Tifa
|
 Aerith Aerith
|
 Cloud Cloud
|
For the first round, you could cast the Sleep Spell on the Test 0 if you have your characters equipped with the Binding Materia. From there, cast Fire spells or abilities to exploit their weakness.
The Tonbery King during the second round causes instant death to all those on the receiving end of its short-ranged attacks, so it is advisable to equip accessories that prevent instant death such as the Safety Bit accessory.
Six-Person Bout: Four-Way Deadlock
| Level | 58 | Rounds | 2 |
|---|---|---|---|
| Enemies | Round 1: • King Zu x1 (Weakness:
• Quetzacoatl x1 (Weakness: Round 2: • Jabberwock x1 (Weakness:
• Great Malboro x1 (Weakness: |
||
| Unlock Conditions | • Complete Six-Person Bouts: The Boss and the Hound • Complete the main scenario |
||
| Rewards | • Fortitude Ring x1 • Gold Saucer Points x210 |
||
| Best Party (1st Round) |
 Yuffie Yuffie
|
 Cloud Cloud
|
 Aerith Aerith
|
| Best Party (2nd Round) |
 Tifa Tifa
|
 Red XIII Red XIII
|
 Barret Barret
|
During the first round, it is recommended that you equp your characters with the Fire and Elemental Materia to nullify or absorb any fire-based attacks dealt by King Zu.
If King Zu begins to cast its Swan Song ability, prioritize all your attacks to its wings and concentrate on destroying them to prevent the ability from being executed.
It is recommended that members during the second round be equipped with Cleansing Materia so they could use Resist and Esuna to act as countermeasures against the Great Malboro's mist attacks and the Jabberwock's petrifying abilities.
Equip the Safety Bit to any party member so that you could prevent the Jabberwock's petrifying abilities from disabling all your participants.
Six-Person Bout: Dragon Warrior
| Level | 59 | Rounds | 2 |
|---|---|---|---|
| Enemies | Round 1: • Suevite Disgorgon x1 (Weakness:
• Disgorgon x1 (Weakness: Round 2: • Dragon x2 (Weakness:
|
||
| Unlock Conditions | • Complete Six-Person Bouts: Four-Way Deadlock • Complete the main scenario |
||
| Rewards | • Elixir x2 • Gold Saucer Points x230 |
||
| Best Party (1st Round) |
 Tifa Tifa
|
 Red XIII Red XIII
|
 Barret Barret
|
| Best Party (2nd Round) |
 Yuffie Yuffie
|
 Cloud Cloud
|
 Aerith Aerith
|
For the first round, you could pressure both the Suevite Disgorgon and Disgorgon by attacking them when their employing Petrifying Mist and Poisonous Haze respectively.
It is recommended to use Tifa so you could quickly attack the enemies as soon as the ability name hovers above their heads.
During the second round, use Aerith and equip her with the Ice Materia so she could cast powerful Blizzard spells against the Dragon and exploit its weakness.
Six-Person Bout: Riotous Feast
| Level | 60 | Rounds | 2 |
|---|---|---|---|
| Enemies | Round 1: • Mindflayer x1 (Weakness: None)
• Jabberwock x1 (Weakness: Round 2: • King Zu x1 (Weakness:
• Great Malboro x1 (Weakness: |
||
| Unlock Conditions | • Complete Six-Person Bouts: Dragon Warrior • Complete the main scenario |
||
| Rewards | • Transference Module x1 • Gold Saucer Points x250 |
||
| Best Party (1st Round) |
 Tifa Tifa
|
 Red XIII Red XIII
|
 Yuffie Yuffie
|
| Best Party (2nd Round) |
 Barret Barret
|
 Cloud Cloud
|
 Aerith Aerith
|
For the first round, it is recommended that you prioritize defeating the Jabberwock, since the Mindflayer can only be pressured and defeated by employing Synergy Abilities against it.
Equip your participants with accessories and materia that counter against the petrification abilities of the Jabberwock, such as the Safety Bit and Cleansing Materia.
During the second round, equip your characters with the Fire and Elemental Materia to nullify or absorb any fire-based attacks dealt by King Zu.
If King Zu begins to cast its Swan Song ability, prioritize all your attacks to its wings and concentrate on destroying them to prevent the ability from being executed.
After you've taken out King Zu, focus all your efforts in eliminating Great Malboro and cast Blizzard spells using a party member equipped with Ice Materia to prevent it from casting breath abilities and dispose it entirely.
FF7 Rebirth Related Guides

List of All Available Minigames
All Minigame Guides
Author
Musclehead Colosseum Advanced Mode Guide and Rewards
Rankings
- We could not find the message board you were looking for.
Gaming News
Popular Games

Genshin Impact Walkthrough & Guides Wiki

Honkai: Star Rail Walkthrough & Guides Wiki

Arknights: Endfield Walkthrough & Guides Wiki

Umamusume: Pretty Derby Walkthrough & Guides Wiki

Wuthering Waves Walkthrough & Guides Wiki

Pokemon TCG Pocket (PTCGP) Strategies & Guides Wiki

Abyss Walkthrough & Guides Wiki

Zenless Zone Zero Walkthrough & Guides Wiki

Digimon Story: Time Stranger Walkthrough & Guides Wiki

Clair Obscur: Expedition 33 Walkthrough & Guides Wiki
Recommended Games

Fire Emblem Heroes (FEH) Walkthrough & Guides Wiki

Pokemon Brilliant Diamond and Shining Pearl (BDSP) Walkthrough & Guides Wiki

Diablo 4: Vessel of Hatred Walkthrough & Guides Wiki

Super Smash Bros. Ultimate Walkthrough & Guides Wiki

Yu-Gi-Oh! Master Duel Walkthrough & Guides Wiki

Elden Ring Shadow of the Erdtree Walkthrough & Guides Wiki

Monster Hunter World Walkthrough & Guides Wiki

The Legend of Zelda: Tears of the Kingdom Walkthrough & Guides Wiki

Persona 3 Reload Walkthrough & Guides Wiki

Cyberpunk 2077: Ultimate Edition Walkthrough & Guides Wiki
All rights reserved
© SQUARE ENIX CO., LTD. All Rights Reserved.
CHARACTER DESIGN: TETSUYA NOMURA/ROBERTO FERRARI
LOGO ILLUSTRATION: © 1997 YOSHITAKA AMANO
The copyrights of videos of games used in our content and other intellectual property rights belong to the provider of the game.
The contents we provide on this site were created personally by members of the Game8 editorial department.
We refuse the right to reuse or repost content taken without our permission such as data or images to other sites.
 Piano Minigame
 Hustle de Chocobo
 Moogle MIschief
 Dolphin Show Minigame
 Junon Parade and All 7th Infantry Locations
 Fort Condor
 Cactuar Caper and All Cactuar Locations
 Run Wild
 Card Carnival (Costa del Sol Queen's Blood Challenges)
 Pirate's Rampage
 Wheelie Rendezvous
 Minecart Adventure
 G-Bike Minigame
 Desert Rush
 Galactic Saviors
 3D Brawler
 Chocobo Races
 Musclehead Colosseum
 Jumpfrog
 Crunch-Off
 Glide de Chocobo
 Cactuar Crush
 Gears and Gambits
 Gold Saucer Queen's Blood Challenges


![Animal Crossing: New Horizons Review [Switch 2] | Needlessly Crossing Over to a New Generation](https://img.game8.co/4391759/47d0408b0b8a892e453a0b90f54beb8a.png/show)


Exemplary Exterminators is recommended level 39, not 29.