Rude and Elena (Chapter 3) Hard Mode Guide
Rude and Elena (Chapter 3) are bosses in Chapter 3: Deeper into Darkness of Final Fantasy 7 Rebirth (FF7 Rebirth). Learn how to beat Rude and Elena (Chapter 3) on Hard Mode and normal difficulties, their weaknesses and resistances, and a list of their moves and attack patterns in this guide!
List of Contents
Rude and Elena Weaknesses and Stats
Rude Weaknesses and Stats
 |
|||
| Easy | Normal | Hard | |
|---|---|---|---|
| HP | 6854 | 9792 | 61460 |
Weakness and Resistances
| Weaknesses | Lesser Resistances | Greater Resistances |
|---|---|---|
| Absorbed Elements | Immunities | |
| None | ||
Changes When Staggered
| Weakness / Effective | Resistance |
|---|---|
| None | None |
Elena Weaknesses and Stats
 |
|||
| Easy | Normal | Hard | |
|---|---|---|---|
| HP | 4950 | 7072 | 44388 |
Weakness and Resistances
| Weaknesses | Lesser Resistances | Greater Resistances |
|---|---|---|
|
|
None |
|
| Absorbed Elements | Immunities | |
| None |
|
|
Changes When Staggered
| Weakness / Effective | Resistance |
|---|---|
| None | None |
How to Pressure Rude and Elena
How to Pressure Rude
|
|
In order to Pressure Rude during this fight, you will need to hit him with powerful ATB commands or Wind spells. Chain ATB commands between Cloud and Tifa, or have Aerith double-cast Wind spells using her Arcane Ward, especially when he enters Atlas Stance.
How to Pressure Elena
|
|
To Pressure Elena, hit her with multiple Focused Thrusts using Cloud or Counter her attacks to instantly Pressure her. However, do note that when you start focusing down Elena, Rude will start using powerful AoE abilities like Triple Shockwave and Spirit Geyser.
How to Pressure and Stagger Enemies
Rude and Elena Best Party and Builds
| This section is for players who are playing on Easy and Normal difficulties. To check out the best builds and tips for Hard Mode, jump to our Hard Mode Guide section, below! |
Recommended Party Setup
| Available Characters and Roles | |
|---|---|
 Cloud Cloud
|
【Physical DPS / Stagger Buildup】 ・Pressure Elena by Countering and Parrying or spamming Focused Thrust. ・Equip the Sleek Saber to get better ATB Recovery via its Weapon Skills. |
 Aerith Aerith
|
【Caster DPS / Support】 ・Exploit Rude's weakness and Pressure him with Aero spells. ・Hit Elena with Thunder to exploit her weakness and Pressure her. |
 Tifa Tifa
|
【Physical DPS】 ・Pressure the enemy with Divekick and Reverse Gale (for Rude). ・Increase Stagger damage multiplier by using Omnistrike + Unbridled Strength spam. |
Best Materia to Use
| Materia | How to Use |
|---|---|
|
|
・Recover HP to all allies, but costs 2-ATB. ・Equip to the Leader character to make sure you have enough ATB to use it. |
|
|
・Heal a single ally when their HP drops. |
|
|
・Use Aero to exploit Rude's weakness and Pressure him. ・Best used on Aerith for her high Magic Attack stat. ・Aerith's Arcane Ward can allow you to double-cast the spell. |
|
|
・Use Thunder to exploit Elena's weakness and Pressure her. ・Best used on Aerith for her high Magic Attack stat. ・Aerith's Arcane Ward can allow you to double-cast the spell. |
How to Beat Rude and Elena
| Rude and Elena Boss Fight Tips |
|---|
|
|
Lock-On to Elena and Focus Your Attacks on Her
| Lock-On | R3 (Press the R-Stick) |
|---|---|
| Switch Targets | R-Stick |
Due to Rude's high HP and frequent guarding, it's best to take out Elena first to make things quicker. To make it easier, just lock-on to her and make sure all attacks and ATB commands are targeted her way.
Use Cloud's Counterattacks to Pressure
Using Counters from Cloud will allow you to easily pressure Rude and Elena. While in Punisher Mode, simply block an enemy attack to activate one (can also be done while changing into Punisher mode).
How to Counter and Parry Attacks
Hit with Focused Thrust when Pressured
Once either Elena or Rude are Pressured, use Focus Thrust to build up their Stagger meter. When filled, this procs a Stagger, stunning them and leaving them open to attack.
How to Pressure and Stagger Enemies
Lay Into Them When Staggered
Since damage output is increased on Staggered enemies, use as many attacks as possible to knock off large chunks of HP before they recover from Stagger. If you're using Cloud, spam Braver and Punisher Mode attacks to deal damage.
You can even increase the stagger damage multiplier by switching to Tifa and spamming Omnistrike and Unbridled Strength. Alternate between the two since Omnistrike has the fastest animation out of the 3 types of Chi strikes.
Focus on Dodging Synergy Strikes
While Rude and Elena are both still present, they will announce before doing a Synergy Strike. These have a large attack range, so be sure to dodge them when you see one coming. If Elena goes for the ranged grenade toss spam, simply run around the arena to dodge them.
Rude and Elena Hard Mode Guide
| Rude and Elena Hard Mode Tips |
|---|
| ★ Best Hard Mode Builds for Rude and Elena ★ |
|
|
Rude and Elena Hard Mode Builds
| The builds featured in this Hard Mode section are at Weapon Levels 7~8. If you find that you don't have enough Materia slots to complete the setup, consider getting all the possible Manuscripts on Normal, first. |
 Cloud Cloud Damage / ATB Battery | |||||
| Weapon | Armor | ||||
|---|---|---|---|---|---|
| Igneous Saber | Cetran Bracer | ||||
| Accessory | Summon Materia | ||||
| Supernatural Wristguards | Bahamut Arisen | ||||
| Weapon Materia | Armor Materia | ||||
| Weapon Skills | |||||
 Aerith Aerith Main Spellcaster / Support | |||||
| Weapon | Armor | ||||
|---|---|---|---|---|---|
| Plumose Rod | Cetran Armlet | ||||
| Accessory | Summon Materia | ||||
| Circlet | Phoenix | ||||
| Weapon Materia | Armor Materia | ||||
| Weapon Skills | |||||
 Tifa Tifa Damage / Secondary Spellcaster | |||||
| Weapon | Armor | ||||
|---|---|---|---|---|---|
| Kaiser Knuckles | Varvados Bracelet | ||||
| Accessory | Summon Materia | ||||
| Space Ranger Medal of Honor | Odin | ||||
| Weapon Materia | Armor Materia | ||||
| Weapon Skills | |||||
Open with Focused Thrust and Arcane Ward
Take advantage of your First Strike Materia on Cloud and Aerith by opening the fight with an Arcane Ward cast on Aerith and a Focused Thrust cast on Elena. This immediately pressures Elena, allowing you to build up her stagger, while also readying Aerith's best Ward.
The goal of this fight is to build enough ATB on Aerith to allow her to double-cast Aeroga when the Turks use their Synergy Ability in the middle of the boss fight. If done right, you should have 2-ATB charges on Aerith once Elena gets staggered for the first time.
Spam Focused Thrust on Elena to Pressure Her
Once you have Elena pressured, continue using Cloud's Punisher Mode to build up ATB. As soon as you get a charge, spam Focused Thrust to build up Elena's stagger. After 2-3 casts, she should get Staggered.
Dodge Rude's Triple Shockwave After First Pressuring Elena
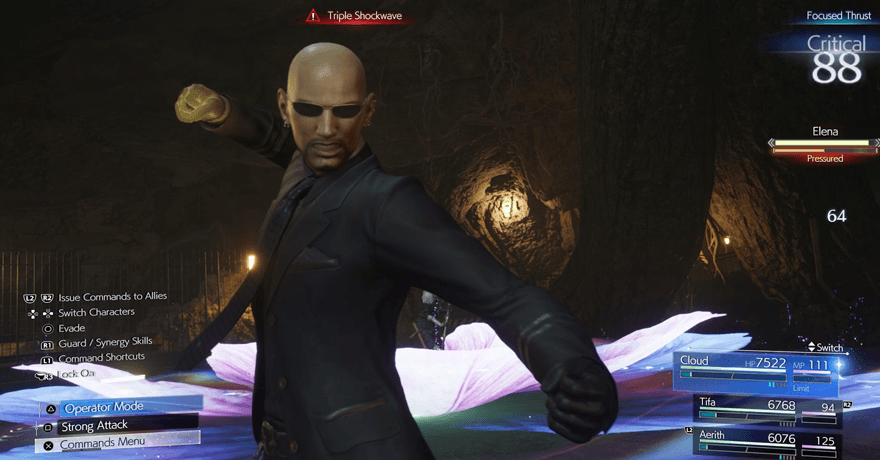
After you first Pressure Elena, Rude will start casting a powerful, triple-homing attack called Triple Shockwave. Once he casts it, stop hitting Elena and focus on dodging since it deals a large amount of damage on hit.
Build ATB on Aerith to Prepare for Aeroga
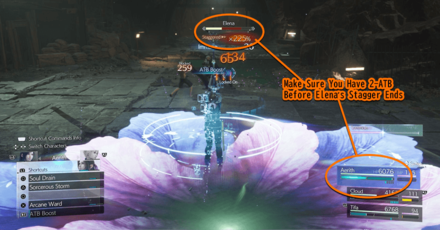
When Elena gets Staggered for the first time, make sure to spam ATB commands on Cloud, mixing it up between Braver, Triple Slash, and Disorder (for quick animations). The variety of moves is to ensure you proc ATB Assist as well as the Skill Master Materia.
If done correctly, Aerith should get enough ATB to push her near 2-ATB once Elena's Stagger ends. If you're finding yourself short of 2, simply use Aerith's equipped ATB Boost Materia. Hold L1 before pressing R1 to get one whole bar of your ATB filled instantly.
Cast Aeroga on Rude While He is in Atlas Stance
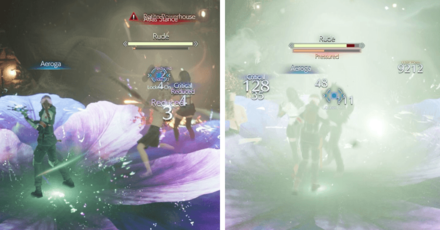
Once Elena's Staggered state ends (provided you did enough damage), a short cutscene will play. When it ends she and Rude will start casting their Synergy Ability. Rude will go into Atlas Stance while Elena casts Petite Powerhouse.
When this happens, immediately switch to Aerith and cast Ward Shift (Triangle) to teleport to the Arcane Ward you cast earlier. Using 2-ATB, cast Aeroga on Rude. On hit, he will be Pressured, stopping the Synergy Ability. The second Aeroga should push both Turks into Pressured states.
Spam ATB Commands and Aeroga to Finish the Fight
With both Turks Pressured, unload ATB Commands with Cloud and Aeroga with Aerith to push them into a Staggered state. Since both Turks will be in close proximity after you interrupt their Synergy Ability, it will be easy to put them down at the same time.
Note: You can allow the AI to control Tifa since her Auto-Unique Ability and Auto-Weapon Ability Materia should be more than enough to get her to spam commands throughout the entire fight.
Rude and Elena Rewards and Details
Rude Rewards
| Rude Rewards | |||||||||||
|---|---|---|---|---|---|---|---|---|---|---|---|
| Easy/Normal | Hard Mode | ||||||||||
|
・560 EXP ・50 Party EXP ・10 AP ・1400 Gil |
・5200 EXP ・30 AP ・6500 Gil ・Telluric Scriptures Vol. VIII・Fortunes Untold Vol. XV |
||||||||||
| Items Dropped | Rare Items Dropped | ||||||||||
| ・Mega-Potion |
None
|
||||||||||
| Stealable Items | Morphable Items | ||||||||||
| ・Mega-Potion |
None
|
||||||||||
Basic Information and Details
| Rude | |
|---|---|
 |
|
| Location | Chapter Unlocked |
| Mythril Mines | Chapter 3 |
| Species | Movement |
| Human | Grounded |
| Details | |
|
An operative with the Turks unit of Shinra's General Affairs Division. He prefers to use his bare fists and physical prowess to subdue his enemies. With his partner Reno out of commission, he has instead teamed up with new recruit Elena on his current business. Hitting him with multiple powerful offensive abilities while his guard is up will pressure him. Interrupting his synergy strikes will also pressure him. |
|
Elena Rewards
| Elena Rewards | |||||||||||
|---|---|---|---|---|---|---|---|---|---|---|---|
| Easy/Normal | Hard Mode | ||||||||||
|
・700 EXP ・50 Party EXP ・10 AP ・700 Gil |
・6500 EXP ・30 AP ・3250 Gil |
||||||||||
| Items Dropped | Rare Items Dropped | ||||||||||
|
None
|
None
|
||||||||||
| Stealable Items | Morphable Items | ||||||||||
|
None
|
None
|
||||||||||
Basic Information and Details
| Elena | |
|---|---|
 |
|
| Location | Chapter Unlocked |
| Mythril Mines | Chapter 3 |
| Species | Movement |
| Human | Grounded |
| Details | |
|
A new operative with the Turks unit of Shinra's General Affairs Division. After distinguishing herself in the military academy, she was brought into the fold as the unit's newest member. What she lacks in practical experience, she makes up for with enthusiasm. Hitting her with powerful offensive abilities will pressure her. Interrupting her synergy strikes will also pressure her. |
|
FF7 Rebirth Related Guides

Boss Fight Guide and List of All Bosses
Story Bosses
| All Major Story Bosses | |
|---|---|
| Chapter 1 | Materia Guardian |
| Chapter 2 | Midgardsormr |
| Chapter 3 |
Rude and Elena Mythril Golem |
| Chapter 4 |
Terror of the Deep Roche |
| Chapter 5 | Jenova Emergent |
| Chapter 6 | Grasptropod |
| Chapter 7 |
Custom Valkyrie Gigatrice |
| Chapter 8 |
Dyne Anuran Suppressor |
| Chapter 9 |
Specimen H1024 Crimson Mare Mk. II |
| Chapter 10 | Gi Nattak |
| Chapter 11 |
Diabolic Variant Yin and Yang Forgotten Specimen Galian Beast Roche |
| Chapter 12 |
Abzu Rude and Elena Rufus |
| Chapter 13 |
Red Dragon Ironclad Reno and Rude Tseng and Elena Moss-Grown Adamantoise Demon Gate |
| Chapter 14 |
Jenova Lifeclinger Sephiroth Reborn |
Optional Bosses
| Grasslands | |
|---|---|
| Summon | Titan |
| Classified Intel | Quetzalcoatl |
| Side Quests |
White Terror |
| Junon | |
| Summon | Phoenix |
| Classified Intel | Mindflayer |
| Side Quests |
White Mousse Hell Rider II Sandstorm Drake |
| Corel | |
| Summon | Alexander |
| Classified Intel | Tonberry King |
| Side Quests |
Dark Claw Joker |
| Minigame | Test 0 |
| Gongaga | |
| Summon | Kujata |
| Classified Intel | Great Malboro |
| Side Quests |
Levridon Mastodon Gorgon Mane Gigantoad |
| Cosmo Canyon | |
| Summon | Bahamut Arisen |
| Classified Intel | Jabberwock |
| Side Quests | Irasceros Gigaworm |
| Nibel | |
| Summon | Odin |
| Classified Intel | King Zu |
| Side Quests |
Queen Bee Dranabarga |
| Meridian Ocean | |
| Gilgamesh's Island |
Gilgamesh Titan and Bahamut Arisen Phoenix and Kujata Alexander and Odin |
| Pirate King's Treasure |
Ogre Raider Brineborn Demon Hueyacoatl Sea Dragon |
Comment
Author
Rude and Elena (Chapter 3) Hard Mode Guide
Rankings
- We could not find the message board you were looking for.
Gaming News
Popular Games

Genshin Impact Walkthrough & Guides Wiki

Honkai: Star Rail Walkthrough & Guides Wiki

Arknights: Endfield Walkthrough & Guides Wiki

Umamusume: Pretty Derby Walkthrough & Guides Wiki

Wuthering Waves Walkthrough & Guides Wiki

Pokemon TCG Pocket (PTCGP) Strategies & Guides Wiki

Abyss Walkthrough & Guides Wiki

Zenless Zone Zero Walkthrough & Guides Wiki

Digimon Story: Time Stranger Walkthrough & Guides Wiki

Clair Obscur: Expedition 33 Walkthrough & Guides Wiki
Recommended Games

Fire Emblem Heroes (FEH) Walkthrough & Guides Wiki

Pokemon Brilliant Diamond and Shining Pearl (BDSP) Walkthrough & Guides Wiki

Diablo 4: Vessel of Hatred Walkthrough & Guides Wiki

Super Smash Bros. Ultimate Walkthrough & Guides Wiki

Yu-Gi-Oh! Master Duel Walkthrough & Guides Wiki

Elden Ring Shadow of the Erdtree Walkthrough & Guides Wiki

Monster Hunter World Walkthrough & Guides Wiki

The Legend of Zelda: Tears of the Kingdom Walkthrough & Guides Wiki

Persona 3 Reload Walkthrough & Guides Wiki

Cyberpunk 2077: Ultimate Edition Walkthrough & Guides Wiki
All rights reserved
© SQUARE ENIX CO., LTD. All Rights Reserved.
CHARACTER DESIGN: TETSUYA NOMURA/ROBERTO FERRARI
LOGO ILLUSTRATION: © 1997 YOSHITAKA AMANO
The copyrights of videos of games used in our content and other intellectual property rights belong to the provider of the game.
The contents we provide on this site were created personally by members of the Game8 editorial department.
We refuse the right to reuse or repost content taken without our permission such as data or images to other sites.


![Animal Crossing: New Horizons Review [Switch 2] | Needlessly Crossing Over to a New Generation](https://img.game8.co/4391759/47d0408b0b8a892e453a0b90f54beb8a.png/show)


