Crimson Mare Mk. II Hard Mode Guide

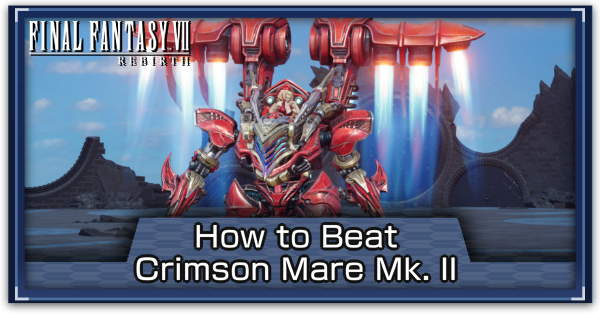
Crimson Mare Mk. II is a boss in Chapter 9: The Planet Stirs of Final Fantasy 7 Rebirth (FF7 Rebirth). Learn how to beat Crimson Mare Mk. II on Hard Mode and normal difficulties, its weaknesses and resistances, and a list of its moves and attack patterns in this guide!
List of Contents
Crimson Mare Mk. II Weaknesses and Stats
Stats
 |
|||
| Easy | Normal | Hard | |
|---|---|---|---|
| HP | ? | 50768 | ? |
Weakness and Resistances
| Weaknesses | Lesser Resistances | Greater Resistances |
|---|---|---|
| - | ||
| Absorbed Elements | Immunities | |
| - | ||
Changes When Staggered
| Weakness / Effective | Resistance |
|---|---|
| - | - |
Crimson Mare Mk. II doesn't have any changes to its weakness or resistance when staggered.
How to Pressure Crimson Mare Mk. II
How to Pressure
|
|
The only way to apply pressure on Crimson Mare Mk. II is to destroy its arms and hit Scarlet after she's exposed. However, its arms have a lot of HP, and it might take some time before you can take them out.
How to Pressure and Stagger Enemies
Crimson Mare Mk. II Best Party and Builds
| This section is for players who are playing on Easy and Normal difficulties. To check out the best builds and tips for Hard Mode, jump to our Hard Mode Guide section, below! |
Fixed Party Setup
| Recommended Party Setup | |
|---|---|
 Tifa Tifa
|
【Punisher】 ・Focus on attacking the boss if pressured or staggered. |
 Yuffie Yuffie
|
【Ranged Attacker / Healer】 ・Deal ranged damage against this flying boss ・Has the ability to infuse Lightning to its ranged attacks ・Can charge ATB quickly, allowing her to provide healing to allies if needed |
 Aerith Aerith
|
【Spellcaster / Healer】 ・Cast powerful Lightning spells to damage the boss ・Use Limit Break or Healing Spells to heal all allies |
Play Between Tifa or Yuffie Only
Tifa and Yuffie should be able to hold their ground against Crimson Mare Mk. II because of their speed, so it is best to play between them. Only include Aerith if both Tifa and Yuffie are in critical health, as Aerith is slow and might not survive one or two hits if the aggro is on her.
Crimson Mare Mk. II Best Materia to Use
Recommended Materia
| Materia | Effect |
|---|---|
|
|
・Ability to cast Lightning spell, which is the only weakness of Crimson Mare Mk. II.
・Can be equipped to all characters. |
|
|
・Can help inflict Lightning damage once summoned. |
|
|
・Heal a single ally in battle.
・Can be equipped to all characters |
|
|
・Heal all allies in battle.
・Best equipped on Yuffie |
|
|
・Increase the HP of a character.
・Can be equipped to all characters. |
|
|
・Gain ATB when blocking attacks.
・Can be equipped to all characters. |
|
|
・Improves the functionality of blocking.
・Works better together with Steadfast Block Materia. ・Can be equipped to all characters. |
|
|
・Heals a small amount of HP and cures poison. ・Best equipped on Yuffie and Tifa. |
How to Beat Crimson Mare Mk. II
| Crimson Mare Mk. II Boss Fight Tips |
|---|
|
|
Use Lightning to Deal More Damage
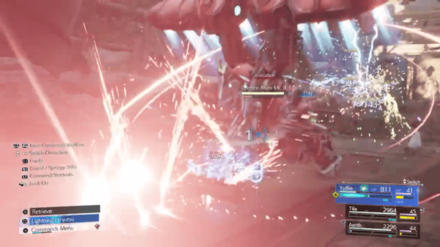
Crimson Mare Mk. II is weak against Lightning, meaning it will receive more damage when hit by Lightning spells or abilities, like Yuffie's Lightning Ninjutsu. You can place Aerith's Arcane Ward before using Lightning Spells to double the damage.
You can also equip the Ramuh Materia to summon Ramuh and inflict consistent Lightning damage after staggering the boss for the first time.
Equip Materia that can Help Blocking Attacks
You can equip Precision Defense Focus Materia to help you block attacks. Additionally, you can pair it up with Steadfast Block Materia to gain small ATB chargers when blocking!
You should be able to get them in any Vending Machine at this point in the story!
Guard Against X-ecution Attack

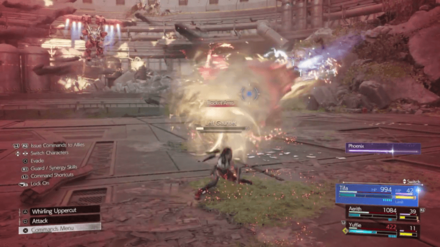
X-ecution is a quick, cross-slashing move of Crimson Mare Mk. II during the first phase. Once you see the prompt, quickly put your guard up to defend against it. You can try to perfect block that attack once you get the timing!
Destroy Both Arms to Expose Scarlet

Destroying both weapon arms will expose Scarlet, giving you a chance to knock her out and pressure Crimson Mare Mk. II. Aside from pressuring Crimson Mare Mk. II, it will also weaken and reduce its number of moves in battle. Note that it will get a new pair of arms at the start of second phase and last phase.
You can use Limit Break like Tifa's Somersault or Yuffie's Bloodbath to destroy them quickly since each arm is tough and won't easily go down. You can also use Synergy Abilities like Tifa and Yuffie's Cyclonic Kick or Aerith and Tifa's Divine Punishment.
Focus on Crimson Mare Mk. II in the Last Phase
You will most likely defeat Crimson Mare Mk. II before you can destroy the arms in the last phase. It's better to funnel your attacks directly on it to defeat it faster!
Uses Different Arms in Each Phase
| Phase / Weapon | Effect |
|---|---|
| 1st Phase: Saber Hands |
Can perform variety of quick and deadly sword attacks. |
| 2nd Phase: Mako Cannons |
Can unleash wide and long-range laser beam attacks. |
| 3rd Phase: Gauntlets |
Can do various melee combos and ranged attacks. |
Crimson Mare Mk. II has three sets of arms it will use during the boss fight, with each one having different attack sets.
First Phase: Saber Hands
The first and default one is the Saber Hands, which allows it to perform a variety of melee attacks. Although limited to melee attacks, it is swift and can hit you easily if you're not paying enough attention!
Second Phase: Mako Cannons
The second set of arms is the Mako Cannons, which only use ranged attacks to hit your party. Crimson Mare Mk. II will use these arms at the start of its second phase after losing around 30% HP.
Third Phase: Gauntlets
The last arms it will use are the Gauntlets, which allow it to switch between melee and ranged attacks. These arms will replace the Mako Cannons at the start of the last phase after losing around 60% HP.
Avoid its Rotating Rail Laser and Impact Eruption

Rotating Rail Laser and Impact Eruption are Crimson Mare Mk. II's AoE moves during the second phase and last phase, respectively. They cover a lot of ground and inflict almost the same damage as X-ecution.
Move away quickly once you see the attack prompt to avoid getting hit. If you think you can't make it in time, you can still block it to reduce the damage!
Guard Against its Rocket Arms

Crimson Mare Mk. II will release both its arms and make them into Rocket Arms in the last phase. The arms move fast, making it hard to attack and dodge them. Focus on blocking them instead of attacking and dodging until they return to the main body.
Crimson Mare Mk. II Hard Mode Guide
| Crimson Mare Mk. II Hard Mode Tips |
|---|
| ★ Best Hard Mode Builds for Crimson Mare Mk. II ★ |
|
|
Crimson Mare Mk. II Hard Mode Builds
| The builds featured in this Hard Mode section are at Weapon Levels 7~8. If you find that you don't have enough Materia slots to complete the setup, consider getting all the possible Manuscripts on Normal, first. |
 Tifa Tifa Physical DPS | |||||
| Weapon | Armor | ||||
|---|---|---|---|---|---|
| Járngreipr | Valkyrian Bangle | ||||
| Accessory | Summon Materia | ||||
| Enhanced Karmic Cowl | Ramuh | ||||
| Weapon Materia | Armor Materia | ||||
| Weapon Skills | |||||
 Yuffie Yuffie Main Lightning Caster / Support | |||||
| Weapon | Armor | ||||
|---|---|---|---|---|---|
| Fuma Shuriken | Cetran Bracer | ||||
| Accessory | Summon Materia | ||||
| Hermes Shoes | Odin | ||||
| Weapon Materia | Armor Materia | ||||
| Weapon Skills | |||||
 Aerith Aerith Secondary Spellcaster / Healer | |||||
| Weapon | Armor | ||||
|---|---|---|---|---|---|
| Gambanteinn | Cetran Armlet | ||||
| Accessory | Summon Materia | ||||
| Healing Carcanet | Phoenix | ||||
| Weapon Materia | Armor Materia | ||||
| Weapon Skills | |||||
Combine Arcane Ward and Doppelganger
With Aerith, you can cast Arcane Ward on the ground and have Yuffie stand on the flower. Then, you can use Yuffie and her Doppelganger to cast Thundaga using 3★ Lightning Materia to instantly burst down any part of the Crimson Mare Mk. II. This combo will allow Yuffie to perform four Thundaga spells consecutively, dealing massive damage to the boss.
Destroying Both Arms Applies Pressure
If you manage to destroy both arms of the Crimson Mare Mk. II, it will automatically become pressured, allowing you to stagger the boss and unleash all of your powerful abilities to deal a huge chunk of damage to its health.
Keep Your Distance With Ninjutsu
While playing as Yuffie, you can attack the Crimson Mare Mk. II from a distance with your Ninjutsu attacks infused with Lightning. This tactic keeps you out of range of the Crimson Mare Mk. II's melee attacks and gives you more time to react and dodge its Spinning Thrust.
Change Affinity Using Lightning Ninjutsu
You can use Yuffie and switch your affinity to Lightning using the Elemental Ninjutsu to consistently deal Lightning damage, which allows you to exploit the boss's weakness and quickly build up the stagger meter.
Crimson Mare Mk. II Rewards and Details
Rewards
| Crimson Mare Mk. II Rewards | |||||||||||
|---|---|---|---|---|---|---|---|---|---|---|---|
| Easy/Normal | Hard Mode | ||||||||||
|
・2250 EXP ・50 Party EXP ・10 AP ・1500 Gil |
・6500 EXP ・30 AP ・3250 Gil ・Secrets of the Ninja Vol. X |
||||||||||
| Items Dropped | Rare Items Dropped | ||||||||||
|
None
|
None
|
||||||||||
| Stealable Items | Morphable Items | ||||||||||
|
None
|
None
|
||||||||||
Drops Secrets of the Ninja Vol. X on Hard Mode
You can obtain the Secrets of the Ninja Vol. X Manuscript for Yuffie by defeating the Crimson Mare Mk. II on Hard Mode.
Basic Information and Details
| Crimson Mare Mk. II | |
|---|---|
 |
|
| Location | Chapter Unlocked |
| Gongaga Reactor | Chapter 9 |
| Species | Movement |
| Mechanical | Flying |
| Details | |
|
A modified version of the blooded battle armor designed for Scarlet's personal use. It is equipped with state-of-the-art weaponry, allowing for even more savagery without sacrificing style. Destroying the weapons on both of its arms will allow you to target Scarlet. Knocking her out will pressure the battle armor. |
|
FF7 Rebirth Related Guides

Boss Fight Guide and List of All Bosses
Story Bosses
| All Major Story Bosses | |
|---|---|
| Chapter 1 | Materia Guardian |
| Chapter 2 | Midgardsormr |
| Chapter 3 |
Rude and Elena Mythril Golem |
| Chapter 4 |
Terror of the Deep Roche |
| Chapter 5 | Jenova Emergent |
| Chapter 6 | Grasptropod |
| Chapter 7 |
Custom Valkyrie Gigatrice |
| Chapter 8 |
Dyne Anuran Suppressor |
| Chapter 9 |
Specimen H1024 Crimson Mare Mk. II |
| Chapter 10 | Gi Nattak |
| Chapter 11 |
Diabolic Variant Yin and Yang Forgotten Specimen Galian Beast Roche |
| Chapter 12 |
Abzu Rude and Elena Rufus |
| Chapter 13 |
Red Dragon Ironclad Reno and Rude Tseng and Elena Moss-Grown Adamantoise Demon Gate |
| Chapter 14 |
Jenova Lifeclinger Sephiroth Reborn |
Optional Bosses
| Grasslands | |
|---|---|
| Summon | Titan |
| Classified Intel | Quetzalcoatl |
| Side Quests |
White Terror |
| Junon | |
| Summon | Phoenix |
| Classified Intel | Mindflayer |
| Side Quests |
White Mousse Hell Rider II Sandstorm Drake |
| Corel | |
| Summon | Alexander |
| Classified Intel | Tonberry King |
| Side Quests |
Dark Claw Joker |
| Minigame | Test 0 |
| Gongaga | |
| Summon | Kujata |
| Classified Intel | Great Malboro |
| Side Quests |
Levridon Mastodon Gorgon Mane Gigantoad |
| Cosmo Canyon | |
| Summon | Bahamut Arisen |
| Classified Intel | Jabberwock |
| Side Quests | Irasceros Gigaworm |
| Nibel | |
| Summon | Odin |
| Classified Intel | King Zu |
| Side Quests |
Queen Bee Dranabarga |
| Meridian Ocean | |
| Gilgamesh's Island |
Gilgamesh Titan and Bahamut Arisen Phoenix and Kujata Alexander and Odin |
| Pirate King's Treasure |
Ogre Raider Brineborn Demon Hueyacoatl Sea Dragon |
Comment
You can't summon Odin for this fight, the game won't let you.
Author
Crimson Mare Mk. II Hard Mode Guide
Rankings
- We could not find the message board you were looking for.
Gaming News
Popular Games

Genshin Impact Walkthrough & Guides Wiki

Umamusume: Pretty Derby Walkthrough & Guides Wiki

Crimson Desert Walkthrough & Guides Wiki

Monster Hunter Stories 3: Twisted Reflection Walkthrough & Guides Wiki

Honkai: Star Rail Walkthrough & Guides Wiki

Pokemon Pokopia Walkthrough & Guides Wiki

The Seven Deadly Sins: Origin Walkthrough & Guides Wiki

Wuthering Waves Walkthrough & Guides Wiki

Zenless Zone Zero Walkthrough & Guides Wiki

Arknights: Endfield Walkthrough & Guides Wiki
Recommended Games

Fire Emblem Heroes (FEH) Walkthrough & Guides Wiki

Diablo 4: Vessel of Hatred Walkthrough & Guides Wiki

Cyberpunk 2077: Ultimate Edition Walkthrough & Guides Wiki

Yu-Gi-Oh! Master Duel Walkthrough & Guides Wiki

Super Smash Bros. Ultimate Walkthrough & Guides Wiki

Pokemon Brilliant Diamond and Shining Pearl (BDSP) Walkthrough & Guides Wiki

Elden Ring Shadow of the Erdtree Walkthrough & Guides Wiki

Monster Hunter World Walkthrough & Guides Wiki

The Legend of Zelda: Tears of the Kingdom Walkthrough & Guides Wiki

Persona 3 Reload Walkthrough & Guides Wiki
All rights reserved
© SQUARE ENIX CO., LTD. All Rights Reserved.
CHARACTER DESIGN: TETSUYA NOMURA/ROBERTO FERRARI
LOGO ILLUSTRATION: © 1997 YOSHITAKA AMANO
The copyrights of videos of games used in our content and other intellectual property rights belong to the provider of the game.
The contents we provide on this site were created personally by members of the Game8 editorial department.
We refuse the right to reuse or repost content taken without our permission such as data or images to other sites.


Your hard mode builds make no sense. Why would you put ice on Aerith when the boss is weak to thunder? Why put assess on anyone?