Sephiroth Reborn Hard Mode Guide
Sephiroth Reborn is a boss in Chapter 14: End of the World of Final Fantasy 7 Rebirth (FF7 Rebirth). Learn how to beat Sephiroth Reborn on Hard Mode and normal difficulties, his weaknesses and resistances, and a list of his moves and attack patterns in this guide!
List of Contents
Sephiroth Reborn Weaknesses and Stats
Stats
 |
|||
| Easy HP | Normal HP | Hard HP | |
|---|---|---|---|
| 1st Form | 19143 | 27348 | 40973 |
| 2nd Form | 54240 | 77486 | 116091 |
| 3rd Form | 55835 | 79765 | 119506 |
Weakness and Resistances
| Weaknesses | Lesser Resistances | Greater Resistances |
|---|---|---|
| None | None | None |
| Absorbed Elements | Immunities | |
| None |
|
|
Changes When Staggered
| Weakness / Effective | Resistance |
|---|---|
| None | None |
How to Pressure Sephiroth Reborn
|
|
Destroy the Face During Phase 4
During Phase 4, when your only party member is Zack, destroying Sephiroth Rebron's Face will cause him to get pressured. Look to destroy the face manually with attacks or instantly break it by destroying the White Orb in the center of the field to pressure Sephiroth Reborn.
Destroy Masamune or the Wing During the Final Phase
When Sephiroth uses Whisper Cannon and Whisper Whirlwind, he will leave his Wing and Masamune exposed to getting destroyed. Use Firework Blade or switch to Aerith to destroy them with Magic-based attacks since they are immune to physical damage.
How to Pressure and Stagger Enemies
Sephiroth Reborn Best Builds
Change Builds Between Bosses
Do note that you can change builds during the cutscene between the Jenova and Sephiroth fights by holding the square button.
If ever you miss the opportunity to change your loadout, you can go to the menu and select Retry from This Battle so that you can go back to the cutscene and change your build.
Sephiroth Reborn Normal Mode Builds
| Builds by Difficulty | |
|---|---|
| Normal Mode | Hard Mode |
Party Setup and Strategy for Each Phase
| First Phase Members and Strategy |
|---|
Party Members:
・ Avoid Attacks and Go for a Counterattack ・Leave the Recovery to Zack ▶︎ How to Beat 1st Phase |
| Second Phase Members and Strategy |
Party Members:
・Attack the Body (Weak Spot) ・Get Close after Errant Whisper ・Use Ranged Attack after Destroying the Body ・Use Limit Break and Abilities Once Staggered ▶︎ How to Beat 2nd Phase |
| Third Phase Members and Strategy |
Party Members (Only 3):
・Defeat Bahamut Arisen Whisper First ・Aim for Sephiroth's Wings ▶︎ How to Beat 3rd Phase |
| Fourth Phase Members and Strategy |
Party Members:
・Charge Inside the barrier ・Meteor Shots to Stagger and Chain Slash for Damage ・Destroy the Chest First ▶︎ How to Beat 4th Phase |
| Fifth Phase Members and Strategy |
Party Members (Only 3):
・Use Magic According to the Element of the Wings ・Save ATB to Heal After Heartless Angel ▶︎ How to Beat 5th Phase |
| Final Phase Members and Strategy |
Party Members:
・Destroy the Wing or Masamune ・Save ATB to Heal After Heartless Angel ・Stop The End is Nigh Move by Staggering ▶︎ How to Beat Final Phase |
Best Materia to Use
| Materia | How to Use |
|---|---|
|
|
・Gives the ability to cast Fire and Ice spells
・Can save an extra slot for stat-increasing Materia |
|
|
・Gives the ability to cast Lightning and Wind spells
・Can save an extra slot for stat-increasing Materia |
|
|
・Gives the ability to cast healing spells to heal your party |
|
|
・Equip to increase HP |
|
|
・Apply Haste on your party to increase their overall speed |
|
|
・Increase the effect of items like Potions |
|
|
・Automatically use items without consuming ATB during battle |
Sephiroth Reborn Hard Mode Builds
| Builds by Difficulty | |
|---|---|
| Normal Mode | Hard Mode |
| These Hard Mode builds use equipment at Weapon Level 9, except for Cloud. If you don't have enough Materia slots or the right Weapon Skills to complete a setup, consider using a different weapon or collect all of the character's Manuscripts first. |
Best Build for Cloud
| Jump to Build | |||||||||||
|---|---|---|---|---|---|---|---|---|---|---|---|
| Cloud | Barret | Tifa | Aerith | ||||||||
| Red XIII | Yuffie | Cait Sith | |||||||||
 Cloud Cloud
Physical DPS |
|||||
| Weapon | Armor | ||||
|---|---|---|---|---|---|
| Sleek Saber | Cetran Bracer | ||||
| Accessory | Summon Materia | ||||
| Enhanced Expeditionary Medal | Gilgamesh | ||||
| Weapon Materia | Armor Materia | ||||
| Weapon Skills | |||||
|
|
|
||||
|
|
|
||||
Since Cloud will be the most important character for this boss, he will have Skill Master, First Strike, and ATB Assist equipped to help him spam abilities and generate ATB Charges for himself and his ally depending on the Boss Phase.
Besides that, he has generic stat boosting, blocking, and supportive Materia equipped to maximize his damage output while also keeping himself and the party alive and healthy.
If you've beaten the Brutal Challenge: Rulers of the Outer Worlds, you can replace Reraise with Limit Siphon and equip Aerith with the Gotterdammerung so that you can spam Limit Breaks during the Final Phase.
Best Build for Barret
| Jump to Build | |||||||||||
|---|---|---|---|---|---|---|---|---|---|---|---|
| Cloud | Barret | Tifa | Aerith | ||||||||
| Red XIII | Yuffie | Cait Sith | |||||||||
 Barret Barret
Tank |
|||||
| Weapon | Armor | ||||
|---|---|---|---|---|---|
| Barrage Blaster | Hades Armlet | ||||
| Accessory | Summon Materia | ||||
| Enhanced Karmic Cowl | Kujata | ||||
| Weapon Materia | Armor Materia | ||||
| Weapon Skills | |||||
|
|
|
||||
|
|
|
||||
Barret's primary role in this fight is to tank hits for his allies. In between Steelskin, Lifesaver, his Defensive Materia, and his Weapon Skills, Barret can easily stay alive so that he can heal or revive any party member that goes down.
Also, like every other party member besides Cloud and Aerith, he has all four elemental Materia equipped since the party members selected for the 5th Phase are random. As a precaution, all 5 characters are equipped with the elemental Materias so that they can destroy Sephiroth's Wings with their elemental weakness.
Best Build for Tifa
| Jump to Build | |||||||||||
|---|---|---|---|---|---|---|---|---|---|---|---|
| Cloud | Barret | Tifa | Aerith | ||||||||
| Red XIII | Yuffie | Cait Sith | |||||||||
 Tifa Tifa
Physical DPS |
|||||
| Weapon | Armor | ||||
|---|---|---|---|---|---|
| Dragon Claws | Valkyrian Bangle | ||||
| Accessory | Summon Materia | ||||
| Hermes Shoes | Odin | ||||
| Weapon Materia | Armor Materia | ||||
| Weapon Skills | |||||
|
|
|
||||
|
|
|
||||
Tifa will be your primary physical damage dealer during Phase 3 and/or Phase 5 of the boss fight. While her equipped Materia doesn't increase her Attack, her equipment and Weapon Skills increase the damage of her unique ability into True Strike staggered combo.
For her equipped Materia, she has the generic stat boosting, blocking, and supportive Materia as generally useful boosts and spells to have. She also has Jump so that she can dodge Sephiroth's attacks, including moves like Heartless Angel and Octoslash which normally are guaranteed to hit.
Also, like every other party member besides Cloud and Aerith, she has all four elemental Materia equipped since the party members selected for the 5th Phase are random. As a precaution, all 5 characters are equipped with the elemental Materias so that they can destroy Sephiroth's Wings with their elemental weakness.
Best Build for Aerith
| Jump to Build | |||||||||||
|---|---|---|---|---|---|---|---|---|---|---|---|
| Cloud | Barret | Tifa | Aerith | ||||||||
| Red XIII | Yuffie | Cait Sith | |||||||||
 Aerith Aerith
Support |
|||||
| Weapon | Armor | ||||
|---|---|---|---|---|---|
| Ceremonial Staff | Cetran Armlet | ||||
| Accessory | Summon Materia | ||||
| Genji Earrings | Phoenix | ||||
| Weapon Materia | Armor Materia | ||||
| Weapon Skills | |||||
|
|
|
||||
|
|
|
||||
Aerith only shows up in the Final Phase of the fight, and since this is the most important part of the battle, her build is tailored to supporting Cloud with healing and buffing spells.
Aside from the usual blocking and supportive Materia, she has Vitality and Spirit Up as well as Magnify-Barrier so that she can better tank hits and stay alive longer without relying on Radiant Ward. She also has Genji Earrings equipped to further reduce damage taken, but you can replace this with an Enhanced Psychic's Charm instead.
Alternatively, you could replace Vitality Up, Spirit Up, or Time with any elemental spell, like a Lightning Materia, so that Aerith has an offensive spell that she can cast. Also, if you've beaten the Brutal Challenge: Rulers of the Outer Worlds, you can equip Aerith with the Gotterdammerung, so that Cloud can spam Limit Breaks by using Limit Siphon on Aerith.
Best Build for Red XIII
| Jump to Build | |||||||||||
|---|---|---|---|---|---|---|---|---|---|---|---|
| Cloud | Barret | Tifa | Aerith | ||||||||
| Red XIII | Yuffie | Cait Sith | |||||||||
 Red XIII Red XIII
Support |
|||||
| Weapon | Armor | ||||
|---|---|---|---|---|---|
| Brisingamen | Enhanced Garm Bangle | ||||
| Accessory | Summon Materia | ||||
| Enhanced Draconic Ring | Alexander | ||||
| Weapon Materia | Armor Materia | ||||
| Weapon Skills | |||||
|
|
|
||||
|
|
|
||||
Red XIII will primarily be a support thanks to him being able to heal and buff the party with Watcher's Respite and Supernal Fervor respectively. This means that he can save his MP for Curagas and Arise in case of emergencies.
While Red will mostly be supporting the party, he can still do a lot of damage with moves like Reaper Touch and Retaliation if your main damage dealers aren't available or are at risk of going down.
Also, like every other party member besides Cloud and Aerith, he has all four elemental Materia equipped since the party members selected for the 5th Phase are random. As a precaution, all 5 characters are equipped with the elemental Materias so that they can destroy Sephiroth's Wings with their elemental weakness.
Best Build for Yuffie
| Jump to Build | |||||||||||
|---|---|---|---|---|---|---|---|---|---|---|---|
| Cloud | Barret | Tifa | Aerith | ||||||||
| Red XIII | Yuffie | Cait Sith | |||||||||
 Yuffie Yuffie
Magic DPS |
|||||
| Weapon | Armor | ||||
|---|---|---|---|---|---|
| Crescent Sickle | Enhanced Yggdrasill Armlet | ||||
| Accessory | Summon Materia | ||||
| Genji Gloves | Bahamut Arisen | ||||
| Weapon Materia | Armor Materia | ||||
| Weapon Skills | |||||
|
|
|
||||
|
|
|
||||
Yuffie will be your primary Magic DPS since she has Elemental Ninjutsus and Spells to quickly destroy Sephiroth's Wings during Phase 5. If ever she shows up only for Phase 3, she can still do a lot of damage by spamming spells followed by Banishment or Purification to quickly deal with Bahamut Arisen Whisper.
Alternatively, you could replace MP Absorption and the elemental Materias with the individual spell Materias, similar to the other builds, in case you wish to use the dual element Materias on someone else like Aerith for example.
Best Build for Cait Sith
| Jump to Build | |||||||||||
|---|---|---|---|---|---|---|---|---|---|---|---|
| Cloud | Barret | Tifa | Aerith | ||||||||
| Red XIII | Yuffie | Cait Sith | |||||||||
 Cait Sith Cait Sith
Magic DPS |
|||||
| Weapon | Armor | ||||
|---|---|---|---|---|---|
| Crystal Megaphone | Enhanced Varvados Bracelet | ||||
| Accessory | Summon Materia | ||||
| Limit Booster | Titan | ||||
| Weapon Materia | Armor Materia | ||||
| Weapon Skills | |||||
|
|
|
||||
|
|
|
||||
Cait Sith is your other Magic DPS if you don't get Yuffie during Phase 5. This is because he has the third-highest Magic Attack stat after Aerith and Yuffie using the recommended builds. Also, he can dismount from the Moogle to have it distract the boss, letting you safely attack and cast spells at a distance.
Another thing that Cait Sith can do is apply buffs with his Level 2 Moogle Abilities, Roll o' the Dice, and Lucky Slots abilities. The only issue is that you have to get lucky to get the ideal results, so it would be safer to just spam elemental spells instead.
How to Beat Sephiroth Reborn 1st Phase
| Jump to Boss Phase | |||||
|---|---|---|---|---|---|
| 1st | 2nd | 3rd | 4th | 5th | 6th |
| Sephiroth 1st Phase Boss Fight Tips | |||||
|
|
|||||
Focus on Blocking and Counterattacking
Let Sephiroth finish his combo before attacking him to avoid getting damaged. You will have plenty of time to land an attack after Sephiroth attacks several times.
Make sure to block his attacks when you can instead of dodging them so that you can build up ATB Charges using the Steadfast Block Matera.
Zack's Primarily Used as a Support
Since Cloud is used in two more Phases for this boss compared to Zack, who only shows up in one more Phase, it's better to save Cloud's MP and use Zack instead to heal and buff the party. Just make sure that you save enough MP in case he needs to heal himself later on.
Run Away When Sephiroth Uses Octoslash
While Sephiroth's Octoslash cannot be dodged, it's still advised to run away from Zack so that he doesn't get caught up in the attack and take any unnecessary damage. Have Cloud run as far away from him as possible and have Zack cast Barrier on him to minimize the damage he takes.
Use a Limit Break to Negate an Attack's Damage
In case you don't have ATB Charges or MP to immediately heal party members after a dangerous attack, like Heartless Angel or Octoslash, you can use a Limit Break to make a character immune to the attack's damage. Save your Limit Breaks for crucial moments to dodge an attack that could otherwise kill you.
Do note that this also applies to every Phase of this boss battle, so make sure you keep this tip in mind and save your Limit Breaks unless you can use it to force Sephiroth into his next Phase.
The Jump Ability Has a Similar Effect
By equipping the Jump Materia, you will also be able to negate an attack's damage with the Jump command. You can opt to remove it from Tifa and put it on any other character instead, like Cloud since he appears in three different Phases for this boss.
Save MP for Future Phases on Hard Mode
On your first playthrough, you'd have your MP restored before the last phase of the fight, but on Hard mode only your HP is restored. Make sure that Cloud saves his MP during the first two Phases so that he has enough MP in case he needs to cast a spell during the Final Phase.
Reduce HP to 0 to Start the 2nd Phase
You can only proceed to the next phase once you've reduced Sephiroth's HP to 0. Use high-damaging abilities like Cloud's Infinity's End once Sephiroth's staggered to end the 1st Phase quickly!
How to Beat Sephiroth Reborn 2nd Phase
| Jump to Boss Phase | |||||
|---|---|---|---|---|---|
| 1st | 2nd | 3rd | 4th | 5th | 6th |
| Sephiroth 2nd Phase Boss Fight Tips | |||||
|
|
|||||
Attack the Body (Weak Spot)
Attack the lower half of Sephiroth Reborn to hit his weak spot and progress the boss to the second part of Phase 2. The lower half doesn't have that much HP and it only takes a few Bravers from Cloud to destroy it.
Have an ATB Charge to Heal After Heartless Angel
On Hard Mode, when you destroy Sephiroth Reborn's body and move on to his upper half, he will immediately use Heartless Angel and reduce Cloud's health to 1 HP. Make sure that you have an ATB Charge before you destroy his body so that you can use Chakra and prevent Cloud from dying in one hit.
Prioritize Blocking and Dodging His Attacks
During this part of the fight, Sephiroth Reborn will send a barrage of attacks coming your way. These attacks are pretty easy to block or dodge, so make sure that you focus on evading his attacks first before going back in with a counterattack.
Use a Limit Break or Abilities Once Staggered
Use Limit Break like Cross-Slash or powerful abilities like Infinity's End once Sephiroth is staggered to maximize the damage and quickly send him into his 3rd Phase. Just make sure that a Limit Break will reduce his HP to 90%, otherwise, it's better to save it for the Final Phase or to dodge an attack.
Reduce HP to Around 80% to Start the 3rd Phase
End the second phase by reducing Sephiroth's HP to around 80%. You don't have to worry about Cloud's HP and MP since they'll be fully restored when he comes back during the Final Phase.
However, if you're playing on Hard Mode, make sure that you preserve his MP since only his HP will be restored before the Final Phase.
How to Beat Sephiroth Reborn 3rd Phase
| Jump to Boss Phase | |||||
|---|---|---|---|---|---|
| 1st | 2nd | 3rd | 4th | 5th | 6th |
| Sephiroth 3rd Phase Boss Fight Tips | |||||
|
|
|||||
Defeat Bahamut Arisen Whisper First
Sephiroth Reborn will only be targetable once his summon, Bahamut Arisen Whisper, is defeated. Focus all your power on defeating Bahamut Arisen Whisper to expose Sephiroth Reborn to attacks.
Have ATB Charges to Heal Gigaflare's Damage
Unlike the regular Bahamut Arisen boss, Bahamut Arisen Whisper will already be in Gigadrive Mode. This means that it can use Gigaflare, so make sure that you always have extra ATB Charges to immediately cast Curaga in case it uses it.
Do note that on Hard Mode, it will use it a lot earlier than normal. Be prepared since Bahamut can use it before you get any significant damage in.
Equip Barrier to Cast Manaward
Alternatively, you can remove Prayer on the Phase 3 party members and replace it with a Barrier Materia. This way you can cast Manaward on the party to reduce the damage that Gigaflare does.
Destroy Sephiroth's Wings to Start the 4th Phase
Once you reduce Bahamut Arisen Whisper to 0 HP, Sephiroth Reborn will envelop it with his wings to heal it back to full health. Destroying one of its wings will stop it from healing Bahamut and cause it to reappear at a lowered HP level while destroying both wings will push it into the next Phase.
Also, Sephiroth Reborn will occasionally use Atonement, leaving one of his wings exposed to getting destroyed. This is the only way to target and break them without reducing Bahamut Arisen Whispers HP to 0.
How to Beat Sephiroth Reborn 4th Phase
| Jump to Boss Phase | |||||
|---|---|---|---|---|---|
| 1st | 2nd | 3rd | 4th | 5th | 6th |
| Sephiroth 4th Phase Boss Fight Tips | |||||
|
|
|||||
Destroy the Chest First
Aim for the chest or the big face first to pressure Sephiroth Reborn. Use Chain Slash to quickly break his chest, or you can destroy the White Orb that appears after he uses Wail to destroy it instantly. Just make sure that the Dark Orb that spawns from Wail hits the barrier to transform it into the White Orb.
Charge Inside the Barrier
After a certain amount of time, a barrier that can block Sephiroth's ranged attacks will appear in the middle of the arena. Stand inside the barrier to safely Charge and upgrade Zack's abilities.
Meteor Shots to Stagger and Chain Slash for Damage
You should use Meteor Shots first to stagger Sephiroth followed by Chain Slash to deal tons of damage. Doing so will maximize the damage you inflict on Sephiroth and end this phase faster.
Use Your Synergy Ability
Even though your only party member for this Phase is Zack, you can still use your Synergy Ability with Cloud to deal damage and increase Zack's ATB to three bars.
Reduce HP to Around 15% to Start the 5th Phase
You can start the next phase once you've reduced Sephiroth's HP to around 15%. Since this is the last time you'll use Zack for this boss, don't be afraid to use up his MP if you need to.
How to Beat Sephiroth Reborn 5th Phase
| Jump to Boss Phase | |||||
|---|---|---|---|---|---|
| 1st | 2nd | 3rd | 4th | 5th | 6th |
| Sephiroth 5th Phase Boss Fight Tips | |||||
|
|
|||||
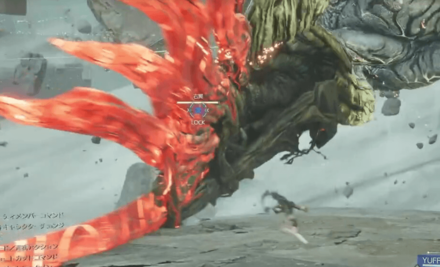
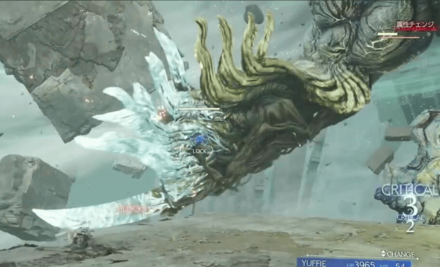
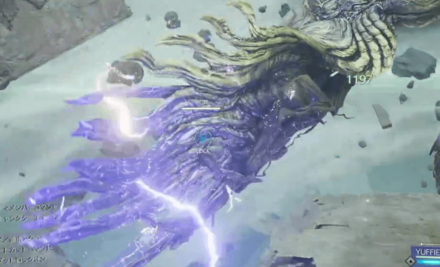
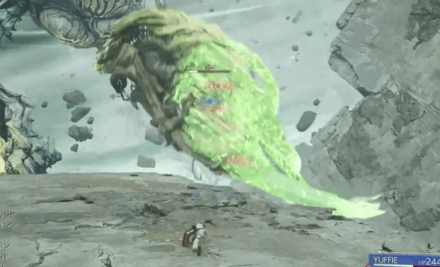
Exploit the Wing's Elemental Weakness
| Wing's Element and Weakness | |
|---|---|
 Weakness: |
 Weakness: |
 Weakness: |
 Weakness: |
Sephiroth's Core is protected by a barrier during this Phase of the fight, and the only way to expose it is by destroying his wings.
Use the element opposite of the currently infused element on the wings to quickly destroy them. For example, if the wings are infused with Fire, you can use Blizzara on it to deal more damage.
Have All Four Element Materias Equipped
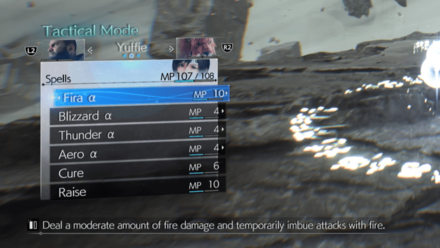
The party members selected for Phase 3 and 5 are random, so you'll want to make sure that everyone can destroy Sephiroth Reborn's Wings with the appropriate element. As a precaution, the rest of the party besides Cloud and Aerith should be able to cast Fire, Ice, Lightning, and Wind spells.
As a note, use Yuffie if you have her during Phase 5 since she's the party member with the highest Magic stat, ignoring Aerith, plus she has Elemental Ninjutsus and Banishment. If you don't have her in the party, you can use Cait Sith or Red XIII instead.
Save ATB to Heal After Heartless Angel and Octoslash
All of your characters' health will be reduced to 1 HP once Sephiroth uses Heartless Angel. Also, unlike Sephiroth's human form, Sephiroth Reborn's Octoslash will hit the entire party and deal massive damage to everyone. Save at least 1 ATB Charge on each character so they can heal themselves with Curaga when he uses these moves.
Reduce HP to 0 to Start the Final Phase
Beat Sephiroth and reduce his HP to 0 to enter the final phase. This is also the last time you'll use these party members so don't be afraid to use up their MP.
How to Beat Sephiroth Reborn Final Phase
| Jump to Boss Phase | |||||
|---|---|---|---|---|---|
| 1st | 2nd | 3rd | 4th | 5th | 6th |
| Sephiroth Final Phase Boss Fight Tips | |||||
|
|
|||||
Destroy his Wing and Masamune
Once Sephiroth attacks with Whisper Whirlwind or Whisper Cannon, his wing and Masamune will become exposed, respectively. Target and destroy them to reduce Sephiroth's power and put him under pressure.
Note that the wing and Masamune are immune to physical damage, so use Magic attacks or use the Firework Blade synergy ability to destroy them.
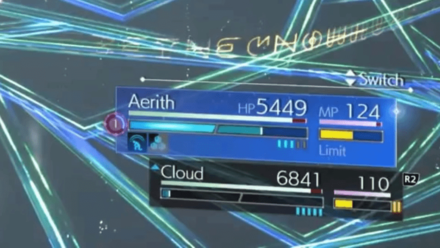
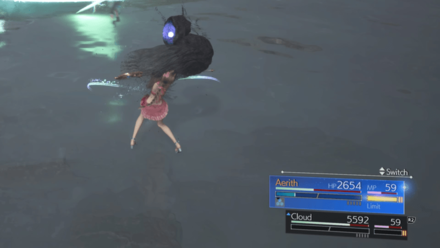
Save ATB to Heal After Heartless Angel and Octoslash
Sephiroth will also use Heartless Angel in the final phase. You should save at least one ATB charge for Aerith and Cloud so you can heal them once Heartless Angel hits!
Run Away When Sephiroth Uses Octoslash
Similar to Phase 1 with Zack, you'll want to have Cloud run as far away from Aerith as possible so that she doesn't get hit by Octoslash. Make sure that he also has Barrier active to reduce the damage he takes from the attack.
Always Have Buffs Active
Considering that this is the Final Phase, you can spend more MP to constantly cast Buffs on both Cloud and Aerith. Prioritize maintaining Barrier over Haste to reduce the amount of damage Sephiroth deals.
Have Transcendence Active When Possible
If you have an extra ATB Charge on Aerith and you don't need to cast spells, use Soul Drain, or reset Radiant Ward, use Transcendence so that she can charge up a powerful attack that you can unleash at will.
Don't Interrupt Grip of Fate
Whenever Sephiroth uses Grip of Fate, wait for the attack to finish before using a move that can interrupt him, like with a Limit Break for example. Currently, there's a bug if you interrupt him mid-attack where the character that's bound can't escape until they're dead.
To be safe, whenever you see this move, wait for the character that was hit to get unbound first before staggering Sephiroth or using Cloud's Limit Break so that you won't be down a character.
Stop Sephiroth's Last Stand by Staggering Him
When Sephiroth's HP is around 5-10%, he will use The End is Nigh to shrink the arena size and Tempus Finis which is a spinning attack that hits characters on both sides of Sephiroth.
Save your ATB Charges so that you can spam Focused Thrust to quickly stagger and stop him from using this move. Since he's low, you can also kill him with powerful attacks like a Limit Break or Transcendence II to straight up end the fight.
Sephiroth Reborn Rewards and Details
Rewards
| Sephiroth Reborn Rewards | |||||||||||
|---|---|---|---|---|---|---|---|---|---|---|---|
| Easy/Normal | Hard Mode | ||||||||||
|
・50 Party EXP |
TBD
|
||||||||||
| Items Dropped | Rare Items Dropped | ||||||||||
|
None
|
None
|
||||||||||
| Stealable Items | Morphable Items | ||||||||||
|
None
|
None
|
||||||||||
Drops The Art of Sword Play Vol. XIV on Hard Mode
Defeating Sephiroth on Hard Mode will award you with The Art of Sword Play Vol. XIV Manuscript for Cloud. This is important because you will need to collect all of a character's Manuscripts to reach Weapon Level 9.
Basic Information and Details
| Sephiroth Reborn | |
|---|---|
 |
|
| Location | Chapter Unlocked |
| Forgotten Capital | Chapter 14 |
| Species | Movement |
| Human | Grounded |
| Details | |
|
A resurrected being who now wields unimaginable might and commands the arbiters of fate. He seeks to pierce through the layers of existence, and reunite fragmented space-time. He shall rule over the planet and create eternity. Unable to read |
|
FF7 Rebirth Related Guides

Boss Fight Guide and List of All Bosses
Story Bosses
| All Major Story Bosses | |
|---|---|
| Chapter 1 | Materia Guardian |
| Chapter 2 | Midgardsormr |
| Chapter 3 |
Rude and Elena Mythril Golem |
| Chapter 4 |
Terror of the Deep Roche |
| Chapter 5 | Jenova Emergent |
| Chapter 6 | Grasptropod |
| Chapter 7 |
Custom Valkyrie Gigatrice |
| Chapter 8 |
Dyne Anuran Suppressor |
| Chapter 9 |
Specimen H1024 Crimson Mare Mk. II |
| Chapter 10 | Gi Nattak |
| Chapter 11 |
Diabolic Variant Yin and Yang Forgotten Specimen Galian Beast Roche |
| Chapter 12 |
Abzu Rude and Elena Rufus |
| Chapter 13 |
Red Dragon Ironclad Reno and Rude Tseng and Elena Moss-Grown Adamantoise Demon Gate |
| Chapter 14 |
Jenova Lifeclinger Sephiroth Reborn |
Optional Bosses
| Grasslands | |
|---|---|
| Summon | Titan |
| Classified Intel | Quetzalcoatl |
| Side Quests |
White Terror |
| Junon | |
| Summon | Phoenix |
| Classified Intel | Mindflayer |
| Side Quests |
White Mousse Hell Rider II Sandstorm Drake |
| Corel | |
| Summon | Alexander |
| Classified Intel | Tonberry King |
| Side Quests |
Dark Claw Joker |
| Minigame | Test 0 |
| Gongaga | |
| Summon | Kujata |
| Classified Intel | Great Malboro |
| Side Quests |
Levridon Mastodon Gorgon Mane Gigantoad |
| Cosmo Canyon | |
| Summon | Bahamut Arisen |
| Classified Intel | Jabberwock |
| Side Quests | Irasceros Gigaworm |
| Nibel | |
| Summon | Odin |
| Classified Intel | King Zu |
| Side Quests |
Queen Bee Dranabarga |
| Meridian Ocean | |
| Gilgamesh's Island |
Gilgamesh Titan and Bahamut Arisen Phoenix and Kujata Alexander and Odin |
| Pirate King's Treasure |
Ogre Raider Brineborn Demon Hueyacoatl Sea Dragon |
Comment
Author

Sephiroth Reborn Hard Mode Guide
Rankings
- We could not find the message board you were looking for.
Gaming News


Popular Games

Genshin Impact Walkthrough & Guides Wiki
Honkai: Star Rail Walkthrough & Guides Wiki
Arknights: Endfield Walkthrough & Guides Wiki
Umamusume: Pretty Derby Walkthrough & Guides Wiki
Wuthering Waves Walkthrough & Guides Wiki
Pokemon TCG Pocket (PTCGP) Strategies & Guides Wiki
Abyss Walkthrough & Guides Wiki
Zenless Zone Zero Walkthrough & Guides Wiki
Digimon Story: Time Stranger Walkthrough & Guides Wiki
Clair Obscur: Expedition 33 Walkthrough & Guides Wiki


Recommended Games
Fire Emblem Heroes (FEH) Walkthrough & Guides Wiki
Pokemon Brilliant Diamond and Shining Pearl (BDSP) Walkthrough & Guides Wiki
Diablo 4: Vessel of Hatred Walkthrough & Guides Wiki
Super Smash Bros. Ultimate Walkthrough & Guides Wiki
Yu-Gi-Oh! Master Duel Walkthrough & Guides Wiki
Elden Ring Shadow of the Erdtree Walkthrough & Guides Wiki
Monster Hunter World Walkthrough & Guides Wiki
The Legend of Zelda: Tears of the Kingdom Walkthrough & Guides Wiki
Persona 3 Reload Walkthrough & Guides Wiki
Cyberpunk 2077: Ultimate Edition Walkthrough & Guides Wiki


All rights reserved
© SQUARE ENIX CO., LTD. All Rights Reserved.
CHARACTER DESIGN: TETSUYA NOMURA/ROBERTO FERRARI
LOGO ILLUSTRATION: © 1997 YOSHITAKA AMANO
The copyrights of videos of games used in our content and other intellectual property rights belong to the provider of the game.
The contents we provide on this site were created personally by members of the Game8 editorial department.
We refuse the right to reuse or repost content taken without our permission such as data or images to other sites.